Advertisement
Table of Contents
- 1 Table of Contents
- 2 Introduction
- 3 Description of each Part and Function
- 4 Installation
- 5 Window Slider Kit Installation
- 6 Description of the Control Panel
- 7 Operating from the Control Panel
- 8 Description of the Remote Control
- 9 Operating from the Remote Control
- 10 Water Drainage Methods
- 11 Maintenance and Service
- 12 Troubleshooting
- 13 Trouble Shooting
- Download this manual
PORTABLE REFRIGERATED AIR CONDITIONER
USER MANUAL
Thank you for selecting our quality air conditioner. Please be sure to read this user manual carefully before using.
POLOCOOL Portable Refrigerated Air Conditioners are imported and distributed throughout Australasia by POLO
Appliances. Any enquiries should be directed to POLO Appliances on 1800 087 840 in the first instance
A p p l i a n c e s
17 Brett Drive, Carrum Downs, VIC 3201
www.mypolo.com.au
USER MANUAL
POLOCOOL
POLOCOOL
EX10
10,000 BTU (2.9kW)
EX12
12,000 BTU (3.5kW)
ABN 80 749 103 558
For
JULY 2017
Advertisement
Table of Contents

Related Manuals for Polocool EX10


Summary of Contents for Polocool EX10
- Page 1 Thank you for selecting our quality air conditioner. Please be sure to read this user manual carefully before using. POLOCOOL Portable Refrigerated Air Conditioners are imported and distributed throughout Australasia by POLO Appliances. Any enquiries should be directed to POLO Appliances on 1800 087 840 in the first instance...
- Page 2 Important Issues Regarding the Proper Use of this Air Conditioner Please contact Polo on 1 800 087 840 for advice before returning unit Use this air conditioner only as described in this instruction manual. • IMPORTANT - Ensure front louvres are open before using this air conditioner, see page 4. •...
-
Page 3: Table Of Contents
CONTENTS Introduction ..................Description of each part and function ..........Installation ..................Description of the control panel ............Operating from the control panel ............Description of the remote control ............11 Operating from the remote control ............ 12 Water drainage methods ..............15 Maintenance and service .............. -
Page 4: Introduction
Model EX12 – 12,000 BTU or 3.5kW. This is sufficient to cool rooms with floor areas of between 6 and 22 square metres Model EX10 – 10,000 BTU or 2.9kW . This is sufficient to cool rooms with a floor area of between 5 and 18 square metres •... -
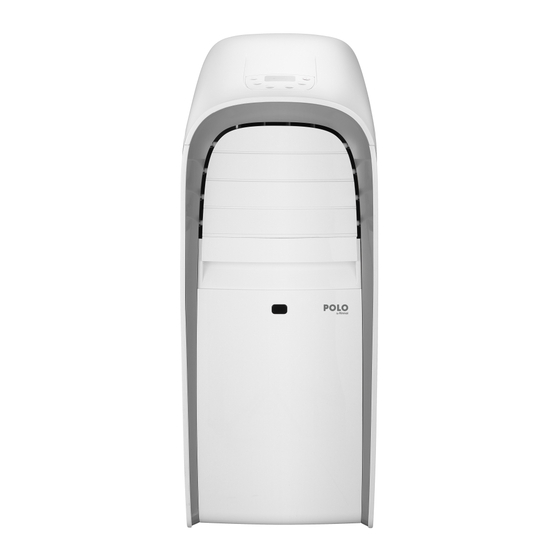
Page 5: Description Of Each Part And Function
DESCRIPTION OF EACH PART AND FUNCTION 1. Air outlet grill – cooled air comes out of this outlet. IMPORTANT – ensure horizontal louvres are open by grasping the top louvre and pulling downwards. Louvres can be locked in 4 positions depending on where air needs to be directed. -
Page 6: Installation
INSTALLATION SELECTION OF INSTALLATION LOCATION (Fig.3) USER MANUAL Place the portable air conditioner in a flat location where the air inlets and outlets cannot be covered up. Place the unit no less than 50cm away from a wall or other obstacle. In addition a minimum 50cm clearance is required from all faces of the air conditioner including the rear face. - Page 7 MOUNTING OF ASSEMBLED AIR EXHAUST HOSE • Make certain the air intake and outlet grills are unobstructed. • Push the hose inlet into the air exhaust hose housing lining up the slots with the side lugs. Twist anti clockwise to secure.
-
Page 8: Window Slider Kit Installation
WINDOW SLIDER INSTALLATION WINDOW SLIDER KIT INSTALLATION (Fig. 9, Fig. 10, Fig. 11 and Fig. 12) The window slider has been designed to fit most standard “vertical” and “horizontal” window applications. It may be nec- The window slider kit has been designed to fit most standard "vertical" and "horizontal" window applications. It may essary for you to improvise/modify some aspects of the installation procedures for certain types of windows. -
Page 9: Description Of The Control Panel
DESCRIPTION OF THE CONTROL PANEL 1 Mode button 4 Increase button 2 Swing button 5 Fan speed button 3 Decrease button 6 On Off button A. Cool indicator F. High speed indicator High fan speed indicator B. Dry indicator G. Med speed indicator Med fan speed indicator C. -
Page 10: Operating From The Control Panel
OPERATING FROM THE CONTROL PANEL The control panel enables you to manage all the main functions of the appliance, but to fully exploit its potential, you must use the OPERATING FROM THE CONTROL PANEL OPERATING FROM THE CONTROL PANEL remote control unit. The control panel enables you to manage all the main functions OPERATING FROM THE CONTROL PANEL OPERATING FROM THE CONTROL PANEL... -
Page 11: Swing Function
MODE Ideal to reduce room humidity (spring and autumn, damp rooms, rainy periods, etc). In dry mode, the appliance should be prepared in the same way as for cool mode, with the air exhaust hose attached to enable the moisture to be discharged outside. To set this mode correctly: Press the "... -
Page 12: Description Of The Remote Control
DESCRIPTION OF THE REMOTE CONTROL 1. Mode indicator - COOL / DEHUMIDIFY (DRY) / FAN 2. Sleep indicator 3. Timer on 4. Timer off 5. Auto speed indicator 6. Fan speed indicator 7. (a) increase (+) button (b) decrease (-) button 8. -
Page 13: Operating From The Remote Control
ON/OFF BUTTON 1. Press the ON/OFF button to turn the unit ON or OFF. 2. Each time the unit is turned ON it will start operation in last selected mode. CLOCK REMOTE CONTROL ❄ CLOCK BUTTON OPERATING FROM THE REMOTE CONTROL 1. - Page 14 TIMER TIMER FUNCTION ❄ Timer function is used to set the ON or OFF time of the unit. This function can only be set using the remote control. The Timer Function is used to set the ON or OFF time interval of the unit. TIMER ON This function can only be set using the remote control.
- Page 15 SELF-DIAGNOSIS SELF-DIAGNOSIS The appliance has a self diagnosis system to identify a number of malfunctions. Error messages are displayed on the appliance display. F IS DISPLAYED WHAT SHOULD I DO? The appliance is fitted with a frost protection device to avoid excessive formation of ice.
-
Page 16: Water Drainage Methods
WATER DRAINAGE METHOD This air conditioner is equipped with the very latest MIST technology which means that the water tank generally never needs emptying even in high humidity areas. Water drainage will generally only be required at the end of the season (see End of Season Operations – page 16) NOTE As a safety measure, to positively prevent water spillage, the air conditioner is equipped with a fail safe device, if, the water tank fills. -
Page 17: Maintenance And Service
CLEANING Before cleaning or maintenance, turn the appliance off by pres- sing the button on the control panel or ON/OFF botton on MAINTENANCE AND SERVICE remote control, wait for a few minutes then unplug from the mains socket. CLEANING CLEANING CLEANING THE CABINET Before cleaning or maintenance, turn the appliance off by pres- You should clean the appliance with a slightly damp cloth then dry... -
Page 18: Trouble Shooting
TROUBLE SHOOTING Before seeking repair or service, please check the following. PROBLEM CHECK ACTION Is A/C plugged into power supply Insert power plug securely into • • outlet? power supply outlet and turn No power to Air Conditioner power on Has fuse blown (circuit breaker Turn A/C off, replace fuse wire •... - Page 19 TECHNICAL SPECIFICATIONS TECHNICAL SPECIFICATIONS Mains voltage see rating label Polocool EX10 Polocool EX12 Maximum absorbed power in air conditioning Rated Voltage 240 Volts Rated Voltage 240 Volts Refrigerant Rated Power Input 1100 watts Rated Power Input 1200 watts Refrigerant/Charge R410A/0.56kg Refrigerant/Charge R410A/0.59kg...
Need help?
Do you have a question about the EX10 and is the answer not in the manual?
Questions and answers