Table of Contents
Advertisement
Quick Links
Advertisement
Table of Contents

Summary of Contents for MegaSquirt MS3-PRO
-
Page 2: Table Of Contents
1.2 MS3-Pro components ........ - Page 3 5 Setting up a basic configuration 5.1 Connecting the MS3-Pro to your laptop ......51 5.2 Basic engine constants .
- Page 4 5.3.36 Specific ignitions: VQ35DE ......92 DIYAutoTune.com MS3-Pro manual version 1.036, firmware 1.3.4, 6/10/2015...
- Page 5 6.5 Getting a good idle ........121 DIYAutoTune.com MS3-Pro manual version 1.036, firmware 1.3.4, 6/10/2015...
- Page 6 7.2.3.1 Tuning Staged Injection ......149 7.2.3.2 Tuning Table-based Staged Injection ....149 DIYAutoTune.com MS3-Pro manual version 1.036, firmware 1.3.4, 6/10/2015 Page 6...
- Page 7 7.4.7.1 Tuning closed loop idle ......178 DIYAutoTune.com MS3-Pro manual version 1.036, firmware 1.3.4, 6/10/2015...
- Page 8 Single algorithm with table switching ..... 210 Single algorithm with table blending ..... 211 DIYAutoTune.com MS3-Pro manual version 1.036, firmware 1.3.4, 6/10/2015 Page 8...
- Page 9 7.8.1.1 Analogue linear input ......220 7.8.1.2 Digital pulse input to MS3-Pro ..... . . 220 Wheel mounted .
- Page 10 7.10.13Special options ........259 DIYAutoTune.com MS3-Pro manual version 1.036, firmware 1.3.4, 6/10/2015...
-
Page 11: Introduction
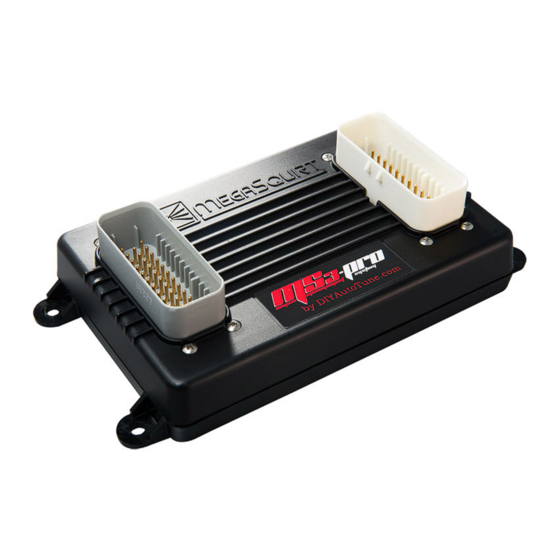
1 Introduction 1.1 Overview Congratulations on your purchase of an MS3-Pro! The MS3-Pro is based on the proven MegaSquirt- III sequential ECU, but we have combined parts originally spread across five separate circuit boards into a single, compact, weather resistant package. We’ve also made dozens of small tweaks to the design to maximize reliability, improve noise resistance, and decrease power consumption. -
Page 12: Technical Support
1.2.3 Tuning cables The MS3-Pro supports tuning via both USB and RS232. Both cables are included with a standard wiring harness package; the connectors they plug into are inline style ones that are part of the wiring harness, rather than separate connectors on the ECU. -
Page 13: Ms3-Pro Accessories
MS3-Pro over a CAN network to avoid the inaccuracies of using a digital to analog conversion circuit. The MS3-Pro can use this both for data logging and for safety shutdown features if the exhaust gas temperatures go too high under load. -
Page 14: Part Numbers
As a general rule, you’ll want to have the following tools and supplies on hand for a successful MS3- Pro installation: • Multimeter • Laptop (the MS3-Pro software supports Windows, Linux, or Mac OS) • Screwdrivers • Soldering iron, solder, and heat shrink tubing (if joining wires by soldering) or crimp connectors and crimp tool •... -
Page 15: Installing Software
MS3-Pro. This appears on a label on the underside of the box as well as on a tag on the back of the MS3-Pro. You will enter the serial number at https://www.efianalytics.com/register/registerCoupon.jsp as a “Coupon code provided by dealer” to obtain a registration key. -
Page 16: Creating A Project
Selecting “New Project” from the File menu opens a wizard to create a new project. It will bring up a screen like the one below. At this point, you will want to have the MS3-Pro powered up (see section 4 for wiring details) and connected to the laptop with either the USB or RS232 cable. - Page 17 You can enter a name for the project in (1). Next, click the Detect button (2). TunerStudio will detect what firmware is on your MS3-Pro. If it does not have a definition file, it will prompt you to download one from the Internet, which TunerStudio will handle automatically for any standard release version of the MS3-Pro firmware.
- Page 18 2 INSTALLING SOFTWARE Driver options include: 1. RS232 serial. Use this for connecting to the MS3-Pro’s RS232 port without a USB adapter. 2. USB and wireless. This setting can be used with a Bluetooth adapter, the MS3-Pro’s inter- nal USB port, or DIYAutoTune.com’s USB-2920 adapter on the MS3-Pro’s RS232 port. This supports several connection types: (a) RS232 Serial Interface.
-
Page 19: Tunerstudio Main Screen
Click “Finish” to confirm your gauge selection and launch the new project. 2.1.3 TunerStudio main screen Once you’ve made a project, TunerStudio will bring up its main screen. DIYAutoTune.com MS3-Pro manual version 1.036, firmware 1.3.4, 6/10/2015 Page 19... - Page 20 • There is a second set of tabs at the bottom of the gauge cluster that allows you to set up multiple, separate gauge clusters. Click on the rectangular icon to create a new cluster. DIYAutoTune.com MS3-Pro manual version 1.036, firmware 1.3.4, 6/10/2015 Page 20...
-
Page 21: Ms3-Pro Hardware
3 MS3-Pro hardware 3.1 Overview The MS3-Pro is a full standalone ECU with everything you need to run sequential fuel injection on up to 12 cylinders. This ECU is based on the previous MegaSquirt-III design and runs similar code, but we’ve miniaturized the system to fit into a smaller package, and put it in a waterproof enclosure with... - Page 22 Our strategy for heat management is simple: You don’t need to dissipate heat if you don’t make heat in the first place. The MS3-Pro uses a power supply optimized for high efficiency, and if you want to use circuits that generate large amounts of heat like peak and hold injector drivers, they can be ordered as an external box.
-
Page 23: Inputs
A third temperature input monitors ECU internal temperature. This sensor cannot detect individual hot spots, but if you are installing this under the hood or in other applications where you are concerned about exceeding its internal temperature limit, this will let you log and view how hot the MS3-Pro is getting. -
Page 24: Knock Input
3.3.2 Ignition outputs The MS3-Pro uses 5 volt, logic level ignition outputs with a high side driver circuit. These will drive most factory ignition modules and coils with built in ignitors. For use with coils that lack built in ignition modules, we recommend the QuadSpark external ignition module. -
Page 25: Pwm Medium Current Outputs
The CANbus wires are a communications network that allow the MS3-Pro to talk to other CAN enabled modules. Note that not all CAN enabled devices will communicate with the MS3-Pro; CAN is a type of hardware, and in addition to having the required hardware, the device you are attempting to connect to the MS3-Pro must also be programmed to understand the type of messages the MS3-Pro sends. -
Page 26: Maintenance Inside The Case
The MS3-Pro real time clock uses a lithium battery for maintaining its time and other data when the ECU is powered down. The battery slips in with the positive (flat) side up. The MS3-Pro can use any of the following batteries. Part numbers starting with BR can be used for -30 to +80 ˇ r C (-22 to 176 ˇ r F) and should be used if mounting the MS3-Pro under the hood. -
Page 27: Improving The Waterproofing
- we recommend sealing the O-ring with a continuous bead of sensor safe RTV silicone, and replacing the silicone every time the case is opened. DIYAutoTune.com MS3-Pro manual version 1.036, firmware 1.3.4, 6/10/2015 Page 27... -
Page 28: Wiring
You will also want to make sure the 12 volt power wire is clean. We recommend using one power wire from the battery for the MS3-Pro EFI main relay, and a separate power wire to power the relay for the injectors, fuel pump, and ignition system for maximum noise reduction. Fuel pumps and ignition coils in particular tend to inject significant amounts of noise into their 12 volt supply wire. - Page 29 Do not leave the logic ground disconnected, as this may result in noise issues or improper operation. ** RS232 connections are brought to their own Weather Pack 4 pin connector and do not go into the main harness. DIYAutoTune.com MS3-Pro manual version 1.036, firmware 1.3.4, 6/10/2015 Page 29...
- Page 30 Stepper IAC out 2B Green USB D- White USB shield USB D+ Green USB shield RS232 serial cable The pin names are marked on the connector. Weather Pack pin DB9 pin DIYAutoTune.com MS3-Pro manual version 1.036, firmware 1.3.4, 6/10/2015 Page 30...
-
Page 31: Wiring Diagram
4 WIRING 4.2 Wiring diagram These show the basic connections - power, ground, fuel, ignition, idle control, and basic sensors. Other inputs and outputs are covered in their respective sections. DIYAutoTune.com MS3-Pro manual version 1.036, firmware 1.3.4, 6/10/2015 Page 31... - Page 32 4.2 Wiring diagram 4 WIRING DIYAutoTune.com MS3-Pro manual version 1.036, firmware 1.3.4, 6/10/2015 Page 32...
- Page 33 4.2 Wiring diagram 4 WIRING DIYAutoTune.com MS3-Pro manual version 1.036, firmware 1.3.4, 6/10/2015 Page 33...
- Page 34 4.2 Wiring diagram 4 WIRING DIYAutoTune.com MS3-Pro manual version 1.036, firmware 1.3.4, 6/10/2015 Page 34...
-
Page 35: Engine Position Sensors
Note that the conditioner circuit will invert the signal. We have left the settings unchanged because a lot of other MegaSquirt installs use a conditioner that behaves in a similar way. So if you set the ignition input capture to “rising edge”, that is the signal at the processor - it will actually be activated when the signal coming in to the MS3-Pro transitions from high to low. -
Page 36: Points Triggering And Points Replacement Devices
1K resistor from the signal wire to the power wire. If it is at zero volts in one state and bounces up to at least 5 volts in the other state, it doesn’t need a pull up resistor. The MS3-Pro package includes two 1K resistors in blue sealed tubing with blue wire leads. -
Page 37: Map Sensors
For a voltage based MAP sensor, connect the signal pin to the MS3-Pro’s MAP input wire. An additional MAP sensor may be used to measure barometric pressure on one of the spare analog inputs. Frequency based MAP sensors such as those used in Ford Mustangs must be wired to a Digital Frequency In wire instead of the MAP or analog inputs. -
Page 38: Mass Air Flow Sensors
TPS. These do not provide very much information that MS3-Pro needs, as it can tell if you are at idle or full throttle by the MAP sensor information. You can still use MAP based acceleration enrichment. If the TPS input is not used, this wire should be connected to sensor ground. -
Page 39: Ford 5.0 Mustang 4 Pin Oval Connector Maf
MS3-Pro sensor return MAF output signal MS3-Pro MAP, Analog In 1, Analog In 2, or Analog In 3 4.4.4.2 Ford 5 pin rectangular connector MAF The rectangular connector MAF sensor has 5 pins denoted by A, C, D, and E, with the B pin missing:... -
Page 40: Oxygen Sensors
The MS3-Pro can accept input from a narrow band O2 sensor directly; simply wire the narrow band sensor signal to the O2 input wire on the MS3-Pro. Narrow band O2 sensors may have from one to four wires. Here is what to do with the wires depending on the type. -
Page 41: Knock Sensors
The above list is not intended to be a complete list of what wideband controllers will work with the MS3-Pro; it will work with many other ones not listed. As long as the wideband has a 0-5 volt analog output, and you can obtain the specifications for its output, you can make it work with the MS3-Pro. -
Page 42: Other Sensors
Fuel injectors are pretty simple; one side gets switched, fused 12 volt power. The other side connects to the MS3-Pro injector output. They are not polarized so it doesn’t matter which is which. Current MS3-Pro settings have the firing order hard-coded in, so they always fire in alphabetical order. -
Page 43: Ign-1A Coil With Built In Ignition Module
They can be wired directly to the MS3-Pro. LS1 and LS2 coils use different connector designs, but the connectors are always marked with small letters to indicate the function, and the function is the same on both:... -
Page 44: Msd And Other Single Channel Capacitive Discharge Ignitions
Many of these are intended for an unusually high current signal instead of a logic level output. To use one of these boxes, connect the Tach Out wire on the MS3-Pro to the ignition box’s points trigger. The MSD 6A box used a white wire for this input, and most other CDI boxes have followed their lead. -
Page 45: Common Firing Orders
4.6 Ignition outputs 4 WIRING 4.6.0.6 Common firing orders DIYAutoTune.com MS3-Pro manual version 1.036, firmware 1.3.4, 6/10/2015 Page 45... -
Page 46: Iac Valves
IAC stands for Idle Air Control. These valves work like a small throttle under ECU control to allow the MS3-Pro to adjust idle speed. Sometimes you will see these called an ISC valve, for Idle Speed Control, or BAC, for Bypass Air Control. Idle air control valves come in several varieties. The MS3-Pro supports most designs out there, with a few exceptions. - Page 47 The schematic below shows how such a motor is wired. The picture below shows most of the common GM and Chrysler IAC valve pinouts and how they wire to the MS3-Pro. The illustration is looking into the IAC valve itself, not the wiring on the harness side.
-
Page 48: Pwm Iac Valves
Two coil IAC valves have three wires. One terminal is for 12 volt switched power; the other two connect to the MS3-Pro PWM outputs, one of which should be PWM / Idle Out 1 (you can specify in the software which output closes the valve and which opens it). Usually, the center wire on the connector gets 12 volt power. -
Page 49: On/Off Iac Valves
ECU main relay to minimize electrical noise. Do not wire a fuel pump directly to the MS3-Pro. Also, do not wire the fuel pump relay coil in such a way that it receives 12 volts with the key off, as this power can backfeed into the MS3-Pro and cause it to stay powered up when the ignition is turned off. -
Page 50: Grounding Notes
Leaving the logic ground disconnected can result in improper operation. The MS3-Pro has a sensor ground pin on pin 18 of the white connector. All sensors except VR sensors should be grounded to this pin. Do not ground the sensors to the chassis, engine block, or other external point, as this can create noise issues. -
Page 51: Setting Up A Basic Configuration
5.1 Connecting the MS3-Pro to your laptop 1. Power up the MS3-Pro and plug it in to your laptop with either the provided serial or USB cable. The MS3-Pro is not powered through the serial cable; it will need to be connected to a good power and ground source to communicate. -
Page 52: Basic Engine Constants
We recommend that you do not have the ignition coils hooked up while doing a basic setup on the MS3-Pro. During the setup stage, you will define what type of ignition hardware that you are using, but if the ignition you have doesn’t work with the default settings, you may overheat your ignition module and damage it before you are done with your setup. - Page 53 • Engine Stroke / Rotary - Specify whether the engine is a four or two stroke piston engine, or a Wankel rotary engine. The rotary mode allows for trailing spark outputs on Mazda and other dual plug rotary designs. DIYAutoTune.com MS3-Pro manual version 1.036, firmware 1.3.4, 6/10/2015 Page 53...
- Page 54 • Engine Size and Injector Size are used for MAF fueling and the Required Fuel calculator. • Main fuel outputs - This should be set to “Injector A, B...” Fuel for all normal MS3-Pro installs. This is included to allow you to check tune files imported from standard MS3s. It can be set to use only injector I and J, but this is mostly to maintain compatability with MS3 V3.0 / V3.57 tune...
-
Page 55: Ignition Settings
Next, proceed to the Ignition Settings menu and select Ignition Options / Wheel Decoder to set up how the MS3-Pro gets its RPM input and controls the ignition. Here are what the settings under this menu do. We’ll go over setting these up, then the next subsection will cover the settings for specific engine modes. - Page 56 Honda K24A2 HD 32-2 Yes, using MAP sensor Fuel injected Harley-Davidson V-twins Miata 36-2 Flyin’ Miata aftermarket trigger • Trigger Angle/Offset - There are three different ways this setting is used: DIYAutoTune.com MS3-Pro manual version 1.036, firmware 1.3.4, 6/10/2015 Page 56...
- Page 57 ECU. The MS3-Pro’s input conditioner will invert the signal. So if you were using a Hall effect sensor where the voltage dropped from 12 to 0 volts, the MS3-Pro will see this as a rising edge instead of a falling one. If using the Digital Frequency In pins for cam input, the signal on the Digital Frequency In pins is not inverted.
- Page 58 Going Low means that the output is held at 5 volts, drops to 0 volts to dwell the coil, and then goes back to 5 volts to make the coil discharge. For 99% of installs using the MS3-Pro, this should be set to "Going high".
- Page 59 • Cranking dwell - specifies the base coil dwell time during cranking before battery correction is applied. • Cranking advance - The MS3-Pro uses a fixed timing angle while cranking, specified here. • Toyota Multiplex - Used for Toyota DLI distributorless ignitions. Known applications include the 7M-GTE and Japanese market 4A-GZE.
-
Page 60: Specific Ignitions: Basic Trigger
In all cases, you’d wire the Crankshaft Position In wire to the distributor pick-up, and Spark A Out to an ignition module. 5.3.1.1 Input phasing In most cases you will be controlling timing with the MegaSquirt, for this you need a trigger that does not vary angle with rpm or load. This is called a "locked distributor". -
Page 61: Ford Tfi Distributors
The crank angle at which the tach input triggers is of importance and needs to be configured in the MegaSquirt. For best spark control, there are some optimal and some disallowed crank angles. A typical engine will have an operating advance range of approximately 10-50ˇ r BTDC timing (depending on engine type.) The trigger must not happen during this range of angles. -
Page 62: Gm Hei
5.3.3 Specific (non) ignition: Fuel only When the MS3-Pro is not controlling ignition, you will need to send it a tach signal on the CKP In white wire. The MS3-Pro cannot trigger off the negative terminal of the coil. Examples of acceptable signals that you CAN use to trigger the MS3-Pro include: •... -
Page 63: Specific Ignition: Toothed Wheel
Just guessing at timing is a great way to damage an engine. Running excessive timing under load will almost always cause severe engine damage, e.g. broken pistons. It is essential that timing is confirmed with a timing-light on EVERY install. DIYAutoTune.com MS3-Pro manual version 1.036, firmware 1.3.4, 6/10/2015 Page 63... -
Page 64: Terminology Notes
Full sequential: Supports sequential COP and sequential fueling. 5.3.4.1 Terminology notes • Missing tooth - This is a regular wheel with a group of "missing" teeth e.g. 12-1, 36-1, 36-2, 60-2 DIYAutoTune.com MS3-Pro manual version 1.036, firmware 1.3.4, 6/10/2015 Page 64... -
Page 65: Wheel Naming
5.3.4.2 Wheel naming There does not appear to be universal agreement on the way to name wheels among manufacturers. In the MegaSquirt world, we use a standard where a minus sign indicates missing teeth, a slash indicates a separate wheel, and a plus indicates a tooth added to the same wheel. -
Page 66: Existing
There are two main categories of install - Existing and Retrofit. 5.3.4.4 Existing In this cases where you are fitting MegaSquirt to an engine already fitted with a trigger wheel, your main task is to wire up the sensor(s), determine the tooth #1 angle and wire up your coil(s). -
Page 67: Missing Tooth Crank Wheel
If you have one of these wheels, see the spark mode sections be The Megasquirt-3 code benefits from a reasonable number of teeth (hence 36 or 60) for best ignition timing accuracy. Low tooth count wheels such as 4-1 are not advised. -
Page 68: A Note About Vr Sensors And Missing Tooth Wheels
Cam triggering is less accurate than crank triggering due to timing belt or chain stretch. The Megasquirt-3 code benefits from a reasonable number of teeth (hence 36 or 60) for best ignition timing accuracy. Low tooth count wheels such as 8-1 are not advised. -
Page 69: Missing Tooth Crank Wheel And Single Tooth Cam Wheel
(typically Rising) as the signal is a very short pulse. For a hall type sensors you need to ensure that the edge you choose matches up with the phasing as below. To confirm correct cam sensor phasing proceed as follows. First, set your engine at TDC compression #1. DIYAutoTune.com MS3-Pro manual version 1.036, firmware 1.3.4, 6/10/2015 Page 69... - Page 70 However, the cam sensor can be at any angle except having the active edge aligned in the tooth gap. DIYAutoTune.com MS3-Pro manual version 1.036, firmware 1.3.4, 6/10/2015 Page 70...
-
Page 71: Missing Tooth Crank Wheel And Polled (50/50 Or Half Moon) Cam Wheel
This wheel decoder mode has a limp home feature: If the camshaft position sensor works OK during startup, but the MS3-Pro subsequently loses the cam wheel, it will “remember” what phase the cylinders are on, and keep running as if nothing happened. - Page 72 20 crank degrees afterwards. (The level is actually polled at tooth#2.) To confirm correct cam sensor phasing proceed as follows. First, set your engine at TDC com- pression #1. DIYAutoTune.com MS3-Pro manual version 1.036, firmware 1.3.4, 6/10/2015 Page 72...
- Page 73 With the cam sensor powered and connected to the MegaSquirt, measure the output voltage. When using the standard cam input, a voltage of ~0V here requires the HIGH setting and a voltage of ~5V here requires the LOW setting, as the MS3-Pro input conditioner inverts the signal.
- Page 74 5.3 Ignition settings 5 SETTING UP A BASIC CONFIGURATION Example of a distributor converted to a cam sensor, using a commonly available gear-tooth sensor. DIYAutoTune.com MS3-Pro manual version 1.036, firmware 1.3.4, 6/10/2015 Page 74...
-
Page 75: Nippon Denso Cas
OEM to allow the engine to synchronize within one engine revolution. Presently, the MS3-Pro only supports using one of the "G" sensors. Some Toyota JZ series and Honda H series engines used a variation of this method, with a 12 tooth crank wheel replacing the 24 tooth cam wheel. -
Page 76: Non-Missing Tooth Cam Wheel With Single-Tooth Cam
Note that you must connect both the CKP- and CMP- to the ground wire if there is only one ground. The MS3-Pro’s input circuit uses a differential input, and both circuits must be at the same reference volts to use this mode. - Page 77 If they do happen at the same time, you can probably chose the triggering edges so the MS3-Pro does not “see” the two edges at the same time. Here is how to set this one up.
- Page 78 • Main wheel speed = Cam wheel • Second trigger active on = Set to make sure this does not overlap with main wheel • and every rotation of = Cam DIYAutoTune.com MS3-Pro manual version 1.036, firmware 1.3.4, 6/10/2015 Page 78...
-
Page 79: Non-Missing Tooth Cam Wheel With Two Opposite Teeth On The Cam
5.3.4.13 Non-missing tooth cam wheel with one cam tooth per cylinder This arrangement is one of the variants used in Nippon Denso CAS. Three and four cylinder versions are known to exist. DIYAutoTune.com MS3-Pro manual version 1.036, firmware 1.3.4, 6/10/2015 Page 79... -
Page 80: Non-Missing Tooth Crank Wheel With One Cam Tooth
Toyota JZ engines. Also, it could be used to extend a simple distributor crank trigger to support se- quential. Generally Megasquirt-3 benefits from many crank teeth to improve ignition timing accuracy. However, with this wheel arrangement, you need to beware of trying to use too many teeth on the crank as there is a risk of the trigger inputs overlapping as the cam belt or chain stretches. - Page 81 Here’s how to determine the trigger angles. First, set your engine at TDC compression #1. Now rotate the engine backwards until the cam sensor and tooth line up. If you rotated more than DIYAutoTune.com MS3-Pro manual version 1.036, firmware 1.3.4, 6/10/2015 Page 81...
- Page 82 • Tooth #1 Angle (deg BTDC) = set as above • Main wheel speed = Crank wheel • Second trigger active on = Set to make sure this does not overlap with main wheel DIYAutoTune.com MS3-Pro manual version 1.036, firmware 1.3.4, 6/10/2015 Page 82...
-
Page 83: Other Wheel Arrangements
The EDIS modules are very reliable and the system works well. The EDIS module itself handles all the decoding of the toothed wheel and sends one pulse per cylinder to the MS3-Pro. The code optionally supports the use of a cam sensor in addition to the EDIS system and then supports sequential fuel. -
Page 84: Checking The Timing
Now that you have confirmed that the EDIS is correctly running at 10ˇ r BTDC base timing, you need to check that MegaSquirt is correctly commanding timing on the EDIS. Start the engine and then on the Ignition settings menu, select Fixed Timing and enter 15 BTDC; check that you strobe 15ˇ r BTDC on the crank. -
Page 85: Cam Sensor And Edis
firing each coil pair every crank revolution. However for sequential fuel it is necessary to use a cam sensor in addition so the MS3-Pro knows what phase the engine is on. Most original cam sensors are 2 wire VR type, so only require a ground and the signal connecting to the MS3-Pro. -
Page 86: Specific Ignitions: 36-2-2-2
ECU will “see” three pulses on the CKP wire for every crank revolution. Ignition input capture needs to be set to Rising Edge. This mode supports full sequential operation. DIYAutoTune.com MS3-Pro manual version 1.036, firmware 1.3.4, 6/10/2015 Page 86... -
Page 87: Specific Ignitions: Iaw Weber
Twin trigger is a specific ignition mode designed for use on a range of motorbike engines that use a crank or cam mounted reluctor and two discrete pickup sensors. Each sensor triggers a separate ignition coil. DIYAutoTune.com MS3-Pro manual version 1.036, firmware 1.3.4, 6/10/2015 Page 87... -
Page 88: Specific Ignitions: Chrysler 2.2 / 2.5
Because of the nature of the VR sensor, it can trigger off either edge, depending on the wiring. Ignition input capture should be tried both ways and set to which one gives you the most stable signal. DIYAutoTune.com MS3-Pro manual version 1.036, firmware 1.3.4, 6/10/2015 Page 88... -
Page 89: Specific Ignitions: Suzuki Vitara 2.0
Cam input is supported for sequential injection. 5.3.27 Specific ignitions: QR25DE Used on the Nissan QR25DE and some other Nissan four cylinders. Supports fully sequential injec- tion. DIYAutoTune.com MS3-Pro manual version 1.036, firmware 1.3.4, 6/10/2015 Page 89... -
Page 90: Specific Ignitions: Honda Rc51
The Optispark requires a fused 12V supply. This can be tapped into the same 12V supply as the MegaSquirt. The Ground connection should be run to the sensor ground at the MegaSquirt. The DIYAutoTune.com MS3-Pro manual version 1.036, firmware 1.3.4, 6/10/2015... -
Page 91: Specific Ignitions: Nissan Sr20
The MS3-Pro can use these different lengths to sync faster and avoid the sorts of problems caused by timing chain stretch causing the cam sensor to trigger on different teeth. Ignition Input Capture needs to be set to Rising Edge for MS3-Pro, and spark output needs to be set to Going High. -
Page 92: Specific Ignitions: Yzf1000
Note that the VQ30DE used in late ’90s Maximas has a different trigger pattern that is not currently supported. 5.3.37 Specific ignitions: Jeep 2000 Known applications include: • 1991-2000 Jeep 4.0 inline six DIYAutoTune.com MS3-Pro manual version 1.036, firmware 1.3.4, 6/10/2015 Page 92... -
Page 93: Specific Ignitions: Jeep 2002
flywheel sensors are both VR type with a Hall effect cam sensor, so you will use CMP for the reference sensor and Digital Frequency In 2 for the cam sensor. This mode is also considered experimental at this point. DIYAutoTune.com MS3-Pro manual version 1.036, firmware 1.3.4, 6/10/2015 Page 93... -
Page 94: Specific Ignitions: 2Jz Vvti
A cam sensor is also required, with a one tooth trigger wheel. Both are Hall effect and require pull ups. Supports sequential injection, but as the MS3-Pro has only eight ignition outputs, you will need to run wasted spark ignition. Factory Chrysler coils require external ignition modules such as the QuadSpark. -
Page 95: On / Off Settings
We’ve found some stepper valves, particularly used ones on older cars, may stick if commanded to move fewer than 5 to 8 steps. DIYAutoTune.com MS3-Pro manual version 1.036, firmware 1.3.4, 6/10/2015 Page 95... -
Page 96: Pwm Idle Valve Settings
Table. These specify the IAC position in cranking and running as a function of temperature. A third menu, PWM Idle Voltage Compensation, lets you specify an amount of duty cycle to be added to or subtracted from the duty cycle as a function of battery voltage. DIYAutoTune.com MS3-Pro manual version 1.036, firmware 1.3.4, 6/10/2015 Page 96... -
Page 97: Sensor Calibration
You’ll also want to set up a couple basics on how the MS3-Pro uses the oxygen sensor. Go to Fuel Settings and select AFR / EGO Control. This will bring up the screen below. - Page 98 5.5 Sensor calibration 5 SETTING UP A BASIC CONFIGURATION the far right lets you pair each injector channel with a specific O2 sensor. The MS3-Pro can use any O2 sensor to correct for any injector channel. Once you’re done calibrating the sensors, check them from the main dash. To change any gauges Right-Click on them and pick a different gauge.
-
Page 99: Tuning The Ms3-Pro
6.1.1.1 Injector test mode The injector test mode can be used both to confirm the injectors are wired correctly and to use the MS3-Pro as a controller for an injector test bench. If your injectors are fitted to the engine, you must not run the test mode with fuel pressure or you will fill your engine with fuel! Remove the fuse from your fuel pump and de-pressurize the line first. -
Page 100: Coil Test Mode
Output Test Mode. Note that with a PWM idle valve or a five or six wire stepper valve, you may need to run a temporary fused 12V supply to the valve if you normally take power from the fuel pump relay and are testing with the engine off. DIYAutoTune.com MS3-Pro manual version 1.036, firmware 1.3.4, 6/10/2015 Page 100... -
Page 101: Testing A Stepper Iac Valve
PWM valves. Here are some common problems and what to do if you encounter them. • Problem: Valve vibrates when commanded to move, but does not actually turn. DIYAutoTune.com MS3-Pro manual version 1.036, firmware 1.3.4, 6/10/2015 Page 101... -
Page 102: Testing A Pwm Iac Valve
(see section 8.3) should also be used to confirm that the pattern is stable if you do not have a steady RPM. Keep working on the crank/cam sensor inputs until you have stable rpm with no loss of sync. DIYAutoTune.com MS3-Pro manual version 1.036, firmware 1.3.4, 6/10/2015 Page 102... -
Page 103: Setting Cranking Timing
While the engine will usually start if you’ve gone through all the previous steps for setting up MS3-Pro, sometimes you’ll need a couple more tweaks, and the data log can be very valuable if it comes to that. Go to the Data Logging menu, select Start Logging, and enter a name for your data log. -
Page 104: Setting Running Timing
• If it does not, then adjust your tooth#1 angle (trigger wheel) or trigger angle/offset (other spark modes.) • If the actual timing is more advanced than MegaSquirt thinks, then increase the trigger an- gle/offset. If adjustments of more than 10 degrees are required, making the change, click Burn, turn the key off, and restart the engine. -
Page 105: The Basics Of 3D Tuning Tables And Load Types
These tables are called 3D tables because they can be drawn as a shape in 3 dimensional space. The first dimension, the X axis, is pretty much always RPM for the 3D tables in MS3-Pro. The Y axis is a load variable, usually expressed as a percent. It is possible to use different load methods for different tables;... - Page 106 When the engine is running, a blue dot indicating the current RPM and load will appear on the table, and the nearest cells under the dot will be highlighted in yellow. The MS3-Pro interpolates between the closest four cells if the engine is not directly on top of a load point.
-
Page 107: Tuning Fuel
After these are dialed in, you can come back and dial in the acceleration enrichment and other enrichments applied to the fueling. DIYAutoTune.com MS3-Pro manual version 1.036, firmware 1.3.4, 6/10/2015 Page 107... -
Page 108: Dead Time
- especially if you have very large injectors. The MS3-Pro dead time system is found on the Fuel Settings -> Injector Dead-time. It allows for individual or grouped setting of these dead times. This will match up with the "Main fuel outputs setting"... -
Page 109: Small Pulse Widths
At most pulsewidths (say above 2ms), injectors behave in a linear manner, where 10% increase in effective pulsewidth gives a 10% increase in fuel flow. The MS3-Pro normally relies on this linear behavior for fuel calculations. However, at small pulsewidths, injectors behave non-linearly. This table allows for you to correct for this. -
Page 110: Afr Table
13.2 to 13.5 at full throttle, while engines running forced induction may need to run as rich as the mid 11’s under boost. The Tools menu in the upper left hand corner lets you bring up an AFR table generator. DIYAutoTune.com MS3-Pro manual version 1.036, firmware 1.3.4, 6/10/2015 Page 110... -
Page 111: Ve Table
find that youll need to be light on the throttle, as the AE is needed to fill "holes" that occur when the throttle opens quickly. Remember to tune the AE when you have a tuned VE Table. DIYAutoTune.com MS3-Pro manual version 1.036, firmware 1.3.4, 6/10/2015 Page 111... -
Page 112: Basic Acceleration Enrichment (Ae) Tuning
TPSdot rate of 100 %/sec would be opening from closed to wide open throttle in one second, or the equivalent speed, such as going from 25% to 75% throttle in 1/2 second. The MAPdot is measured in kPa per second. MS3-Pro can use either one, or a combination of the two, to trigger acceleration enrichment. -
Page 113: Accelerator Pump Ae
– Start Transition - A MAP decrease at a rate slower than this will not trigger X-Tau fuel cuts. – Finish Transition - When the MAP sensor reading drops faster than this, full X-Tau driven fuel cuts are in effect. Between the start and finish values, the MS3-Pro will ramp in this feature. -
Page 114: Time Based Ae
As with MAPdot threshold, this has similar trade-offs between setting it too sensitive and not sensitive enough. • Cold Accel multiplier %: This is applied whenever warmup enrichment is active. The MS3-Pro applies the full amount of multiplier when coolant temperature is at -40 degrees. It tapers off in a linear fashion to zero when you reach the point on the warmup enrichment curve where WUE equals 100% and there is no enrichment. - Page 115 Increasing this number will decrease false triggering from a noisy MAP signal, but too much will mean you miss triggering acceleration enrichment at lower amounts of tip in. DIYAutoTune.com MS3-Pro manual version 1.036, firmware 1.3.4, 6/10/2015 Page 115...
- Page 116 • Cold Accel Adder: This is applied whenever warmup enrichment is active, and is added to the standard PW adder. The MS3-Pro applies the full amount of added pulse width when coolant temperature is at the lowest temperature point in the warmup enrichment curve. It tapers off in a linear fashion to zero when you reach the point on the warmup enrichment curve where WUE equals 100% and there is no enrichment.
-
Page 117: Getting It Dialed In
You’ll need to have a safe way to accelerate from the bottom to the top of a gear, preferably your 1:1 ratio gear, and you’ll want to datalog your engine idling, as well as these WOT pulls with your MS3-Pro and TunerStudio. -
Page 118: Tuning The Tables
1. When the key is on, the MS3-Pro will turn the fuel pump on for 2 seconds and fire one priming pulse to clear air for the lines. (You can disable this feature by setting the priming pulse to zero.) 2. -
Page 119: Cranking / Startup Settings
Usually you would only use the “Alternate events” setting on engines with more than eight cylinders. • Priming pulse delay: This allows the MS3-Pro to wait a number of seconds after key on to fire a priming pulse. • Ignore MAT correction during ASE: This can be used to compensate for MAT sensors that absorb heat from the engine. -
Page 120: Priming Pulse
6.3.6.3 Afterstart (ASE) percentage This is a curve of percentage multiplier versus time. The MS3-Pro will apply the full amount immediately after RPM climbs past cranking RPM and then taper it off linearly through the ASE taper time. This number is added to the WUE number and then the combined number is multiplied by the number the main fuel loop calculates. -
Page 121: Getting A Good Idle
We’ll take some time here to explain how to tune your MS3-Pro for a smooth idle.The first key may surprise many novice tuners: The idle control settings are not the most important thing to adjust to get a smooth idle. -
Page 122: Correct Fuel
300 RPM below your target idle speed if you find the idle to be unstable. The timing in this row can be bumped up by around 2 to 4 degrees over the idle timing. The 3d view below shows a spark table set up this way. DIYAutoTune.com MS3-Pro manual version 1.036, firmware 1.3.4, 6/10/2015 Page 122... -
Page 123: Correct Airflow
Closed loop mode tries to maintain a target idle speed. We’ll cover closed loop idle tuning and several of the MS3-Pro’s other idle control features, such as increasing the idle speed when the A/C or cooling fan come on, under the Additional Items. -
Page 124: Additional Items: Beyond Basic Fuel And Ignition Control
The MS3-Pro will control a lot more than basic fuel and ignition. In this section, we’ll cover what else the MS3-Pro can do, one menu screen at a time. We’ll skip the menu screens that were set up in sections 5 and 6, and cover the rest here. -
Page 125: Map Sensor Settings
7.1.1.3 General Sensor Settings The MegaView is an add on display device from the DIY line of MegaSquirt products. Ones built for the MegaSquirt-II will also work with MS3-Pro. • MegaView temp units - Choose degC or degF to match your MegaView. -
Page 126: Load Parameters
7.1.2 Rev Limiter MS3-Pro allows for fuel or spark based rev limiting. You can also allow the rev limit to change as a function of coolant, so as to set it low before the engine warms up, or even drop the rev limit if you overheat. -
Page 127: Hard Rev Limit
7.1.2.3 Spark retard The MS3-Pro has several different spark retard strategies. You specify the timing retard in an absolute angle which the MS3-Pro will use as your timing; the timing specified here is not an amount of timing to pull but the total amount of timing to use. The spark retard begins at the soft rev limit - the hard limit minus the soft zone number. -
Page 128: Spark Cut
• Progressive Fuel Cut - If this is turned off, the fuel cut applies abruptly when you reach the hard limit. If this setting is on, the MS3-Pro will shut off fuel to one cylinder at the soft rev limit and ramp this up to cutting all cylinders at the hard limit. -
Page 129: Tacho Output
Many cars have enough airflow at cruising speed to not need an electric fan at that point, so you can shut it off to save power. The MS3-Pro outputs can drive a relay; don’t wire them to the fan directly. - Page 130 7.1 Basic / Load Sections 7 ADDITIONAL ITEMS: BEYOND BASIC FUEL AND IGNITION CONTROL • Fan Control On - Enables the MS3-Pro fan control • Fan Control Idles up - Whether the fan activation should also raise the idle • Output Pin - The output pin for the fan relay •...
-
Page 131: Torque Converter Lockup
• Activation delay - wait this long after conditions are met before locking up. The MS3-Pro can drive a 5A solenoid with a high current output, or up to 3A with a PWM output. If you need more current, you will need to use a relay. -
Page 132: Barometric Correction
The number is a multiplier, so that 100% indicates to use normal fueling. The barometer reading is whatever the MS3-Pro is currently using for correction. If you have enabled a barometric pressure sensor, the reading will change in real time. If you are using the initial MAP reading for barometric pressure, it will display the MAP reading it sampled when the MS3-Pro initially powered up. -
Page 133: Event Average
MAP sampling will occur in order to get a repeatable reading. Here is a MAP log from a 1 cylinder 4-stroke engine. DIYAutoTune.com MS3-Pro manual version 1.036, firmware 1.3.4, 6/10/2015 Page 133... - Page 134 70.5 70.5 The MS3-Pro is sampling the MAP reading on both the intake stroke and the power stroke; the intake strokes have a low MAP reading, but the pressure on the power stroke is nearly atmospheric. This results in the MAP bouncing around between 70 and 98 resulting in unpredictable tuning. Using Event Average would be equally poor.
-
Page 135: Itb Load Settings
TunerStudio now work correctly with the single table. This new tuning mode introduces a new engine load type to MegaSquirt, the ITB load. This load type is selected in the tuning configuration the same way that Alpha-N, Speed-Density, or blended tuning are selected. -
Page 136: Itb Load Tps Switch Point Curve
If you have allocated the region between 0% ITB Load and 60% ITB Load on your VE table for use in Speed-Density tuning and your %baro is 50% then the VE value for 30% ITB load will be used. In DIYAutoTune.com MS3-Pro manual version 1.036, firmware 1.3.4, 6/10/2015 Page 136... -
Page 137: Itb Load Calculation In Alpha-N Mode
VE table for use in Alpha-N tuning and also assigned a value of 10% TPS on your ITB load TPS switchpoint curve then a TPS value of 55% would yield an ITB Load value of 80% and the VE bin for DIYAutoTune.com MS3-Pro manual version 1.036, firmware 1.3.4, 6/10/2015 Page 137... -
Page 138: Tuning For Idle Air Control
flow.) In practice, like any other sensor input, the MAF has its own quirks and can suffer from reversion effects (particularly on "cammy" engines) where the air flow gets measured twice. The MegaSquirt implementation of MAF consists of the following main elements: • Engine and injector parameters •... - Page 139 7 ADDITIONAL ITEMS: BEYOND BASIC FUEL AND IGNITION CONTROL The MS3-Pro will need all these numbers to be entered correctly, as it calculates the required pulse width to hit target air/fuel ratios, instead of using something along the lines of “send X pulse width at Y RPM and Z air flow meter volts.”...
-
Page 140: More About Frequency Based Mafs
1000Hz and 11500Hz. When using the 1300g/s file (~1600hp) set the min/max frequencies to 1000Hz and 14125Hz. For larger flowing MAFs, a custom calibration will be required. DIYAutoTune.com MS3-Pro manual version 1.036, firmware 1.3.4, 6/10/2015 Page 140... -
Page 141: Maf Flow Curve
It is suggested that EGO correction be set to "No correction" at this time. Having started your engine, your primary tuning DIYAutoTune.com MS3-Pro manual version 1.036, firmware 1.3.4, 6/10/2015 Page 141... -
Page 142: Using Ve1 As A Trim Table
If it is found necessary to make small adjustments for air temperature, then an optional correction curve may be enabled. Enabling this allows access to the MAT correction table on the DIYAutoTune.com MS3-Pro manual version 1.036, firmware 1.3.4, 6/10/2015 Page 142... -
Page 143: Realtime Display
This tab allows you to monitor real time data from the ECU. The “Summary” tab gives line graphs over time of the more commonly used channels, while All Output Channels gives a numerical readout of more channels. DIYAutoTune.com MS3-Pro manual version 1.036, firmware 1.3.4, 6/10/2015 Page 143... -
Page 144: Feature List Shiwing I/O Pins
7.1.17 Expansion I/O Pins List / Usage This screen is similar to the I/O Pins Showing Usage screen, but does the same for devices connected to the MS3-Pro via the CAN connection, such as a CAN-EGT or a MicroSquirt running IO Box or transmission control code. -
Page 145: Fuel Settings
Values under 100% will reduce fueling to less than the base fueling. This is ordinarily an undersirable thing to do, so the MS3-Pro will lock you out of this. However, LPG and gaseous fuels often use an evaporator or expansion device heated by engine coolant. When the engine is cold, the evaporator delivers colder, denser fuel than normal, which may require reducing warmup enrichment below 100%. -
Page 146: Secondary Injector Timing Table
If you have enough outputs to use timed injection on the secondary injection, the Secondary Injection Timing Table is enabled (in addition to the standard injection timing table), so the user must remember to tune secondary injection timing separately from primary injection timing. DIYAutoTune.com MS3-Pro manual version 1.036, firmware 1.3.4, 6/10/2015 Page 146... - Page 147 • Secondary Outputs - This setting controls whether the regular sequential outputs are used for secondaries or the I/J outputs on the gray connector are used. This option is only available with 4 or less cylinders. The following options are possible: DIYAutoTune.com MS3-Pro manual version 1.036, firmware 1.3.4, 6/10/2015 Page 147...
- Page 148 Note that this setting should not be set the same as the first parameter setting. This setting is not available with table-based staging. The following settings are available: – Off – RPM – MAP DIYAutoTune.com MS3-Pro manual version 1.036, firmware 1.3.4, 6/10/2015 Page 148...
-
Page 149: Tuning Staged Injection
The table displayed at the beginning of the staged injection settings section is a good example of how to tune table- based staging for a smooth transition on a naturally aspirated engine. DIYAutoTune.com MS3-Pro manual version 1.036, firmware 1.3.4, 6/10/2015 Page 149... -
Page 150: Tuning All Other Staged Injection Modes
• Sensor port - where the sensor is connected. A GM flex fuel sensor typically has pin A as ground, B as 12 volt supply, and C to the MS3-Pro Digital Switched In 1. Note that Digital Switched In 1 is currently the only supported port. -
Page 151: Afr / Ego Control
RPM. For example, you might want to give a large amount of control authority while cruising at light throttle, but DIYAutoTune.com MS3-Pro manual version 1.036, firmware 1.3.4, 6/10/2015 Page 151... -
Page 152: Ego Ports
• Number of Sensors - This setting is used to select the number of oxygen sensors in use by the MS3-Pro. Up to 12 sensors can be configured. 7.2.5.2 EGO ports The EGO Ports settings allow the user to select the input port used to read the signal from the oxygen sensor. -
Page 153: Simple Algorithm With Narrowband Sensor
PID Algorithm with Wideband Sensor When using a wideband sensor with the PID algorithm, the same steps as when using a narrowband sensor can be followed for tuning the "I" term. DIYAutoTune.com MS3-Pro manual version 1.036, firmware 1.3.4, 6/10/2015 Page 153... -
Page 154: Narrowband Ego Targets
7.2.6 Narrowband EGO targets This is a 3D table that behaves like an AFR table, but instead of specifying a target air/fuel ratio, it specifies what voltage from a narrow band the MS3-Pro should target. 7.2.7 AFR safety system The "AFR Safety" System is designed to help you protect your engine from unwanted dangerous lean conditions. -
Page 155: Cylinder Trim Tables
7.2.8 Cylinder trim tables These tables act like miniature VE tables and are added to each individual cylinder. DIYAutoTune.com MS3-Pro manual version 1.036, firmware 1.3.4, 6/10/2015 Page 155... -
Page 156: Sequenced Batch Fire
This table allows you to specify dwell (before battery voltage correction) as a function of RPM and ignition load. This allows increasing dwell under boost, then backing it off at low load to reduce the amount of heat put into the ignition system. DIYAutoTune.com MS3-Pro manual version 1.036, firmware 1.3.4, 6/10/2015 Page 156... -
Page 157: Cold Advance
7.3.6 Noise filtering The noise filtering menu allows the MS3-Pro to detect and ignore pulses on the crank and cam position inputs caused by electrical noise. DIYAutoTune.com MS3-Pro manual version 1.036, firmware 1.3.4, 6/10/2015... - Page 158 • Route the signal wire away from any electrical noise sources, such as ignition coils, spark plug wires, and the alternator or starter. • Ensure that the MS3-Pro has a clean ground to the engine block, cylinder head, or negative battery terminal.
- Page 159 7.3 Ignition Settings 7 ADDITIONAL ITEMS: BEYOND BASIC FUEL AND IGNITION CONTROL There are several strategies the MS3-Pro has to filter this out, which you enable from the Noise Filtering screen. • Noise filter period - this sets a minimum pulse time to ignore, measured in clock cycles. Each clock cycle is 0.02 microseconds, so a value of 4 corresponds to 0.08 microseconds.
-
Page 160: Examples
• Coil negative triggering for a fuel-only install. This requires noise filtering to eliminate the effects of coil ringing. A typical setting would be to enable crank tach period masking at 2ms and 30%. DIYAutoTune.com MS3-Pro manual version 1.036, firmware 1.3.4, 6/10/2015 Page 160... -
Page 161: Knock Sensor Settings
• Distributor type pickup, such as HEI, TFI, or EDIS (although the last is not a distributor, the MS3-Pro will see a similar signal.). Noise filtering is often useful here. A typical setting would be crank tach period masking with 1ms and 30%. - Page 162 6 to 7 threads with a wrench. Note that the thread on the knock sensor is a tapered thread. The Bosch sensor can be more simply attached by bolting it to the block. It uses a standard EV1 style injector connector. DIYAutoTune.com MS3-Pro manual version 1.036, firmware 1.3.4, 6/10/2015 Page 162...
-
Page 163: Knock Sensor Settings
7.3 Ignition Settings 7 ADDITIONAL ITEMS: BEYOND BASIC FUEL AND IGNITION CONTROL The knock sensor settings screen lets you adjust how the MS3-Pro handles knock input. 7.3.7.1 Knock sensor settings • Knock control: Allows you to change the way the MS3-Pro applies timing retard. -
Page 164: Detection
The curve will need to be set empirically by examining datalogs of knock% when operating the engine under safe conditions. 7.3.8 Knock sensor parameters This screen is used with the internal knock processing. DIYAutoTune.com MS3-Pro manual version 1.036, firmware 1.3.4, 6/10/2015 Page 164... -
Page 165: Knock Window Settings
"listen" to four equally spaced cylinders each. i.e. the front sensor corresponds to cylinders 1,2,3,4 and the rear sensor to cylinders 5,6,7,8. 7.3.9 Knock window settings These are used with both internal and analog knock sensing modes. DIYAutoTune.com MS3-Pro manual version 1.036, firmware 1.3.4, 6/10/2015 Page 165... -
Page 166: Knock Coolant Scaling
7.3.11 Rotary settings The MS3-Pro supports Wankel rotary engines with a leading and trailing spark plug split. Versions supported include Mazda’s RX-7 FC, FD, and RX8 ignition types, as well as 3 and 4 rotor engines with coil on plug. To enable this screen, “Engine Stroke” under Engine and Sequential Settings must be set to Rotary. -
Page 167: Fc Mode
Fuel wiring: • Inj A Front rotor primary injector • Inj B Rear rotor primary injector • Inj C Front rotor secondary injector • Inj D Rear rotor secondary injector DIYAutoTune.com MS3-Pro manual version 1.036, firmware 1.3.4, 6/10/2015 Page 167... -
Page 168: Rx8 Mode
• Inj D Secondary injector A • Inj E Secondary injector B • Inj F Secondary injector C The coils and injectors need to be wired in firing-order sequence. The outputs fire A,B,C,D,A..DIYAutoTune.com MS3-Pro manual version 1.036, firmware 1.3.4, 6/10/2015 Page 168... -
Page 169: Rotor
7.3.12 Rotary split table This allows you to specify the split in degrees between leading and trailing sparks. Positive numbers mean the trailing is later. Negative means that trailing is fired before leading. DIYAutoTune.com MS3-Pro manual version 1.036, firmware 1.3.4, 6/10/2015 Page 169... -
Page 170: Cylinder Trim Tables
MS3/Pro’s startup sequence, including the Cranking Pulse Width, Priming Pulse, Afterstart Enrich- ment, and Warmup Enrichment. Here, we’ll cover the startup and idle control that was not covered there, and revisit a few settings in more detail. DIYAutoTune.com MS3-Pro manual version 1.036, firmware 1.3.4, 6/10/2015 Page 170... -
Page 171: Cranking / Startup Settings
7.4.1 Cranking / startup settings • Cranking RPM - On the initial start, the MS3-Pro will run in batch fire on the cranking pulse width settings until RPM rises above this threshold, or if the RPM falls below this threshold within 5 seconds of starting. -
Page 172: Cranking Taper Curve
7 ADDITIONAL ITEMS: BEYOND BASIC FUEL AND IGNITION CONTROL • Ignore MAT correction during ASE - This setting allows the MS3-Pro to override the air tem- perature correction while afterstart enrichment is active. If this is turned on, MAT correction will be set to 100% until the ASE time is complete. -
Page 173: On/Off Valve
• Algorithm – Open-loop (warmup): The MS3-Pro commands how far to open the valve as a function of coolant temperature. Note that on/off valves are always open loop, so this setting is grayed out when an on/off valve is selected. -
Page 174: Pwm Idle Valve Settings
This may be left off or used to specify the connection used for the coil that closes the valves. • Valve Frequency Selection - Select a frequency from the list. Different valves operate best on different frequencies. DIYAutoTune.com MS3-Pro manual version 1.036, firmware 1.3.4, 6/10/2015 Page 174... -
Page 175: Idle Cranking Duty / Steps
7.4.7 Closed loop idle settings Closed loop idle lets the MS3-Pro target a set idle speed instead of opening the IAC valve a set amount. This is used for compensating for changing engine loads. It should not be used to fix a roving or hunting idle at steady load - you need to get the idle tuned so it is stable in warmup mode under constant load first, if you find the idle is hunting. - Page 176 • Use last value or table - If “Use last value” is selected, the MS3-Pro will start with the value it last used to obtain the target RPM when closed loop idle re-engages. If set to “use table,” when the closed loop idle engages, it will select the initial idle opening from the Closed Loop Idle Initial Value table.
- Page 177 “standard,” it will use the RPM range to determine if it should be using PID control. If set to “Use VSS,” it will only engage closed loop idle when speed is below the minimum. • Minimum VSS1 - Above this speed, closed loop idle is turned off. DIYAutoTune.com MS3-Pro manual version 1.036, firmware 1.3.4, 6/10/2015 Page 177...
-
Page 178: Tuning Closed Loop Idle
• RPMdot threshold - This is a maximum RPM change in RPM per second. Above this rate, the MS3-Pro will expect the car to be in engine braking and not activate closed loop. Set this as low as possible without being below what is normal RPMdot jitter with the engine RPM not changing. - Page 179 Air Conditioning being turned on. Setting it too low can result in the loop being overly sensitive to RPM changes. Typically 100ms works well. DIYAutoTune.com MS3-Pro manual version 1.036, firmware 1.3.4, 6/10/2015 Page 179...
- Page 180 This causes the idle valve to need to open further to keep a particular idle speed. Then when sudden load is added, the timing increases and the valve position does not have to change as much to cope with the sudden load increase. DIYAutoTune.com MS3-Pro manual version 1.036, firmware 1.3.4, 6/10/2015 Page 180...
-
Page 181: Closed Loop Idle Target Curve
7.4.9 Closed loop idle initial values If you are using closed loop idle with the initial value table selected, the MS3-Pro uses this to look up the initial duty cycle when closed loop idle control engages. The X-axis specifies what target RPM, and the Y-axis is either coolant or air temperature, as determined by the closed loop settings screen. -
Page 182: Pwm Idle Voltage Compensation
Three wire PWM valves are less likely to need this. 7.4.11 Air conditioning idle up The MS3-Pro can control the air conditioning and increase the idle speed when the air conditioning is active. DIYAutoTune.com MS3-Pro manual version 1.036, firmware 1.3.4, 6/10/2015... -
Page 183: Idle Advance Settings
• Idle-up output - This uses an output pin to activate the A/C compressor and/or condenser fan. • Idle-up input - This is the input used to tell the MS3-Pro that the air conditioning is on or needs to be turned on. -
Page 184: Idle Advance Tuning
• Idle advance on - Enables or disables this feature. • Idle RPM timing correction - Setting this to on allows the MS3-Pro to use the Idle RPM Timing Correction curve to add or subtract timing based on how far away the idle speed is from the target speed. -
Page 185: Tuning Idle Advance Timing
The idle VE table is similar to the idle advance table, letting you specify a small VE table specifically for idle. This can avoid tying up multiple rows in the VE table strictly for idle tuning. DIYAutoTune.com MS3-Pro manual version 1.036, firmware 1.3.4, 6/10/2015 Page 185... -
Page 186: Accel Enrich
VE table is normally inactive, and is only used when using dual fuel mode with an alternate AFR table. 7.5 Accel Enrich Section 6.3.5 covers basic acceleration enrichment tuning. Here, we’ll go over more advanced ways to fine tune your transient fueling. DIYAutoTune.com MS3-Pro manual version 1.036, firmware 1.3.4, 6/10/2015 Page 186... -
Page 187: Tps Wot Curve
The EAE algorithm tracks the various quantities and adjusts the amount of fuel injected accord- ingly, but does so based on several adjustment curves and settings. The following curves are what you’ll use to tune it. DIYAutoTune.com MS3-Pro manual version 1.036, firmware 1.3.4, 6/10/2015 Page 187... -
Page 188: Adheres To Walls Coefficient
(X-axis), so therefore the percentages are much smaller (about 10x smaller) than the Adhere-to- walls coefficients. It also typically increases with load - while the vacuum can help fuel vaporize, the added mass flow can help pull the fuel off. DIYAutoTune.com MS3-Pro manual version 1.036, firmware 1.3.4, 6/10/2015 Page 188... -
Page 189: Eae Adhere-To-Walls Rpm Correction
flow rate at higher RPM tends to pull more fuel off the walls as well as preventing as much of it from sticking in the first place. 7.5.2.5 EAE Adhere-to-walls CLT correction DIYAutoTune.com MS3-Pro manual version 1.036, firmware 1.3.4, 6/10/2015 Page 189... -
Page 190: Eae Sucked-From-Walls Clt Correction
9. Choose a few other RPM ranges, and slowly step on and release the throttle. Tune the EAE Adhere-to-walls RPM correction and EAE Sucked-from-walls RPM correction curves until the DIYAutoTune.com MS3-Pro manual version 1.036, firmware 1.3.4, 6/10/2015 Page 190... -
Page 191: X-Tau Acceleration Enrichment
RPM. Note that in the way the X-Tau numbering works, setting either curve to values above 48% can cause the fueling to oscillate, particularly at low RPM, unless you use large tau values as well. DIYAutoTune.com MS3-Pro manual version 1.036, firmware 1.3.4, 6/10/2015 Page 191... -
Page 192: Time Factors
The temperature correction factors are enabled if you enable X-Tau with CLT correction. This is a percent multiplier used to scale the accel and decel puddling factor curves as a function of coolant temperature. DIYAutoTune.com MS3-Pro manual version 1.036, firmware 1.3.4, 6/10/2015 Page 192... -
Page 193: Tau (Time) Temp Corrections
X-tau variables. (Note that you may have to increase the cold accel multiplier as you do this.) 7.6 Boost / VVT The MS3-Pro has multiple boost control strategies, and can control up to four channels of continuously variable valve timing. -
Page 194: Boost Control Settings
Inverted means that increasing the duty cycle decreases the boost. • Control Interval - This setting is used to control how often the boost control algorithm runs. DIYAutoTune.com MS3-Pro manual version 1.036, firmware 1.3.4, 6/10/2015 Page 194... -
Page 195: Closed Loop Specific Settings
100%. • Boost Control Lower CLT Threshold - To prevent running maximum boost before the engine is warmed up, the MS3-Pro will run minimum boost until you reach this temperature, at which point the boost control turns on. • Algorithm - Specifies if you are using open loop or closed loop control. -
Page 196: Overboost Protection
For example, you might want one setting for pump gas and another for race gas, and can use a switch to let the MS3-Pro know which you are running. • Alt Maximum Boost - The boost level to allow when the overboost switch is active. -
Page 197: Other Boost Control Settings
You can also allow it to switch tables based on gear by selecting “Gear-based”. • Boost Table Switching Gear - If boost table swithcing is set to gear based, the MS3-Pro will switch to the second boost table when you shift into this gear and above. -
Page 198: Boost Control Target Table
This is a feed-forward table. If the initial value table is enabled, whenever the target boost level or RPM changes, the MS3-Pro will look up what duty cycle to start with. The X axis is the engine RPM, while the Y axis is the target boost level. As with the other tables, the second table (boost control initial duty table 2) can either be used for a second wastegate or for switched boost. -
Page 199: Boost Control Vs Speed
Setups that use a single solenoid to control two wastegates do not need these settings. As the screen notes, you cannot use this with timed, speed, or switched boost control. DIYAutoTune.com MS3-Pro manual version 1.036, firmware 1.3.4, 6/10/2015 Page 199... -
Page 200: Turbo Anti-Lag (Als)
Anti-lag is a combination of features you can use to keep the turbo spooled while shifting, beyond the basic flat shift rev limiter. The MS3-Pro has several strategies it can use to dump extra fuel into the exhaust and increase exhaust gas temperatures under these conditions. This increase in exhaust temperature will shorten turbo life and possibly result in increased wear and tear on other parts of the exhaust system as well. - Page 201 As many anti-lag systems also have the throttle or idle control valve open by a large amount, the MS3-Pro can also use a rotational idle fuel cut to reduce idle speed on engines using anti-lag. The rotational idle engages when anti-lag is off.
-
Page 202: Turbo Anti-Lag Tables
The tables available will depend on what anti-lag options have been enabled, although the Added Fuel %age and ALS Timing will always be available if anti-lag is on. DIYAutoTune.com MS3-Pro manual version 1.036, firmware 1.3.4, 6/10/2015 Page 202... -
Page 203: Als Roving Idle Fuel Cut
• Added fuel %age - The amount of extra fuel to add when anti-lag is active. • ALS timing - This is a timing table in absolute numbers which the MS3-Pro will use when anti-lag is active. As the MS3-Pro specifies timing with BTDC numbers being positive, negative numbers indicate to retard the timing to after top dead center. - Page 204 Since the duty cycle controls the direction the cam moves and not the absolute position, continuously variable valve timing requires closed loop control. The MS3-Pro uses a missing tooth wheel (or otherwise irregular pattern) on the crankshaft compared to a sensor on the moving cam to determine camshaft position, and uses this to adjust the solenoid duty cycle.
- Page 205 • Test duty - the PWM duty cycle to be applied to the chosen VVT output under test. • Control Interval - Synced to Cam adjusts the duty cycle each time the MS3-Pro updates its data on the cam position, which usually gives the best response. Timed mode adjusts the duty cycle once per specified timed interval.
-
Page 206: Vvt Intake And Exhaust Tables
In place of the angle target table, an on/off table is used. In this table, set 100 for cells where VVT should be active and 0 for cell where it should be inactive. Do not use other values. DIYAutoTune.com MS3-Pro manual version 1.036, firmware 1.3.4, 6/10/2015 Page 206... -
Page 207: Table Choices
For many installs a single fuel table is all that is required! New users are strongly advised to start with a single table! MS3-Pro offers a number of methods of switching and blending between tables. These methods can be used to effectively extend the basic table size, for better tunability with different fuel algorithms (e.g. -
Page 208: Example Scenarios
Single algorithm, with table-switching. One fuel algorithm uses VE1 or VE3 depending on table switch setting/input. Could be used with dual-fuel or also as a method to extend effective table size. DIYAutoTune.com MS3-Pro manual version 1.036, firmware 1.3.4, 6/10/2015 Page 208... - Page 209 This is incompatible with ’Dual Table’ as that uses VE3/4 for the second bank. Two way blending is complex ! Do not enable it without fully tuning each individual table. DIYAutoTune.com MS3-Pro manual version 1.036, firmware 1.3.4, 6/10/2015 Page 209...
-
Page 210: Fuel Settings
Multiply MAP controls whether MAP is included in the calculation for VE1 (and VE3). For regular Speed-Density this should almost always be enabled. For "Pure" Alpha-N, leave it disabled. For "Hybrid" Alpha-N, enable it. For MAF, it is ignored. Single algorithm with table switching DIYAutoTune.com MS3-Pro manual version 1.036, firmware 1.3.4, 6/10/2015 Page 210... -
Page 211: Single Algorithm With Table Blending
Some options are not present as they do not apply to ignition; you cannot multiply spark tables, for instance, or stage two sets of spark plugs (although the rotary split tables are a similar idea). DIYAutoTune.com MS3-Pro manual version 1.036, firmware 1.3.4, 6/10/2015 Page 211... - Page 212 Each table should be tuned individually i.e. set the curve to 0% and tune Spk1, then set to 100% and tune Spk2, afterwards enable blending. DIYAutoTune.com MS3-Pro manual version 1.036, firmware 1.3.4, 6/10/2015 Page 212...
-
Page 213: Single Table
Single algorithm with table switching In the above screen shot, the MS3-Pro is set to switch the spark tables at 5000 RPM. You can also set the switching to kPa or throttle position, or use a physical switch. -
Page 214: Combined Tables - Secondary Additive Table
- trying to retune with a partial blend is likely to result in confusion or failure. 7.7.0.5 AFR blending and switching types There are two AFR tables, AFR1 and AFR2. The MS3-Pro has three options for choosing these. DIYAutoTune.com MS3-Pro manual version 1.036, firmware 1.3.4, 6/10/2015 Page 214... -
Page 215: Boost Table Switching
In Closed Loop mode these two tables are target boost. In Open Loop they are raw boost solenoid duty cycle. Method Diagram Single table. Boost is determined from boost table 1. This is the most common setup. DIYAutoTune.com MS3-Pro manual version 1.036, firmware 1.3.4, 6/10/2015 Page 215... -
Page 216: Table Switch / Dual Fuel
• Req Fuel Switching - Allows you to use a hardware input to change the base pulse width number. The MS3-Pro will use the lower number when the switch is active and the higher number when the switch is off. -
Page 217: Temperature Adjustment
• Outputs mode - You can either use two sets of injectors wired to the same outputs and a relay to switch between them, or a second set of outputs for the secondary fuel injectors. Note that the code assumes that the same switch triggers the relay and the input pin - the MS3-Pro does not trigger the relay. -
Page 218: Pressure Adjustment
7.7.6 Blend curve menus The MS3-Pro has six blend curves for blending multiple tables. Each curve has a specific function. 1. Blend curve 1 blends between a primary and secondary fuel algorithm (VE1 and VE2). -
Page 219: Advanced Engine
7.8 Advanced Engine 7.8.1 Speed and gear sensors The vehicle speed sensors (VSS) allow one or two wheel speeds to be monitored. The MS3-Pro allows one or two speed sensors, with the second one being used to measure wheel slip for traction control. -
Page 220: Analogue Linear Input
7.8.1.2 Digital pulse input to MS3-Pro This is most easily achieved with a hall-type sensor ap- plied to one of the frequency or switched digital inputs. Analogue sensor should be set to Off and the 0-5V input pin specified as the Input. -
Page 221: Speed Value From A Remote Can Device
MS3-Pro to collect this number. Analogue sensor should be set to Off and CANVSS specified as the Input. Set scaler% and lag factor. Internally, MS3-Pro stores speed in units of 0.1 ms-1 (metres per second). -
Page 222: Shaft Speed Sensors
7.8.3 EGT / Thermocouple settings The EGT system in MS3-Pro allows inputs from EGT sensors to be datalogged by serial or SDcard. It optionally allows the engine to be shut down if EGT exceeds a set temperature. If an EGT probe is fitted to each exhaust port, it can be used in conjunction with per-cylinder fuel trim to balance cylinders... - Page 223 The thermocouple output is a small voltage that the MS3-Pro will not read directly. There are two ways you can connect a thermocouple to the MS3-Pro: • An amplified that converts the signal to a 0-5 volt reading which you can connect to an MS3-Pro analog input •...
-
Page 224: Generic Sensor Inputs
• Pedal position • Suspension travel The MS3-Pro has three built in 0-5 volt inputs. You can also bring analog sensors in over the CAN bus. Each sensor channel is turned on individually. Once it is enabled it will appear in datalogs. The channels are named sensor01, sensor02..up to sensor16. -
Page 225: V, 5V Value
For example, you may want to enable a sensor as an EGT input, but also have TunerStudio display the raw voltage from the sensor. DIYAutoTune.com MS3-Pro manual version 1.036, firmware 1.3.4, 6/10/2015 Page 225... -
Page 226: Accelerometer Parameters
7.8.5 Accelerometer parameters The accelerometer input allows for a user-supplied one, two or three axis accelerometer to be con- nected to the MS3-Pro and datalogged. It may be connected to any of the spare analogue inputs or remotely via a CAN. -
Page 227: Traction Control Settings
The MS3-Pro offers several strategies for traction control: • VSS Slip %: The MS3-Pro compares a speed sensor on the driving wheels to one on the non-driven wheels, and reduces power if the driving wheel speed exceeds the non-driven wheel speed by a specified amount. -
Page 228: Traction Control Settings
Nitrous Cut curve is less than 40%, and cut if nitrous cut % is over 60%. • Add fuel to - If using added fuel, specifies if this is applied to the first stage (Bank 1), secondary injectors if used (Bank 2), or both. DIYAutoTune.com MS3-Pro manual version 1.036, firmware 1.3.4, 6/10/2015 Page 228... -
Page 229: Traction Control - Perfect Run Vss
This works in the same manner as the perfect run VSS screen, except you specify the maximum engine RPM to allow as a function of time. This provides a slew control function instead of true traction control, to meet various sanctioning body rules. DIYAutoTune.com MS3-Pro manual version 1.036, firmware 1.3.4, 6/10/2015 Page 229... -
Page 230: Traction Control - External % Slip Input
Allows you to specify the maximum slip percent to allow as function of the amount of input from an external adjustment knob. 7.8.10 Traction control reactions This screen lets you specify what actions to take if traction control is active. The MS3-Pro can be DIYAutoTune.com MS3-Pro manual version 1.036, firmware 1.3.4, 6/10/2015 Page 230... -
Page 231: Launch / 2 Step / 3 Step / T-Brake
7.8.11 Launch / 2 step / 3 step / T-Brake The MS3-Pro launch control system is a 2-step limiter, typically used in drag racing applications for consistent hard launches and/or to build boost with a turbocharged engine. The flat shift settings allow full throttle shifts on a clutched vehicle. - Page 232 • Soft Limit Zone - When the RPM is this far below the launch hard limit, the MS3-Pro will apply spark retard, and if spark cut is used, it will begin to phase in a partial spark cut.
-
Page 233: Variable Launch Settings
• Timed retard after launch - Allows you to set a spark retard that is active immediately after launch. The MS3-Pro will then use a time based curve to put the timing back in. Use this to reduce power if you have wheelspin, but are running in a racing series that doesn’t allow traction control. -
Page 234: Step / Burnout Limiter
2. The MS3-Pro pauses for a time defined by the shift cut delay before cutting spark. 3. The MS3-Pro waits for the specified spark cut time plus any gear based delay, if applied. During this point, the solenoid turns off before the ignition resumes. - Page 235 • Mode – Button - The shift cut is activated by an external button. – Auto - The MS3-Pro controls the shifting using preset RPM points. Pressing the button will force an upshift. • Button input - Select the channel for the switch to activate the shift cut. Usually, this button is in the shifter mechanism itself.
-
Page 236: Nitrous System
Systems designed to work with OEM engine management sometimes do this by increasing fuel pressure, which does not give accurate fuel increase across the rev range, but with MS3-Pro, we can directly increase the injector pulse width instead. The nitrous enters through a nozzle typically located upstream of the throttle body. -
Page 237: Tuning Considerations
• Enrich which bank - Set to "Both" for most installs. If "dual table" or Staging are in use it selects which injector bank receives any additional fuel pulsewidth. • On/Off vs Progressive mode - Selects between On/Off or Progressive control mode. DIYAutoTune.com MS3-Pro manual version 1.036, firmware 1.3.4, 6/10/2015 Page 237... - Page 238 • Additional Fuel PW @ N2O max rpm - In on/off mode with a dry system the fuel PW to add at the max rpm. (In between these two rpm points, the MegaSquirt calculates the required pulsewidth using linear interpolation.) •...
-
Page 239: Nitrous - Time Based Progressive
The MS3-Pro can use a level switch to check this.) The MS3-Pro system can control a pump via a relay when conditions are met and map the duty cycle of a water valve on a 3D map of duty vs MAP vs RPM. The valve may either be fast acting (runs DIYAutoTune.com MS3-Pro manual version 1.036, firmware 1.3.4, 6/10/2015... -
Page 240: High Power Time Enrichment
• Use maxAFR shutdown - This allows using a level switch on an input pin connected to the MS3-Pro. When the level switch activates, the MS3-Pro will behave as if it has been shut down from the AFR Safety feature. -
Page 241: Oil Pressure
AFR. The third row onwards specify the richening. 7.8.19 Oil Pressure The MS3-Pro can monitor oil pressure and trigger a smart warning light. This feature can also be used to trigger the check engine light. Setting the minimum pressure to more than zero on startup will ensure that the oil pressure warning light turns on when you turn the key on, so you can make sure it is working. -
Page 242: Programmable On/Off Outputs
For example, if you’re using PWM / Idle Out 1 for idle control, don’t enable it here. Enabling it here will tell the MS3-Pro that you’re trying to use PWM / Idle Out 1 as some sort of on/off output at the same time, and the MS3-Pro will report a configuration error. -
Page 243: Port Settings Pane
• Power On Value Whether the output should be on or off when MS3-Pro first starts. Ensure that this matches up with the conditions the MS3-Pro is likely to see on startup. -
Page 244: Generic Pwm Outputs
7.8.22 Generic Closed Loop outputs The MS3-Pro has several predefined closed loop functions, such as idle speed, fuel pressure, and boost control. For other functions that can use closed loop, the MS3-Pro has a generic function. DIYAutoTune.com MS3-Pro manual version 1.036, firmware 1.3.4, 6/10/2015... -
Page 245: D Tuning Maps
Each view has a set of mini gauges to help tune the map. You may right click on the gauges and swap them to other values if you prefer to use a different gauge type. DIYAutoTune.com MS3-Pro manual version 1.036, firmware 1.3.4, 6/10/2015 Page 245... -
Page 246: Can Bus / Testmodes
CAN network. Here are some general notes; we plan to offer more detailed notes on exactly how to use these settings with specific devices. You will only need to set this up if the MS3-Pro is using the CAN network for data acquisition or to control remote outputs. You do not need to do anything other then set the CAN ID to zero if using the MS3-Pro CAN network for an external dashboard or other CAN device that is set up to automatically fetch data from the MS3-Pro. -
Page 247: Digital I/O
• Enable output port - enable remote output port • Offset - the offset number in the remote table 7.10.1.4 PWM outputs MS3-Pro can command PWM outputs on remote CAN devices. You will need to refer to your CAN device’s documentation for the appropriate settings to use. -
Page 248: Can Broadcasting
7 ADDITIONAL ITEMS: BEYOND BASIC FUEL AND IGNITION CONTROL 7.10.2 CAN broadcasting This if for interfacing with simple gauge circuits that need the MS3-Pro to actively send out in- formation at regular intervals. You can specify how often to transmit this information. Currently, the MS3-Pro can broadcast RPM or coolant temperature data, and supports a handful of European car dashes. -
Page 249: Check Engine Light
7 ADDITIONAL ITEMS: BEYOND BASIC FUEL AND IGNITION CONTROL • Enable real time clock - You may set this to “On-board” to use the MS3-Pro’s internal clock, or “CAN” to use an external, CAN enabled device such as a GPS module. - Page 250 flat value on a running engine. • MAT sensor check - Enable or disable checking of the MAT sensor input. • Minimum ADC - minimum valid ADC reading for the MAT sensor DIYAutoTune.com MS3-Pro manual version 1.036, firmware 1.3.4, 6/10/2015 Page 250...
- Page 251 • No. sync losses allowed - how many recorded losses of tach-in synchronization are allowed before setting the CEL. (During normal operation, you may see one or two sync-losses during startup. Beyond that, there is a problem with your RPM input wiring or configuration.) DIYAutoTune.com MS3-Pro manual version 1.036, firmware 1.3.4, 6/10/2015 Page 251...
-
Page 252: Check Engine Codes
• 13: Cam sensor fault, engine still has sync but is running in semi-sequential • 14: Oil pressure out of range • 15: Fuel pressure sensor out of range • 16: EGT safety shutdown triggered • 17: AFR safety shutdown triggered DIYAutoTune.com MS3-Pro manual version 1.036, firmware 1.3.4, 6/10/2015 Page 252... -
Page 253: Limp Mode
• MAP triggers limp mode - whether a MAP fault triggers limp mode • Use fallback MAP table - if this is enabled, the MS3-Pro uses a table to approximate the likely engine MAP reading if the MAP sensor fails. -
Page 254: Fallback Map Table
7.10.7 Fallback MAP table In the event of a MAP sensor failure, the MS3-Pro can use a synthesized MAP value based on TPS and Rpm. This will be less accurate than the real MAP reading, but the aim is to allow some driveability in the absence of a real sensor reading before the root cause failure is fixed. -
Page 255: Output Test Mode - Inj / Spark
(Do be careful as ignition coils put out a potential lethal voltage. Typically 30,000V or more.) To enable coil testing: 1. Choose the desired output interval (the estimated RPM equivalent is shown below.) 2. Set Coil testing mode to One DIYAutoTune.com MS3-Pro manual version 1.036, firmware 1.3.4, 6/10/2015 Page 255... -
Page 256: Injectors
8. The number of injections gauge will count down and stop at zero. 9. To stop testing sooner, click Stop. When you have finished using the test mode, close the test mode window and power off the MS3-Pro. If you disconnected you fuel pump, reconnect it now. -
Page 257: Output Test Mode - I/O
12V supply to the valve if you normally take power from the fuel pump relay and are testing with the engine off. You need to have enabled idle control before this is available. DIYAutoTune.com MS3-Pro manual version 1.036, firmware 1.3.4, 6/10/2015 Page 257... -
Page 258: Injector Sequence Testing
You can make an engine running full sequential drop down to semi sequential or batch fire, or make an engine running semi sequential swap to batch fire. DIYAutoTune.com MS3-Pro manual version 1.036, firmware 1.3.4, 6/10/2015 Page 258... -
Page 259: Inj / Spk Disabling Test Mode
Looking for a dead cylinder? Instead of unplugging the injectors or coils to check for a cylinder that’s not working, the MS3-Pro lets you shut down individual cylinders through TunerStudio. Note that you need enough inputs for full sequential operation to allow for disabling cylinders. Click the cylinder buttons to disable the coil or injector associated with that cylinder. - Page 260 • Digital switched 12V In Pulldown - causes the voltage on this pin to default to 0 volts. This ordinarily should not be changed unless you have modified the MS3-Pro internally or connected a highly unusual circuit to this input.
-
Page 261: Troubleshooting And Data Logging
This will cause the engine to hiccup while running, and will display a couple other symptoms. The MS3-Pro will reset when it is powered up, and this is the right time for it to reset. Having it reset on a running engine, however, is something you’ll want to fix right away. -
Page 262: Data Logging With The Sd Card
SD card logging reports an error. 8.2.2 Data logging with the SD card The MS3-Pro comes with an SD card built in for internal logging. Selecting SD card datalogging from the menu brings up this screen: •... - Page 263 fill up the allocated space during logging. If the log file is filled, a new file is started. If you turn off the power to the MS3-Pro (which is safe to do during a log) the log will be there and will show full size.
-
Page 264: Downloading Sd Data Logs
The Browse / Import SD Card option on the Data Logging menu brings up the following screen. The screen shot above shows the menu without a MS3-Pro connected. If you have data logs on the SD card, they will appear in the list at the right hand side. Click the green “down arrow” button to save the selected logs to your computer. -
Page 265: Data Log Bit Fields
• Subtracting 2 from 3 gives us 1. This is the last code, a MAP sensor fault. The above combination of faults is likely to be a problem with the VREF voltage or sensor return wiring, if you run into this status in the real world. DIYAutoTune.com MS3-Pro manual version 1.036, firmware 1.3.4, 6/10/2015 Page 265... -
Page 266: Cel Status
2 Port MJ Internal Stepper Internal Internal Internal Internal Stepper Stepper enable out 2 out 1 The stepper enable output is on whenever either stepper output is active. Port T DIYAutoTune.com MS3-Pro manual version 1.036, firmware 1.3.4, 6/10/2015 Page 266... -
Page 267: Status Codes
8.3 Tooth / trigger logger and troubleshooting RPM issues Certain conditions such as electrical noise can cause the MS3-Pro to lose sync with the engine position. This is called a sync loss event or a sync error. Common symptoms of this include: •... -
Page 268: Lost Sync Numbers
"Lost sync count" increases. The "Lost sync reason" shows reason code 2. 8.3.1 Lost sync numbers The MS3-Pro can report several different lost sync reasons in the data logs. Most of these simply show that there’s a problem and don’t particularly pinpoint where it is, but some are more specific than others. - Page 269 • Excessively rich mixture causing misfire • Excessively lean mixture causing misfire Having ruled out all those possible causes, you should enable some noise filtering. See the noise filtering settings, section 7.3.5. DIYAutoTune.com MS3-Pro manual version 1.036, firmware 1.3.4, 6/10/2015 Page 269...
-
Page 270: Using The Diagnostic Logger
It does not give you a voltage reading directly, but it will show you the state of the crank or cam signal, either on or off, as it reaches the MS3-Pro’s processor. Use this to troubleshoot issues with the MS3-Pro’s RPM input. There are several different modes. They work in a similar way: The Logger Type setting selects which log type to use. -
Page 271: Trigger Logger
This is a variant of the composite logger. During normal engine operation it will show nothing at all, but if a sync-loss event occurs (due to noise) it shows the tooth pattern that led up to the loss DIYAutoTune.com MS3-Pro manual version 1.036, firmware 1.3.4, 6/10/2015 Page 271... -
Page 272: Example Logs
The same trigger setup, but at running speed. Note that the time on the teeth smooths out and the effect of the compression is much smaller. Composite log of the same engine running. DIYAutoTune.com MS3-Pro manual version 1.036, firmware 1.3.4, 6/10/2015 Page 272... - Page 273 Falling, if that helps then swap VR sensor wires and return input capture setting to Rising. Composite log of a Nippon Denso ignition with a 24 tooth cam wheel (on the crank input channel) and a 1 tooth cam wheel. DIYAutoTune.com MS3-Pro manual version 1.036, firmware 1.3.4, 6/10/2015 Page 273...
-
Page 274: Communication Issues
A good way to check if this may be an issue without opening the case is to check if you have 5 volts on the VREF wire with the MS3-Pro powered up. If either internal fuse is blown, you will see 0 volts on this wire. - Page 275 Ensure that the COM port number is 9 or less. If not, change it - TunerStudio can find higher numbered ports, but it will take longer to detect an MS3-Pro on a high numbered port. It is usually safe to ignore any Windows warning about ports being in use unless you really do have a physical serial DIYAutoTune.com MS3-Pro manual version 1.036, firmware 1.3.4, 6/10/2015...
-
Page 276: Linux Drivers
8.4.2.1 Portcheck The Port Check program is a small file, portcheck.exe, included for Windows. Port Check scans the available COM ports and sends them commands that will cause a MS3-Pro or other ECU to display its signature. The example below shows it detecting an MS2 on COM port 1. -
Page 277: Loading Or Upgrading Firmware
firmware. In such a case, loading firmware can reset the MS3-Pro’s settings. If the MS3-Pro has power and ground, and is putting out a 5 volt signal on VREF, but does not respond to other communications tests, try this. - Page 278 A message level of 1 is fine for most installs. The higher levels of detail are only needed for debugging problems. Scanning ports automatically is usually your easiest option, but it is slightly faster if you specify what COM port to use. DIYAutoTune.com MS3-Pro manual version 1.036, firmware 1.3.4, 6/10/2015 Page 278...
-
Page 279: Linux Firmware Loader
If this takes long than ~45 seconds then you likely need to adjust the port settings of your USB-serial adapter to reduce the latency setting. For the FTDI built in device, try the following. DIYAutoTune.com MS3-Pro manual version 1.036, firmware 1.3.4, 6/10/2015 Page 279... - Page 280 1 > /sys/bus/usb-serial/devices/ttyUSB0/latency If you get a permissions problem trying to run the file, you likely need to make it executable (e.g. chmod a+x ms3loader_linux32bit or through your graphical interface.) DIYAutoTune.com MS3-Pro manual version 1.036, firmware 1.3.4, 6/10/2015 Page 280...
Need help?
Do you have a question about the MS3-PRO and is the answer not in the manual?
Questions and answers