Table of Contents
Advertisement
Thank you for purchasing this product.
Please read these instructions carefully before using this product,
and save this manual for future use.
Included Installation Instructions (l 3, 18 and 19)
The installation work should be done by a qualified installation specialist.
Before commencing work, carefully read these installation instructions and the operating
instructions to ensure that installation is performed correctly.
(Please keep these instructions. You may need them when maintaining or moving this unit.)
If you have any questions, visit:
www.panasonic.ca/english/support
Panasonic Canada Inc.
5770 Ambler Drive,
Mississauga, Ontario,
L4W 2T3
www.panasonic.com
C Panasonic Corporation 2017
Printed in Malaysia
Owner's Manual
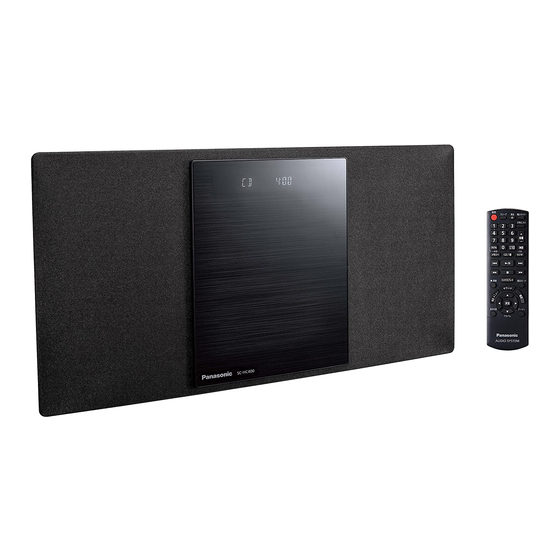
Compact Stereo System
Model No. SC-HC400
p
PC
TQBJ2049
F0317YM1037
Advertisement
Table of Contents

Related Manuals for Panasonic SC-HC400


Summary of Contents for Panasonic SC-HC400
- Page 1 Owner’s Manual Compact Stereo System Model No. SC-HC400 Thank you for purchasing this product. Please read these instructions carefully before using this product, and save this manual for future use. Included Installation Instructions (l 3, 18 and 19) The installation work should be done by a qualified installation specialist.
-
Page 2: Important Safety Instructions
IMPORTANT SAFETY INSTRUCTIONS AC power supply cord Read these operating instructions carefully before using ≥ The power plug is the disconnecting device. the unit. Follow the safety instructions on the unit and the Install this unit so that the power plug can be unplugged applicable safety instructions listed below. -
Page 3: Table Of Contents
About descriptions in these operating instructions This transmitter must not be co-located or operated in ≥ Pages to be referred to are indicated as “l ±±”. conjunction with any other antenna or transmitter. ≥ Unless otherwise indicated, operations are described using the remote This equipment complies with IC radiation exposure control. -
Page 4: Control Reference Guide
Control reference guide Top view USB port (l 7) Adjust the volume (0 (min) to 50 (max)) AUX IN jack (l 6) FAVOURITE buttons for storing or selecting radio Standby/on switch (Í/I) station ([1] to [5]) (l 11) Press to switch the unit from on to standby mode or vice Set wall mount mode versa. -
Page 5: Using The Remote Control
® owned by Bluetooth SIG, Inc. and any use of such marks by Panasonic Corporation is under license. Other trademarks and trade names are those of their respective owners. Turn the unit on or off... -
Page 6: Connections
Connections Connect the antenna. Adhesive tape (not supplied) FM indoor antenna (supplied) Connect the AC power supply cord after all other connections are completed. This unit consumes a small amount of AC power (l 17) even when turned off. ≥ In the interest of energy conservation, if you will not be using this unit for an extended period of time, unplug it from the AC outlet. -
Page 7: Inserting Media
Inserting media ∫ Connecting a USB device ≥ Insert the USB device directly. Do not use any USB extension cable. ≥ Please disconnect the USB device if you finish using. ≥ Before removing the USB device, select a source other than “USB”. ∫... -
Page 8: Bluetooth ® Operations
≥ Select “MODE 1” if the sound is interrupted. on the unit. ≥ When enjoying video contents with this function, the video and audio output may not be synchronized. In this case, Select “SC-HC400” from the Bluetooth device’s ® select “MODE 1”. -
Page 9: About Bluetooth
About Bluetooth Media playback controls ® The following marks indicate the availability of the Panasonic bears no responsibility for data and/or feature. information that is compromised during a CD audio in CD-DA format or a CD that [CD]: wireless transmission. -
Page 10: Program Play
Program play ≥ To use this unit’s remote control with a Bluetooth device, the ® [CD], [USB] Bluetooth device must support AVRCP (Audio Video ® This function allows you to program up to 24 tracks. Remote Control Profile). Depending on the status of the device, some controls may [CD] (CD-DA) not work. -
Page 11: Listening To Fm Radio
Listening to FM radio Presetting stations manually You can preset up to 30 FM channels. Channel 1 to 5 will be set as the favorite stations under While listening to the radio broadcast (FAVOURITE) [1] to [5]. (l right, “Changing the Press [PROGRAM]. -
Page 12: Sound Adjustment
Sound adjustment D.Bass The following sound effects can be added to the audio Press [D.BASS] to select “ON D.BASS” or output. “OFF D.BASS”. ≥ Alternatively, press [D.BASS] on the unit. Press [SOUND] repeatedly to select the effect. Press [2, 1] to select the setting and then press Preset EQ [OK]. -
Page 13: Others
Play timer Bluetooth standby ® You can set the timer so this unit turns on at a certain When “SC-HC400” is selected from a paired time every day. Bluetooth device’s Bluetooth menu, this unit will turn ® ® Preparation on automatically from standby mode and establish a Bluetooth connection. -
Page 14: Troubleshooting
≥ For some built-in Bluetooth devices, you have to set the audio ® ≥ There is moisture on the lens. Wait for about an hour and then try output to “SC-HC400” manually. Read the operating instructions again. for the device for details. TQBJ2049... -
Page 15: Adjust Clock
The sound is interrupted. “PLAYERROR” ≥ The device is out of the 10 m (33 ft) communication range. Place ≥ You played an unsupported file. The system will skip that track the Bluetooth device closer to this unit. and play the next one. ®... -
Page 16: Unit And Media Care
Unit and media care Playable media Pull out the AC power supply cord from the outlet Compatible CD before maintenance. ≥ A disc with the CD Logo. ∫ Clean this unit with a soft, dry cloth ≥ When dirt is heavy, wring a wet cloth tightly to wipe the dirt, and then wipe it with a dry cloth. -
Page 17: Specifications
Specifications ∫ Bluetooth SECTION ® Version Bluetooth Ver.2.1+EDR ® ∫ GENERAL Class Class 2 Supported Profiles A2DP, AVRCP Power consumption 23 W Frequency band 2.4 GHz band FH-SS Power consumption in standby mode Operation Distance 10 m (33 ft) Line of sight (When “BLUETOOTH STANDBY”... -
Page 18: Attaching The Unit To A Wall (Optional)
Attach the fall prevention cord (not supplied) to this unit. Professional installation is required. The installation should never be done by any other than a qualified installation specialist. PANASONIC DISCLAIMS ANY PROPERTY DAMAGE AND/OR SERIOUS INJURY, INCLUDING DEATH RESULTING FROM IMPROPER INSTALLATION OR INCORRECT HANDLING. - Page 19 Put up the wall mounting sheet on the wall where Attach the unit. the unit is to be mounted. 1 Hook the unit securely onto the wall mount brackets with both hands. ≥ Spread out the wall mounting sheet when tapping it to ≥...
-
Page 20: Limited Warranty
Home Theater Systems Product - One (1) year, parts and labour This warranty is given only to the original purchaser, or the person for whom it was purchased as a gift, of a Panasonic brand product mentioned above sold by an authorized Panasonic dealer in Canada and purchased and used in Canada, which product was not sold “as is”, and which product was delivered to you in new condition in the original packaging.