Table of Contents
Advertisement
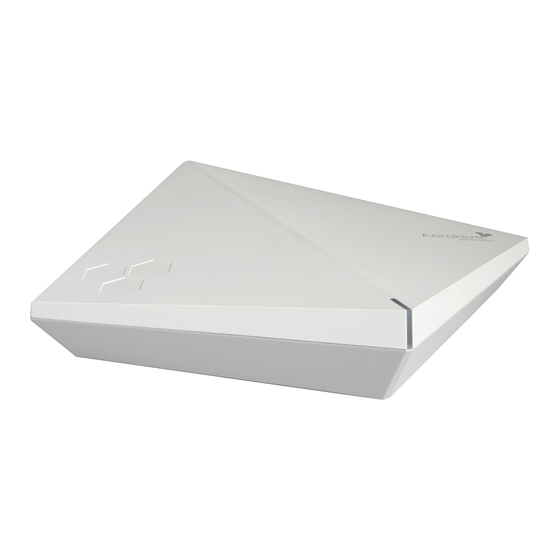
Aerohive AP230 User Guide
The Aerohive AP230 has two radios that can operate in 802.11a/b/g/n/ac modes with optional Frame Burst support across all modes. The AP230
supports three 802.11n MIMO streams and three 802.11ac/n MIMO streams simultaneously. The maximum data rates are up to 450 Mbps in the 2.4
GHz 802.11n/g mode, up to 600 Mbps in the 2.4 GHz 802.11n mode with TurboQAM enabled, and 1.3 Gbps in the 5 GHz 802.11ac mode. Both
radios also support legacy 802.11a/b/g wireless. The AP230 has two 10/100/1000 Mbps Ethernet ports. These devices provide multi-function
capabilities including high throughput and strong security.
Regulatory Compliance Statements
The regulatory compliance statements in this section apply to Aerohive AP230 devices.
For Japan, the AP230 is restricted for indoor use in the 5150-5350 MHz band only.
Compliance Statements
The following compliance information applies to the AP230.
AP230 Compliance Statement - Europe
Page 1 of 18
Advertisement
Table of Contents

Related Manuals for Aerohive AP230


Summary of Contents for Aerohive AP230
- Page 1 Aerohive AP230 User Guide The Aerohive AP230 has two radios that can operate in 802.11a/b/g/n/ac modes with optional Frame Burst support across all modes. The AP230 supports three 802.11n MIMO streams and three 802.11ac/n MIMO streams simultaneously. The maximum data rates are up to 450 Mbps in the 2.4 GHz 802.11n/g mode, up to 600 Mbps in the 2.4 GHz 802.11n mode with TurboQAM enabled, and 1.3 Gbps in the 5 GHz 802.11ac mode.
- Page 2 English: Hereby, [Aerohive], declares that this [AP230] is in compliance with the essential requirements and other relevant provisions of Directive 1999/5/EC. • Español [Spanish]: Por medio de la presente [Aerohive] declara que el [AP230] cumple con los requisitos esenciales y cualesquiera otras disposiciones aplicables o exigibles de la Directiva 1999/5/CE. 6/26/2014...
- Page 3 Français [French]: Par la présente [Aerohive] déclare que l'appareil [AP230] est conforme aux exigences essentielles et aux autres dispositions pertinentes de la directive 1999/5/CE. • Italiano [Italian]: Con la presente [Aerohive] dichiara che questo [AP230] è conforme ai requisiti essenziali ed alle altre disposizioni pertinenti stabilite dalla direttiva 1999/5/CE. •...
- Page 4 AP230 Page 4 of 18 • Connect the equipment into an outlet on a circuit different from that to which the receiver is connected. • Consult the dealer or an experienced radio/TV technician for help. FCC Caution: Any changes or modifications not expressly approved by the party responsible for compliance could void the user's authority to operate this equipment.
- Page 5 The following sections describe how to install your AerohiveAP370 or AP390 devices, connect them to the network, and start managing them in HiveManager. These instructions apply to both models. Shipping Carton Contents The AP230 access point shipping carton contains the following items: • AP230 chassis • Aerohive Generic QuickStart Guide •...
- Page 6 Mounting the AP230 You can mount the AP230 on a flat surface using the adhesive rubber feet that ship with the device. You can also mount these devices on a wall or to the tracks of a dropped ceiling grid. The following sections describe these installation methods.
- Page 7 AP230 Page 7 of 18 6/26/2014...
- Page 8 AP230 Page 8 of 18 To remove the device, insert a flat-blade screwdriver behind the device and depress one of the mount clips on the bottom of the device to release it from the bracket. Rotate the device slightly and use the screwdriver to release the other mount clip, after which you can remove the device from the bracket, as shown in the illustration below.
- Page 9 Dropped Ceiling Track Mount You can mount the AP230 in either a square or diagonal position on a standard 15/16"-wide track (2.38 cm) in a dropped ceiling. A diagonal mount requires the diagonal mount bracket that ships with the device. This section describes how to do both installations.
- Page 10 Diagonal Dropped Ceiling Track Mount Follow these steps and the illustration to mount an AP230 in the diagonal position on a standard dropped ceiling track. 1. Attach the diagonal bracket to the device by slipping the mount tabs on the device over the plain edges of the diagonal bracket.
- Page 11 Press the device gently against the track and rotate it until the mount clips click into place. Locking the AP230 You can secure the AP using a Kensington® lock in the lock slot on the side of the device, or you can use the security bracket and a crosshead screw or a security screw, which both ship with the device to secure it to a ceiling track or to a wall.
- Page 12 If you use the security screw, you will need a spanner insert bit for size #6 security screws and a driver that will accept the bit. These bits are available from Aerohive in sets of three (AH-ACC-SEC-BIT-330-AP350-3PK). If you use the crosshead screw, you can install it with a standard crosshead screwdriver or driver bit.
- Page 13 Hardware Components You can see the hardware components of the AP230 in the illustration below and read about them in the sections that follow. To meet federal radiation exposure requirements, these devices should be installed at a minimum distance of 9.05" (23 cm) from your body.
- Page 14 Port". • Power Connector: There are two ways to power an AP230. You can connect a device to a 100 – 240-volt AC power source by connecting an AC/DC power adapter (available as an option) to the 12 V (1.1A) DC connector. You can also power the device through the ETH0 port from PSE (power sourcing equipment) that is compatible with the 802.3af and 802.3at standards.
- Page 15 The status light conveys operational states for system power, firmware updates, Ethernet and wireless interface activity, and major alarms. The AP230 has a rectangular status light bar on the top corner and down one side of the chassis. The colors of this light bar indicate the following states of activity: •...
- Page 16 If you use the security screw, you will need a spanner insert bit for size #6 security screws and a driver handle that will accept the bit. These bits are available from Aerohive in sets of three for AP121, AP141, AP230, AP330, AP350, AP370, and AP390 models (AH-ACC-SEC-BIT-330-AP350-3PK).
- Page 17 Hardware Specifications Understanding the range of specifications for the AP230 is necessary for optimal deployment and device operation. The following specifications describe the physical features and hardware components, the power adapter and PoE electrical requirements, and the temperature and humidity ranges in which the devices can operate.
- Page 18 AP230 Page 18 of 18 6/26/2014...
Need help?
Do you have a question about the AP230 and is the answer not in the manual?
Questions and answers