Wattbike ATOM Quick Start Manual
Hide thumbs
Also See for ATOM:
- User manual (21 pages) ,
- Quick start manual (9 pages) ,
- Quick start manual (9 pages)

Related Manuals for Wattbike ATOM


Summary of Contents for Wattbike ATOM
-
Page 3: T O Y O U R
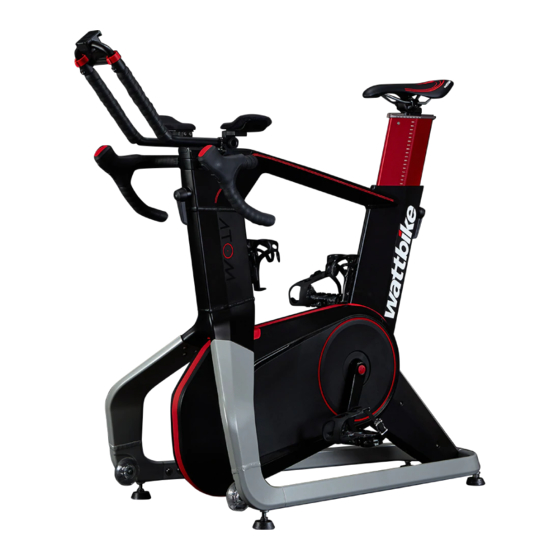
T O Y O U R W A T T B I K E A T O M This guide will show you how to build and setup your Atom, connect your devices and give you tips to get the most from your Atom’s features. - Page 4 T H E B O X – 2, 4, 5, 6 and 8mm Allen keys – Power adaptor – Combination pedals – Device holder – Tri-bars – Atom Tri-pads – Atom...
- Page 5 03 F E A T U R E S Device holder Handlebar adjuster Saddle adjuster Shifter Handlebar lever Saddle lever Power inlet and on/off button...
- Page 6 Tri-pad cup. Remove the screws from the mount. Line up the holes in the mount with the Tri-pad cup. Insert the two screws and tighten using the 4mm Allen key. Before riding the Atom ensure all bolts are tight to secure the handlebar fixings. Tighten the Tri-bar bolts (suggested torque 5 Nm or 3.7 ft.lb.)
- Page 7 S E T U P Use the corresponding levers and adjusters to set up the Atom to your preferred cycling position. Make all adjustments off the bike. Raise or lower your saddle height using the lever on the rear of the saddle stem. Loosen the lever to adjust the stem and tighten to secure.
-
Page 9: Get Connected
G E T C O N N E C T E D Once your Atom is set up, you’ll need to link your devices before you can start riding. Turn your devices Bluetooth™ on. Download the Wattbike app from your app store. - Page 10 S T O R A G E After each session, wipe any sweat, water or foreign objects from the Atom. If you need to store your Atom, make sure it is unplugged and use the wheels to guide it to a safe place.
- Page 12 W A T T B I K E . C O M @Wattbike /Wattbike /Wattbike /Wattbike...
Need help?
Do you have a question about the ATOM and is the answer not in the manual?
Questions and answers