Advertisement
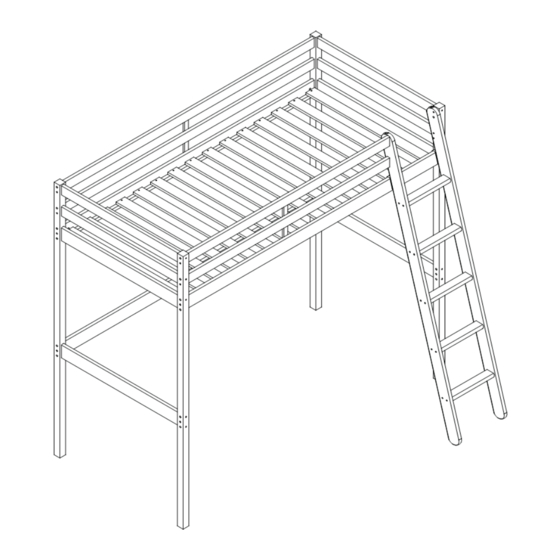
High sleeper - White
- 190x90cm
1926925
- Please keep for future reference
Dimensions
Length - 196cm
Depth - 147cm
Height - 177cm
Weight - 34kg
Important
– Please read these instructions fully before starting assembly
If you need help or have damaged or missing parts, call the Customer Helpline:
0045 7668 8055 or e-mail: order@fl exa.dk
Issue 3 - 15/05/14
Advertisement
Table of Contents

Summary of Contents for Argos 1926925
- Page 1 High sleeper - White - 190x90cm Assembly Instructions 1926925 - Please keep for future reference Dimensions Length - 196cm Depth - 147cm Height - 177cm Weight - 34kg Important – Please read these instructions fully before starting assembly If you need help or have damaged or missing parts, call the Customer Helpline: 0045 7668 8055 or e-mail: order@fl...
- Page 2 Safety and Care Advice Important – Please read these instructions fully before starting assembly • We do not • Check you have all the • Do not stand or put weight on recommend the components and tools listed on the product, this could cause use of power pages 2 and 3.
- Page 3 If you have damaged or missing components, Components - Parts call the Customer Helpline: 0045 7668 8055 Please check you have all the parts listed below Slat x15 Endrail x2 (89.7x6.5x1.5cm) (87.7x8.9x2.0cm) List x2 (31.8x2.8x1.2cm) No. 12-01508971 No. 12-01203181-20 No. 12-020087714-20 Tread x5 Endrail x2 (31.8x6.0x2.6cm)
- Page 4 Components - Parts Please check you have all the parts listed below Safety rail 1/1 x2 (186.7x6.5x2.0cm) No. 12-02018673-20 Leg x4 (176.2x4.3x4.3cm) No. 12-04317621-20 Bedside x2 (186.7x8.9x2.0cm) No. 1305-18673-20...
- Page 5 Components - Fittings Please check you have all the fi ttings listed below Note: The quantities below are the correct amount to complete the assembly. In some cases more fi ttings may be supplied than are required. No. 3922-06014 No. 3901-40030 No.
- Page 6 Assembly Instructions Step 1 Attach the dowels the endrails and to the bedside and to the safety rails Step 2 Attach the leg to the endrails with assembly screws using the Allen Key. Repeat same procedure for both headboard and footboard.
- Page 7 Assembly Instructions Step 4 Attach the bedside and the safety rails to end boards fi rstly by placing the dowels in the holes in end boards. The thin rail attached to the bedsides should face inwards. Push barrel nuts into the small holes in the bedside and the safety rail...
- Page 8 Assembly Instructions Step 6 Attach the treads the ladder sides with assembly screws Attach the bracket the ladder side with chipboard screws Front edge 16,5 mm 11,5 mm Step 7 Attach the ladder side to the leg with the sleeve nut connecting bolt Attach the ladder side to the safety rails...
- Page 9 Assembly Instructions Step 8 Place 1 slat in the PUSH centre of the bed. Follow the measurement and place 2 following slats in the bed with a distance of 836 mm between 836 mm each. Push the bedsides together whilst attaching slats to the bed with chipboard screws...
- Page 10 Assembly Instructions Step 10 Max. mattress height ! Attach the safety list inside the bed, on the front safety rails Should be in the center of the front guards between the slats. Attach it to the safety rails and the bedside with chipboard screws.


Need help?
Do you have a question about the 1926925 and is the answer not in the manual?
Questions and answers
I need parts D,G and F for the highsleep Argos 1926925
Parts D, G, and F for the Argos high sleeper model 1926925 are identified in the manual as follows:
- Part D: 10x45mm Dowel (x30), No. 3913-06055
- Part G: 6.3x90mm Assembly screw (x26), No. 3909-63090
- Part F: 6.3x50mm Assembly screw (x24), No. 3909-63050
These parts are included in the hardware pack provided with the product. If any are missing or damaged, you can contact the Customer Helpline at 0045 7668 8055 or email order@flexa.dk.
This answer is automatically generated