
Related Manuals for Innovative Technology ITVS-750B


Summary of Contents for Innovative Technology ITVS-750B
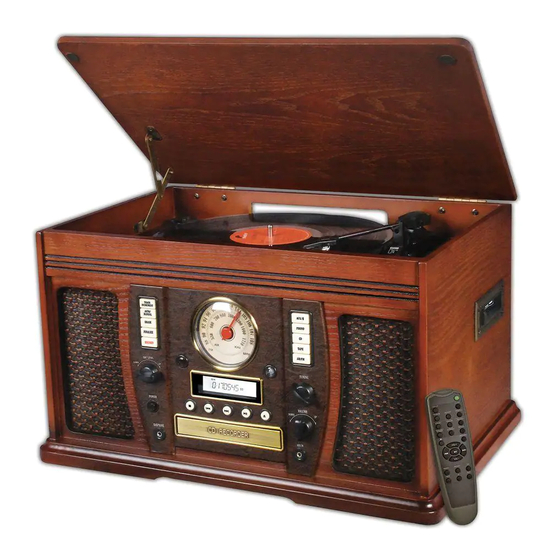
- Page 1 User Manual (E-696D) MODEL: ITVS-750B WOODEN MUSIC CENTER WITH BLUETOOTH & RECORDABLE CD PLAYER...
-
Page 2: Table Of Contents
IMPORTANT SAFETY INSTRUCTIONS....................... 3 PRODUCT OVERVIEW..........................4 SETUP / BASIC OPERATION........................7 REMOTE CONTROL............................. 7 LISTENING TO A VINYL RECORD ......................8 LISTENING TO A CD ............................ 9 LISTENING TO THE RADIO ........................11 LISTENING TO AN EXTERNAL AUDIO DEVICE (AUX MODE) ..............11 LISTENING TO AN EXTERNAL AUDIO DEVICE (BLUETOOTH MODE).......... -
Page 3: Important Safety Instructions
CAUTION RISK OF ELECTRIC SHOCK DO NOT OPEN AVERTISSEMENT: RISQUE DE CHOC LECTRIQUE – NE PAS OUVRIR. CAUTION: To reduce the risk of fire or electric shock, do not expose this appliance to rain or moisture. WARNING: To prevent electric shock, do not use this (polarized) plug with an extension cord, receptacle or other outlet unless the blades can be fully inserted to prevent blade exposure WARNING: Invisible laser radiation when open and interlock failed or defeated. -
Page 4: Product Overview
objects have fallen into the apparatus has been exposed to rain or moisture, does not operate normally, or has been dropped. -This lightning flash with arrowhead symbol within an equilateral triangle is intended to alert the user to the presence of non-insulated dangerous voltage within the product s enclosure that may be of sufficient magnitude to constitute a risk of electric shock. - Page 5 Push to turn the unit on or off. During playback, press again to pause. Press to play a vinyl record. 17. OPEN/CLOSE In CD, PHONO or AUX mode, use to open and close the disc tray. , BLUETOOTH & AUX IN Jack (Note: This button will not work in AM/FM Press to listen to an external...
- Page 6 A. FM wire antenna While tuned to a station in FM mode, extend the wire and reposition to adjust for best reception. B. AUX IN jacks For audio sources with RCA jacks, insert the white and red plugs on the RCA cable into the unit. Insert the opposite end into the audio source.
-
Page 7: Setup / Basic Operation
Setup / Basic Operation Setup 1. Remove white protective needle cover by gently pulling towards front of unit. 2. Remove any packaging materials from the unit. 3. Connect the AC power cord to a wall outlet. Note: To prevent interference, avoid bundling audio signal cables together with the AC power cord. Basic Operation 1. -
Page 8: Listening To A Vinyl Record
Battery Replacement When the operating distance between the remote control unit and main unit decreases, it is necessary to replace the battery with new ones. Battery Precautions Be sure to insert the batteries with correct positive “+” and negative “-” orientation. ALWAYS use batteries of the same type. -
Page 9: Listening To A Cd
4. Select the appropriate speed. 5. Remove the tone arm-rest holder to release the tone arm. 6. Move the tone arm gently to the edge of the record (or the starting point of a track). The turntable will begin to turn. 7. - Page 10 Display Each time the DISPLAY button is pressed, the display mode will cycle between the following options: - Track Number + Track Play Time (Default Display Mode) - Track Play Time Countdown - Track Play Time - CD Play Time Countdown Repeat Playback Each time the REPEAT button is pressed, the repeat mode will cycle through the following options:...
-
Page 11: Listening To The Radio
5. Press the PROGRAM button again to set the current track. . “P- 2” is displayed. Repeat steps 4 thru 5 to program the additional tracks. . When the selection of track numbers has been finished, press the P A button to start program playback. -
Page 12: Listening To An External Audio Device (Bluetooth Mode)
NOTE: In some circumstances you will be asked for a password. 5. After a few seconds your device will be successfully connected to the ITVS-750B. NOTE: Some music control features such as Fast Forward and Rewind are only available on your external device. -
Page 13: Before Recording
BEFORE RECORDING Audio from the PHONO, TAPE or AUX/ sources can be recorded on the CD recorder. Prepare the audio source for recording 1. Select the desired audio recording source by pressing the corresponding selector button. 2. Prepare the appropriate audio source for normal play (external audio device / vinyl record / cassette tape). - Page 14 5) Press RECORD button. 6) Adjust your recording volume to medium (you can adjust on your next recording if too loud or too low). 7) Place the needle on the record and then press “play/pause” button (it looks like this 8) Now you are recording.
- Page 15 7) When the CD is completely finalized, the CD tray will come out automatically and the recorded and finalized CD can be played in other players. Before a CD-R or CD-RW can be played in a standard CD Player, it must be finalized. During finalization, a Table of Contents (TOC) is written to the CD.
-
Page 16: Maintenance / Proper Handling
Maintenance / Proper Handling Compact Disc Handling • Always place the disc on the disc tray with the label side facing upward (compact discs can be played/recorded only on one side) • To remove a disc from its storage case, press down on the center of the case and lift the disc upward, holding it carefully by its edges. -
Page 17: Specifications
Specifications GENERAL Power Requirements AC 120 V~ 60 Hz Power Consumption 510x300x340mm | 20x11.8x13.3in Dimensions (W x H x D) (approx.) 12 kg Weight . (approx.) AMPLIFIER Output Power 5 W + 5 W Frequency Response 60 to 20, 000 Hz SPEAKER SYSTEM Type 1-way... -
Page 18: Troubleshooting Guide
Troubleshooting Guide Symptom Possible Cause Solution • Unit will not power on. • Unit is unplugged. • Connect the unit to the AC power supply. • No sound output from • The volume level is set too low. • Adjust the volume. speakers. -
Page 19: Fcc Statement
No sound The unit is not on Bluetooth Ensure the unit is switched mode to Aux/ mode. Your device’s and/or the unit’s Move your Bluetooth volume is not turned up. device closer to unit Your device is too far from the Turn up the volume on unit or there’re some obstacle your portable device... - Page 20 INDUSTRY CANADA This device complies with Industry Canada licence-exempt RSS standard(s). Operation is subject to the following two conditions: (1) this device may not cause interference, and (2) this device must accept any interference, including interference that may cause undesired operation of the device. Under Industry Canada regulations, this radio transmitter may only operate using an antenna of a type and maximum (or lesser) gain approved for the transmitter by Industry Canada.
Need help?
Do you have a question about the ITVS-750B and is the answer not in the manual?
Questions and answers