
Related Manuals for Monoprice 27771


Summary of Contents for Monoprice 27771
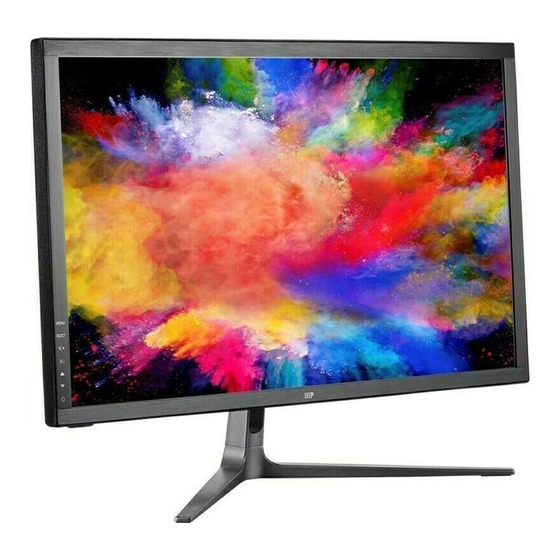
- Page 1 User’s Manual P/N 27771 27” Gaming Monitor To assure the product to work in best status Please read the user manual carefully before operation and keep it well for use...
-
Page 2: Table Of Contents
TABLE OF CONTENTS A. INSTRUCTIONS 1. Safety Warnings and Guidelines 2. Features 3. Viewing Angle Adjustment 4. Package Contents 5. Installation 6. The Main Parts and Terminals 7. Setup B.KEYPAD FUNCTION 8. Keypad Function 9. Quick Enter Keypad C. MENU ADJUSTMENT 10. -
Page 3: Safety Warnings And Guidelines
SAFETY WARNINGS AND GUIDELINES Please read this entire manual before using this device, paying extra attention to these safety warnings and guidelines. Please keep this manual in a safe place for future reference. • Do not place the monitor on an unstable surface where it could fall and cause either personal injury or damage to the monitor and/or other equipment. -
Page 4: Features
FEATURES • 3840 x 2160 maximum resolution • 16:9 aspect ratio • HDMI®, and DisplayPort video inputs • +13°/0° tilt range using included stand • 5ms response time VIEWING ANGLE ADJUSTMENT The included monitor stand supports tilt adjustment from -0° (down) to +13°... -
Page 5: Package Contents
Package Contents 1x Stand Base 1x Monitor 6x Screws for Stand Base User’s Manual P/N 27771 27” Gaming Monitor To assure the product to work in best status Please read the user manual carefully before operation and keep it well for use 1x User's Manual 1x HDMI 2.0 Cable... -
Page 6: Installation
Installation QUICK START GUIDE Put the monitor face down on a stable and smooth surface, pay attention not to damage or scratch the front glass / screen. It’s better putting a soft piece of cloth on the table beforehand to protect the monitor. Make sure the monitor is unplugged before starting installation. - Page 7 4. Put the base kit on the back side of the display as per the below picture. Fix the stand kit to the back side of the monitor as per the above picture. Screw without force. 5. Make sure the stand and base are firmly attached. 6.
-
Page 8: The Main Parts And Terminals
The Main Parts and Terminals Front LED Indicator/IR Screen signal receiver Base Back Keypad VESA hole Speaker Hole I/O Port 100mm x 100mm... -
Page 9: Setup
The Main Parts and Terminals AUDIO DP 2 DP 1 HDMI 2 HDMI 1 DC IN AUDIO OUT : To be use when using HDMI or DP signal to get audio on earphone or speakers. HDMI : HDMI 2.0 version, maximum resolution 3840 x 2160 @60Hz. DP: Display Port 1.2 version, maximum resolution 3840x2160@60Hz. -
Page 10: Select Input Source
Keypad on the front panel Select Input Source: 1. Press the “Select”button, the main menu will HDMI 1 display on the screen. HDMI 2 2. Press the ▲ and ▼ to select a applicable input DP 1 source, and press the “V-” button or wait for 3 DP 2 seconds to perform the selection. -
Page 11: Osd Menu Map
OSD MENU MAP Sub Menu Main Menu Option Function Item Item Level can be adjusted from 0 to 100 BRIGHTNESS 0~100 0~100 CONTRAST Level can be adjusted from 0 to 100 STANDARD Choose the picture mode: GAME For videos games there is three mode: PICTURE MOVIE BRIGHTNESS... - Page 12 OSD MENU MAP Main Menu Sub Menu Option Function Item Item HDMI 1 SIGNAL HDMI 2 Select signal source. MISC. SOURCE DP 1 DP 2 LOW BLUE LIGHT 0/25/50/75/100 Level can be adjusted from 0 to 100. VOLUME 0~100 Set up Freesync function ON/OFF (to be set FREESYNC to OFF when using non-AMD card).
-
Page 13: Remote Control
Remote Control Turn on/off the monitor Select the input source SOURCE Switch the sound on or off MUTE MUTE SCALE SOURCE Select the picture aspect ratio SCALE Up select the channel Down select the channel/ Quick enter for the Cross hair target Decrease the volume/ Increase the volume/ Display the source... -
Page 14: Product Specification
LED Indicator LED light color Status Green or blue Working Status Standby Orange or Red Power off No color Product specification Model 27771 Screen Diagonal 684.7mm(27”) Active Area 630.0(H)x368.2(V) Response Time 8ms(GTG) Viewing Angle 178°(H)/178°(V) White Luminance 350cd/m² Contrast Ration(Center of screen) -
Page 15: Compatible Video Resolutions
COMPATIBLE VIDEO RESOLUTIONS Vertical Horizontal Video Standard Resolution Frequency (Hz) Frequency (KHz) 720x400 31.47 60.0 31.47 60.0 640x480 37.5 75.0 37.861 72.8 37.879 60.0 800x600 48.077 72.2 SVGA 46.875 75.0 48.363 60.0 1024x768 56.476 70.0 XVGA 60.02 75.0 63.981 60.0 1280x1024 SXVGA 79.976... -
Page 16: Troubleshooting
Troubleshooting Issues Possible Solution LED light is not Check that the power cord is connected properly. working - Please make sure that the power cord is plugged on properly. - Please make sure that the signal cable is firmly connec- ted to the PC or the video sources.
Need help?
Do you have a question about the 27771 and is the answer not in the manual?
Questions and answers