Henny Penny SCR-8 Service Manual
Rotisserie
Hide thumbs
Also See for SCR-8:
- Operator's manual (44 pages) ,
- Brochure (12 pages) ,
- Technical manual (52 pages)
Table of Contents
Advertisement
Quick Links
Advertisement
Table of Contents

Related Manuals for Henny Penny SCR-8


Summary of Contents for Henny Penny SCR-8
- Page 2 0 TO 3 YEARS: During this time, any frypot that fails due to manufacturing or workmanship is- sues will be replaced at no charge for parts, labor, or freight. Henny Penny will either install a new frypot at no cost or provide a new or reconditioned replacement fryer at no cost.
-
Page 3: Table Of Contents
Henny Penny SCR-6/8 TABLE OF CONTENTS Section Page Section 1. INTRODUCTION ..................... 1-1 Henny Penny Rotisserie ................. 1-1 Features ......................1-1 Assistance ...................... 1-1 Safety ......................1-2 Proper Care ....................1-2 Section 2. INSTALLATION ...................... 2-1 Introduction ....................2-1 Location ......................2-1 Stacking Instuctions .................. - Page 4 Henny Penny SCR-6/8 TABLE OF CONTENTS Section Page Section 6. TROUBLESHOOTING .................... 6-1 Introduction ....................6-1 Troubleshooting ..................... 6-1 Error Codes ....................6-3 Section 7. MAINTENANCE ...................... 7-1 Introduction ....................7-1 Maintenance Hints ..................7-1 Halogen Lamp Replacement ................7-1 Blower Replacement ..................
-
Page 5: Section 1. Introduction
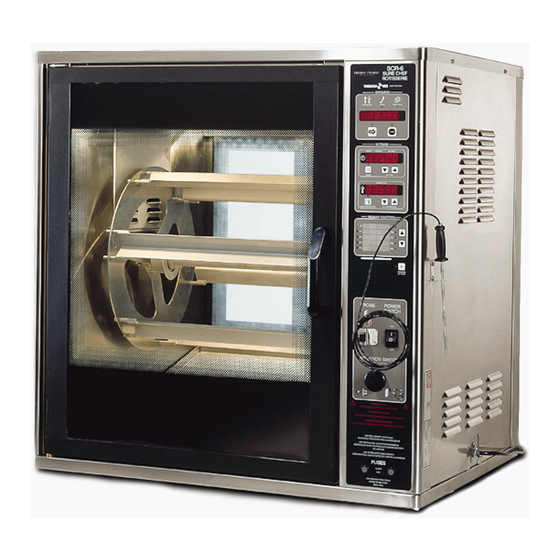
Henny Penny SCR-6/8 SECTION 1. INTRODUCTION 1-1. HENNY PENNY The Henny Penny Rotisserie, SCR-6 or 8 , combines ROTISSERIE rotating convection heat with rotating disks so that food browns more evenly and cooks faster. It can also be used as a display unit for displaying of product while in the cooking or holding mode. -
Page 6: Safety
Henny Penny SCR-6/8 1-4. SAFETY To ensure safe operation of the Henny Penny Rotisserie, the proper procedures for installation, operation, and mainte- nance should be followed and properly understood. Where information is of particular importance or is safety related, the words WARNING, CAUTION, and NOTE are used. -
Page 7: Section 2. Installation
The SCR-6/8s rotisseries must be 2 inches from any rear wall. No minimum spacing is required for the sides of the units. After the Henny Penny Rotisserie has been placed on a table, run a bead of silicone (silicone or equivalent sealant must be a NSF listed material) around the perimeter of the unit sealing it to the table top. -
Page 8: Stacking Instuctions
3. Carefully lift the rotisserie and place it on top of the display, or bottom rotisserie, with the controls on the same side. The SCR-8 weighs approximately 500 lbs. (230 Kg) and the SCR-6 weighs 380 lbs. (172 Kg). Extreme care should be taken when lifting the rotisserie to prevent personal injury. -
Page 9: Unpacking
NOTE Any shipping damages should be noted in the presence of the delivery agent and signed prior to his or her departure. To remove the Henny Penny Rotisserie from the carton you should: Carefully cut banding straps. Remove packing from around the unit. -
Page 10: Leveling Of Unit
For proper operation, the Rotisserie should be level from side to side and front to back. This will ensure proper door operation. 2-6. ELECTRICAL The Henny Penny rotisserie is available from the factory REQUIREMENTS wired 208 or 240 volt, 220-380 volt, 240-415 volt, 230-400 volt, 1 or 3 phase, 50/60 hertz service. -
Page 11: Section 3. Operation
Henny Penny SCR-6/8 SECTION 3. OPERATION 3-1. INTRODUCTION The Henny Penny Rotisserie is computer controlled. The computer control regulates the cabinet temperatures and provides timing and program functions of the rotisserie. 3-2. CONTROLS AND SWITCHES (Refer to Figures 3-1 and 3-2) - Page 12 Henny Penny SCR-6/8 3-2. CONTROLS AND SWITCHES (Refer to Figures 3-1 and 3-2) (continued) Item Description Function Start Button The start button is pressed to begin the unit preheating or begins a cook cycle. Stop Button The stop button is pressed to end a cook or hold cycle.
- Page 13 Henny Penny SCR-6/8 Figure 3-1...
- Page 14 Henny Penny SCR-6/8 Figure 3-2...
-
Page 15: Installation Of Discs, Rods, And Spits
Henny Penny SCR-6/8 3-3. INSTALLATION OF DISCS, ROD AND SPITS 1. Fit discs up to appropriate disc support on each side of unit. 2. Place each end of the rod assembly into the hubs on each disc. 3. Slide the collars onto each hub of discs. -
Page 16: Procedure For Angled Spits
Henny Penny SCR-6/8 3-4. PROCEDURE FOR The angled spits are the standard accessory for the Henny ANGLED SPITS Penny rotisseries. Some of the advantages of the angled spits, compared to the meat forks, are the ease and speed in which whole chickens can be placed on the spits. -
Page 17: Procedure For Meat Forks Or Spits
Henny Penny SCR-6/8 3-5. PROCEDURE FOR MEAT Pork ribs - spare or baby racks should be weaved on the spits FORKS OR SPITS like an accordion. Both tines of the meat fork should pierce (continued) the slab. Best results are obtained if poultry or roasts are not crowded together. -
Page 18: Preheat Control
Henny Penny SCR-6/8 3-7. OPERATION MODE 3 Open the door and load the product into the unit. Press the (continued) rotate knob as needed to rotate the discs to help in loading. Close the door, then press the START button to begin cook cycle. -
Page 19: Cleaning Procedures
4. Remove grease pan, vent panels (side vents first), back panel, and grease trays from unit, and take to a sink to clean thoroughly. NOTE The top vent panel (covering air heaters), is slotted to the right on the SCR-8 and to the left on the SCR-6. - Page 20 Henny Penny SCR-6/8 3-12. CLEANING 5. Loosen the thumb screw on the blower fan blade and pull PROCEDURES blade from shaft. Then take fan blade to a sink to clean (continued) thoroughly. When reinstalling fan blade, be sure the offset shaft matches up, and the thumb screw is tightened snug, but not too tight.
-
Page 21: Section 4. Programming
Henny Penny SCR-6/8 SECTION 4. PROGRAMMING 4-1. INTRODUCTION The controls can be preset at the factory, or the desired functions can be programmed in the field. The Program Settings (“P”) button is used to program the following functions: Cooking(steps), alarms, and hold. - Page 22 Henny Penny SCR-6/8 4-2. PROGRAMMING FOR 6. A radiant heat setting may be programmed by pressing COOK AND HOLD and holding the “oven temperature” button (thermometer). (continued) The default setting is 100%, but can be changed from 0% to 100%, using the Up and Down buttons. By lower- ing the setting, the amount of time the radiant heaters are on, is lowered.
- Page 23 Henny Penny SCR-6/8 4-2. PROGRAMMING FOR COOK AND HOLD 10.Repeat above steps for each product programmed. After (continued) all products are programmed, exit the program mode by holding in on the Program (“P”) button for 2 seconds. 11.You are now ready to cook.
- Page 24 Oven Type (SP-2) After entering the access code (1,2,3), press and release the P button. “OVEN TYPE” shows in the top display and “Scr-6” or “Scr-8” shows in the middle display. This must match the type of unit before programming, or the unit may not perform properly. This will be preset from the factory.
- Page 25 Henny Penny SCR-6/8 4-3. SPECIAL PROGRAM MODE Audio Tone (SP-5) (continued) The tone of the speaker can be adjusted. After entering the access code (1,2,3), press the P button four times. “AUDIO TONE shows in the top display, and a number 50 thru 2000 shows in the middle display.
-
Page 26: Tech Mode
4-4. TECH MODE The Tech Mode has many self diagnostic capabilities which are used for internal Henny Penny use only, and a different code is needed to access this mode. The word “TECH” shows in the display when the P button is pressed for eight seconds, and the P button pressed again, when “LEVEL 2”... -
Page 27: Section 5. Cooking Procedures
Henny Penny SCR-6/8 SECTION 5. COOKING PROCEDURES 5-1. PROGRAM COOK Your rotisserie is preprogrammed at the factory for several PARAMETERS types of products. The size, weight, temperature, and quantity of the product is critical to the success of the preset cooking programs. -
Page 28: Seasonings And Barbecue Sauce
Henny Penny SCR-6/8 5-5. SEASONINGS AND Henny Penny has two seasonings and a barbecue sauce available BARBECUE SAUCE for use with the Rotisserie. Lightly sprinkle or rub seasonings on meats evenly. Additional seasoning can be sprinkled in the cavity of whole poultry. -
Page 29: Minimum Temperature Requirements For Hot And Cold Food Storage
140 o F (60 o C) or above HOT AND COLD FOOD STORAGE for hot food storage. The SCR-8 and SCR-6 will meet this requirement. Henny Penny also manufactures various styles of excellent holding cabinets and display warmers to suit your needs. -
Page 30: Basic Cooking Procedures
Henny Penny SCR-6/8 5-9. BASIC COOKING Choose the desired product by pressing the Up or Down PROCEDURES button, then press the Start button to begin preheating. 2. Season product and load onto spits. 3. Once READY LED is lit, use the Manual Rotation Switch to load product into rotisserie. -
Page 31: Cooking Guidelines
Henny Penny SCR-6/8 5-10. COOKING GUIDELINES Whole Chicken, Fresh-3 Pounds Each Remove excess fat and skin from thigh and neck area. Rinse birds inside and out with cool tap water. Marinate if desired. Tuck wings and tuck or tie legs. Place on spits, or in baskets, and season as desired. - Page 32 Henny Penny SCR-6/8 5-10. COOKING GUIDELINES Chicken Quarters, Fresh-2 ½-2¾ Pounds (continued) Marinate and season as desired. Place chicken quarters in baskets, bone down. SCR-8 Chicken Quarters Preheat/Cook Per Basket Cook Times Temp. 0:45:00 350-375°F (177-190 °C) SCR-6 0:50:00-0:55:00 350-375°F (177-190 °C)
- Page 33 Henny Penny SCR-6/8 5-10. COOKING GUIDELINES Spare Ribs, Canadian Style-2 - 2½ Pounds (continued) Remove excess fat from the ribs and rinse with cool tap water. Weave ribs into the piercing spit. Season as desired. SCR-8 Number of Preheat/Cook Ribs Cook Times Temp.
-
Page 34: Section 6. Troubleshooting
Henny Penny SCR-6/8 SECTION 6. TROUBLESHOOTING 6-1. INTRODUCTION This section provides troubleshooting information in the form of an easy to read table. If a problem occurs during the first operation of a new rotisserie, recheck the installation per the Installation Section of this manual. - Page 35 Henny Penny SCR-6/8 6-2. TROUBLESHOOTING (continued) Problem Cause Correction COOKING SECTION • Product Color Not Check Probe position - 1 1/2 Correct: inches into cabinet (see section 7-5). • • A. Too Dark Temperature too high. Check temperature setting in the program mode.
-
Page 36: Error Codes
Henny Penny SCR-6/8 6-2. TROUBLESHOOTING (continued) Problem Cause Correction • • Product not done Low or improper voltage. Use a meter and check the receptacle against data plate. • • Weak or burnt out elements. Check heating element(s) per Section 7-12. -
Page 37: Section 7. Maintenance
Henny Penny SCR-6/8 SECTION 7. MAINTENANCE 7-1. INTRODUCTION This section provides procedures for the checkout and replacement of the various parts used within the rotisserie. Before replacing any parts, refer to the Troubleshooting section. It will aid you in determining the cause of the malfunction. -
Page 38: Blower Replacement
Henny Penny SCR-6/8 7-4. BLOWER REPLACEMENT 1. Remove electrical power to unit. Remove electrical power supplied to the unit by un- plugging the unit, or by turning off the wall circuit breaker, or electrical shock could result. 2. Using Phillips head screwdriver, remove the side panel closest to the controls. -
Page 39: Thermal Sensor Replacement
Henny Penny SCR-6/8 7-5. THERMAL SENSOR REPLACEMENT 1. Remove electrical power to unit. Remove electrical power supplied to the unit by unplugging the unit, or by turning off the wall circuit breaker, or electrical shock could result. 2. Remove the control side-side panel. -
Page 40: Contactor
Henny Penny SCR-6/8 7-6. CONTACTOR 1. Remove electrical power to unit. Checkout: Remove electrical power supplied to the unit by unplugging the unit, or by turning off the wall circuit breaker, or electrical shock could result. 2. Remove the side panel closest to the controls. -
Page 41: Drive Motor Replacement
Henny Penny SCR-6/8 7-6. CONTACTOR (continued) 6. Check voltage as follows: Test Points Results from terminal 29 to 28 The voltage from terminal 27 to 28 should read the from terminal 27 to 29 same at each terminal. Replacement: If contactor proves defective: 7. -
Page 42: Rotation Control Switch
Henny Penny SCR-6/8 7-7. DRIVE MOTOR 5. Remove lock nut and nut from the bolt in the extension REPLACEMENT hub, and remove bolt. (continued) 6. Separate the extension hub from drive motor shaft. 7. Install extension hub into new motor. -
Page 43: Capacitor Replacement - Blower Motor
Henny Penny SCR-6/8 7-8. ROTATION CONTROL 4. Take a continuity reading across terminals. If meter SWITCH (continued) shows constant open or closed circuit each time the button is pushed, the switch is defective. 5. Unscrew the back ring of switch and pull out switch from the front of the unit. -
Page 44: Capacitor Replacement - Drive Motor
Henny Penny SCR-6/8 7-10. CAPACITOR REPLACE 1. Remove electrical power supplied to unit. MENT - DRIVE MOTOR Remove electrical power supplied to the unit by unplugging the unit, or by turning off the wall circuit breaker, or electrical shock could result. -
Page 45: Socket - Halogen Lamp
Henny Penny SCR-6/8 7-11. DOOR SENSOR REPLACEMENT (continued) 5. Using a Phillips head screwdriver and a 5/16" wrench, re- move screws from switch and remove switch from bracket. 6. Cut wires behind splices and then splice wires of new sensor on existing wires. -
Page 46: Power Switch
Henny Penny SCR-6/8 7-13. POWER SWITCH 1. Remove electrical power supplied to the unit. Remove electrical power supplied to the unit by unplugging the unit, or by turning off the wall circuit breaker, or electrical shock could result. 2. Remove the control side-side panel. -
Page 47: Speaker" Replacement
Henny Penny SCR-6/8 7-14. RADIANT HEATERS (continued) 4. Remove the wires from the terminals. 5. Remove screws from both support brackets, and pull brack- ets and heater from unit. 6. Install new heater in reverse order. 7-15. CONTROL BOARD 1. Remove electrical power supplied to the unit. -
Page 48: Meat Probe Receptacle Replacement
Henny Penny SCR-6/8 7-16. MEAT PROBE 1. Remove electrical power to unit. RECEPTACLE REPLACEMENT Remove electrical power supplied to the unit by unplugging the unit, or by turning off the wall circuit breaker, or electrical shock could result. 2. Remove the control side-side panel. - Page 49 Henny Penny SCR-6/8 7-17. TRANSFORMER (continued) The following checks are performed with the wall circuit breaker closed and the main power switch in the ON position. Extreme caution should be taken. Make connections before applying power, take reading, and remove power before removing meter leads, or electrical shock could result.
-
Page 50: Control Board Replacement
Henny Penny SCR-6/8 7-18. CONTROL BOARD REPLACEMENT 1. Remove electrical power supplied to the unit. Remove electrical power supplied to the unit by unplugging the unit, or by turning off the wall circuit breaker, or electrical shock could result. 2. Remove the Phillips head screws securing the control side, side panel and remove side panel. - Page 51 Henny Penny SCR-6/8 7-19. RELAYS (continued) The following checks are performed with the wall circuit breaker closed and the main power switch in the ON position. Extreme caution should be taken. Make connections before applying power, take reading, and remove power before removing meter leads, or electrical shock could result.
-
Page 52: High Limits
Once the temperature inside the unit goes down, then the high limit automatically resets and the unit can then be heated. All SCRs have two high limits. The SCR-6 and SCR-8 both have a 450ºF high limit and a 500ºF high limit. The SCR-3 has a 285ºF high limit and a 450ºF high limit. - Page 53 Henny Penny SCR-6/8 7-20. HIGH LIMIT (Continued) NOTE Units with a small diameter hole, in the high limit box, must follow the proceeding steps to access the wires and mounting nuts of the high limit. Units with a large diameter hole can access the wires and mounting nuts from the hole in the front of the box.
- Page 54 Henny Penny SCR-6/8...
-
Page 55: Section 8. Parts Information
This section identifies and lists the replaceable parts of the Henny Penny SCR Rotisserie. 8-2. GENUINE PARTS Use only genuine Henny Penny parts in your cabinet. Using a part of lesser quality or substitute design may result in cabinet damage or personal injury. - Page 56 LH Hub 49186 LH Hub - Coated 40827 Weldment - Drive Tube - SCR-8 49185 Weldment - Drive Tube - SCR-8 - Coated 40826 Weldment - Drive Tube - SCR-6/3 49192 Weldment - Drive Tube - SCR-6/3 - Coated 40242...
- Page 57 Qty. Part No. Description SCR-8 SCR-6 SCR-3 63714-01 Power Cord Assy.-GM-Inboard Casters- SCR-8 63714-02 Power Cord Assy.-GM-Outboard - Top 63714-03 Power Cord Assy.-GM-Outboard - Bottom 40998 Power Cord Assy. - 30 Amp - SCR-6 (3 ph) 41659 Power Cord Assy. - 50 Amp - SCR-6 (1 ph)
- Page 58 Henny Penny SCR-6/8...
- Page 59 Henny Penny SCR-6/8 Qty. Qty. Qty. Item No. Part No. Description SCR-8 SCR-6 SCR -3 45065-09 Air Heater-208V 1650W 45065-10 Air Heater-240V 1650W 45065-03 Air Heater-208V 1550W 45065-07 Air Heater-240V 1550W 45065-01 Radiant Heater-208V 2800W 45065-05 Radiant Heater-240V 2800W 45065-03...
- Page 60 Henny Penny SCR-6/8 Qty. Qty. Qty. Item No. Part No. Description SCR-8 SCR-6 SCR -3 49751 Door Assy.-Control Side w/ Handle 49752 Door Assy-Mir.Control Side w/ Handle 49753 Door Assy. Customer Side w/o Handle 49754 Door Assy. Customer Side w/ Handle 49261 Door Assy.
- Page 61 Henny Penny SCR-6/8 Qty. Qty. Qty. Item No. Part No. Description SCR-8 SCR-6 SCR -3 40577 Removable Duct-L.H 49179 Removable Duct-L.H. Coated 40707 Removable Duct-L.H 49189 Removable Duct-L.H Coated 40244 Bearing 40049 Top Removable Duct 40581 Top Removable Duct 49845...
- Page 62 Henny Penny SCR-6/8 Qty. Qty. Qty. Item No. Part No. Description SCR-8 SCR-6 SCR -3 14242 Drive Motor Assy. (includes 56164) 49451 Drive Motor Assy-240V. 44596 Drive Motor Assy-208V 40637 Capacitor- Drive Motor - 3 mF SN: IE044II and below...
- Page 63 Henny Penny SCR-6/8 Qty. Qty. Qty. Item No. Part No. Description SCR-8 SCR-6 SCR -3 EF02-104 Fuse Holder EF02-105 Fuse 44428 Rotation Switch MOV 51128RB-01 Control/Display Board Assy. -Std. 51128RB-02 Control/Display Board Assy.-300° F 1 51980 Drive Motor Relay MOV 40645 S.S.
- Page 64 Henny Penny SCR-6/8 Qty. Qty. Qty. Item No. Part No. Description SCR-8 SCR-6 SCR -3 51476 Speaker Assy. 54561 Speaker Assy. 49686 Power Supply Board 29523 Probe Assy. 37397 High Limit-500 Deg. 49218 High Limit-285 Deg. 41405 Blower Motor Assy...
- Page 65 Henny Penny SCR-6/8 Qty. Qty. Qty. Item No. Part No. Description SCR-8 SCR-6 SCR -3 48769 Drip Tray 49763 Drip Tray- Coated 48755 Drip Tray 49762 Drip Tray- Coated 44443 Drip Tray 21241 Drip Tray- Coated 49256 Drain PLug Assy.
- Page 67 For Sales or Service Please Contact The Nearest Henny Penny Distributor General Services Barnett Supply PHT Systems Top-Line Distributors Art Cole Associates DSL Inc., Canada Mid-Nebraska Restaurant Scotsman Supply Supply Co. Globe-Monte Metro, Inc. St. Clair Supply Company Robert G. Wood & Co.
- Page 69 Henny Penny International Distributor Network Henny Penny Corporation Pesin Equipment Food Service Sisustaja As A. Karlsson H. F. 1219 U.S. Route 35 West R. Olavo Bilac 188/198 Tihniku 5 Brautarholti 28 Eaton, OH 45320 USA Sao Caetano Do Sul - SP...
- Page 70 Pro Kitchen Grillfagmannen A.S. Commercial Center Feco Corporation Cahlfoun Building Ostensjoveien 44 Development & Economy 420, 11 F Keelung Rd. Kaslik - Main Road N-0667 Oslo 6, Norway P.O. Box 1210 Sec. 1 Postal Code 110 PO Box 1066 Jounieh Telephone: 47 (2) 651410 Jeddah 21431, Saudi Arabia Taipei, Taiwan...
Need help?
Do you have a question about the SCR-8 and is the answer not in the manual?
Questions and answers