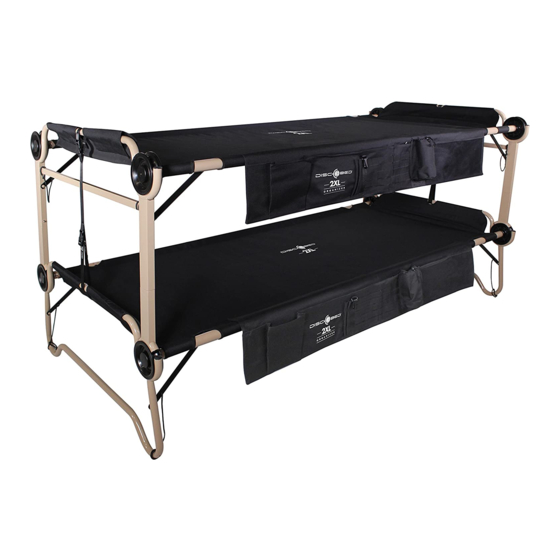
Disc-O-Bed 2XL Outfitter Assembly Instructions Manual
Bunk bed
Hide thumbs
Also See for 2XL Outfitter:
- Assembly instructions manual (35 pages) ,
- Assembly instructions manual (35 pages) ,
- Assembly instructions manual (35 pages)
Table of Contents
Advertisement
Quick Links
Advertisement
Table of Contents

Related Manuals for Disc-O-Bed 2XL Outfitter


Summary of Contents for Disc-O-Bed 2XL Outfitter
- Page 1 assembly instructions www.discobed.com AI30007BOUS...
- Page 2 IMPORTANT INFORMATION CONCERNING THIS PRODUCT TO PREVENT SERIOUS OR FATAL INJURIES Keep these instructions for future reference Read carefully and fully understand the manufacturer’s assembly. Care and special attention should be used where a warning is indicated. Never allow a child under 6 years of age on the top bed. Only one person allowed on each level. Use the bunk as it is intended –...
- Page 3 PARTS 2x Sleeping Mats 2x Side Organizers 4x Stack Adapters 8x Stabilizer Bars 2x Locking Straps 2x Straight End Frames 2x Round End Frames 8x Discs 4x Foot Plugs 4x Straight Side Rails 8x Swaged Side Rails...
- Page 5 B U N K rounded frame assembly instructions www.discobed.com...
- Page 6 STEP 1. SECURING DISC TO SWAGED SIDE RAIL 1.1. Holding swaged rail, press pin (A) down and hold. 1.2. Line up pin (B) with hole in disc, insert rail into disc. Let pin (A) go. Pin (B) is only securely locked in when you hear a ‘click’...
- Page 7 STEP 2. CONNECTING SWAGED SIDE RAIL TO STRAIGHT SIDE RAIL 2.1. Attach a swaged side rail (completed in step 1) to a straight rail. Make sure they slide into one another completely. 2.2. Repeat step 2.1 STEP 3. ATTACHING SLEEPING MAT TO SIDE RAILS 3.1.
- Page 8 STEP 4. SECURING EACH DISC INTO THE END FRAME 4.1. Make sure pin (A) and (C) are visible, are not covered by the sleeping mat and are facing inwards. Check all four bed posts (see diag. 4.1). 4.2. Loosely place each disc into the loop of the bed end frame, ensure your fingers are not in the way and firmly push down on the side rail (see diag.
- Page 9 STEP 5. SECURING HEAD REST 5.1. Flap head rest over bed end frame and secure on underside hook and loop. 5.2. Repeat at other bed end. THE ASSEMBLY OF YOUR XL OUTFITTER BUNK ROUNDED FRAME SINGLE COT IS NOW COMPLETE.
- Page 10 STEP 6. STRAIGHT FRAME ASSEMBLY 6.1. Follow steps 1 - 5 to complete the assembly of the straight frame single cot. THE ASSEMBLY OF YOUR XL OUTFITTER BUNK STRAIGHT FRAME SINGLE COT IS NOW COMPLETE.
- Page 11 B U N K bunk assembly instructions www.discobed.com...
- Page 12 STEP 1. REMOVE FOOT PLUGS 1.1. Remove the 4 foot plugs from the straight bed end frame. STEP 2. ATTACH STACK ADAPTERS TO STRAIGHT LEG BED END FRAME 2.2. Line pin (A) with hole in leg of straight bed end frame. 2.1.
- Page 13 STEP 3. STACK STRAIGHT END FRAME ONTO ROUNDED END FRAME 3.1. Place straight end frame (fitted with stack adapters completed in step 2) onto rounded end frame. STEP 4. CORRECT STACK ADAPTER FITMENT 4.1. Make sure the stack adapter fits directly into the groove of each disc on the bottom cot. 4.2.
- Page 14 STEP 5. CHECK THAT STABILIZER PINS FACE INWARDS 5.1. Make sure that all stabilizer pins are aligned with sleeping deck and face inwards. 5.2. Adjust if needed by lifting disc out from bed end frame. Make sure pin (A) is facing inwards and not covered by sleeping mat.
- Page 15 STEP 7. CLIP STABILIZER BAR TO SIDE RAIL 7.1. Hook stabilizer bar to pin on side rail and bed end frame. 7.2. Repeat step 7.1 to each bed post. STEP 8. ATTACHING LOCKING STRAP 8.1. Feed locking strap through center of each head rest and lock each buckle (1 and 2) onto the end frames. 8.2. ...
- Page 16 YOU HAVE NOW SUCCESSFULLY COMPLETED THE ASSEMBLY OF YOUR XL OUTFITTER BUNK. We hope that you are completely happy with our product and it is exactly what you expected...
- Page 17 B U N K bench setup www.discobed.com...
- Page 18 STEP 1. DETACH HEAD REST 1.1. Detach head rest from from hook and loop, on both sides of top bunk. STEP 2. SETTING UP BACK REST 2.1. Unhook stabilizer bar on one side of top bunk.
- Page 19 2.2. Lift disc 1 and 2 out of bed end frame of top cot. 2.3. Place disc 1and 2 bed end rail of bottom cot.
- Page 20 2.4. Let disc rest between bed end rail and stack adapter. The disc should not be able to roll forward. YOU HAVE NOW SUCCESSFULLY COMPLETED THE SETUP OF YOUR 2XL OUTFITTER BENCH...
- Page 21 IMPORTANT TO NOTE WHEN CONVERTING YOUR BENCH BACK TO A BUNK CONFIGURATION Make sure pin (A) and (C) are facing inwards and not covered by sleeping mat.
- Page 23 B U N K side organizer assembly instructions www.discobed.com...
- Page 24 STEP 1. SETTING UP SIDE-ORGANIZER...
- Page 25 B U N K package instructions 2XL Rounded frame 2XL Straight frame www.discobed.com...
- Page 27 5 POINT CHECK LIST Make sure that these simple checks are followed PRIOR TO EACH use of your Bunk. 1. The pin (B) is securely locked in to the disc. STEP 1 page 5. 2. Side rails fit into one another completely. Should feel smooth to the touch. STEP 3 page 6. 3.
-
Page 28: Limited Warranty
LIMITED WARRANTY DISC-O-BED® (“MANUFACTURER”) warrants only that this product shall be free from defects in materials and workmanship for a period of one year after the date of delivery. If within the applicable warranty period, (i) the purchaser discovers any defects in the materials or workmanship of this product and (ii) notifies MANUFACTURER in writing of such defects and returns the defective product to MANUFAC- TURER, MANUFACTURER shall repair or replace the defective product, or, at MANUFACTURER’s sole option, refund the purchase price for... - Page 29 If you have any questions, comments or concerns, please don’t hesitate to contact us: Disc-O-Bed® Retail, Inc. 2408 Tech Center Pkwy STE 100, Lawrenceville, GA 30043 USA Toll Free: +1 800.613.0910 Monday – Friday 8:30 to 5:00pm (EST) cs@discobed.com...
Need help?
Do you have a question about the 2XL Outfitter and is the answer not in the manual?
Questions and answers