Table of Contents
Advertisement
Available languages
Available languages
User's Manual
Model______________
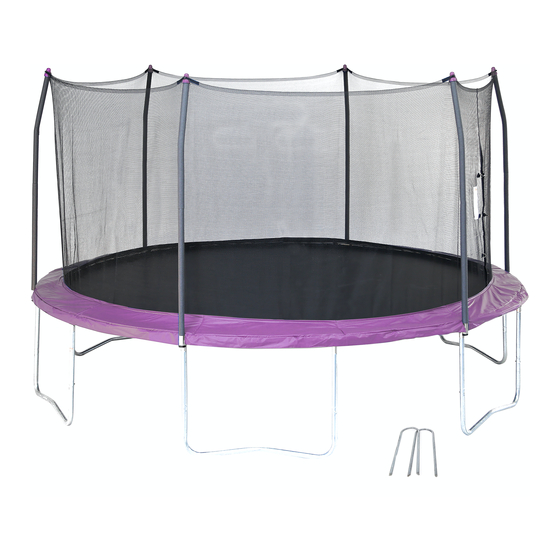
SWTC1400WS
WARNING
Read all precautions and
instructions in this manual before
using this equipment. Save this
manual for future reference.
Maximum user weight 200 lbs.
IMPORTANT
CAUTION: Adult Assembly
Required
Trampoline and Enclosures are
susceptible to winds. Be sure to
secure your trampoline and enclosure.
Wind Damage is not covered in the
warranty of your trampoline
Advertisement
Chapters
Table of Contents

Related Manuals for Skywalker SWTC1400WS


Summary of Contents for Skywalker SWTC1400WS
- Page 1 User’s Manual Model______________ SWTC1400WS WARNING Read all precautions and instructions in this manual before using this equipment. Save this manual for future reference. Maximum user weight 200 lbs. IMPORTANT CAUTION: Adult Assembly Required Trampoline and Enclosures are susceptible to winds. Be sure to secure your trampoline and enclosure.
-
Page 2: Table Of Contents
SWTC1400WS Model_____________ A serial decal is found on one of the trampoline legs. Model number decal tag is located on the jumping mat. CONTENTS Important Precautions...........3 Warning Label Placement........4 Before You Begin..........4 Trampoline Safety Information......5 Enclosure Safety Information.......6 Methods of Accident Prevention......7 Important Warnings..........8... - Page 3 USE INSTRUCTIONS WARNING: To reduce the risk of serious injury, read and follow all of the warnings, precautions, and instructions in this manual before you use the trampoline enclosure. Warnings and instructions for care, maintenance, and use of this trampoline and enclosure are included to promote safe, enjoyable use of this equipment. It is the responsibility of the owner and supervisors of the Do not attach anything to the enclosure barrier that is not a trampoline and enclosure to make sure all users obey the safety...
-
Page 4: Warning Label Placement
BEFORE YOU BEGIN Thank you for choosing your Skywalker Trampolines brand Trampoline. Skywalker Trampoline round Trampolines are designed and crafted to provide many years of fun and fitness. This trampoline comes equipped with warnings and instructions for the assembly, care, maintenance, and use of the trampoline. -
Page 5: Trampoline Safety Information
TRAMPOLINE SAFETY INFORMATION In trampoline use, as in all active recreational sports, participants can be injured. However, there are steps that can be taken to reduce the risk of injury. In this section, primary accident patterns are identified and the responsibilities of supervisors and jumpers in accident prevention are described. -
Page 6: Enclosure Safety Information
ENCLOSURE SAFETY INFORMATION NEED FOR TRAMPOLINE ENCLOSURE SAFETY A trampoline enclosure is a recreational product. The information on this page and on pages 7-9 identify important safety precautions. The precautions are not all-inclusive, because an enclosure can be used in ways that this manual cannot cover completely. To prevent pinches and cuts during enclosure use, a frame pad must be installed on the trampoline (See the trampoline manufacturer’s instructions). -
Page 7: Methods Of Accident Prevention
METHODS OF ACCIDENT PREVENTION The Supervisor's Role in Preventing Accidents It is the responsibility of the supervisors of trampoline users to provide knowledgeable and mature supervision. They need to know and enforce all of the rules and warnings printed in this manual to minimize the likelihood of accidents and injuries. - Page 8 • Wear clothing that does not have drawstrings, hooks, loops or anything else that could get caught while using the trampoline/enclosure and result in entanglement or strangulation, or both. • Do not attach anything to the netting that is not a Skywalker Trampolines approved accessory or part of the of the trampoline enclosure.
-
Page 9: Use And Instructional Material
D-ring on the jump mat and that the horizontal clips are attached to the D-rings on the enclosure netting, both during use and after use. For additional information regarding equipment, contact Skywalker Holding, LLC. For additional information regarding skill training, contact a trainer certification organization. -
Page 10: Instructional Program And Model Lessons
INSTRUCTIONAL PROGRAM AND MODEL LESSONS The following lessons are examples of an instructional program. They should follow a complete discussion and demonstration of body mechanics between the supervision and the student(s). See also page 11. 1. Mounting and dismounting (getting on and off)-Demonstration and practice of proper techniques. 2. - Page 11 Lesson 5: Seat Drop Lesson 6: Front Drop 1. Review and practice of skills already learned. 1. To save time and avoid mat (bed) burns, all students should 2. Land in a sitting position with your legs parallel to the be requested to assume the front drop position on the floor mat.
- Page 12 Model No. SWTC1400WS Use below drawings to identify all the parts. Top Tube with T-joint (6 pcs) Top Tube with Socket (6 pcs) Leg extension (12 pcs) Leg brace (6 pcs) Jumping mat (1 pc) Frame PAD (1 pc) Enclosure net (1 pc) Spring (84 pcs) Straight Tube(6 pcs)...
- Page 13 Exploded Drawing----Model No. SWTC1400WS...
-
Page 14: Ordering Replacement Parts
SWTC1400WS Key No. Qty. Description Top Tube with T-joint Top Tube with Socket Leg extension Leg brace Jumping mat Frame PAD Enclosure net Spring Straight Tube Curved Tube Foam Pole Cap End Cap M6x45mm Bolt M5x44mm Screw M6 Nut M6 Washer... -
Page 15: Assembly
ASSEMBLY ASSEMBLY (PUTTING THE TRAMPOLINE AND ENCLOSURE TOGETHER) IMPORTANT ASSEMBLY INFORMATION • Need phillips screw driver (included with trampoline) and 2 adjustable wrenches (for putting the trampoline together). A rubber mallet is also recommended to make assembly easier. • Assembly requires two adults. Keep children away from the trampoline and enclosure until they are completely put together. •... - Page 16 Insert the Leg Brace(4) into two Leg Extensions(3) as shown, then tighten with M6x45mm Bolts(14), M6 Washers(18) and M6 Nuts(17). Press down on both Leg Extensions(3) at the same time and fully insert them into the T-joint and Socket, then tighten by M6x48mm Bolts(19) , M6 Washers(18) and M6 Nuts(17).
- Page 17 If the Enclosure net(7) and Jumping mat(5) are not pre-installed, follow below steps to install. Place the Jumping mat(5) on clear ground. Identify the warning label on mat top and the ID label on mat back as shown. the first hole the first V-ring ID label (on mat back) Place the Enclosure net(7) on the Jumping mat(5),...
- Page 18 If the Enclosure net and Jumping mat are pre-installed, follow below steps to assemble the Jumping mat to frame. T-joint Warning 5.1 Inspect the connection of Jumping mat and Enclosure Decal net, make sure all the V-rings are passed through the corresponding net holes.
- Page 19 Attach the Spring as follows: V-ring Hook one end of Spring into the V-ring sewn on Jumping mat. Hook a Spring Tool as shown to the free end of the Spring. Pull the Spring until it reaches the frame. Push the end of the Spring into a hole in the frame, then unlook the Spring Tool Frame CAUTION:...
- Page 20 Attach all the remaining V-rings with spring to Top tube holes correspondlingly. Enclosure door T-joint Lay the Frame Pad(6) on the frame. Adjust it’s position so that the slits are just above the Sockets as shown. CAUTION: Do not use the trampoline without the Frame Pad(6).
- Page 21 Slide the Straight Tube(9) and Curved Tube(10) into Foams (11) as shown. Lay one Straight Tube(9) with Foam and one Curved Tube(10) with Foam on the ground. Insert the Straight Tube(9) into the Curved Tube(10). Secure with a Self-tapping screw(16). Repeat this step to attach the five remaining Straight Tubes(9) and Curved Tubes(10) together (not shown).
- Page 22 11. Start from the Enclosure door, lift one of the assembled poles and then insert the Straight Tube(9) into the vertical tube of Socket as shown. Make sure the bent side of the enclosure poles are facing toward the center of the trampoline. Enclosure door NOTE: The end of the Straight Tubes(9) are sharp.
-
Page 23: Assembly
14. Using the included plastic tie, attach the Safety Placard Frame to the frame near the point where jumpers will climb onto and off the trampoline. Safety Placard 15. Insert one Tie down kit(23) into ground as shown. Then insert the other in the same way in the opposite side. -
Page 24: Care And Maintenance
WARNING TRAMPOLINE AND ENCLOSURE CARE AND MAINTENANCE Care To avoid damage to the trampoline and enclosure, do not allow pets or animals inside the enclosure. The trampoline is intended to be used by one person at a time who weighs no more than 200 pounds. The user should be either barefoot, wearing socks, or wearing gymnastic shoes. -
Page 25: Limited Warranty
Skywalker Holdings, LLC option, the product at one of this authorized service centers. All products for which a warranty claim is made must be received by Skywalker Holdings, LLC at one of its authorized locations. Preauthorization may be obtained by calling Skywalker Holding, LLC Customer Care Hot Line at 1-866-603-Jump(5867). - Page 26 Manual del usuario Modelo - SWTC1400WS ADVERTENCIA Lea todas las precauciones e instruc- ciones de este manual antes de utilizar PRECAUCIÓN: Es necesario que el montaje este producto. Guarde este manual lo realice un adulto. para consultarlo en el futuro. Peso máximo del usuario de 200 lb...
- Page 27 Modelo SWTC1400WS En una de las patas del trampolín encontrará una etiqueta con el número de serie. La etiqueta con el número del modelo se ubica en la lona de salto. CONTENIDO Precauciones importantes........... 3 Colocación de la etiqueta de advertencia......4 Antes de comenzar.............
- Page 28 INSTRUCCIONES DE USO ADVERTENCIA Para reducir el riesgo de lesiones graves, lea y respete todas las advertencias, precauciones e instrucciones de este manual antes de usar el cerramiento del trampolín. Se incluyen advertencias e instrucciones de cuida- do, mantenimiento y uso de este trampolín y cerramiento para promover el uso seguro y agradable de este equipo. Es responsabilidad del propietario y de los supervisores del No coloque nada en la barrera del cerramiento, a menos que sea trampolín y del cerramiento asegurarse de que todos los...
-
Page 29: Antes De Comenzar
Climb on to and off the trampoline. Do not jump on or off. Do not use the trampoline as a springboard to other objects. of loss of control, collision and falling For further equipment information contact Skywalker. For skill training information, contact a trainer certification organization. off. This can result in broken head, Hora de la Montaña, para pedir una... - Page 30 INFORMACIÓN DE SEGURIDAD SOBRE EL TRAMPOLÍN Con el uso del trampolín, como en todos los deportes recreativos activos, los participantes pueden lesionarse. Sin embar- go, pueden tomarse medidas para reducir el riesgo de lesión. En esta sección, se identifican los principales patrones de accidentes y se detallan las responsabilidades de los supervisores y de los usuarios relativas a la prevención de accidentes.
- Page 31 INFORMACIÓN DE SEGURIDAD SOBRE EL CERRAMIENTO NECESIDAD DE SEGURIDAD EN EL CERRAMIENTO DEL TRAMPOLÍN Un trampolín con cerramiento es un producto recreativo. La información de esta página y de las páginas 7-9 identifica las precauciones de seguridad importantes. Las precauciones no incluyen todas las posibilidades, dado que un cerramiento puede utilizarse de maneras que este manual no puede cubrir en su totalidad.
-
Page 32: Métodos Para Evitar Accidentes
MÉTODOS PARA EVITAR ACCIDENTES La función del supervisor en la prevención de accidentes Los supervisores de los usuarios del trampolín tienen la responsabilidad de proporcionar supervisión informada y madura. Deben conocer y hacer cumplir todas las reglas y advertencias impresas en este manual para minimizar la probabilidad de accidentes y lesiones. - Page 33 • Use ropa sin cordones, ganchos, lazos o cualquier cosa que pudiera quedar enganchada mientras usa el trampolín/cerramiento y pudiera resultar en enredos y estrangulamiento, o ambas cosas. • No coloque nada en la red que no sea un accesorio aprobado por Skywalker Trampolines o parte del cerramiento del trampolín.
-
Page 34: Material De Uso Y Didáctico
D en la lona de salto y que los sujetadores horizontales se unen a los anillos en D en la red del cerramiento, tanto durante su uso como después de este. Para obtener más información sobre el equipo, comuníquese con Skywalker Holding, LLC. Para obtener más información sobre la formación de habilidades, comuníquese con una organización de instrucción certificada. -
Page 35: Programa Instructivo Y Lecciones Modelo
Programa instructivo y lecciones modelo Las siguientes lecciones son ejemplos de un programa instructivo. Deben presentarse tras un debate y una demostración completos de la mecánica corporal entre la supervisión y el(los) estudiante(s). Consulte también la página 12. 1. Cómo subirse y bajarse del trampolín, demostración y prácticas de las técnicas adecuadas. 2. - Page 36 Lección 5: Caída de sentado Lección 6: Caída de frente 1. Revise y practique las habilidades que ya ha aprendido. 1. Para ahorrar tiempo y evitar quemarse con la lona (cama), todos 2. Aterrice sentado con las piernas paralelas a la lona. los estudiantes deben asumir la posición de caída de frente en el 3.
-
Page 37: Gráfica De Identificación De Piezas
Gráfica de identificación de piezas (no a escala real) - Modelo SWTC1400WS Use las siguientes imágenes para identificar todas las piezas. Tubo superior con Tubo superior con articulación manguito (6 unidades) en T (6 unidades) Extensión de la pata Refuerzo de la pata (6 unidades) - Page 38 Dibujo de despiece -- Modelo SWTC1400WS...
-
Page 39: Pedido De Piezas De Repuesto
Lista de piezas N.° de ref Cant. Descripción Tubo superior con articulación en T Tubo superior con manguito Extensión de la pata Refuerzo de la pata Lona de salto Almohadilla del armazón Red del cerramiento Resorte Tubo recto Tubo curvo Gomaespuma Tapa del poste Tapa del extremo... -
Page 40: Montaje
MONTAJE MONTAJE (ARMADO DEL TRAMPOLÍN CON EL CERRAMIENTO) INFORMACIÓN IMPORTANTE SOBRE EL MONTAJE • Necesita un destornillador Phillips (incluido con el trampolín) y 2 llaves ajustables (para armar el trampolín). También se recomienda el uso de un mazo de goma para facilitar el montaje. •... - Page 41 Inserte el refuerzo de la pata (4) en las dos exten- siones de la pata (3), tal como se muestra, y luego ajuste con dos Pernos M6 x 47 mm (14), Arandelas M6 (17) y Tuercas M6 (18). Presione ambas extensiones de la pata (3) al mismo tiempo e insértelas por completo en la articulación en T y el manguito, luego ajuste los Pernos M6 x 47 mm (14) y Tuercas M6 (18).
- Page 42 Si la red del cerramiento (7) y la lona de salto (5) no vienen preinstaladas, siga los siguientes pasos para instalarlas. Coloque la lona de salto (5) en un espacio del suelo despejado. Identifique la etiqueta de advertencia en la parte superior de la lona de salto y la etiqueta de identificación en la parte posterior de la lona, tal el primer agujero como se muestra.
- Page 43 Si la red del cerramiento y la lona de salto ya están preinstaladas, siga los siguientes pasos para montar la lona de salto al armazón. Etiqueta Articulatión en T de advertencia Inspeccione la conexión de la lona de salto y la red del cerramiento, asegúrese de que todos los anillos en V se pasen por los agujeros de la red correspondientes.
- Page 44 Una los resortes del siguiente modo: Anillo en V A: Enganche un extremo del resorte en el anillo en V cosido en la lona de salto. B: Enganche la herramienta para el resorte, tal como se muestra, en el extremo libre del resorte. C: Tire del resorte hasta que llegue al armazón.
- Page 45 Una los anillos en V restantes con resortes a los agujeros del tubo superior del mismo modo. Puerta del cerramiento Articulatión en T Estire la almohadilla del armazón (6) alrededor del armazón. Ajuste la posición para que las ranuras queden justo sobre los manguitos, tal como se muestra. PRECAUCIÓN: No utilice el trampolín sin la almohadilla del armazón (6).
- Page 46 Deslice el tubo recto (9) y el tubo curvo (10) en las gomaespumas (11), tal como se muestra. Coloque un tubo recto (9) con gomaespuma y un tubo curvo (10) con gomaespuma en el suelo. Inserte el tubo recto (9) en el tubo curvo (10). Ajústelos con un tornillo autorroscante (16) Repita este paso para unir los 5 tubos rectos (9) a los 5 tubos curvos (10) restantes (no se muestra).
- Page 47 Postes Comience desde la puerta del cerramiento, levante uno de los postes montados y luego inserte el tubo recto (9) en el tubo vertical del manguito, tal como se muestra. Puerta del cerramiento Asegúrese de que el lado doblado de los polos del cerramiento estén orientados hacia el centro del trampolín.
- Page 48 14. Usando el amarre de plástico incluido, coloque el letrero Armazón de seguridad en el armazón cerca del punto por el que los usuarios subirán y bajarán del trampolín. Letrero de seguridad 15. Inserte una estaca de viento (18) en el suelo sobre la pata de trampolín tal como se muestra.
-
Page 49: Cuidado Y Mantenimiento
ADVERTENCIA CUIDADO Y MANTENIMIENTO DEL TRAMPOLÍN Y DEL CERRAMIENTO CUIDADO Para evitar los daños en el trampolín y el cerramiento, no permita que las mascotas u otros animales se suban al cerramiento. El trampolín está diseñado para ser utilizado por una persona a la vez que pese 200 libras como máximo. El usuario debe estar descalzo, usar medias o zapatos de gimnasia. -
Page 50: Garantía Limitada
La obligación de Skywalker Holdings, LLC conforme a esta garantía se limita a reemplazar o reparar el producto, a criterio de Skywalker Holdings, LLC, en uno de sus centros de servicio autorizados. Skywalker Holdings, LLC debe recibir, en uno de sus sitios autorizados, todos los productos para los cuales se realice una reclamación de la garantía.
Need help?
Do you have a question about the SWTC1400WS and is the answer not in the manual?
Questions and answers