Table of Contents
Advertisement
Quick Links
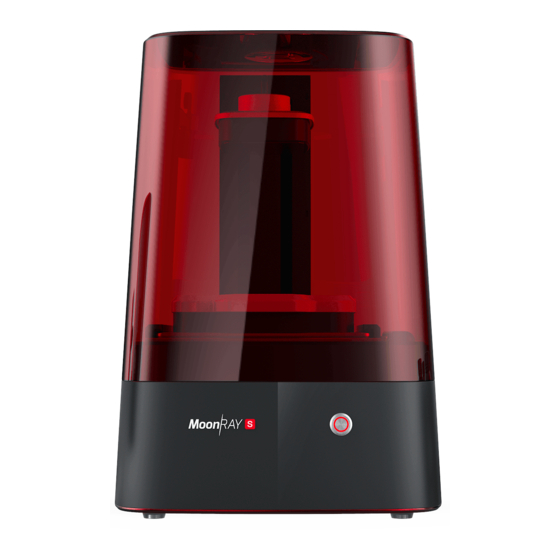
MoonRay D/S Quick Start Guide
Hello!
Thank you for choosing MoonRay, and welcome to the cutting edge of desktop 3D printing!
This guide is going to go over the basics of getting your MoonRay up and running.
We highly recommend you set up an appointment with us to guide you through the setup
process and your first print. Call or follow the link in your purchase confirmation email to
schedule a time.
Never hesitate to to reach out to us or explore our website for more advanced tips.
We can't wait to see what you make with your MoonRay!
-The SprintRay Team
Advertisement
Table of Contents

Related Manuals for SprintRay MoonRay


Summary of Contents for SprintRay MoonRay
- Page 1 MoonRay D/S Quick Start Guide Hello! Thank you for choosing MoonRay, and welcome to the cutting edge of desktop 3D printing! This guide is going to go over the basics of getting your MoonRay up and running. We highly recommend you set up an appointment with us to guide you through the setup process and your first print. Call or follow the link in your purchase confirmation email to schedule a time. Never hesitate to to reach out to us or explore our website for more advanced tips. We can’t wait to see what you make with your MoonRay! -The SprintRay Team...
- Page 2 M oonRay 3 D printer. the glass or puncture the film layer when cleaning your resin tank. Slicing : The process of turning a 3D model into a print file containing instructions for Resin Tray : Aluminum with a glass center, your MoonRay 3D printer. Use R ayWare t o this is the lower piece of the Resin Tank slice your models. Assembly. MeshMixer : A free C AD t ool for 3D Resin Drum : This is the upper part of the printing. ...
- Page 3 Setting up your MoonRay MoonRay should only be used on a solid, stable surface that is level and well ventilated. First, slide the resin tank into the base of the machine, ensuring that it catches the channel. The handle will be facing out when the tank is inserted correctly. Then, place the build platform on the print arm and lock it securely with the handle. MoonRay Resin Before pouring resin into the tank, shake the bottle thoroughly. Pour resin into the tank, being mindful of the min and max fill lines, then stir using the provided black squeegee until it is completely mixed. Never use a metal or hard plastic scraper in the resin tank, if you scratch the glass or puncture the film you will need to replace those parts. You can leave resin covered in the printer for up to three days. When not in use, it is recommended you pour excess resin through a screen or fine mesh back into the bottle. RayWare Download RayWare at https://www.sprintray.us/download Click the icon with a line through it on the right side of the window (pictured), then click the ‘Connect A Printer’ option to launch an automated wizard that will guide you through the setup process. Note that you will be briefly disconnected from your internet while you configure your printer. If you are unable to connect to your MoonRay, disable your firewall or ...
- Page 4 Add your model Download the MoonRay Keychain .STL file from our website at http://www.sprintray.us/rayware/MoonRay_keychain.STL Click the + button on the top left side to add your model. You can also go to File > Open or drag and drop files onto the build platform. T he white area represents the bottom of the platform. Models will print upside down; the surface that is flush with the white area will be attached to the platform after printing On the left side of the window, you'll see several options underneath the + button. Size and Scale : You can change the size of your model or scale your model up or down within RayWare. Rotation and Base: This option allows you to rotate your model on the platform, or change which side of your part is its base when printing. ...
- Page 5 Try adding and removing supports with your piece at various angles to see where they generate. Strength/Thickness : The diameter of each support, from low (thinnest) to high (thickest). Density : Adjusts the number of supports per square millimeter. Print your model When you're ready to print your model(s), click the MoonRay button on the middle of the right side of the screen. You have a few options to select before printing. Printer : If you have multiple MoonRay 3D printers connected, you can select the machine for the specific print job here. Material : Select the type of resin you will be using to print your model. It is very important you make the correct selection. Resolution : You have three options for layer thickness, each in microns. As layer thickness increases, print time and detail level decrease. For most models, we recommend printing using ...
- Page 6 Finishing/Post Processing Once your part has finished printing, follow these steps to complete the finishing process. The below instructions are for our standard resins, look online for details on finishing surgical guide & castable resins. 1. Remove the build platform. A lways remove the build platform before removing the resin tank to avoid any excess resin dripping inside your MoonRay. Place the cover on MoonRay to minimize light exposure to the tank. 2. Place your build platform in the finishing kit and carefully use the finishing tool to remove your part from the platform. Expect your parts to be very difficult to remove for your first dozen prints or so. The removal process will become easier over time. 3. C lean the excess wet resin from your part by submerging it in fresh 91% or 99% isopropyl alcohol. Stir to ensure the alcohol reaches any small gaps. You can also use an ultrasonic cleaner for best results. 4. Once your part is clean of resin, dry it off thoroughly. We recommend you use compressed air. ...
Need help?
Do you have a question about the MoonRay and is the answer not in the manual?
Questions and answers