Table of Contents
Advertisement
Advertisement
Table of Contents

Related Manuals for iCarsoft MB II

Summary of Contents for iCarsoft MB II
- Page 2 2015-02-06 V1.00.00 Note: This manual applies to iCarsoft 2nd generation serial products and CR Plus and is subject to change without prior written notice. In addition, all instructions and illustrations herein are mainly prepared based on iCarsoft 2nd generation serial products. Please kindly note that no further descriptions...
- Page 3 Safety Precautions and Warnings To prevent personal injury or damage to vehicles and / or the iCarsoft Serial products / CR Plus, please read this user’s manual first carefully and observe the following safety precautions at a minimum whenever working on a vehicle: ...
-
Page 4: Table Of Contents
English User’s Manual Table of Contents 1. INTRODUCTION ..................1 ........1 ARSOFT ENERATION ERIAL RODUCTS 1.2 CR P ....................1 2. General Information ..................3 2.1 O (OBD) II ............3 OARD IAGNOSTICS 2.2 D (DTC ) ............ 3... -
Page 5: Introduction
II and MMA II, which are especially designed for the DIY users and the servicemen of small service workshop. Featuring the color LCD display and personalized function menu, the iCarsoft Serial products support all 10 models of OBDII test for a complete diagnosis, which can diagnose full electronic control system of single vehicle model and enable you to read/clear DTCs and playback data stream in live graphic form. -
Page 6: Icarsoft/
English User’s Manual In addition to amazing & powerful diagnosing function, CR Plus also features some special functions such as Oil/ Service lamp reset, EPB and SAS etc. It can be upgraded via TF card: Download the upgrade package into the TF card and then insert the TF card into your tool to keep it updated with the latest software version. -
Page 7: General Information
English User’s Manual 2. General Information 2.1 On-Board Diagnostics (OBD) II The first generation of On-Board Diagnostics (called OBD I) was developed by the California Air Resources Board (ARB) and implemented in 1988 to monitor some of the emission control components on vehicles. As technology evolved and the desire to improve the On-Board Diagnostic system increased, a new generation of On-Board Diagnostic system was developed. -
Page 8: Location Of The Data Link Connector (Dlc)
English User’s Manual 2.3 Location of the Data Link Connector (DLC) The DLC (Data Link Connector or Diagnostic Link Connector) is the standardized 16-cavity connector where diagnostic code readers interface with the vehicle’s on-board computer. The DLC is usually located 12 inches from the center of the instrument panel (dash), under or around the driver’s side for... -
Page 9: Product Descriptions
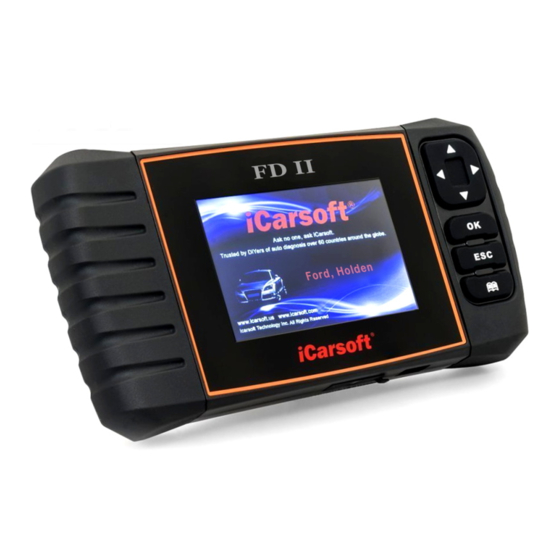
English User’s Manual 3. Product Descriptions 3.1 Outline of iCarsoft Serial products / CR Plus Figure 2-1 OBD-16 Connector Connects the iCarsoft Serial products / CR Plus to the vehicle’s Data Link Connector (DLC) via the diagnostic cable. ▲/▼... -
Page 10: Specifications
English User’s Manual previous screen. To retrieve the DTCs in the database. Button LCD Display Indicates test results. USB Port To connect to PC to upload data or print test results. TF card slot Insert the TF card into it to update your tool. -
Page 11: Connections & Settings
2) Locate the vehicle’s DLC socket. 3) Plug one end of the diagnostic cable into the OBDII 16pin connector of iCarsoft Serial products/CR Plus, and connect the other end to the vehicle’s DLC. 4) Turn the ignition on. Engine can be off or running. -
Page 12: Settings
English User’s Manual 4.2 Settings Select [Settings] in the main menu and press [ ] to enter. Figure 3-2 1) Language This option enables you to set the user interface language. Note: Due to continuous software upgrade, language interface may differ from different software versions. - Page 13 English User’s Manual Figure 3-3 1) DLC Location Position This option helps you to find the location of vehicle’s DLC. 2) DTC Library In Figure 3-3, select [DTC Library] and press [OK] to enter the following screen. Figure 3-4 Press [►]/[◄] to move the highlight bar to different position;...
- Page 14 Note: You are strongly recommended to note down the Serial Number and Register Code in Figure 3-6 since these 2 pieces of information are required while registering your iCarsoft Serial products / CR Plus. 5) About OBD This option allows you to have a general knowledge of OBD.
-
Page 15: Diagnose
Select [Diagnose] in main menu screen and press [OK], the screen will display as follows: Figure 5-1 In Figure 5-1, press [OK] to enter system, a screen similar to Figure 5-2 will appear: Figure 5-2 (For iCarsoft Serial products) Note: For different models, this page may vary from different vehicle makes. -
Page 16: Obdii/Eobd Diagnosing
In Figure 5-2 (For iCarsoft Serial products), press [OK] and the screen will enter Fig. 5-3. In Figure 5-2 (For CR Plus), press [►]/[◄] to highlight the “EOBD”, and then press [OK] to enter Fig. - Page 17 English User’s Manual Figure 5-4 It mainly includes the following functions: 1. Read Codes -- This option is used to identify which section of the emission control system has malfunctioned. 2. Erase Codes -- It is used to clear the diagnostic trouble codes.
-
Page 18: System Diagnosing (For Icarsoft Serial Products)
This function is specially designed to diagnose all electronic control systems of single vehicle model. Note: Before diagnosing, please make sure the diagnostic program corresponding to certain vehicle model has been installed on your iCarsoft Serial products. Refer to the flowchart illustrated as below to diagnose a vehicle: English Select “Diagnose”... -
Page 19: System Diagnosing (For Cr Plus)
English User’s Manual Select Vehicle Model (Note: For different vehicles, vehicle make selection may differ. Generally we can choose a vehicle via make year. But for BENZ, we need to choose it via chassis.) Select test system Automatic (Note: This mode allows your tool to scan the vehicle test system automatically.) - Page 20 English User’s Manual SRS (Supplemental Restraint System) Note: Before diagnosing, please make sure the diagnostic program corresponding to certain vehicle model has been installed on your CR Plus. Refer to the flowchart illustrated as below to diagnose a vehicle: Note: For vehicles manufactured by different vendors, it is possible that it has different diagnostic menus.
-
Page 21: Register & Update
2. A TF card reader/writer and a TF card that need to be updated. Follow the steps described as below to proceed registration and update: 1. Install the iCarsoft Serial products update tool and launch it. 2. You will be prompted to type in the Serial Number (located on the back of... - Page 22 (If you have the Register Code, proceed to step 8 directly) 4. The Register Code can be found by connecting the supplied USB cord to the iCarsoft Serial products / CR Plus and inserting into the computer. 5. When the tool has powered up, highlight “Help” icon and press [OK].
- Page 23 English User’s Manual 9. Reopen the update tool and select the update or click “Select All” and click “Download”. Figure 7 10. Once all steps are complete, reinsert the TF card into the tool and power the tool via USB in computer or via OBD2 port in vehicle. The tool will prompt you to upgrade, click “OK”...
-
Page 24: Faq
Question: System halts when reading data stream. What is the reason? Answer: It may be caused by a slackened connector. Please turn off the iCarsoft Serial products / CR Plus, firmly connect the connector, and switch on it again. Question: Screen of main unit flashes at engine ignition start.
Need help?
Do you have a question about the MB II and is the answer not in the manual?
Questions and answers