Table of Contents
Advertisement
Advertisement
Table of Contents

Related Manuals for Honda EP1000


Summary of Contents for Honda EP1000
- Page 1 Honda EP1000 OWNER’S MANUAL...
- Page 2 The information and specifications included in this publication were in effect at the time of approval for printing. Honda Siel Power products Ltd. reserves the right, however, to discontinue or change specifications or design at any time without notice and without incurring any obligation whatsoever.
- Page 3 INTRODUCTION Congratulations on your selection of a Honda generator. We are certain you will be pleased with your purchase of one of the finest generators in the market. We want to help you get the best results from your new generator and to operate it safely.
- Page 4 A FEW WORDS ABOUT SAFETY Your safety and the safety of others are very important. And using this generator safely is an important responsibility. To help you make informed decisions about safety, we have provided operating procedures and other information on labels and in this manual.
-
Page 5: Table Of Contents
CONTENTS GENERATOR SAFETY ..............5 IMPORTANT SAFETY INFORMATION ......... 5 Operator Responsibility ............5 Carbon Monoxide Hazards ............5 Electric Shock Hazards............6 Fire and Burn Hazards ............6 Refuel With Care ..............7 SAFETY LABEL LOCATION............8 CONTROLS & FEATURES ............11 COMPONENT &... - Page 6 CONTENTS SERVICING YOUR GENERATOR ..........27 THE IMPORTANCE OF MAINTENANCE ........27 MAINTENANCE SAFETY ............28 Safety Precautions .............. 28 MAINTENANCE SCHEDULE ............. 29 REFUELING................30 FUEL RECOMMENDATIONS............. 31 ENGINE OIL LEVEL CHECK ............32 ENGINE OIL CHANGE ............. 33 ENGINE OIL RECOMMENDATIONS ...........
-
Page 7: Generator Safety
GENERATOR SAFETY IMPORTANT SAFETY INFORMATION Honda generators are designed for use with electrical equipment that has suitable power requirements. Other uses can result in injury to the operator or damage to the generator and other property. Most injuries or property damage can be prevented if you follow all instructions in this manual and on the generator. -
Page 8: Electric Shock Hazards
GENERATOR SAFETY Electric Shock Hazards • The generator produces enough electric power to cause a serious shock or electrocution if misused. • Do not use in wet conditions. Keep the generator dry. – Do not use in the rain or snow. –... -
Page 9: Refuel With Care
GENERATOR SAFETY Refuel With Care Gasoline is extremely flammable, and gasoline vapor can explode. Allow the engine to cool if the generator has been in operation. Refuel only outdoors in a well-ventilated area with the engine off. Do not refuel during operation. Do not overfill the fuel tank. -
Page 10: Safety Label Location
GENERATOR SAFETY SAFETY LABEL LOCATION These labels warn you of potential hazards that can cause serious injury. Read them carefully. If a label comes off or becomes hard to read, contact your authorised Honda servicing dealer for a replacement. - Page 11 GENERATOR SAFETY • Honda generator is designed to give safe and dependable service if operated according to instructions. Read and understand the Owner's Manual before operating the generator. Failure to do so could result in personal injury or equipment damage.
- Page 12 GENERATOR SAFETY • Do not connect to a building’s electrical system unless an isolation switch has been installed by a qualified electrician. • Connections for standby power to a building’s electrical system must be made by a qualified electrician and must comply with all applicable laws and electrical codes.
-
Page 13: Controls & Features
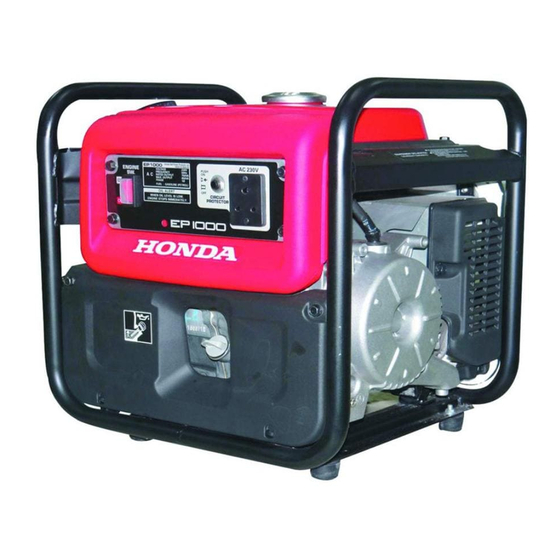
CONTROLS & FEATURES COMPONENT & CONTROL LOCATIONS Use the illustrations on these pages to locate and identify the most frequently used controls. AC RECEPTACLE AC CIRCUIT PROTECTOR ENGINE SWITCH CONTROL PANEL... - Page 14 CONTROLS & FEATURES FRAME BAR STARTER GRIP CHOKE LEVER AIR CLEANER OIL FILLER CAP FUEL VALVE OIL DRAIN PLUG FUEL TANK CAP SPARK PLUG GROUND TERMINAL MUFFLER...
-
Page 15: Controls
CONTROLS & FEATURES CONTROLS Fuel Valve FUEL VALVE The fuel valve is located between the fuel tank and carburetor. The fuel valve must be in the ON position for the engine to run. After stopping the engine, turn the fuel valve to the OFF position. Choke Lever The choke lever opens and closes CHOKE LEVER... -
Page 16: Engine Switch
CONTROLS & FEATURES Engine Switch ENGINE SWITCH The engine switch controls the ignition system. OFF – Stops the engine. ON – Running position, and for starting. Starter Grip Pulling the starter grip operates STARTER GRIP the recoil starter to crank the engine for starting. -
Page 17: Ac Circuit Protector
CONTROLS & FEATURES AC Circuit Protector The AC circuit protector will automatically switch OFF (push button comes out) if there is a short circuit or a significant overload of the generator at the receptacle. If an AC circuit protector switch OFF automatically, check that the appliance is working properly and does not exceed the rated load capacity of the circuit before resetting the AC circuit protector ON (pushing the push button in). -
Page 18: Features
CONTROLS & FEATURES FEATURES Oil Alert System The Oil Alert system is designed to prevent engine damage caused by an insufficient amount of oil in the crankcase. Before the oil level in the crankcase can fall below a safe limit, the Oil Alert system will automatically stop the engine (the engine switch will remain in the ON position). -
Page 19: Before Operation
Be sure to take care of any problem you find, or have your authorised Honda servicing dealer correct it, before you operate the generator. Improperly maintaining this generator, or... -
Page 20: Check The Engine
BEFORE OPERATION To prevent a possible fire, keep the generator at least 1 meter away from building walls and other equipment during operation. Do not place flammable objects close to the engine. Before beginning your pre-operation checks, be sure the generator is on a level surface and the engine switch is in the OFF position. -
Page 21: Operation
OPERATION SAFE OPERATING PRECAUTIONS Before operating the generator for the first time, review chapters GENERATOR SAFETY (see page 5) and BEFORE OPERATION (see page 17). For your safety, do not operate the generator in an enclosed area such as a garage. Your generator’s exhaust contains poisonous carbon monoxide gas that can collect rapidly in an enclosed area and cause illness or death. -
Page 22: Starting The Engine
OPERATION STARTING THE ENGINE To prevent a possible fire, keep the generator at least 1 meter away from building walls and other equipment during operation. Do not place flammable objects close to the engine. Refer to SAFE OPERATING PRECAUTIONS on page 19 and perform the IS YOUR GENERATOR READY TO GO? checks (see page 17). - Page 23 OPERATION 4.Turn the engine switch to the ENGINE SWITCH ON position. 5.Pull the starter grip lightly until FRAME BARS you feel resistance while STARTER GRIP holding the frame bars, then pull briskly in the direction of the arrow as shown. Direction to pull •...
-
Page 24: Stopping The Engine
OPERATION STOPPING THE ENGINE To stop the engine in an emergency, simply turn the engine switch to the OFF position. Under normal conditions, use the following procedure. 1.Turn off or disconnect all appliances connected to the generator. 2.Turn the engine switch to the ENGINE SWITCH OFF position. -
Page 25: Ac Operation
OPERATION AC OPERATION Before connecting an appliance to the generator, make sure that it is in good working order and that its electrical rating does not exceed that of the generator. Substantial overloading may damage the generator. Marginal overloading may shorten the service life of the generator. 1.Start the engine (see page 20). -
Page 26: Ac Applications
OPERATION AC Applications Before connecting an appliance or power cord to the generator: • Make sure that it is in good working order. Faulty appliances or power cords can create a potential for electrical shock. • If an appliance begins to operate abnormally, becomes sluggish, or stops suddenly, turn it off immediately. -
Page 27: Standby Power
OPERATION STANDBY POWER Connections to a Building’s Electrical System Connections for standby power to a building’s electrical system must be made by a qualified electrician. The connection must isolate the generator power from utility power, and must comply with all applicable laws and electrical codes. -
Page 28: Special Requirements
OPERATION Special Requirements Do not lay the generator on its side when moving, storing, or operating it. Oil may leak and damage the engine or your property. There may be applicable laws, local codes, or ordinances that apply to the intended use of the generator. Please consult a qualified electrician, electrical inspector, or the local agency having jurisdiction. -
Page 29: Servicing Your Generator
Remember that an authorized Honda servicing dealer knows your generator best and is fully equipped to maintain and repair it. To ensure the best quality and reliability, use only new, Honda Genuine parts or their equivalents for repair and replacement. -
Page 30: Maintenance Safety
SERVICING YOUR GENERATOR MAINTENANCE SAFETY Some of the most important safety precautions follow. However, we cannot warn you of every conceivable hazard that can arise in performing maintenance. Only you can decide whether or not you should perform a given task. Failure to properly follow maintenance instructions and precautions can cause you to be seriously hurt or killed. -
Page 31: Maintenance Schedule
– (1) Service more frequently when used in dusty areas. (2) These items should be serviced by your authorised Honda servicing dealer, unless you have the proper tools and are mechanically proficient. Refer to the Honda shop manual for service procedures. -
Page 32: Refueling
SERVICING YOUR GENERATOR REFUELING With the engine stopped, remove the fuel tank cap and check the fuel level. Refill the fuel tank if the fuel level is low. Gasoline is highly flammable and explosive. You can be burned or seriously injured when handling fuel. -
Page 33: Fuel Recommendations
SERVICING YOUR GENERATOR UPPER LIMIT MARK FUEL TANK UPPER LIMIT FUEL FILTER After refueling, reinstall the fuel tank cap securely. FUEL RECOMMENDATIONS Use unleaded gasoline with a Research Octane Number of 91 or higher. Use unleaded gasoline only, or the catalyzer will lose its effectiveness and negatively affect exhaust emissions. -
Page 34: Engine Oil Level Check
SERVICING YOUR GENERATOR ENGINE OIL LEVEL CHECK Check the engine oil level with the generator on a level surface and the engine stopped. 1.Remove the oil filler cap. OIL FILLER CAP 2.Check the oil level. If it is below the upper limit, fill with the recommended oil to the upper limit (see page 35). -
Page 35: Engine Oil Change
SERVICING YOUR GENERATOR ENGINE OIL CHANGE Drain the oil while the engine is warm to assure rapid and complete draining. 1.Remove the two 6 x 18 mm bolts and washers, then remove the front cover WASHER 6×18 mm BOLT FRONT COVER 2.Place a suitable container below the engine to catch the used oil, and then remove the oil filler cap, oil drain plug, and sealing washer. - Page 36 SERVICING YOUR GENERATOR 4.With the generator in a level surface, fill with the recommended oil to the upper limit (see page 35). Engine oil capacity: 0.36 L UPPER LIMIT FUNNEL (Use the funnel that come with the generator, if necessary) 5.Reinstall the oil filler cap securely.
-
Page 37: Engine Oil Recommendations
SERVICING YOUR GENERATOR ENGINE OIL RECOMMENDATIONS Oil is a major factor affecting engine performance and service life. Use 4-stroke motor oil that meets or exceeds the requirements for API service category SE or later (or equivalent). Always check the API SERVICE label on the oil container to be sure it includes the letters SE or later (or equivalent). -
Page 38: Air Cleaner Service
SERVICING YOUR GENERATOR AIR CLEANER SERVICE 1.Pull the clips to unlock. 2.Remove the air cleaner case, then remove the air filter from the air cleaner case. 3.Check the air filter to be sure it is clean and in good condition. If the air filter is dirty, clean it as described on page 38. - Page 39 SERVICING YOUR GENERATOR 4.Reinstall the air filter in the air cleaner case. Install the air filter so that it is not pinched between the air cleaner base and the air cleaner case. 5.Reinstall the air cleaner case, then push the clips to the lock position. Operating the engine without an air filter, or with a damaged air filter, will allow dirt to enter the engine, causing rapid engine wear.
-
Page 40: Air Filter Cleaning
SERVICING YOUR GENERATOR AIR FILTER CLEANING A dirty air filter will restrict air flow to the carburetor, reducing engine performance. If you operate the generator in very dusty areas, clean the air filter more frequently than specified in the Maintenance Schedule. 1.Clean the air filter in warm soapy water, rinse, and allow to dry thoroughly, or clean in nonflammable solvent and allow to dry. -
Page 41: Spark Plug Service
SERVICING YOUR GENERATOR SPARK PLUG SERVICE Recommended spark plug: LR4C-E (NGK) An incorrect spark plug can cause engine damage. 1.Unlock the latch using a LATCH screwdriver or similar tool, and remove the rear cover. REAR COVER UNLOCK 2.Disconnect the spark plug cap, SPARK PLUG WRENCH and remove any dirt from around the spark plug area. - Page 42 SERVICING YOUR GENERATOR 6.Make sure that the spark plug sealing washer is in good condition, and thread the spark plug in by hand to prevent cross threading. 7.After the spark plug seats, tighten with a spark plug wrench to compress the washer. If reinstalling a used spark plug, tighten 1/8–1/4 turn after the spark plug seats.
-
Page 43: Storage
30 days and may cause damage to the carburetor and/or fuel system. Please check with your authorised Honda servicing dealer for local storage recommendations. Gasoline will oxidize and deteriorate in storage. Old gasoline will cause hard starting, and it leaves gum deposits that clog the fuel system. -
Page 44: Storage Procedure
STORAGE STORAGE PROCEDURE 1.Drain the fuel tank and carburetor. Gasoline is highly flammable and explosive. You can be burned or seriously injured when handling fuel. • Stop the engine and keep heat, sparks, and flame away. • Handle fuel only outdoors. •... - Page 45 STORAGE d. Turn the fuel valve to the ON position (see page 20). e. Loosen the carburetor drain screw and drain the gasoline from the carburetor into a suitable container. Tighten DRAIN SCREW Loosen DRAIN HOSE f. After all fuel has drained into a suitable container, tighten the drain screw.
-
Page 46: Storage Precautions
STORAGE STORAGE PRECAUTIONS If your generator will be stored with gasoline in the fuel tank and carburetor, it is important to reduce the hazard of gasoline vapor ignition. Select a well-ventilated storage area away from any appliance that operates with a flame, such as a furnace, water heater, or clothes dryer. Also avoid any area with a spark-producing electric motor, or where power tools are operated. -
Page 47: Transporting
TRANSPORTING BEFORE TRANSPORTING 1.Make sure the engine switch, fuel valve are OFF (see page 22). 2.Drain all gasoline from the fuel tank, tighten the fuel tank cap securely (see page 42). Gasoline is highly flammable and explosive. You can be burned or seriously injured when handling fuel. -
Page 48: Transporting The Generator By Truck
TRANSPORTING Transporting the Generator by Truck Load the generator on a place where it will not drop off, tumble over or be damaged and tie it up with ropes or tie down straps. When using ropes or tie down straps to secure the generator for transportation, only use the frame bars as attachment points, by protecting them with protective cloths or equivalent. -
Page 49: Transporting The Generator By Hand
TRANSPORTING Transporting the Generator by Hand When you or with your assistant are to lift up your generator by hands. make sure to lift by the frame bars. If there is “lifting weight limit” law or regulation in your country, please obey. -
Page 50: Taking Care Of Unexpected Problems
Spark plug wet with fuel (flooded Dry and reinstall spark plug. engine). Fuel filter restricted, carburetor Take generator to your authorised malfunction, ignition malfunction, Honda servicing dealer, or refer to valves stuck, etc. shop manual. ENGINE LACKS POWER Possible cause Correction Air filter restricted. -
Page 51: No Power At The Ac Receptacle
Check AC load and reset circuit protector (see page 15). Faulty power tool or appliance. Replace or repair power tool or appliance. Stop and restart the engine. Faulty generator. Take generator to your authorised Honda servicing dealer, or refer to shop manual. -
Page 52: Technical Information
TECHNICAL INFORMATION SERIAL NUMBER LOCATIONS FRAME SERIAL NUMBER ENGINE SERIAL NUMBER... -
Page 53: Carburetor Modification For High Altitude Operation
Operation at altitudes below 1,500 meters with a modified carburetor may cause the engine to overheat and result in serious engine damage. For use at low altitudes, have your authorised Honda servicing dealer return the carburetor to original factory specifications. -
Page 54: Specifications
TECHNICAL INFORMATION SPECIFICATIONS Dimensions Model EP1000N Description code EEHD Length 404 mm Width 352 mm Height 431 mm Dry mass (weight) 27.8 kg Engine Model GX80D Engine Type 4-stroke, overhead valve, single cylinder Displacement 79.7 cm Bore×Stroke 46.0×48.0 mm Cooling System Forced air Ignition System Transistorized magneto ignition... - Page 55 MEMO...
- Page 56 MEMO...
Need help?
Do you have a question about the EP1000 and is the answer not in the manual?
Questions and answers