Table of Contents
Advertisement
Quick Links
Advertisement
Table of Contents

Related Manuals for dji Inspire 1 V2.0


Summary of Contents for dji Inspire 1 V2.0
- Page 1 DJI Inspire 1 V 2 . 0 User Manual ...
- Page 2 “해당무선설비는 운용 중 전파혼신 가능성이 있으므로 인명안전과 관련된 서비스는 할 수 없습니다.” “해당 무선설비는 운용 중 전파혼신 가능성이 있음” In the Box Check that all of the following items have been included in your package before use. If anything is missing, please contact your local dealer. Index Name Picture Qty. 1 DJI Inspire 1 1 V2.0 2 Propeller 4 3 C1 1 4 Camera with gimbal 1 ...
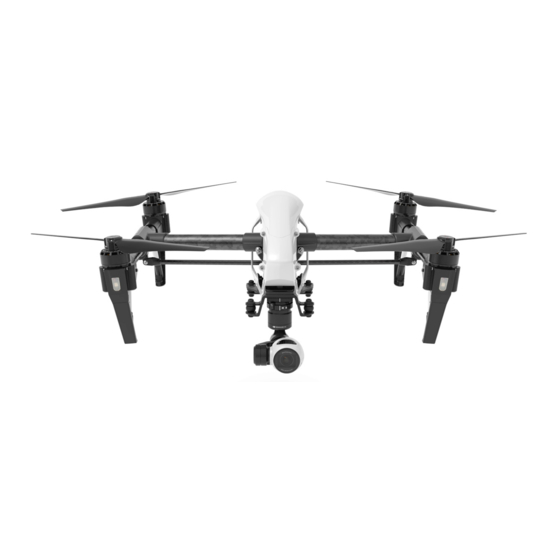
- Page 3 Introduction DJI Inspire 1 package includes aircraft, C 1, gimbal, c amera and DJI App. Flight control system is inside V2.0 the aircraft, the built‐in camera has been integrated with gimbal. C1 and DJI App are used to control the aircraft, gimbal and camera. The HD video downlink and receiver have been integrated in the aircraft, which is used for HD video transmitter and control the aircraft. Features: ‐Equipped with retractable landing gear, and unobstructed 360 degree view from the camera is made possible by simply moving the landing gear out of sight. The maximum flight height of DJI Inspire 1 V2.0 **, t he maximum distance is **. D JI Inspire 1 ...
- Page 4 Airc raft Built‐in G GPS Propeller r Motor Front LE ED Landing gear Frame ar rm Gimbal DJI Smar rt Battery Micro‐US SB Port Rear LED D [10] Camera M Micro‐USB P Port [11] Camera M Micro‐SD C ard [12] Port [13] Hover as ssistant cam 58A ...
- Page 5 Handle Bar [20] [21] Reserved Button Power Source Port [22] [23] Reserved Button Start 1. Watch the tutorial video Scan the QR code or click the link shown below to watch the tutorial video. Tutorial video http://www.dji.com/Inspire1/training 2. Download DJI App Search ʺDJI” on the App Store then follow instructions for iOS version. Search ʺDJIʺ on Google Play then follow instructions for Android version. Register your e‐mail address when using the app for the very first time. App Store Google Play 3. Ensure the smart battery\C1 and the mobile device are fully charged. Please charge the device if it has low battery level. Important: Please watch the tutorial and read the quick start guide fully before using your DJI Inspire 1 V2.0. * For the best experience, install and use the DJI App on tablet. ** See Appendix for checking battery levels. Refer to user manual for charging。 ...
- Page 6 DJI App There are four page of GUI: Camera, ground station, tool box and user center. [1] Present flight mode [2] GPS signal status [3] Aircraft status [4] RC settings [5] HD video downlink settings [6] Smart battery information [7] General settings [8] Photo format [9] Video format/Recording time [10] Shutter/Record switch [11] Shutter/Record [12] Play back [13] Camera settings [14] Ground station [15] Aircraft orientation/Height/Distance [16] Home point settings [17] Return home [18] Gimbal mode [19] Take off ...
- Page 7 Camera GUI: For display the real time HD images and aircraft data, enable shutter and video recording. Ground Station: For display the map for setting flight mission. User Center: photograph and video synchronization, flight record, DJI Shop and account information. Preparing DJI Inspire 1 V2.0 1. Mounting the Gimbal Step 1:Remove the Gimbal Cover and the Gimbal Clamp from the gimbal. Step 2:Turn the Gimbal Lock to the right ( when you are facing the nose of the DJI Inspire 1 until it V2.0 locks in place and you hear a clicking sound. Refer to the picture below for details: ...
- Page 8 Step 3: Insert the gimbal into the Gimbal Lock. Ensure the white mark on the gimbal is aligned with the white mark on the left of the Gimbal Lock. Refer to the picture below for details: Step 4: With the gimbal in place, turn the Gimbal Lock to the left (when you are facing the nose of the DJI Inspire 1 V2.0 ) until it locks in the position shown in the below. Now the gimbal is secured: 2. Attaching the Propellers Screw the propellers, clockwise for grey nuts and anti‐clockwise for black nuts, onto the four motors. Be sure to match the black propeller nuts with the black dot motors. Important:Make sure your smart flight battery and Micro‐SD care are inserted correctly. ...
- Page 9 3. Description of Aircraft Port (See the location on P) Micro‐USB Port: For connecting aircraft and PC Assistant to upgrade firmware. Camera Micro‐ USB Port: For connecting aircraft and PC to output the data to PC. Camera Micro‐SD Card Port: For placing the SD card. 4. Powering On Smart Flight Battery Press the circular power button once, then press again and hold for 2 seconds to power on the smart flight battery. (Repeat the above steps to power off the smart battery.) * Press circular power button once to check battery level. Preparing C1 1. Switch the flight mode switch to GPS mode, ensure the transformation switch is on the lower position. ...
- Page 10 Playback Button: Press to view the images or videos that have already been captured. Recording Button: Press once to start recording video, then press again to stop recording. Flight Mode Switch: Toggle the switch to select the desired flight mode. You may choose between; GPS mode, OPTI mode and ATTI mode. Position 1:GPS mode Position 2:OPTI mode Position 3:ATTI mode Transformation Switch: This switch has two positions. The effect of toggling the switch to any of these four positions is defined below: 1) Raise, 2) Lower. Raise: Raise the landing gear to its upper most position. 1) ...
- Page 11 RTH H procedure e and regain n the ntrol of the a aircraft. B Port: Conn nect your mo obile device to the USB P Port to acces ss all of the camera and aircraf ft features av vailable in th he DJI app. MI Port: Con nnect an HD D compatibl e monitor to o the HDMI port to see w what your mera sees in f full HD. grade Port: U Use this port t to connect the GL658C to a PC or Mac and up pgrade the ...
- Page 12 Step 4: Connect the mobile device to C1 USB port via micro‐USB cable. 4. Powering on C1 Press the power button once to check the current battery level. Press once and then press again and hold for 2 seconds to power on the C1. (Repeat the above steps again to power off the C1) Ready to Fly 1. Place the aircraft on flat ground in an open place with rear LED flight indicators facing you, and then power on the C1 and aircraft. 2. Connect C1 and mobile device. 3. Launch DJI App, make sure the GPS mode has been selected. 4. Calibrating Compass Always calibrate compass before your flight. Step 1: Go into the App camera GUI and tap the button, select “calibrate compass” to start the process, the rear LED flight indicator will be solid blue at this time. Step 2: Hold aircraft horizontally then rotate 360° around the center axis until rear LED flight indicator will be solid green. ...
- Page 13 ( indicates nose direction) Moving the left stick up and down changes the aircraft’s elevation. Push the stick up to ascend and down to descend. Push the throttle stick up to takeoff. When both sticks are centered, t he DJI Inspire 1 V2.0 will hover in place. The more the stick is pushed away from the center position, the faster the DJI Inspire 1 will change ...
- Page 14 aircraft’ ’s left and rig ght pitch. Push lef ft to fly left and right to o fly right. T The DJI Inspire will hover in place if th he stick is cen ntered. V2.0 Push ...
- Page 15 LEDs w will blink r ed, sound an alert, a and then automat tically powe er off after 3 3 seconds w when the batt tery level is s critically low. If th his occurs d during flight t, your DJI In nspire 1 wil l enter Fails safe Mode and Retu urn to Home e, which can nnot be inter rrupted. C1 b battery level in ndicator descr ription ...
- Page 16 20%~3 30% % When bat ttery life reac ches 0%, it c can no longe er be used. For more information n about the b battery, laun nch DJI App p and check the informatio on under th e battery tab b. 2.3 C Charging the S Smart Battery y 1. C Connect Bat ttery Charge er to a powe er source (10 00‐240V 50/6 60Hz). ...
- Page 17 C1 signal lost. ickly hite lights blinking IMU error r ickly If a syste em error oc curs, c onne ect your DJI I Inspire 1 to the DJI Inspire 1 V2.0 V2.0 Assistant for more de etailed diagn nostic inform mation and p potential sol lutions. ...
-
Page 18: Specifications
Specifications Battery Model (Standard) TB47 22.2V Voltage Energy 99.9Wh Net Weight 570g Model (Option) TB48 22.8V Voltage Energy 129.96Wh Net Weight 570g Charger (Standard) 100W Output Power Charging Time 85min for 4500mAh; 103 min for 5700mAh Charger (Option) 180W Output Power Charging Time 49min for 4500mAh; 56 min for 5700mAh Camera ... - Page 19 Working Current / Voltage 1.2A@7.4V Battery capacity 6000mAH Optical Flow 50HZ Sensor Frequency Velocity Range <8m/s ( 2m above ground) Altitude Range 5cm‐500cm Operating Environment Rich pattern surface with adequate lighting (Lux > 15) Operating Range 0‐2.5m FAQ 。 。 。 。 。 。 Standard Logo ...
- Page 20 DJI Inspire 1 V2.0 should be installed and operated with minimum distance 20cm between the radiator& your body. DJI Inspire 1 V2.0 should be installed and operated with minimum distance 20cm between the radiator& your body.
Need help?
Do you have a question about the Inspire 1 V2.0 and is the answer not in the manual?
Questions and answers