Table of Contents
Advertisement
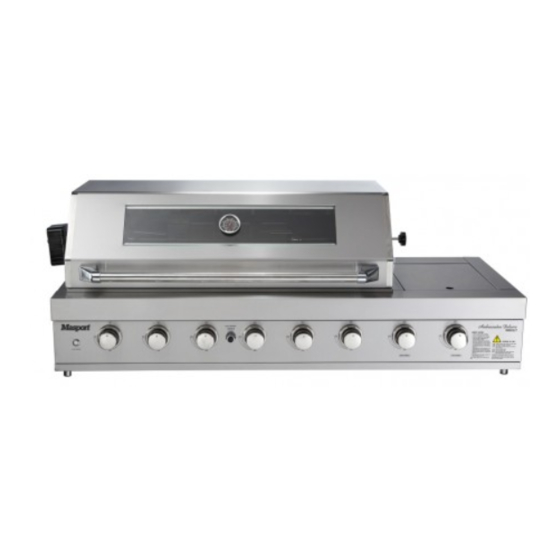
Barbecues
MASPORT AMBASSADOR IB / AMBASSADOR DELUXE IB
OWNER'S MANUAL
Please read these instructions carefully before assembly, to
reduce risk of fire, burn hazard or other injury.
Keep these instructions in a safe place for future use.
This manual covers a range of barbecues which include:
AMBASSADOR IB and AMBASSADOR DELUXE IB.
www.masport.com
Part N
: 548187.A.2
o
Advertisement
Table of Contents

Related Manuals for Masport AMBASSADOR DELUXE IB 611UB-W


Summary of Contents for Masport AMBASSADOR DELUXE IB 611UB-W
- Page 1 Barbecues MASPORT AMBASSADOR IB / AMBASSADOR DELUXE IB OWNER’S MANUAL Please read these instructions carefully before assembly, to reduce risk of fire, burn hazard or other injury. Keep these instructions in a safe place for future use. This manual covers a range of barbecues which include: AMBASSADOR IB and AMBASSADOR DELUXE IB.
-
Page 2: Table Of Contents
CONTENTS SAFETY AND WARRANTY INFORMATION PARTS DIAGRAM, PARTS LIST & FIXTURES ASSEMBLY INSTRUCTIONS INSTALLATION NATURAL GAS CONVERSION LEAK TESTING OPERATION TROUBLESHOOTING CARE AND MAINTENANCE TECHNICAL DATA... -
Page 3: Safety And Warranty Information
SAFETY AND WARRANTY INFORMATION Keep the instructions in a safe place for future use. WARNING! Do not try lighting this appliance without first reading the “LIGHTING INSTRUCTION” section of this manual. DO NOT OPERATE THIS BBQ BEFORE IT HAS BEEN ASSEMBLED CORRECTLY AND YOU HAVE READ AND UNDERSTOOD THESE INSTRUCTIONS. -
Page 4: Disposal Of Packaging
Nests/webs are dangerous and need to be fully period from the date of purchase, Masport will replace or repair the cleaned. defective part free of charge. Refer to the warranty for details. Do •... -
Page 6: Parts Diagram, Parts List & Fixtures
PARTS DIAGRAM, PARTS LIST & FIXTURES 4 BURNER PARTS DIAGRAM *IMAGE IS FOR ILLUSTRATION PURPOSE ONLY... - Page 7 4 BURNER PARTS LIST Item No. Description Temperature gauge Glass Hood unit Hood handle seat Hood handle Warming rack Infrared burner ignition cable Infrared burner wind cover Infrared burner rear cover Infrared burner Cooking grill Cast iron plate Flame diffuser Main burner Fire box unit Manifold...
- Page 8 6 BURNER - PARTS DIAGRAM *IMAGE IS FOR ILLUSTRATION PURPOSE ONLY...
-
Page 9: Hood Handle Seat
6 BURNER PARTS LIST Item No. Description Flame diffuser Cast iron plate Cooking grill Warming rack Temperature gauge Glass Hood unit Hood handle seat Hood handle Infrared rear burner rear cover Infrared rear burner Infrared burner ignition cable Infrared rear burner wind cover Main burner Fire box unit Side burner cooking grid... -
Page 10: Assembly Instructions
ASSEMBLY INSTRUCTIONS NOTE: When assembling the barbecue, ensure it is sitting on a flat surface. For illustration purposes a 6 Burner with Side Burner and Rear Burner is used in assembly steps shown in the next few pages. Tools Required: Phillips Head Screwdriver and Gloves STEP 1 4 x Feet assembly. - Page 11 Unscrew the battery box. Install a 9 volt battery. Place the battery inside then put the cover on. Screw the battery box on and reinsert the fat tray. STEP 3 Assemble the flame tamers.
- Page 12 STEP 4 Assemble the cooking grid/plate. STEP 5 Assemble the warming rack.
- Page 13 STEP 6 1 x 1.5V AA battery needed for ignition. Battery not included. Unscrew igniter button cap by turning counterclockwise. Install AA battery with negative end inserted first. Screw back on the igniter button cap turning clockwise. STEP 7 Assemble the rotisserie kit.
-
Page 14: Installation
INSTALLATION Both ends open WARNING! FOR OUTDOOR USE ONLY This Cooking Appliance should not be used in a building, garage or any other enclosed area. Also THIS APPLIANCE should be placed in a well-ventilated area. Take care to ensure that the minimum clearances guidelines are followed. - Page 15 be connected directly to copper piping. From here the barbecue THE BARBECUE CAVITY cannot be moved. Your barbecue has been designed to sit into a cavity or cutout rather than be placed directly onto a flat surface. It is important that •...
- Page 16 BUILT-IN INSTALLATION WARNING! Prior to starting any construction, check with your local council for any building codes regulating the installation of outdoor barbecue appliances. Outdoor installations must conform to the local codes or, in the absence of local codes, refer to the Australian Gas Standard: AS 4557-2004 (Amdt2).
- Page 17 4 BURNER DIMENSIONS 6 BURNER DIMENSIONS...
- Page 18 WARNING! 1. Please follow following instruction to Install. 2. The minimum clearance of the sides of the BBQ to walls needs to be 50mm. 3. DO NOT block any ventilation of the BBQ. 4. The enclosure material for the cutout is not combustibles. 5.
-
Page 19: Natural Gas Conversion
The cylinder manufacturer/distributor is responsible for the safety and performance of the LPG cylinder. This is not included in the Masport BBQ warranty. Do not use a cylinder that is unsafe. When disconnecting and removing the gas cylinder for the purpose of refilling, always observe the following procedure. - Page 20 Unscrew the main burner securing screws and remove the burner, sitting it alongside. Reassemble the burner. Note: Please make sure the gas valve is located well inside the main burner tube when re-installing the burners. With the burner removed, you will see the brass gas jet which Repeat the above steps for the other main burners.
- Page 21 Remove the LPG jet from the elbow shaped brass injector Reassemble theelbow shaped brass injector assembly (NG jet) assembly, leaving the NG jet in place. and reassemble the rear burner cover. CONVERTING THE SIDE BURNER Take away the grease tray. Remove the side burner ignition wire from the terminal.
-
Page 22: Leak Testing
Unscrew and take away the side burner. Reassemble the side burner. LEAK TESTING WARNING! Never use a naked flame to check for gas leaks. Always use the following procedure to check for gas leaks. 1. In a small container, mix up a solution of water and detergent or soap. -
Page 23: Operation
been detected, contact your local BBQ Dealer for repair. • Do not repair or replace any part of the grill unless specifically recommended in this manual. All other service should be referred OPERATION to a qualified technician. • The appliance is for outdoor use only. •... - Page 24 FOR MANUAL LIGHTING (REAR BURNER) LIGHTING THE BBQ Open the lid before igniting the barbecue. Check All the knobs are in the “OFF” position. Lighting the BBQ is easy, but must be done with due care. Open the gas control valve at the gas cylinder. Make sure that the gas is turned on at the cylinder, or that gas is From the “OFF”...
- Page 25 during cooking fall onto the flame tamers below and vaporise. The the meat. Slide the other fork onto the rod, into the meat, and subsequent rising smoke bastes the food, as it travels upwards, tighten the thumb screw once in place. For optimal rotisserie imparting that unique barbecue flavour.
-
Page 26: Troubleshooting
LP tank must be stored outdoors, out of reach REGULATOR PROVIDED BY THE MANUFACTURER! of children, NEVER store the tank in a building, garage or any If a replacement is necessary, please contact either our Masport other enclosed area. Customer Service Department or your local dealer. -
Page 27: Care And Maintenance
for mild stains and loose dirt and soils. A final rinse with clean CARE AND MAINTENANCE water and a dry wipe will complete the process and eliminate the possibility of water stains. HOUSEHOLD CLEANERS Regularly clean your barbecue between uses and especially Household cleaners fall into two categories: detergent (non- after extended periods of storage. - Page 28 Inspect burner for any damage (crack or holes). If damage is found, REPLACING LED LIGHT (IF NECESSARY) replace with a new burner. Reinstall the burner, check to ensure that Note: The LED light is inserted into the control bezel as a whole unit, the Gas valve orifices are correctly positioned and secured inside if it needs to be replaced, the whole unit needs to be replaced.
- Page 29 If you do require any further assistance with your designed to be a slow cooking process, this allows the food to be barbecue from your local dealer or Masport, please have this serial succulent. External temperatures and breeze will effect the internal number handy as it will quickly allow us to identify the barbecue.
-
Page 30: Technical Data
Auckland 1060, New Zealand PO Box 14349, Panmure Auckland USE OUTDOOR ONLY 1471, New Zealand WARNING: Parts of this appliance MASPORT AUSTRALIA PTY LIMITED 1/40 Abbotts Road, Dandenong South, may be very hot, keep young Manufactured by: Melbourne, Victoria 3175, Australia... - Page 32 Head Office - New Zealand 1-37 Mt Wellington Highway. Panmure, P.O. Box 14 349 Auckland 1060, New Zealand...
Need help?
Do you have a question about the AMBASSADOR DELUXE IB 611UB-W and is the answer not in the manual?
Questions and answers