
Related Manuals for Chore-Time Chore-Tronics 3 Control

Summary of Contents for Chore-Time Chore-Tronics 3 Control
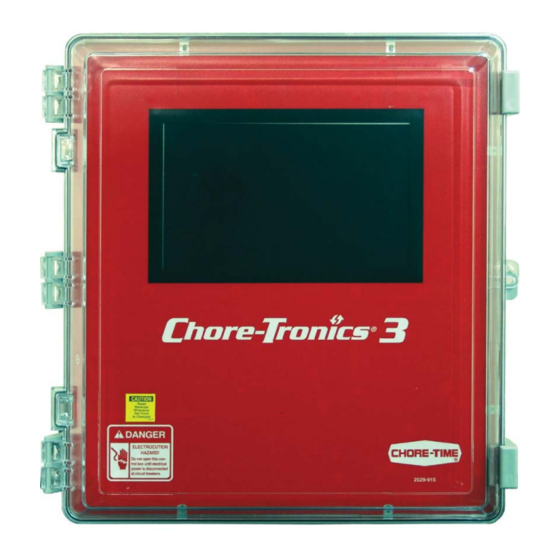
- Page 1 Chore-Tronics 3 Control ® Installation & Operator’s Instruction Manual November 2013 MT2398C...
-
Page 2: Chore-Time Warranty
QUALITY OF THE PRODUCT FURNISHED HEREUNDER. Chore-Time Distributors are not authorized to modify or extend the terms and conditions of this Warranty in any manner or to offer or grant any other warranties for Chore-Time products in addition to those terms expressly stated above. -
Page 3: Table Of Contents
Chore-Time Warranty ........ - Page 4 Contents - continued Topic Page History ..............83 Control Operation Overview .
-
Page 5: General
General Chore-Tronics® 3 Control Technical Specifications140Technical Specifications139 General Support Information ® The Chore-Tronics 3 Controls are used to control the Climate in a structure to insure efficient growth of Livestock. Using this equipment for any other purpose or in a way not within the operating recommendations specified in this manual will void the warranty and may cause personal injury. -
Page 6: Introduction To The Control
Introduction to the Control Chore-Tronics® 3 Control Introduction to the Control Display Screen The display screen is a 10.1 in. Full Color Touch screen. This screen will display the requested information when an Icon on the Touch Screen is pressed. The Display Screen always remains lit. When the Control is left dormant, the Current Conditions Screen will be visible. - Page 7 Introduction to the Control Chore-Tronics® 3 Control Navigating option 2. (Mouse)- A USB mouse can be used by plugging it into the USB port located on the left side of the main Control Box. To navigate using a mouse, position the cursor on the Icon or the simulated button displayed on the screen, and press the left mouse button to select.
- Page 8 Introduction to the Control Chore-Tronics® 3 Control Screen Layout In the top left corner of every screen the path and the screen name is displayed to the screen you are viewing. In this example the Current Conditions screen is displayed. Figure 4.
- Page 9 Introduction to the Control Chore-Tronics® 3 Control Notice the path displayed (Current Condition/Today's Water) Current Path Figure 6. Current Path To return to the Current Conditions screen, select the back button at the top left corner of the screen, or select the CC button.
- Page 10 Introduction to the Control Chore-Tronics® 3 Control Numeric Keypad In a screen that has editable fields, select the value you want to edit (In this example: Set Temperature). A Numeric Key Pad will be displayed. The name of the field will be displayed at the top of the Key pad. Name of Field being edited.
-
Page 11: Relay Box Indication Lights And Auto/Manual Switches
Introduction to the Control Chore-Tronics® 3 Control Graphs 1. A Graph icon will be displayed in the upper right of a screen if there is a graphical repre- sentation. Relay Box Indication Lights and Auto/Manual Switches Each Relay Output has its own three position switch that allows the user to select manual, off or automatic control of each Relay. -
Page 12: Glossary Of Terms
Glossary of Terms Chore-Tronics® 3 Control Glossary of Terms Analog Input Analog Inputs can consist of the following: Temperature sensors Static Pressure sensor (4-20 mA) Relative Humidity Sensor (0-10 volts) Potentiometer (Natural Ventilation) Anticipation When the control is turning on the fans assigned to the Minimum Ventilation Timer, the control will open the inlets to the correct position for static pressure control before the fans are turned on. -
Page 13: Digital Input
Glossary of Terms Chore-Tronics® 3 Control Digital Input Digital Inputs can consist of the following: Water meter Feed scale Air speed sensor Low water pressure switch Max feed run time Input PDS flush feed back Event This term applies to the time clock Outputs. An "event" is an "on at" time combined with an "off at"... -
Page 14: Offset
Glossary of Terms Chore-Tronics® 3 Control Offset The term "offset" applies to the Set Temperature and Minimum Ventilation Timer curves only. If you manually adjust either the Set Temperature or the Minimum Ventilation Timer settings, while the curve is on, you create an "offset" to that curve relative to it's "curve value". -
Page 15: Static Pressure
Glossary of Terms Chore-Tronics® 3 Control Static Pressure Static pressure refers to the pressure difference that exists between the inside of the house and the outside of the house. This pressure difference is the result of Fans in the walls running. The air that they exhaust enters the house through various types of air inlet openings. -
Page 16: Overview Of Screens
Overview of Screens Chore-Tronics® 3 Control Overview of Screens Alarms (Active or Recovered) Active Alarms To see any current "Active" alarms press the Alarms Button. If there are any Active alarms they will be listed here (See Figure below). Notice Button Alarms Button Message Alarm Status... - Page 17 Overview of Screens Chore-Tronics® 3 Control Recovered Alarms To see "Recovered" alarms press the Alarms Button. If there are any Recovered alarms they will be listed here (See Figure below) Alarms Button Recovered From any screen you can select the Alarm but- ton.
-
Page 18: Control Setup
Control Setup Chore-Tronics® 3 Control Control Setup General Setup From any screen select the Main Menu button at the top left of the screen. 2. Select the General button to access the Setup/General screen. 1. Select the Setup button. Note: Path to the Screen being viewed 3. - Page 19 Control Setup Chore-Tronics® 3 Control Time of Day 1. Highlight the hours by selecting the hours. Change the hours by using the up/down ar- rows or the keypad. 2. Highlight the minutes by selecting the min- utes. Change the minutes by using the up/ down arrows or the keypad.
- Page 20 Control Setup Chore-Tronics® 3 Control Units In this screen you will choose the unit of measurement you want to display. 1. Select the General Button in the Setup Screen. 2. Select the Units button 3. Choose the unit of measurement you want to display.
-
Page 21: Analog Inputs
Control Setup Chore-Tronics® 3 Control Analog Inputs To access the Analog Inputs Setup screen start by accessing the Main Menu screen. Select the Setup button. Select the Analog inputs Analog Inputs-Sensor Type Sensor Types Grayed out (Cannot select) Installed Number of Sensors Select the Sensor Type button Enter Sensor Types installed In this screen you choose what type of Analog... - Page 22 Control Setup Chore-Tronics® 3 Control Analog Inputs-House Temperature Sensors. Select the House Temp. Sensor button From the Setup/Analog Inputs screen select House Temp. Sensors button. The Setup/Ana- log Input/House Temperature screen should be displayed at this time Sensor numbers 2. Factory assigned Temperature sensors 1-3 come from the facto- ry pre-assigned.
- Page 23 Control Setup Chore-Tronics® 3 Control Analog Inputs-Outside Temperature Sensor 1. Select the Outside Temp. Sensor button In this screen the Outside sensor is assigned. Calibration is also done from this screen. Skip this Screen if no outside sensors are installed. 2.
- Page 24 Control Setup Chore-Tronics® 3 Control Analog Inputs-Static Pressure Sensors Select the Static Pressure Sensor button 2. Assign Static Pressure input as you did for the House Temperature Sensors. Calibration is also done from this screen. 3. Select the Control Tab button In this screen you set up the specifications for the Stat- ic Pressure Sensors 4.
- Page 25 Control Setup Chore-Tronics® 3 Control 5. Second Static Pressure Selecting this feature a second level of Power Mode static pressure can be chosen. The Tem- perature Sensor(s), (Inside Only), that measure that temperature is defined in this screen. Se- lect the sensor edit field and a sensor assign- ment window will be displayed.
- Page 26 Control Setup Chore-Tronics® 3 Control 8. Tunnel Inlet Static Pressure assist in Power If in the Power Mode, there is inadequate inlet area to keep the static pressure within the high control limits, the Tunnel Curtain will open to give addition- al air inlet area.
- Page 27 Control Setup Chore-Tronics® 3 Control 3. Select the Control tab. 4. Select the RH Influence On Minimum Ventilation box if you want the min/vent timer to be influenced by the RH. 5. The Minimum Ventilation timer will be adjusted based on house RH when the temperature is between set temperature and the Min-Vent fan's ON tempera- ture.
- Page 28 Control Setup Chore-Tronics® 3 Control Analog Inputs-Bird Scale 1. From the Setup/Analog Input screen select Type & Number. 2. Put a Check in the Bird Scale Box. 3. Select the Back Button and then select 4. Select the Board number from the drop down. the Bird Scale Button.
-
Page 29: Analog Input Calibration
Control Setup Chore-Tronics® 3 Control Analog Input Calibration The re-calibration section of this screen should not need to be used at initial installation and start-up of the Control unless natural ventilation is used. If natural ventilation is being used, then the Potentiometers will need to be calibrated at this time. - Page 30 Control Setup Chore-Tronics® 3 Control Static Pressure Sensor Calibration 1. To re-calibrate the Static Pressure Sensor first obtain a manometer or other static pressure measuring device. Then disconnect both hoses from the Static Pressure Sensor. 2. Go to Setup/Analog Inputs/Static Pressure screen and look at the Pres- sure reading in the Zero Level value box.
-
Page 31: Digital Inputs
Control Setup Chore-Tronics® 3 Control Digital Inputs The Digital Input Screens are very similar to the Analog Input screens and setup the same way. In these screens the Control is told what digital inputs (Water Meters, Feed Scales, Airspeed Sensor, Low Water Pressure Switch, Flush Feed Back, Auger Run Time Alarm, etc.) are connected to the Control and where. - Page 32 Control Setup Chore-Tronics® 3 Control Water Meter 1. Select the Main menu button. Select the Setup but- from the Main Menu screen. Finally, se- lect the Digital inputs Button. 2. Select the Water Meters button. 3. Enter all Drinker/Water Meters that are connect- ed to the CT3 here.
- Page 33 Control Setup Chore-Tronics® 3 Control Dump Scale 1. Select the Dump Scale Button. 2. Assign an input to each of the feed scales con- All feed scales that are connected to the Control nected to the Control here. Each Input assigned needs the input it is connected to assigned here.
- Page 34 Control Setup Chore-Tronics® 3 Control Feed Lines 1. Press the Feed Lines button. 2. Enter the board and input of each Feed Line connected to the Control. Feed Line run times will be generated from these inputs. Water Pressure 1. Press the Water Pressure button. 2.
- Page 35 Control Setup Chore-Tronics® 3 Control Flush Feedback 1. Press the Flush Feedback button. 2. Enter the board and input of the PDS flush feed- back. The parameters are setup in the Alarm screen under the Production tab. MT2398C...
-
Page 36: Setup House
Control Setup Chore-Tronics® 3 Control Setup House 1. Select the Main menu button. Select the Setup button from the Main Menu screen. Finally, select the House Button. 2. In this Screen you set what type of ventilation is being used in the House. 3. -
Page 37: Output Assignments
Control Setup Chore-Tronics® 3 Control Output Assignments 1. Select the Main menu button. Select the Setup but- from the Main Menu screen. 2. Press the Outputs button Some of the buttons on this screen may be grayed out at this point of the setup. Outputs-Equipped/Numbers 1. - Page 38 Control Setup Chore-Tronics® 3 Control Outputs-Ventilation Notice that all the buttons are now active. Ventilation-Tunnel Fans 2. Every Output needs to have a relay, mode of opera- 1. Select the Ventilation button. tion (Power, Natural, Tunnel, or combinations of the three), and temperature sensor(s) assigned to it.
- Page 39 Control Setup Chore-Tronics® 3 Control Relay assignment Decal (inside Relay Box) Refer to the Relay Assignment Decal (Inside the Relay Box) to assign relays to each of the fans. 2. Select the Relay dropdown to assign the proper Relay to each Tunnel Fan. 3.
- Page 40 Control Setup Chore-Tronics® 3 Control Ventilation-Stir Fans 1. Select the Ventilation button. 3. Assign Relays, Sensors and Mode values to the 2. Select the Stir Fans button. Stir Fans just as you did for Tunnel Fans. (See previous page) Ventilation-Exhaust Fans 1.
- Page 41 Control Setup Chore-Tronics® 3 Control Ventilation-Variable Fans Note: The Var. Speed output is a 0-10 or 10-0 vdc output on the IO board not the Relay box. 1. Select the Ventilation button. 2. Select the Variable Fans button. 3. Assign Sensors and Mode values to the Variable Speed Fans.
- Page 42 Control Setup Chore-Tronics® 3 Control Ventilation-Cool The Cool outputs can be used for cool pads, fogger pads and or inside foggers. The Cool output can be setup to be on/off based the temperature setting in the Output & Temperature. A timer can be assigned to the Cool output.
- Page 43 Control Setup Chore-Tronics® 3 Control Ventilation-Cool Pad The COOL PAD output is very different from a COOL output. It is not intended that the COOL PAD output and the COOL output would be used together, but it is possible. Both outputs are there to give the user the choice on which type of output to use.
- Page 44 (Setup/Outdputs/Ventilation/Coolpad and Ventilation Set- ting/CoolPad). Chore-Time strongly recommends that the factory default settings be used, un- less poor control of temperature during pad operation is noticed. Chore-Time also recommends that CTB service personnel is contacted before changing the settings.
- Page 45 Control Setup Chore-Tronics® 3 Control Ventilation-Heat Zones 1. Select the Ventilation button. 3. Assign Relays, Sensors, Mode values and Names just as you did for Tunnel Fans. (See pre- vious) 1. Select the Heat Zones button. 4. Select the box if you do not want the Heat Zones to run in Tunnel assist.
- Page 46 Control Setup Chore-Tronics® 3 Control Sidewall Inlet 2. In this screen you will assign Relays to any and all of the air inlets connected to the Control. 3. Select Sidewall Inlet Close Open Relay Number Relay Number Once you enter in the Open relay number the Control will automatically enter the Close relay.
- Page 47 Control Setup Chore-Tronics® 3 Control Tunnel Inlet 2. When you enter in the Open relay number 1. Use the Back button to get to the Setup/Out- the Control will automatically enter the Close puts screen and push the Tunnel Inlet Button. relay.
- Page 48 Control Setup Chore-Tronics® 3 Control Clock Assignments 1. Select the Main menu button. Select the Setup button from the Main Menu screen. Finally, select the Outputs button. 2. Press the Clock button. All of the Clock output Relays are assigned here.
- Page 49 Control Setup Chore-Tronics® 3 Control Feed Clock 1. Press the Feed button. 2. Enter the Relay or Relays that the feeders have been wired to. Only one Feed clock can be assigned with up to four relays. All four re- lays will be activated at the same time.
- Page 50 Control Setup Chore-Tronics® 3 Control Spare Clock 1. Press the Spare button. Clock Name Four Relays per Clock (editable) 2. The Spare Clocks have 8 on and off events and cannot be curved. A maximum of 8 Spare Clocks can be used, with up to four Relays per Clock.
- Page 51 Control Setup Chore-Tronics® 3 Control Miscellaneous Outputs Backup Relay 1. Select the Main menu button. Select the Setup button from the Main Menu screen. 2. Press the Outputs button. 3. Press the Miscellaneous button. 4. select the Backup button. 5. Assign a Backup relay from the drop- down list of avalible Relays.
-
Page 52: Assignments
Control Setup Chore-Tronics® 3 Control Verify Relay Assignments After assigning all the outputs, verify the Relay assignments with the Output Stickers on the Manual Toggle Switches. Manual Toggle Switches Feed Clock 1 Feed Clock 2 Feed Clock 3 Relay Assignments (Inside Cover of Relay Box) Assignments Sensors... - Page 53 Control Setup Chore-Tronics® 3 Control 3. Power Mode- The temperature sensor (s) assigned here will determine what the control will use to transition from Power to Tunnel mode. 4. Temp. Influence On Minimum Ventilation The temperature sensor (s) assigned here will determine the amount of time added or subtracted away from the Minimum Ventilation timer in Power mode.
- Page 54 Control Setup Chore-Tronics® 3 Control Function 1. Select the Main menu button. Select the Setup button from the Main Menu screen. 2. Select the Function button. 3. Alternate Min Vent Fans (Select if you want feature) The Min Cycle (Alternate Minimum Ventilation fans) allows the fan(s) assigned to the Min Vent Timer to alternate with the fans assigned to the Min Cycle.
-
Page 55: Ventilation Settings
Control Setup Chore-Tronics® 3 Control Ventilation Settings Set Temp Timer 1. Select the Main menu button. Select the Ventilation Settings button. 2. Select the Set Temp Timer button. Note: Only the values with a white background are editable. All other boxes are information only. 3. - Page 56 Control Setup Chore-Tronics® 3 Control 7. Current Stir ON Time Current Stir ON Time is the current amount of Stir On Time. If (TMP) is displayed the Stir Fan (s) are on by temperature. The "stir on" Timer is different than the other Timers.
- Page 57 Control Setup Chore-Tronics® 3 Control Timer Settings 1. Min Ventilation Timer Min Ventilation Timer can be attached to Exh Fan, Tun Fan, and Stir Fan Outputs in the "Outputs" screen. The "on" and "off" times for this Timer are set up here in there. The Timer turns the Fan on or off when the temperature is below the Fan's "on"...
- Page 58 Control Setup Chore-Tronics® 3 Control Static Pressure The Static Pressure screen indicates the current static pressure plus provides the fields that can be edited to set the Static Pressure Control limits and the wind delay. The open and close Inlet Relays respond as required to keep the static pressure within the Control limits while in the Power Mode and the open and close Tunnel Curtain Relays do the same to control the static pressure during the Tunnel Mode.
- Page 59 (Setup/Outdputs/Ventilation/Coolpad and Ventilation Setting/CoolPad). Chore-Time strongly recommends that the factory default settings be used, unless poor control of temperature during pad operation is noticed. Chore-Time also recommends that CTB service personnel is contacted before changing the settings. 1. Select the Main menu button.
- Page 60 Control Setup Chore-Tronics® 3 Control Cool Setting 1. Select the Main menu button. Select the Ventilation Settings button. 2. Select the Cool button. 3. Cool Outputs Disabled Above RH- If there are relays assigned to cool output(s), and a relative hu- midity sensor is connected to the Control, the Con- trol can block the cool output from turning on if the relative humidity sensor reading is higher than en-...
- Page 61 Control Setup Chore-Tronics® 3 Control Airspeed Tunnel Settings 1. Select the Main menu button. Select the Ventilation Settings button. 2. Select the Air Speed Tunnel button. 3. Selecting Airspeed Control in Tunnel- To activate put a Check Mark in the Box as shown.
- Page 62 Control Setup Chore-Tronics® 3 Control Variable Speed Settings 1. Select the Main menu button. Select the Ventilation Settings button. 2. Select the Variable Speed button. 4. Variable Speed Maximum- Enter the maximum speed in percent that you want to operate the Var.
- Page 63 Control Setup Chore-Tronics® 3 Control RH (Relative Humidity) Settings 1. Select the Main menu button. Select the Ventilation Settings button. 2. Select the RH Influence button. 3. Actual Influence- The actual amount of influence time the RH function is adding to the minimum ventilation timer.
-
Page 64: Curves
Control Setup Chore-Tronics® 3 Control Curves Curves/Set Temp 1. Select the Main menu button. 3. Select the Set Temp button. 2. Select the Curves Button. There are several terms that need to be defined in order to understand the Set Temperature Curve Screen.. - Page 65 Control Setup Chore-Tronics® 3 Control Minimum Vent Curve Settings 3. Select the Min Vent button. 1. Select the Main menu button. 2. Select the Curves Button. There are several terms that need to be defined in order to understand the Minimum Ventilation Curve Screen.
- Page 66 Control Setup Chore-Tronics® 3 Control Light Clock Curve Settings 3. Select the Light Clock button. 1. Select the Main menu button. 2. Select the Curves Button. 4. Curves- Four different curves can be setup and assigned to four different Light clocks. For light level spiking and for the use of independent clocks to control different light types (incandescent and fluorescent for example) within the house.
- Page 67 Control Setup Chore-Tronics® 3 Control Example: In the example (right), the lights will turn on at 5:00a and will take 15 minutes to go from 0 percent light to 70 percent light. At 9:00a the lights will take 5 minutes to "spike"...
-
Page 68: Management Screens
Control Setup Chore-Tronics® 3 Control Management Screens Mortality Screen 1. Select the Main menu button. 2. Select the Management Button. 3. Select the Mortality button. 4. Picked Up- The number of dead and culled animals collect- ed is entered on the Picked Up line. Select the Agreed button and the number(s) entered in the picked up line will be added to the Today and the Accum lines. - Page 69 Control Setup Chore-Tronics® 3 Control 7. If Males and Females are being entered sepa- rately, use the tab buttons toggle between the Male, Female and Total Screens. When Male and Female Mortality is entered separately, the Total Mortality Screen is a summary of the Male and Female screens and is non-edit- able.
- Page 70 Control Setup Chore-Tronics® 3 Control Flock Setup 2. Select the Management Button. 1. Select the Main menu button. 3. Select the Flock button. 4. Select the Standard button. 5. Growth Curve- Enter the Growth curve for the type of bird you have. This can be entered by Day # or by Week # by select- ing from the drop down in the "Use"...
- Page 71 Control Setup Chore-Tronics® 3 Control Flock Setup/Delivery 13. Select the Deliver Button. 14. Delivery Day (Optional) 15. Delivery weight- The measured live weight in the slaughterhouse can differ from the wight readout on the CT3 Control. This difference in live weight can be caused by transport, animals having empty/full stom- achs, differences in the house, etc.
- Page 72 Control Setup Chore-Tronics® 3 Control Management Reset Button Selecting the Reset button from the Management screen will erase all management data. Warning!! Once the Reset Button has been pressed it can not be reversed. 1. Select the Main menu button. 2.
-
Page 73: Programs/Setup Key Screens
Control Setup Chore-Tronics® 3 Control Programs/Setup Key Screens Programs Screen/ Activate 1. Select the Main menu button. 2. Select the Programs Button. 3. Select the Programs button. 4. In this screen you can choose from available Programs already programmed into the Con- trol. - Page 74 Control Setup Chore-Tronics® 3 Control Programs Screen / Delete 1. Press the Programs Screen/ Programs Button 2. Programs Available- Choose from available Pro- grams already programmed into the Control. 3. Choose Delete from action choices. 4. Select the OK button. 5.
- Page 75 Control Setup Chore-Tronics® 3 Control Program Screen / Save 1. Press the Programs Screen/ Programs Button 2. Programs Available- Choose from available Pro- grams already programmed into the Control. 3. Choose Save from action choices. 4. Select the Program Number from the drop down.
- Page 76 Control Setup Chore-Tronics® 3 Control Programs / Yesterday 1. Press the Programs Screen/ Programs Button 2. Programs Available- Choose from available Programs already programmed into the Control. 3. Select Yesterday from action choices. Every day at midnight, the settings of the Con- trol is saved which can be activated anytime during the following day.
- Page 77 Control Setup Chore-Tronics® 3 Control Setup Key Screen/ Activate Insert a USB Flash Drive into the USB adaptor located on the lower left side of the main box. Unscrew the protective cap and plug-in the Flash Drive. MT2398C...
- Page 78 Control Setup Chore-Tronics® 3 Control 1. Select the Programs Button. 2. Select the Setup Key button. This screen is only available if a Setup Key (USB drive ) is inserted in the USB plug located on the lower left side of the Con- trol.
-
Page 79: Clocks
Control Setup Chore-Tronics® 3 Control Clocks The Clocks screen consists of the Current Light Clock, Current Feed Clock and Spare Clocks. The Lights and Feed Curves are assigned to their specific Clock in theses screens. 1. Select the Main menu button. 2. - Page 80 Control Setup Chore-Tronics® 3 Control 6. Name Clock- Is the current displayed clock. 7. Events- The current number of events that the Clock is using to control the lignts. 8. Use Curve- selecting On or Off from the dropdown activates or deactivates the curve selected.
- Page 81 Control Setup Chore-Tronics® 3 Control Feed Clock 1. Select the Main menu button. 2. Select the Clocks Button. 3. Select the Feed button. 4. This screen displays the Feed Clock settings link for the Feed clock. 5. The icon displayed to the left of the Feed button indicates if the feed output is on or off.
- Page 82 Control Setup Chore-Tronics® 3 Control Spare Clocks 1. Select the Main menu button. 2. Select the Clocks Button. 3. Select the Feed button. 4. This screen displays the Spare Clock settings links for the Spare clock. Up to eight Spare clocks.
-
Page 83: History
Control Setup Chore-Tronics® 3 Control History 1. Select the Main menu button. 2. Select the History button. History-Environment 1. Select the Environment button. History Number of days. Mode Temperature 100 days Sensors (all assigned) 14 days Humidity House 14 days Heat Run Times 14 days 2. - Page 84 Control Setup Chore-Tronics® 3 Control History-Production 1. Select the Main menu button. 2. Select the History button. 3. Select the Production button. 4. To view production history for; Water, Feed, Mor- tality, Auxiliary, or Feed line, select the Tab at the appropriate Tab at the bottom of the screen.
- Page 85 Control Setup Chore-Tronics® 3 Control Setting up Sidewall Inlets 1. Select the Main menu button. 2. Select the Setup button. 3. Select the Outputs button. 4. Select the Equipped/Numbers button. 5. Select both the Sidewall inlets and Ceiling inlets check boxes. The number 1 will appear in the box to the right.
- Page 86 Control Setup Chore-Tronics® 3 Control 10. Select the Control Tab at the bottom of the screen. 11. Inlet Anticipation- Select from the drop down Calculated or Fixed. 11a. If Fixed anticipation is chosen fill in the amount of time in seconds you want the inlets to anticipate.
- Page 87 Control Setup Chore-Tronics® 3 Control Setting up Ceiling Inlets If continuing to setup Ceiling Inlets from the Sidewall screen above, select the Back button twice to return to the Setup/Outputs/Curtain Screen. 1. Select the Main menu button. 2. Select the Setup button. 3.
- Page 88 Control Setup Chore-Tronics® 3 Control Setting up Ceiling Inlet Parameters Setting the parameters for the Ceiling Inlet is done in the Outputs and Temperature screen. 1. Select the Main menu button. 2. Select the Outputs and Temperature button. 3. In the output column you will see "Use Attic Air output". 4.
-
Page 89: Control Operation Overview
Control Operation Overview Chore-Tronics® 3 Control Control Operation Overview Standard Mode Functionality Power Mode All curtain(s) are given a continuous close signal. Inlets are controlled by static pressure (if used). All outputs that are allowed to operate in Power Mode turn on and off per screen 4 trying satisfy their sensors assigned in Screen 13. -
Page 90: Control Installation
Control Installation Chore-Tronics® 3 Control Control Installation Mounting the Control 56 Output Control Mounting ® A 56 Output Chore-Tronics 3 Control consists of a Main Box and a Relay Box. The Main Box requires a minimum mounting area of 21 in. [53 cm] x 21 in. [53 cm] (See Figure below).The Relay Box requires 22 in. - Page 91 Control Installation Chore-Tronics® 3 Control Do Not run I/O Net or 24 Vdc Twisted Pair wire close to and/or parallel with line Warning! voltage wires. (See Figure 75) The I/O Net terminals of the Main Box and the Relay box must be connected together using the Non-Shielded Twisted Pair Wire (Chore Time Part no.
- Page 92 Control Installation Chore-Tronics® 3 Control Caution : Do NOT run 24 Vdc and I/O Line Voltage Wiring Net wire close to and/or parallel with line (120 Vac or greater) voltage wires. Doing so can cause operational failure in the Control 90°...
- Page 93 Chore-Tronics® 3 Control Control Installation MT2398C...
-
Page 94: Wiring The Control
Control Installation Chore-Tronics® 3 Control Wiring the Control Note As with all electronic controls, we recommend the use of a backup system. This will provide continuous operation in the unlikely event of Control failure. Use the current Back Up Box Manual for wiring instructions. ®... - Page 95 Control Installation Chore-Tronics® 3 Control When wiring the Control it is recommended that the line voltage wires be brought into the bottom of the Boxes and the low voltage wires (Temperature Sensors, Potentiometers, relative humidity, etc.) be brought in the side of the Control Box (See Figure 17). Item Description Temperature Sensor, Potentiometer,...
-
Page 96: Analog Inputs
The Temperature Sensors require Non-Shielded 20 Gauge Twisted Pair Wire. This wire is available through Chore-Time. When routing this wire in the house be sure to keep it a minimum of 12"(305mm) away from line voltage wiring. If there is a need for the Sensor wire to cross line voltage wires cross them at a 90° angle to each other as shown below. - Page 97 Control Installation Chore-Tronics® 3 Control Temperature Sensors Continued..Route the wire through the back of the Temperature Sensor and connect it as shown in Figure below. Pull the wire through the back of the box until a drip loop is formed as shown. Front View (with Lid Off) Item...
- Page 98 Box, next to the sensor. Place a ½" water tight connector (Item 3, Figure 24) into each hole and tighten using the hardware provided. Route a 3/16" ID hose (Chore-Time part number 43071) through each of the Water Tight Connectors. Connect one hose to the low pressure barb on the SP module, and run that house into the house.
- Page 99 Potentiometer is connected to that the Blue Jumper above the Input is set to "R" (See Figure 26). To connect the sensor wire to the Potentiometer itself, please see Chore-Time instruction manual MV1251 for internal Potentiometer wiring, or MV1566 for external Potentiometer wiring.
- Page 100 Control Installation Chore-Tronics® 3 Control Digital Inputs Wiring Digital inputs consist of Water Meters, Feed Scales, Air Speed Sensor, Low Water Pressure Switch, Max Feed Run Time Alarm Input, and PDS Flush Feedback. These Inputs can be wired to any of the digital inputs (DI 1 thru DI 8) on the IO board (Figure 27 below).
- Page 101 ® Tronics 3 Control. If a Water Meter not sold by Chore-Time is used, make sure that it has a dry contact output. Do not use a Water Meter that sends voltage out with every pulse. (DI) of your Choice...
- Page 102 Control Installation Chore-Tronics® 3 Control MT2398C...
- Page 103 Chore-Tronics® 3 Control Control Installation Airspeed Sensor Wiring The Airspeed Sensor requires a three conductor wire to connect the Sensor to one of the Digital (DI) Inputs on the IO board. It is recommended that the digital input chosen is adjacent to one of the 12 volt outputs on the IO board (Figure 31).
-
Page 104: Remote Light Dimmer Control Wiring
Control Installation Chore-Tronics® 3 Control PDS Flush Feedback Wiring If a PDS Drinker Control is being used to automatically flush water lines, then the Control can ignore pulses coming from the Water Meter(s) while flushing is taking place. If this option is used then a dry contact relay must be connected to one of the Digital (DI) Inputs of the IO Board. -
Page 105: Bird Scale Wiring Using The Lcc Board (Scales Less Than 150' From Control)
Chore-Tronics® 3 Control Control Installation MT2398C... -
Page 106: Bird Scale Wiring Using The Lcc Board (Scales More Than 150' From Control)
Control Installation Chore-Tronics® 3 Control MT2398C... - Page 107 Chore-Tronics® 3 Control Control Installation Expansion Board Installation/Wiring If it is desired to have more than 12 analog inputs and/or 8 digital inputs, then an Expansion Board(s) is needed to connect the inputs. There can be a maximum of 7 Expansion Boards added to the Chore- ®...
- Page 108 Control Installation Chore-Tronics® 3 Control Expansion Board Dip Switch Setting- Each Expansion Board installed must have the DIP switches set properly. These DIP switches are used to assign a number to each Expansion Board so the Control can identify each Board. To assign the first Expansion Board installed to #1, set the DIP switches for Expansion Board 1 so that the number one switch is in the "OFF"...
- Page 109 Chore-Tronics® 3 Control Control Installation Analog Expansion Boards- Each Analog Expansion Board (AI.4 board) adds 4 additional Analog ® Inputs to the Chore-Tronics 3 Control. There is a Blue Jumper located above each Analog Input (Item 2, Figure 37). This Blue Jumper needs to be set in the "R" position if a resistive Analog Input (Temperature Sensors and Potentiometers) is connected.
- Page 110 Control Installation Chore-Tronics® 3 Control Once the screen has been adjusted, all assigned outputs should be tested individually by placing the Manual Switches located on the Relay Box to the "MANUAL ON" position (See Figure 39). This will also serve as a way of verifying that the proper output was wired to the proper Relay and/or the proper Output Sticker was placed over the Toggle Switch.
-
Page 111: Testing The Back Up Box
The appropriate output stickers should be placed over the toggle switches used, if it has not already been done prior to mounting. Please see the wiring diagrams on the following pages for wiring Chore-Time ventilation equipment. (Wiring diagrams for Fans, Linear Lifts, Super Lifts, Brooders, Turbo Cool, Mister Cool). -
Page 112: Ms Board Dip Switch Positions
Control Installation Chore-Tronics® 3 Control MS Board Dip Switch Positions The MS Board Dip Switches are located on the ends of the Manual Switch Boards as shown in Figure 107 below. New Controls come from the factory preset. This information is provided only when a replacement board is used. -
Page 113: Pc Connection
To see where the FNET Terminal Connectors are located on the I/ O Board see Figure 48. Use only Twisted Pair Wire (Chore-Time Part No. 42208). The Interface Box can be wired in anywhere either at the beginning of your string, at the end, or between Controls;... -
Page 114: Troubleshooting
Troubleshooting Chore-Tronics® 3 Control Troubleshooting Programming Trouble Shooting Problem Possible Cause Possible Solution Can not lower set temperature Normal set temperature range. The Control has been set up so below 32.0° F. and can not raise that set temperature range is the set temperature above between 40.0°... -
Page 115: Programming Troubleshooting Continued
Chore-Tronics® 3 Control Troubleshooting Programming Troubleshooting Continued..Problem Possible Cause Possible Solution Fan assigned to operate in Power A.) A “Pot Not Responding” or a A.) Find out cause of alarm and Mode only is running in Natural “Pot Outside Limits” alarm correct. -
Page 116: Programming Trouble Shooting Continued
Troubleshooting Chore-Tronics® 3 Control Programming Trouble Shooting Continued..Problem Possible Cause Possible Solution Tunnel Curtain opens in Power A.) Power-Tunnel Mode Transi- A.) Normal Operation Mode. tion. B.) High static pressure alarm B.) Static pressure had quickly safety feature has taken over. built to above 0.20”... - Page 117 Chore-Tronics® 3 Control Troubleshooting Temperature Sensor reading very A.) Connections in Temperature A.)Check all Temperature Sensor low, but is not stuck on 0° F. Sensor junction box, and/or I/ connections, correct any O Board have become loose problems. and/or corroded. B.) Defective Temperature Sen- B.) Replace Temperature Sensor.
- Page 118 Chore-Tronics B.) Make sure Water Meter is a B.) Wrong type of Water Meter. dry contact pulsed Water Meter (Chore-Time part no. 13228-GP) and that the pulser unit is working correctly. C.) To prevent noise from bother- C.) There is excessive noise on ing the Water Meter, use non- the Water Meter.
- Page 119 Chore-Tronics® 3 Control Troubleshooting Equipment and Potentiometer Troubleshooting Continued..Problem Possible Cause Possible Solution MS Board not functioning cor- A.) The DIP switches found on A.) Replacement boards come from rectly, or outputs not functioning the side of the MS board are in the the factory with all three DIP correctly.
- Page 120 Troubleshooting Chore-Tronics® 3 Control Equipment and Potentiometer Troubleshooting Continued..Problem Possible Cause Possible Solution Pot not responding alarm (exter- A.) Main Curtain cable and/or A.) Make sure that both the Main nal pot) Potentiometer cable caught, Curtain cable and the Potenti- or broken.
- Page 121 Chore-Tronics® 3 Control Troubleshooting Equipment and Potentiometer Troubleshooting Continued..Pot outside limits alarm (external A.) Potentiometer has not been A.) Go to the Setup screen and pot). calibrated (especially new scroll down to the Main Cur- installations). tain calibration to set up the open and close limits of the Curtain.
-
Page 122: Ionet Error Addr:xx
Troubleshooting Chore-Tronics® 3 Control IONet Error Addr:xx This is a communication failure between the Main box and 1 or more of the Manual Switch Boards (iMSCM). The number following the address indicates which board is having the communications issues. These trouble shooting steps assume that the I/O Net alarm occurred on a previously functioning control and no boards have been replaced. -
Page 123: Wiring Diagrams
Chore-Tronics® 3 Control Wiring Diagrams MT2398C... -
Page 124: Fan Wiring
Wiring Diagrams Chore-Tronics® 3 Control Fan Wiring Figure 45. Fan Wiring MT2398C... -
Page 125: Linear Lift Wiring Diagram
Chore-Tronics® 3 Control Wiring Diagrams Linear Lift Wiring Diagram MT2398C... -
Page 126: Turbo-Cool™ Wiring
Wiring Diagrams Chore-Tronics® 3 Control Turbo-Cool™ Wiring TYPICAL WIRING OF OUTPUT RELAYS A L L O U T P U T R E L A Y S A R E S P S T W I T H D R Y C O N T A C T S A S S H O W N . T H I S S H O W S A T Y P I C A L T . - Page 127 Chore-Tronics® 3 Control Wiring Diagrams This page left blank intentionally..MT2398C...
-
Page 128: Brooder Wiring
Wiring Diagrams Chore-Tronics® 3 Control Brooder Wiring MT2398C... - Page 129 Chore-Tronics® 3 Control Wiring Diagrams MT2398C...
-
Page 130: Improving Lightning Surge Suppression
These products are available from Chore-Time. The products available will be discussed later in this section. It should also be noted that a back-up system consisting of mechanical back-up thermostats be installed in the event of a control failure. Chore-Time has a back-up box available (Part Number 40727). - Page 131 Chore-Tronics® 3 Control Improving Lightning Surge Suppression 47663 Farm Main Service Panel Surge Suppressor Wiring Diagram Main Service Panel (1 per farm) Connect to any of the individual house circuit breakers. Black Black Green Ground Bus P/N 47663 Main Panel Surge Supressor To ground rod Mt1701-056 012/01...
- Page 132 Improving Lightning Surge Suppression Chore-Tronics® 3 Control MT2398C...
- Page 133 Chore-Tronics® 3 Control Improving Lightning Surge Suppression This page left blank intentionally..MT2398C...
-
Page 134: Itemized Parts (Main Box)
Itemized Parts (Main Box) Chore-Tronics® 3 Control MT2398C... -
Page 135: Parts Listing (Main Box)
Chore-Tronics® 3 Control Parts Listing (Main Box) MT2398C... -
Page 136: Itemized Parts (Relay Box)
Itemized Parts (Relay Box) Chore-Tronics® 3 Control MT2398C... -
Page 137: Parts Listing (Relay Box)
Chore-Tronics® 3 Control Parts Listing (Relay Box) MT2398C... -
Page 138: Extra Parts And Kits
Extra Parts and Kits Chore-Tronics® 3 Control Extra Parts and Kits Analog Input Add-On Kit (Part No. 49663) Item Description Part No. SRS Board Spacer 48742 #6-32 x .5" Phil. Pan Head Screw 35367 AI.4 Analog Input 49664 AI.4 Terminal Strip Decal 2526-461 Digital Input Add-On Kit (Part No. -
Page 139: Input Wiring Assignment Diagram
Chore-Tronics® 3 Control Input Wiring Assignment Diagram Input Wiring Assignment Diagram Use this diagram, which is a copy of the Input Wiring Assignment Decal, located in the Main Box, to record where each Input is wired to the Control. MT2398C... - Page 140 NTC Thermister range: -30°C to 50°C/-22°F to 122°F; 10 Kilo ohms @ 77°F /- .7°F Sensor Wire / PC Wire…….20 gauge single Twisted Pair Wire, 1 twist every 2 inches, unshielded wire. Use of Chore-Time part number 42208 strongly recommended. Potentiometer (2-wire)…………… 0-10KW 10-turns (Natural Ventilation Only) Static Pressure Sensor (3-wire)…………….0-.4 inches w.c.
- Page 141 Chore-Tronics® 3 Control Technical Specifications This page left blank intentionally..MT2398C...
- Page 142 Added Items 46 and 47 107, 108 Added Bird Scale Wiring Contact your nearby Chore-Time distributor or representative for additional parts and information. CTB Inc. P.O. Box 2000 • Milford, Indiana 46542-2000 • U.S.A. Phone (574) 658-4101 • Fax (877) 730-8825 E-Mail: ctb@ctbinc.com •...
Need help?
Do you have a question about the Chore-Tronics 3 Control and is the answer not in the manual?
Questions and answers