HP StoreEver MSL4048 Getting Started Manual
Tape library
Hide thumbs
Also See for StoreEver MSL4048:
- User and service manual (220 pages) ,
- Quickspecs (30 pages) ,
- Quickspecs (26 pages)
Table of Contents
Advertisement
HPE StoreEver MSL4048 Tape
Library
Getting Started Guide
Abstract
This guide provides information necessary to install the MSL4048 Tape Library. This guide is intended for system administrators
and other users who need physical knowledge of the library.
*AK380-96020*
Part Number: AK380-96020
Published: December 2015
Edition: 10
Advertisement
Table of Contents

Related Manuals for HP StoreEver MSL4048


Summary of Contents for HP StoreEver MSL4048
- Page 1 HPE StoreEver MSL4048 Tape Library Getting Started Guide Abstract This guide provides information necessary to install the MSL4048 Tape Library. This guide is intended for system administrators and other users who need physical knowledge of the library. *AK380-96020* Part Number: AK380-96020...
- Page 2 © Copyright 2006, 2015 Hewlett Packard Enterprise Development LP The information contained herein is subject to change without notice. The only warranties for Hewlett Packard Enterprise products and services are set forth in the express warranty statements accompanying such products and services. Nothing herein should be construed as constituting an additional warranty.
-
Page 3: Table Of Contents
Contents 1 Overview......................4 Front panel ............................4 Library back panel..........................4 Tape drive back panels.........................5 FC..............................5 SAS..............................5 Power supply LEDs..........................6 Library user interfaces..........................7 Using the OCP..........................7 Control keys..........................7 LED indicators..........................7 Using the RMI..........................7 2 Planning the installation..................9 Planning the FC configuration......................9 Planning the SAS configuration......................9 Choosing a location..........................10 3 Installing the library....................11 Preparing the host..........................11... -
Page 4: Overview
1 Overview The tape library provides a compact, high-capacity, low-cost solution for simple, unattended data backup. This unique design houses up to 12 tape cartridges for each U of height, with easy access to tape cartridges via removable magazines and a mailslot. Each magazine can hold up to 12 tape cartridges. -
Page 5: Tape Drive Back Panels
Tape drive back panels LTO-4 and LTO-5 full-height 1. Magazine release hole 2. Fan 3. FC port A 4. FC port B (when present) 5. Tape drive Ethernet port (when present) 6. Tape drive power indicator LTO-5 half-height and LTO-6 1. -
Page 6: Power Supply Leds
Power supply LEDs 1. Blue AC power is connected. 2. Yellow Fan failure. The fan is running too slow or is defective. 3. Green The power supply is producing good power for the library. Overview... -
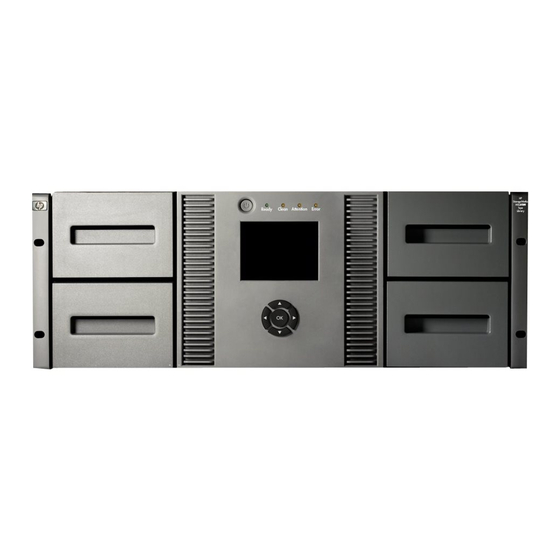
Page 7: Library User Interfaces
Library user interfaces The library has two user interfaces: Operator control panel (OCP). From the OCP you can operate the library from the front panel. Remote management interface (RMI). From the RMI you can monitor and control the library from a web page. You can access most library functions from the RMI. Using the OCP The OCP has a power button, four LEDs, five control keys, and an LCD screen. - Page 8 When possible, use the RMI as the primary library interface because the web interface provides access to additional features, includes online help, and is easier to use. However, the RMI is not required to use the library, except to configure advanced features, such as SNMP, IPv6, encryption, LTFS, HPE TapeAssure, logical libraries, and path failover.
-
Page 9: Planning The Installation
2 Planning the installation Planning the FC configuration You can connect the FC tape drive directly to the server with an HBA or indirectly through a SAN with an FC switch. Most supported tape drives have two FC ports. Only one port can be used at a time, but both ports can be connected for path failover or with software that supports multipath. -
Page 10: Choosing A Location
Cable requirements Most SAS HBA ports have four SAS channels. A tape drive uses one channel, so each HBA port can support up to four tape drives. You can use a cable with one connector on each end, but only one channel will be used. The SAS fanout cable recommended for use with the library can connect up to four SAS tape drives to a single SAS HBA port. -
Page 11: Installing The Library
3 Installing the library IMPORTANT: The shipping lock must be removed for the robotics to operate properly. A robot move error is displayed if the shipping lock is not removed. See “Removing the shipping lock” (page 12). WARNING! When moving the library, to reduce the risk of personal injury or damage to the library: Observe local health and safety requirements and guidelines for manual material handling. -
Page 12: Unpacking The Shipping Container
Unpacking the shipping container CAUTION: If the temperature in the room where the library will be installed varies 15ºC (30ºF) from the room where it was stored, allow it to acclimate to the surrounding environment for at least 12 hours before unpacking it from the shipping container. Unpacking the library: Clear a level work surface near where you will place the library. -
Page 13: Installing The Library In A Rack
Installing the library in a rack The library is installed easily into the HPE Standard Series Racks, HPE Enterprise Series Racks, HPE Advanced Series Racks, HPE Rack System/E, and earlier generation HPE 9.5 mm Square-Hole Racks. You need a #2 and a #3 Phillips screwdriver for this procedure. Select the hardware packet for your rack Packet label Applicable racks... -
Page 14: Install The Library In The Rack
Install the library in the rack Slide the library onto the rails. From the front of the library, secure the front bezel to the rack using a #2 Phillips screw driver placed through the small holes in the mounting bracket. Tighten the captive screws on each side of the library until they are seated. -
Page 15: Installing A Redundant Power Supply
Tighten the blue captive screws with your fingers to secure the tape drive to the chassis. CAUTION: All drive bays without tape drives installed must have drive bay covers installed. Installing a redundant power supply If you have a redundant power supply for the tape library, you can install it now or wait until the installation process is complete. -
Page 16: Connecting The Fc Cable
Connecting the FC cable Remove the FC port caps if necessary. Attach one end of the FC cable to Port A on the tape drive. Attach the other end of the FC cable to a switch or HBA. NOTE: Using both ports on a dual-port drive requires path failover or multipath capability in the host application. -
Page 17: Powering On The Library
Powering on the library WARNING! To reduce the risk of electric shock or damage to the equipment: Use an approved power cord. If you have questions about the type of power cord to use, contact your authorized service provider. You must use a power cord rated for your product and for the voltage and current marked on the electrical ratings label of the product. -
Page 18: Setting The Administrator Password
Access to this feature requires the administrator password, if set. To set the date and time from the OCP: On the front panel, highlight Configuration > Set Date and Time. Press OK. Press OK to select the first block that can be edited. Use the Left and Right control keys to move between digits in the Date and Time fields. -
Page 19: Loading Cartridges
LTO Ultrium tape cartridges have a recessed area located on the face of the cartridge next to the write-protect switch. Use only this recessed area for attaching the adhesive-backed bar code label. Only apply labels as designated. IMPORTANT: The misuse and misunderstanding of bar code technology can result in backup and restore failures. -
Page 20: Verifying The Installation
Verify the connection between the library and the host: Install the Library & Tape Tools Diagnostic/Installation Check Utility onto the host computer. This utility verifies that the unit is connected and communicating with the host server. It also verifies that the device is functioning and provides diagnostic information. Run the Library &... - Page 21 in the kit to install and configure the Encryption Kit. The Encryption Kit is ordered separately. For information about the kit, see: http://www.hpe.com/storage/tape Configuring additional features...
-
Page 22: Ordering Media
4 Ordering media Use Hewlett Packard Enterprise storage media to prolong the life of the library and tape drives. To learn more about, or to purchase media, see: http://www.hpe.com/storage/storagemedia LTO-4 Ultrium 1760 and 1840 tape drives Cartridge type Part number HPE LTO4 Ultrium 1.6 TB RW Data Cartridge, green C7974A HPE LTO4 Ultrium 1.6 TB WORM Data Cartridge, two-tone (green and gray) -
Page 23: Related Information
5 Related information Product documentation Product documentation is available in the Storage section of the Hewlett Packard Enterprise Information Library: http://www.hpe.com/info/enterprise/docs To find documents for this product: In the Products and Solutions pane, select StoreEver Tape. Select the types of documents and your language. In the StoreEver Tape pane, select your library. -
Page 24: A Ocp Menu
A OCP menu OCP menu...
Need help?
Do you have a question about the StoreEver MSL4048 and is the answer not in the manual?
Questions and answers