Table of Contents
Advertisement
Advertisement
Table of Contents

Related Manuals for FLIR FXV101–H


Summary of Contents for FLIR FXV101–H
- Page 1 Instruction Manual FLIR FX...
-
Page 3: Instruction Manual
Instruction Manual FLIR FX #LX400034; r.16787/16787; en-US... -
Page 5: Table Of Contents
Back ..................7 Indoor Stand................7 How do I activate manual recording? .............8 How do I view recordings on my computer?..........9 How do I wall mount my FLIR FX camera? ..........11 FLIR FX Specifications ............... 13 Notices..................... 14 #LX400034; r.16787/16787; en-US... -
Page 7: Safety Precautions
• If using an accessory with replaceable batteries, only use replacement batteries speci- fied by FLIR. Use of other types of batteries may damage the product. • The camera makes a clicking noise when changing between day and night modes. This clicking is normal and indicates that the camera filter is working. -
Page 8: What Is Included With My Flir Fx Camera
What is included with my FLIR FX camera? The standard model FXV101–H comes with the following components: • Camera with indoor stand. • microUSB cable. • 8GB microSD card pre-installed in the camera. • Power adapter. • Power points for European and UK use. -
Page 9: How Do I Set Up My Flir Fx Camera
How do I set up my FLIR FX camera? 1. Connect the included USB cable to the power adapter. Connect the other end of the USB cable to the camera and connect the power adapter to a power outlet. Note •... - Page 10 How do I set up my FLIR FX camera? 3. Download the FLIR FX app from the App Store or Google Play Store. Start up the app and follow the start up wizard in the app to connect to the camera.
-
Page 11: What Are The Parts Of My Flir Fx Camera
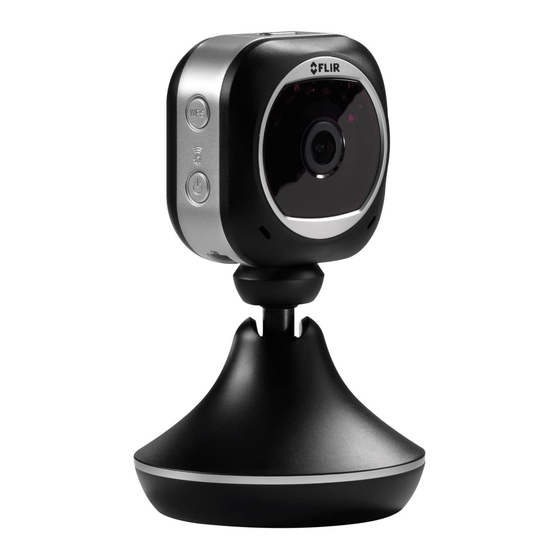
What are the parts of my FLIR FX camera? 4.1 Front 1. Infrared night vision LEDs: Allows the camera to see up to Xft / Xm in total darkness. 2. Lens: Provides a wide-angle 160 degree field of view. 3. Microphone: Allows you to hear the area around the camera. -
Page 12: Left
What are the parts of my FLIR FX camera? 4.3 Left 1. WPS button: Used to connect the camera to a WPS-compatible router (not included). Press the WPS button on the router and then press the WPS button on the camera to make the connection. -
Page 13: Back
What are the parts of my FLIR FX camera? 4.5 Back 1. Direct mode LED: Indicates the camera is in Direct (AP) mode. When the camera is in Direct mode, you can connect to the WiFi hotspot created by the camera to connect to it in areas without access to wireless. -
Page 14: How Do I Activate Manual Recording
How do I activate manual recording? While the camera is on, press the REC button on the top of the camera. The button will be- gin flashing red to indicate recording is in progress. Press the REC button again to stop recording. -
Page 15: How Do I View Recordings On My Computer
Note This section covers local recordings saved to the camera’s microSD card only. If you have a subscription plan and have recordings saved in the cloud, you will need to use the FLIR FX app to view those recordings. To view video recordings from the camera microSD card on a computer running Windows: 1. - Page 16 How do I view recordings on my computer? 3. The camera saves videos and images onto the microSD card in folders based on the type of recording. For example, the USER folder contains manual video recordings. Double-click on the folders to access the video files. Note The camera saves video files to the microSD card in .mp4 format and saves images in .jpg format.
-
Page 17: How Do I Wall Mount My Flir Fx Camera
How do I wall mount my FLIR FX camera? The indoor stand allows you to simply mount the camera to a wall. An extra mounting plate is provided so you can have a permanent mounting place for the camera while still being able to move the camera around when needed. - Page 18 How do I wall mount my FLIR FX camera? 2. Use a pencil to mark holes for the mounting screws. 3. Drill holes where marked using a drill. 4. Tap the included drywall anchors into the holes with a hammer.
-
Page 20: Notices
Changes or modifications made to this equipment not expressly approved by FLIR Sys- tems, Inc. may void the FCC authorization to operate this equipment. -
Page 21: Federal Communication Commission Interference Statement
Notices Audio Recording: Audio recording without consent is illegal in certain jurisdictions. FLIR Systems, Inc. assumes no liability for use of its products that does not confirm with local laws. Need Help Visit www.flir.com/fx to access the FLIR FX knowledgebase or contact technical support or customer service. - Page 24 Disclaimer Specifications subject to change without further notice. Models and accessories subject to regional market considerations. License procedures may apply. Products described herein may be subject to US Export Regulations. Please refer to exportquestions@flir.com with any questions. Publ. No.: LX400034...
Need help?
Do you have a question about the FXV101–H and is the answer not in the manual?
Questions and answers