
Related Manuals for Krups KP 5000


Summary of Contents for Krups KP 5000
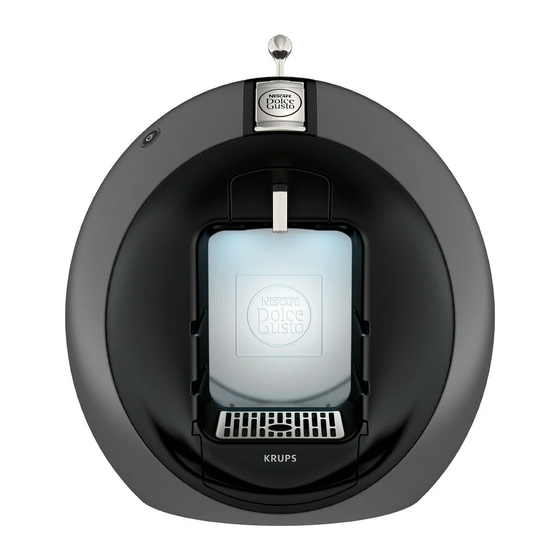
- Page 1 S E R V I C E M A N U A L B E V E R A G E C E N T E R KP 5000_CHARCOAL GREY KP 5002_WHITE & CHOCOLATE KP 5005_COOL GREY KP 5006_METAL RED ...
- Page 2 M A I N C O M P O N E N T S M A I N C O M P O N E N T S Overview of external parts 1. Water tank 10. Capsule holder 2. Power button, illuminated 11. Drip grid 3. Cold water indicator 12. Drip tray 4. ...
- Page 3 M A I N C O M P O N E N T S Overview of internal parts 1. Extraction head 6. NTC temperature sensor 2. Hot water pressure hose 7. Thermo fuses (2x) 3. Cold water pressure hose 8. Thermoblock 4. PCB assembly with power button 9. main pcb 5. Water tank connector 10. Pump...
- Page 4 M A I N C O M P O N E N T S Overview of extraction head parts Top rear view. Bottom front view. 1. Locking handle 5. Microswitch 2. Reed contact 6. Cold water pressure hose 3. Selection lever 7. Hot water pressure hose 4. Shutter assembly 8. Injector plate (with cold/hot water indicators) ...
- Page 5 M A I N C O M P O N E N T S Overview of rating plate The rating plate • can be found on the underside of the machine, • may be of varying design, depending on the brand, • carries the following information:...
- Page 6 M A I N C O M P O N E N T S Water circuit 1. Water tank with valve 7. Position hot 2. Filter and connector 8. Fconnector 3. Pump 9. Injector plate 4. Thermoblock 10. Capsule holder 5. Selection lever 11. Injector 6. Position cold ...
- Page 7 M A I N C O M P O N E N T S Technical data Mains voltage Europe (UK, CH, D, AU, F, I, SP, PT, CZ, SK, PL, NL) ...... 230 V / 50 Hz Russia .......................220 V / 50 Hz USA / Canada ...................120 V / 60 Hz Mexico .......................127 V / 60 Hz Brazil ......................127 V / 60 Hz Japan.................... 100 V / 5060 Hz South Korea ....................220 V / 60 Hz Approvals ...............VDE, SEV, CE, UL, CUL, JET Power consumption (at all voltages and frequencies) ...... max. 1’500 W Ratings (approx.) Preheating ......................8.0 Wh 1 small cup (40 ml, Espresso) ................3.0 Wh 1 large cup (110 ml, Lungo) ................ 8.3 Wh 1 travel mug (350 ml, Powder) ................ ...
- Page 8 M A I N C O M P O N E N T S Various data Preheating time..................approx. 30 sec. Pump pressure max................. 13.5 ± 1.5 bar Noise ......................max. 65 dB(A) Dimensions [mm] Dimensions (D x W x H)..............196 x 316 x 312 mm Power cord length ..................approx. 1 m Weight of machine (without water)............ approx. 3.7 kg Distance drip grid to coffee outlet [mm] Espresso ......................81 mm Mug ........................125 mm Tall glass ......................155 mm Travel mug ......................183 mm...
- Page 9 O P E R A T I N G O P E R A T I N G Machine status After switching on, an automatic selftest is performed to check if the capsule holder is inserted (with reedswitch) NTC is connected, NTC is short circuited, the thermoblock reaches the working temperature in about 30 seconds. Operating modes and detected failures are indicated by LED signals of the power button as listed in the following table: Operating modes Power button LED signals Economy mode / Off — Heating up / selftest red, blinking, approx. 30 sec. Ready green, steady After beverage preparation (cool red, blinking, approx. 5 sec. ...
- Page 10 O P E R A T I N G Preparation, first use The new machine has to be rinsed properly before first use according to the following A timer or stop sequence: watch is helpful to observe the rinsing times. 1. Rinse water tank at first. Then fill 2. Check that capsule holder is empty water tank with fresh, potable water. (no capsule) for the following rinsing precedure. The machine will not work without a capsule holder inserted. Do not insert a capsule yet.
- Page 11 O P E R A T I N G ) 10. Set selection lever at position 11. Set selection lever at middle position (hot water). Let water run through to stop rinsing. for approx. 60 sec. 12. Remove and empty jug. 13. Refill and insert water tank. 14. Remove protective foil from drip grid. 15. Insert drip tray. The drip tray is The machine is now ready for use. height-adjustable in 3 levels.
- Page 12 O P E R A T I N G Preparing a beverage Choose an appropriate cup size for beverage. The locking handle can only be actuated if the selection 1. Check if water tank is filled. 4. Place a cup under outlet. lever is in the middle 2. Check if machine is ON and ready. 5. Open locking handle and pull out position.
- Page 13 O P E R A T I N G 11. After power button lights up green: 12. Discard capsule in capsule bin. Risk of burning open locking handle and pull out from hot capsule. capsule holder. Do not touch capsule immediately after use. 13. Clean capsule holder. 14. Remove cup or proceed with second capsule of beverage.
- Page 14 O P E R A T I N G Economy mode (auto shutoff function) This feature helps to save electricity by reducing the amount of power the machine draws while it is not in use and helps protect the life of the machine. For longer periods of standstill (vacation etc.): •...
- Page 15 O P E R A T I N G Empty fluid system for shipping For shipping a machine, it is important to empty the fluid system. 1. Empty water tank and drip tray. 2. Check that capsule holder is empty. The machine will 3. Reinsert capsule holder. not work without inserted capsule holder. ( ) Prolonged dry- 4. ...
- Page 16 T R O U B L E S H O O T I N G T R O U B L E S H O O T I N G Checklist The checklist enables you to rapidly locate faults on the machine and to initiate appropriate repair action. Follow the check procedure. Repair any faults found and check if the machine is operating perfectly. Check Further action / Symptoms Action / repair work procedure repair work 1.1 Parts of housing are broken or damaged (e.g. snap connec ...
- Page 17 T R O U B L E S H O O T I N G Check Further action / Symptoms Action / repair work procedure repair work 3.1 Water tank is leaking on YES Replace water tank — transport NO Go to point 3.2 YES a) Check if snap connection YES Go to point b) for water tank on housing back is NO Replace housing back 3 Fill water tank functional 3.2 Water tank is leaking when it YES b) Try new water tank and YES Replace connector (tank is inserted in the machine check if it is still leaking to pump), filter and water tank NO Go to point 4 NO Replace old water tank YES a) Check if magnets of ...
- Page 18 T R O U B L E S H O O T I N G Check Further action / Symptoms Action / repair work procedure repair work NO Replace NTC tempera YES a) Check if NTC temperature ture sensor. sensor is functional YES Go to point b) 4.2 Indicator (LED) flashes red YES Replace PCB assembly 3 times a second (error mode) YES b) Check if electrical wires are functional NO Replace defective(s) NO Go to point 4.3 wire(s). 4 Plug into mains and switch ON 4.3 Machine is working without YES Replace the extraction head machine capsule holder ...
- Page 19 T R O U B L E S H O O T I N G Check Further action / Symptoms Action / repair work procedure repair work NO Change NTC tempera YES a) Check if NTC temperature ture sensor. sensor is functional YES Go to point b) YES Descale the fluid system 5.3 Hot water temperature is too YES b) Fluid system is scaled? high (more than 95°C / 203 °F) NO Go to point 5.5 YES Replace the pump. YES d) Flow rate of pump out of range? 5 Checks while NO Go to point 5.4 preparing a beverage 5.4 Cold water temperature too YES Replace the extraction YES Valve malfunction? high (5°C / 41°F more than water ...
- Page 20 T R O U B L E S H O O T I N G Check Further action / Symptoms Action / repair work procedure repair work YES a) Check if drip tray and drip grid are inserted correctly, set it right if necessary NO Go to point b) YES b) Pump is not firm in its 7.1 Check vibrations while YES Plastic beaker is moving support, replace it if necessary putting a plastic beaker on the around drip grid NO Go to point c) 7 Check for loud noises or vibrations YES c) Check if pressure hoses or silicone elbow touch the housing NO Go to point 7.2 YES Pump is not firm in its 7.2 Check vibrations on the YES The water tank is vibrating on support, replace it. water tank (water is waving) the machine? NO Go to point 8 8 Perform function tests. 9 Perform final cleaning. No trouble found during the check procedure? Ask SEB / Krups aftersales service for further details in order to make a decision. End of check procedure. ...
- Page 21 R E P A I R R E P A I R This chapter contains special security and assembling notes. Non-observance can lead to injuries and damages! Tools and repair accessories With the following tools, all described repair work can be done: A pin-torx screw head looks like this: Tool Application Torx screwdriver for security screws, PinTX 10 Housing back screw connections Torx screwdriver for TX 30 Thermoblock screw connection Phillips screwdriver no. 1 and 2 Main PCB screw connection Screwdriver with 4 mm width Open latches and snap connections Pointed pliers NTC temperature sensor Flat receptacles, hose clips, filter element of ...
- Page 22 R E P A I R Removing injector plate, deblocking of injector Solid residues in the water circuit can block the injector completely. An example is the development of calcium particles if the machine is not descaled periodically. Therefore this error appears during descaling frequently. 1. Remove water tank. 3. Take cleaning needle out of support 2. Remove cup holder. in housing back. Danger of injury - sharp pointed injector! The extraction head is adjusted to a spe- cific injector plate. Therefore do not exchange the injector plate or mix up different injector plates.
- Page 23 R E P A I R If upper side of injector plate is wet and badly soiled, the sealing ring is defect. In that case replace com- plete extraction head. 6. Examine upper side of injector plate. 7. Clean interior space of sealing ring with a toothpick etc. Alternatively use a pin or needle with dia.
- Page 24 R E P A I R 9. Check and clean outlet of Fconnector in particular and injector plate holder in general. 10. Perform a complete descaling resp. rinsing cycle without mounted injector plate. It is important to flush the machine thoroughly prior to the assembly of the injector plate. Otherwise remaining impurities can block the injector again. Assembly information 1. Insert the same injector plate with rear side first. Do not exchange 2. Then press injector plate against plate holder till latch at the front side engages. the injector plate.
- Page 25 R E P A I R General disassembly The general disassembly General disassem- makes important components accessible for repair or replacement, bly is presented as step by step instruction. is required for the leakage check. Pay attention to the sequence of disassembly Safety information steps, e.g. housing front cannot be removed before housing back is WA R NI NG ...
- Page 26 R E P A I R Removing housing back 2. Loosen 6 security screws on the housing back (D). 3. Remove housing back.
- Page 27 R E P A I R Removing housing front 4. Disconnect cable plug (E) of cup lighting on front of machine (two different wiring Risk of damage if versions depending on manufacturing date). cable plug is not 5. At the back of machine: disconnected. Push housing front (F) to the front with your thumbs. In case of problems open 2 latches on each side of housing front (F) with the help of a screwdriver. 6. Push in housing front at the top to loosen remaining latch. 7. Remove housing front. The water tank connector and the cup lighting can be replaced now with this partial disassembly.
- Page 28 R E P A I R Removing housing right 8. At the bottom of centerpart: Open 3 snap connections of housing right (G) with the help of a screwdriver. 9. Use a screwdriver to release 3 latches at the back of centerpart.
- Page 29 R E P A I R 10. Use a plastic paletteknife (or an obsolete plastic card) to release 4 snap connec tions at the front of centerpart. 11. Finally swing up housing right (G). 12. Open remaining snap connection and central latch at the top carefully. 13. Remove housing right.
- Page 30 R E P A I R Removing housing left Housing right (G) already removed. 14. At the bottom of centerpart: Open 3 snap connections of housing left (H) with the help of a screwdriver.
- Page 31 R E P A I R Housing right (G) already removed. 15. Use screwdriver to release 3 latches of housing left (H) at the back side of center part.
- Page 32 R E P A I R 16. Use an obsolete plastic card (or a screwdriver with the utmost care) to release 4 snap connections at the front side of centerpart. 17. Remove housing left (H) a little bit from centerpart to gain access to PCB assembly Do not stress con- (I). necting cable of 18. At the inside of housing left: Release 4 hooks by hand successively and detach PCB assembly (I). small PCB (part of PCB assembly).
- Page 33 R E P A I R 19. Finally swing up housing left (H) and open remaining snap connection and central latch carefully. 20. Remove housing left. Removing spacers left and right 21. Use screwdriver to open 4 latches and remove spacer (J).
- Page 34 R E P A I R General assembly information • Reassemble machine in reverse order of general disassembly. Assembling spacers • Left and right spacers are interchangeable but have a special fitting position. Assembling housing left / right • Before assembling, check housing left and right for scratches, defect snap connec tions or latches. Replace if necessary. • Insert housings at the bottom of centerpart at first. • Pay attention to correct fitting position of PCB assembly in housing left. Check function of power button after assembly (audible click). • Make sure that all snap connections and latches of housing left and right are closed and locked. Pay special attention to the snap connection (K) between the two housing parts at the top.
- Page 35 R E P A I R Assembling housing front • Put connector plug (E) of cup lighting through opening in centerpart first. • Snap in housing front (F) with its upper latch (L) at first. • Reconnect plug (E) of cup lighting after assembly of housing front.
- Page 36 R E P A I R Assembling housing back • Insert housing back (D) with its 2 pins at the bottom of centerpart first. • Fasten 6 screws, starting with the 2 screws at the bottom. Do not overturn screws when • Check if cleaning needle is attached to housing back. Replace if missing. assembling housing back.
- Page 37 R E P A I R Replacing water tank connector 1. Remove housing back first (see page 28 and following). 2. Unlatch water tank connector (M) with screwdriver. 3. Remove water tank connector from support and pull off hose. Assembly information • Check that filter element and gasket are inserted correctly. Otherwise the water tank can leak or the water tank valve does not open.
- Page 38 R E P A I R Replacing cup lighting 1. Remove housing front first. 2. Press with screwdriver at plastic lens of each cup light (N) to remove it from housing front. 3. Replace complete cup lighting assembly. Assembly information • Insert plastic lens of cup lighting (N) from above into support like shown. Then turn plastic lens clockwise till it snaps in place. • Place connection wires between cup lights under latch (L) of housing front.
- Page 39 R E P A I R Replacing PCB assembly The PCB assembly consists of The PCB of the power button is part a main PCB (O) of the PCB assembly and a small PCB (P) for the power button. and cannot be replaced separatedly. 1. Remove housing left first. 2. Unplug 3 connectors from main PCB: Valve Detection (to microswitch in extraction head) Capsule Holder (to reed contact in extraction head) NTC (to thermoblock) 3. Unplug pigtail of main pcb from cup lighting assembly. 4. Unplug 4 flat receptacles from main pcb: Pump Line Neutral Heater ...
- Page 40 R E P A I R The flat receptacles on the main PCB have a special connector latching. Press down lever at first, then pull receptacle. 5. Loosen central fastening screw. Do not lose special 6. Remove special plastic washer. plastic washer (see 7. Remove PCB assembly together with protective cover. detail). 8. Use screwdriver to detach protective cover (Q) from main PCB (O). ...
- Page 41 R E P A I R Assembly information The PCB assembly is sensible to elec- trostatic discharge - use safety measures. • For handling the new PCB assembly, the service technician must be earthed using an earthing strap. • Insert main PCB (O) with its corners into the guiding slots of the protective cover (Q) first. Then press main PCB down and lock it in place. • Make sure that the main PCB is screwed with the special plastic washer to the centerpart. • For correct wiring refer to electrical wiring diagrams.
- Page 42 R E P A I R Replacing power button 1. Remove housing left first. 2. Release 4 hooks on housing left sucessively and push out cap (R) of power button. Assembly information • Before pressing in, align cap (R) of power button at first.
- Page 43 R E P A I R Replacing pump Depending on sup- plier, the body of the pump can have 3 dif- ferent colors. 1. Remove housing left and spacer left first. 2. Unplug flat receptacle (S) from pump (T). 3. Unplug pump wire (U) from main pcb. The flat receptacles have a special connector latching. Press down lever at first, then pull receptacle. 4. Remove silicone elbow (V) from pump. 5. Remove pressure hose (W) with clip from Tpiece of extraction head. The pressure hose and clip have to be discarded together with Always use new clips for pressure hose assembly.
- Page 44 R E P A I R 6. Pull out rubber strap (X) together with pump (T) as follows: Pull rubber strap at a groove by hand. Simultaneously insert a small screwdriver between end of groove and rubber strap. Swivel rubber strap out of groove with screwdriver. Continue with next groove. The rubber strap (X) sits in the grooves of the centerpart very tightly. Use moderate force and a screwdriver for removal. 7. Remove rubber strap from pump. 8. Replace defective pump. ...
- Page 45 R E P A I R Assembly information • Always exchange a defect pump together with its thermal cut off fuse (Y). The thermal cut off • Remove main PCB (O) first (see page 42) and lead pressure hose of new pump fuse has different through rubber bushing (Z) in centerpart. designs depending on the pump manufacturer. Ensure that the rubber strap (X) with the new pump is pushed back to the end positions in all 4 grooves of the centerpart. • Check pump wiring according to the wiring diagram.
- Page 46 R E P A I R • Check the mounting position of the pressure hose connector at the top of the pump The white plastic (T). If necessary, adjust connector towards centerpart with a fork wrench no. 12 (see Iid on the pump is detail). rotatable and has a square seat for the fork wrench. Make sure that the pump pressure hose does not touch housing or PCB support to avoid noise emission.
- Page 47 R E P A I R Assembling a new NTC temperature sensor 1. Remove housing right with spacer and housing left first. 2. Unplug NTC connector from main PCB (O). NTC wire routing beginning with first production batch (obsolete) For better identifica tion, NTC wires are shown in black.
- Page 48 R E P A I R New NTC wire routing For better identifica tion, NTC wires are shown in black. 3. Lead connector through opening in centerpart. Different NTC wire routing depending on 4. Remove NTC wires from cable guides on extraction head. machine version. 5. Lead connector through second opening in centerpart. 6. On thermoblock (Z) pull defect NTC sensor (a) out of socket with a pair of pointed pliers. ...
- Page 49 R E P A I R 7. Apply a sufficient amount of standard heat conducting paste into socket (b). 8. Attach a new clamp spring (c) on the new NTC temperature sensor (a). Use a pair of pliers to 9. Tilt clamp spring on sensor body. fix the spring. 10. Insert NTC temperature sensor (a) in socket (b) partly so that both spring ends are in the socket already. 11. Place a piercer (or the blade of a screwdriver) on opposite clamp shoulder. 12. Drive clamp spring down the socket with light blows of a hammer. Assembly information • Check that the new NTC temperature sensor is pressed down at the bottom of the socket. • Route NTC wires according to machine version. Wrong NTC wire routing can cause • Plug in NTC connector in main PCB. malfunctions.
- Page 50 R E P A I R Replacing thermoblock 1. Remove housing right with spacer and housing left first. Pay attention to residual water flow- 2. Unplug flat receptacles from thermoblock (Z). ing out from the ther- moblock. The flat receptacles have a special connector latching. Press down lever at first, then pull receptacle. 3. Unplug NTC connector from main PCB. 4. Remove NTC cable from cable guides in centerpart.
- Page 51 R E P A I R 5. Loosen screw and remove ground connection (d), fuse holder (e) and thermo fuses (f). 6. Remove cold water pressure hose (g) with clip from Tpiece of extraction head. The pressure hoses and clips have to be discarded together with Always use a new clip for pressure hose assembly. the defect thermoblock.
- Page 52 R E P A I R 7. Cut through hot water pressure hose (h) like pictured above. Do not damage cold water pressure hose with cutter. 8. Pull cold water pressure hose (g) through rubber bushings. 9. Loosen screw (i) and remove thermoblock with insert (j). 10. Check if support on centerpart has melting marks due to overheating of the defect thermoblock. The machine is irreparable if a new thermoblock cannot be screwed on centerpart properly due to melting marks.
- Page 53 R E P A I R Assembly information The new thermoblock assembly includes thermoblock, NTC temperature sensor, power cord and fuse holder. 1. Cut off new cold and hot water pressure hoses from spare silicone tube. 2. Lead new cold water pressure hose through rubber bushings and attach it to T connector of extraction head. 3. Cut Hconnector (l) in two with a side cutter. 4. Use one half of the Hconnector to couple the hot water pressure hoses.
- Page 54 R E P A I R Replacing power cord with thermo fuses Defective thermo fuses can only be replaced together with the power cord. Power cord wires have country-spe- cific color code. 1. Remove housing right and left with spacers. 2. Unplug 2 flat receptacles from main PCB (O). 3. Unplug flat receptacle from pump (T). The flat receptacles have a special connector latching. Press down lever at first, then pull receptacle. 4. Remove line and neutral wires from cable guides in centerpart. 5. Unplug flat receptacle from thermoblock (Z). 6. Loosen screw and remove fuse holder (e).
- Page 55 R E P A I R 7. Unlatch water tank connector (M) with screwdriver. 8. Replace defective power cord (m). Assembly information • Check power cord wiring according to the wiring diagram. • Check wiring layout (cable guides, cable ties etc.).
- Page 56 R E P A I R Fastening a shaky extraction head After impact stress, falling down, holding the locking handle and lifting the machine etc. the latch and screw connections between extraction head and centerpart can become loose. The extraction head is mounted on the centerpart with 2 addi- tional screws. 1. Remove housing right and left. 2. Check if the 2 screws (n) are present. 3. Replace or fasten screws. Use only torx 4. Check if extraction head is steady now. screws 3 x 15 mm for thermoplastics.
- Page 57 R E P A I R Replacing extraction head 1. Remove housing right and left with spacers. 2. Unplug 2 connectors from main PCB (O): Valve Detection (to microswitch in extraction head) Capsule Holder (to reed contact in extraction head). Wire routing beginning with first production batch (obsolete) Depending on the machine version, there are two different wire routings at the back of the extraction head. 3. Lead connectors through opening in centerpart. 4. Remove NTCwires from cable guides on extraction head.
- Page 58 R E P A I R New wire routing 5. Lead connectors through opening in centerpart. 6. Remove NTCwires from cable guides on extraction head. Rear view. The pressure hoses and clips have to be discarded together with the defect extraction head. 7. Remove both hoses from thermoblock (Z). 8. Remove hose from top of pump (T). 9. Pull hoses through rubber bushings in centerpart.
- Page 59 R E P A I R Always use a new clip for pressure hose assembly. The new extraction head is delivered without selection lever (p) and locking handle (r). These parts have to be detached from the defect extraction head. 10. Screw out selection lever (p). Lift locking handle 11. Release 4 latches and remove shutter assembly (q). to pull out shutter assembly.
- Page 60 R E P A I R 12. Release latch with screwdriver and pull off locking handle (r). 13. Remove 2 screws (n).
- Page 61 R E P A I R Danger of injury. Sharp injector needle. 14. Press with fingers against injector plate continuously. The pressure 15. Place tip of screwdriver above first latch. against the injector 16. Turn screwdriver till latch opens. plate prevents the engag- 17. Repeat procedure with other 3 latches in numbered sequence. ing of the latch after the 18. Remove extraction head (s) from coffee machine. screwdriver is removed.
- Page 62 R E P A I R Assembly information The new extraction head is equipped with a Tconnection and the hot water pressure hose. 1. Cut off new cold water pressure hoses from spare silicone tube. 2. Lead new pressure hoses through rubber bushings and connect them. Always use new clips for pressure hose assembly. 3. Press extraction head onto centerpart till all 4 latches engage. 4. Screw down extraction head tightly. 5. Route wires to main PCB according to machine version. Wrong wire routing can cause malfunc- tions.
- Page 63 W I R I N G D I A G R A M W I R I N G D I A G R A M Wiring diagram for 100V / 120V / 230V mains voltage ...
- Page 64 F U N C T I O N T E S T S F U N C T I O N T E S T S The following function tests guarantee the correct function of the machine: • Heating up time • Priming of fluid system • Measuring temperature of hot beverage • Measuring flow rate of hot beverage Function test equipment ...
- Page 65 F U N C T I O N T E S T S Heating up time If the heating up time is more than 40 sec., change the main pcb. 1. Plug into mains and press power 2. Check the heating up time (time until button. power button stops blinking). The time must be not more than 40 sec. Priming of fluid system Prime the fluid sys- tem before pressure test and flow rate meas- urement.
- Page 66 F U N C T I O N T E S T S Measuring temperature of hot beverage 1. Switch machine ON. 4. Insert capsule holder in machine and 2. Place a measuring beaker under close locking handle. ) outlet. 5. Set selection lever at position 3. Insert an espresso capsule in (hot). capsule holder. 6. Wait until 20 ml coffee has flown in 7. Measure the coffee temperature with the measuring beaker. a temperature sensor approx. 5 10 mm below the outlet. Coffee temperature must be 85 °C ± 5 °C (185 °F ± 41 °F).
- Page 67 F U N C T I O N T E S T S Measuring flow rate of hot beverage 1. Switch machine ON. 4. Insert capsule holder and push it 2. Place a measuring beaker under down. ) outlet. 5. Set selection lever at position 3. Insert an espresso capsule in (hot). capsule holder. 6. Start timer simultaneously. 7. Wait until 40 ml coffee has flown in the measuring beaker. 8. Stop timer. The measured time must be within 9 15 sec.
- Page 68 F U N C T I O N T E S T S Movability of selection lever 1. Switch machine ON. 3. After heating up, set selection lever ( ) 2. Place a recipient under outlet. at positions (cold) and (hot) separately. The selection lever must move smoothly and stay in positions cold, central and hot. 4. Inspect shutter assembly. The shutter assembly must be clean and undamaged.
- Page 69 M A I N T E N A N C E M A I N T E N A N C E Descaling Do not interrupt Only use KRUPS descaling powder (FO54) never vinegar! descaling proce- Decalcifier is aggressive to surface of casing. dure. Carefully read safety instructions on decalcifier package. Procedure takes approx. 15 min. 1. Fill measuring jug with 0.5 l fresh, 2. Fill water tank with descaling solu ...
- Page 70 M A I N T E N A N C E ) 7. Press and hold power button for at 8. Set selection lever at position least 5 sec, till it starts blinking. (hot). 9. Let hot descaling solution flow into jug for 45 sec. Machine is ready for descaling now (ther moblock temperature monitored at 65 70 °C). ( 10. Set selection lever at middle position 12. Set selection lever at position (stop). (cold). 11. Wait for 5 minutes. 13. Let cold descaling solution flow into jug for 45 sec. 14. Set selection lever at middle position 16. Remove and empty jug. (stop). ...
- Page 71 M A I N T E N A N C E ) 18. Fill water tank with 1 l fresh, potable 21. Set selection lever at position water using a measuring jug. (hot). 19. Reinsert water tank. 22. Let hot water flow into jug for 45 sec. 20. Place empty jug under outlet again. ( 23. Set selection lever at position 25. Set selection lever at middle position (cold). (stop). 24. Let cold water flow into jug for 26. Switch machine OFF. 45 sec. This turns off the descaling mode. 27. Remove and empty jug. 28. ...
- Page 72 M A I N T E N A N C E Daily care and final cleaning Never use detergents to clean the appliance. Clean the appliance only using soft cleaning cloths, sponges or brushes. The water tank must be cleaned with a baby bottle brush. 1. ...
- Page 73 M A I N T E N A N C E 10. Place a jug with enough capactiy 12. Rinse machine with hot water for under outlet. 10 sec. 11. Check that locking handle is closed, machine is switched on. 13. Remove and empty jug. 14. Clean machine with a moistened sponge.
Need help?
Do you have a question about the KP 5000 and is the answer not in the manual?
Questions and answers