Table of Contents
Advertisement
Available languages
Available languages
Quick Links
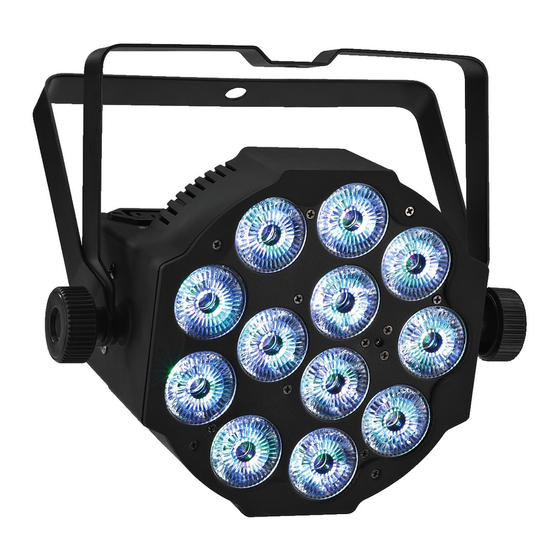
DMX-LED-Scheinwerfer
DMX LED Spotlight
PARL-12 RGBW
Bestell-Nr. • Order No. 38.6890
BEDIENUNGSANLEITUNG
INSTRUCTION MANUAL
MODE D'EMPLOI
ISTRUZIONI PER L'USO
GEBRUIKSAANWIJZING
MANUAL DE INSTRUCCIONES
INSTRUKCJA OBSŁUGI
SIKKERHEDSOPLYSNINGER
SÄKERHETSFÖRESKRIFTER
TURVALLISUUDESTA
ELECTRONICS FOR SPECIALISTS ELECTRONICS FOR SPECIALISTS ELECTRONICS FOR SPECIALISTS ELECTRONICS FOR SPECIALISTS
Advertisement
Chapters
Table of Contents

Related Manuals for IMG STAGE LINE PARL-12 RGBW


Summary of Contents for IMG STAGE LINE PARL-12 RGBW
- Page 1 DMX-LED-Scheinwerfer DMX LED Spotlight PARL-12 RGBW Bestell-Nr. • Order No. 38.6890 BEDIENUNGSANLEITUNG INSTRUCTION MANUAL MODE D’EMPLOI ISTRUZIONI PER L’USO GEBRUIKSAANWIJZING MANUAL DE INSTRUCCIONES INSTRUKCJA OBSŁUGI SIKKERHEDSOPLYSNINGER SÄKERHETSFÖRESKRIFTER TURVALLISUUDESTA ELECTRONICS FOR SPECIALISTS ELECTRONICS FOR SPECIALISTS ELECTRONICS FOR SPECIALISTS ELECTRONICS FOR SPECIALISTS...
- Page 2 Deutsch . . . . . . . . . . Seite English . . . . . . . . . . . Page Français .
- Page 3 MENU DOWN ENTER ➀ SLAVE AUTO AUTO SPEED SOUND SOUND DOWN STROBE ➁...
-
Page 4: Table Of Contents
Inhalt LED-Scheinwerfer Diese Anleitung richtet sich an Benutzer mit Übersicht der Bedienelemente und Grundkenntnissen in der DMX-Steuerung . Bitte Anschlüsse . . . . . . . . . . . . . . . 4 lesen Sie die Anleitung vor dem Betrieb gründ- lich durch und heben Sie sie für ein späteres 1.1 Infrarot-Fernbedienung . -
Page 5: Infrarot-Fernbedienung
1.1 Infrarot-Fernbedienung (Abb . 2) 3 . wenn Funktionsstörungen auftreten . Geben Sie das Gerät in jedem Fall zur Repa- Taste Funktion ratur in eine Fachwerkstatt . alle LEDs aus- und wieder einschalten DMX-Betrieb, Eingabe der DMX-Startadres- • Ziehen Sie den Netzstecker nie am Kabel aus se mit den Zifferntasten (3-stellig) der Steckdose, fassen Sie immer am Stecker SLAVE... -
Page 6: Inbetriebnahme
über das Netz-Verlängerungskabel AAC-170 / SW WARNUNG Der Scheinwerfer muss fachge- erfolgen . Auf diese Weise lassen sich mehrere recht und sicher montiert werden . PARL-12RGBW miteinander verbinden . Wird er an einer Stelle installiert, unter der sich Personen aufhal- ten können, muss er zusätzlich 6 Bedienung gesichert werden (z . -
Page 7: Bedienung Über Das Menü
7 Betrieb ohne DMX-Steuergerät Bei längerem Nichtgebrauch die Batteri- en herausnehmen, damit die Fernbedienung bei einem eventuellen Auslaufen der Batteri- 7.1 Farbstrahler und Stroboskop en nicht beschädigt wird . In diesem Modus strahlt das Gerät konstant in Verbrauchte Batterien dürfen nicht in einer einstellbaren Farbe . -
Page 8: Automatisch Ablaufende Programme
7.2 Automatisch ablaufende Programme Alternativ über den Untermenüpunkt mit der Taste UP oder DOWN die Emp- Zwei Programme können ausgewählt werden: findlichkeit zwischen ein- AUTO 1 = Farbfolge mit Überblendungen stellen und mit der Taste ENTER speichern . AUTO 2 = Farbfolge ohne Überblendungen 1) Das gewünschte Programm mit der Fern- 7.4 Master/ Slave-Betrieb bedienung (Taste AUTO 1 oder AUTO 2) -
Page 9: Dmx-Steuerung
8 DMX-Steuerung verfügbaren Steuerkanäle am Lichtsteuergerät . Informieren Sie sich bitte im Kapitel 10 .1 über DMX ist die Abkürzung für Digital Multiplex die Funktionen, die jeweils möglich sind, und und ermöglicht die digitale Steuerung von wählen Sie danach die Anzahl aus: mehreren DMX-Geräten über eine gemeinsame Steuer leitung . -
Page 10: Weitere Funktionen
9 Weitere Funktionen 10 Technische Daten Steuerprotokoll: ..DMX 512 9.1 IR-Empfänger ausschalten Anzahl der DMX-Kanäle: . . 1, 4, 5 oder 8 Um unbeabsichtigte Bedienung über die Infra- Leuchtmittel: ... 12 × 8-W-RGBW-LEDs rot-Fernbedienung auszuschließen, lässt sich der Abstrahlwinkel: . -
Page 11: Dmx-Funktionen
10.1 DMX-Funktionen 10.1.2 4-Kanal-Modus DMX-Wert Funktion 10.1.1 1-Kanal-Modus Kanal 1: Rot-Anteil 0 – 255 Helligkeit Rot DMX-Wert Funktion Kanal 2: Grün-Anteil 0 – 255 Helligkeit Grün 1 – 4 Farbe 1 (Rot) Kanal 3: Blau-Anteil 5 – 9 Farbe 2 (Grün) 0 –... -
Page 12: Menüstruktur
10.2 Menüstruktur Hauptmenü Firmware-Version MENU DOWN ENTER Temperatur, z.B. 29 °C Infrarot-Empfang Slave-Betrieb Musiksteuerung Modus (Sound) Sou1/ 2 Mikrofonempfindlichkeit (Sensitivity) SEN0… SEN9 Farbstrahlerbetrieb Helligkeit Weiß Helligkeit Blau Stroboskop- Blitzfrequenz St01 … St99 Helligkeit Grün Helligkeit Rot Farbstrahlerbetrieb mit vorgegebenen Farben Farbe (Colour) Co01…... -
Page 13: Operating Elements And Connections
Contents LED Spotlight These instructions are intended for users with Operating Elements and Connections . 13 basic knowledge in DMX control . Please read these instructions carefully prior to operating the 1.1 Infrared remote control . . . . . . . . . . 14 unit and keep them for later reference . -
Page 14: Infrared Remote Control
• 1.1 Infrared remote control (fig . 2) For cleaning only use a dry, soft cloth; never use water or chemicals . Button Function • No guarantee claims for the unit and no li- switch all LEDs off and on again ability for any resulting personal damage or DMX mode, input of the DMX start address with the number buttons (3 digits) -
Page 15: Setting Into Operation
1 . Use a mounting bracket (3) to fasten the information on how to operate the spotlight by spotlight, e . g . by means of a stable mount- means of a DMX light controller can be found ing screw or a support for lighting units in chapter 8 . -
Page 16: Operation By Means Of The Menu
7 Operation without 6.2 Operation by means of the menu To make settings by means of the menu, use DMX Controller the buttons MENU, UP, DOWN and ENTER (7) . 1) Press the button MENU repeatedly until 7.1 Colour spotlight and stroboscope the display does not change anymore: The In this mode, the spotlight constantly emits light top menu level (main menu) has then been... -
Page 17: Automatic Programs
7.2 Automatic programs 2) On the remote control, use the buttons UP and DOWN to set the sensitivity for the mi- Two programs are available: crophone . AUTO 1 = colour sequence with crossfading Alternatively, set the sensitivity on the AUTO 2 = colour sequence without crossfading menu: Call up the submenu item , use... -
Page 18: Dmx Control
8 DMX Control the number of the control channels available at the light controller . Please refer to chapter 10 .1 DMX (Digital Multiplex) allows for digital for the functions available and then select the control of multiple DMX units by means of a appropriate number: common control line . -
Page 19: Additional Functions
9 Additional Functions 10 Specifications Control protocol: ..DMX 512 9.1 Switching off the IR receiver Number of To protect the spotlight against inadvertent op- DMX channels: ..1, 4, 5 or 8 eration via the infrared remote control, switch Light source: . -
Page 20: Dmx Functions
10.1 DMX functions 10.1.2 4-channel mode DMX value Function 10.1.1 1-channel mode Channel 1: red component 0 – 255 brightness of red DMX value Function Channel 2: green component 0 – 255 brightness of green 1 – 4 Colour 1 (red) Channel 3: blue component 5 –... -
Page 21: Menu Structure
10.2 Menu structure Main menu Firmware version MENU DOWN ENTER Temperature, e. g. 29°C Infrared reception Slave mode Music control Mode (Sound) Sou1/ 2 Microphone sensitivity SEN0…SEN9 Colour spotlight mode brightness of white brightness of blue Stroboscope flash frequency St01… St99 brightness of green brightness of red Colour spotlight mode with predefined colours... -
Page 22: Eléments Et Branchements
Table des matières Projecteur à LEDs Cette notice s’adresse aux utilisateurs avec des Eléments et branchements . . . . . . 22 connaissances de base dans la gestion DMX . Veuillez lire la présente notice avec attention 1.1 Télécommande infrarouge . -
Page 23: Télécommande Infrarouge
1.1 Télécommande infrarouge (schéma 2) 3 . des dysfonctionnements apparaissent . Dans tous les cas, les dommages doivent être Touche Fonction réparés par un technicien spécialisé . éteindre puis rallumer toutes les LEDs • mode DMX, saisie de l’adresse de démarrage Ne débranchez jamais l’appareil en tirant sur DMX avec touches numériques (3 positions) le cordon secteur ;... -
Page 24: Montage
4 Montage (9) si la consommation totale ne dépasse pas le courant nominal du fusible dans le porte-fusible Placez l’appareil toujours de telle sorte qu’une ☞ (2) ( étiquette) . Le branchement peut se faire circulation d’air suffisante soit assurée pendant p . -
Page 25: Utilisation Via Le Menu
7 Fonctionnement sans En cas de non utilisation prolongée de la télécommande, retirez les batteries, elles contrôleur DMX pourraient couler et endommager la télé- commande . 7.1 Projecteur de couleur Ne jetez pas les batteries usagées dans et stroboscope la poubelle domestique . Déposez-les Avec ce mode, le projecteur émet en continu dans un container spécifique, par une couleur réglable . -
Page 26: Programmes À Défilement Automatique
7.2 Programmes à défilement A la place, via le point de sous-menu automatique réglez la sensibilité entre avec la touche UP ou DOWN, et mémorisez avec Vous pouvez sélectionner deux programmes : la touche ENTER . AUTO 1 = suite de couleurs avec transition AUTO 2 = suite de couleurs sans transition 7.4 Mode Master / Slave 1) Activez le programme voulu avec la télécom-... -
Page 27: Gestion Dmx
8 Gestion DMX sur les fonctions possibles . Sélectionnez ensuite le nombre : DMX est l’abréviation de Digital Multiplex et si- 1) Appelez le point de menu . L’affichage gnifie commande digitale de plusieurs appareils indique le réglage en cours : DMX via un câble commun de commande . -
Page 28: Autres Fonctions
9 Autres fonctions 10 Caractéristiques techniques Protocole de commande : . DMX 512 9.1 Eteindre le récepteur infrarouge Nombre de canaux DMX : . 1, 4, 5 ou 8 Pour éviter toute utilisation inappropriée du pro- Source de lumière : ..12 × LEDs RGBW 8 W jecteur par la télécommande infrarouge, on peut Angle de rayonnement : . -
Page 29: Fonctions Dmx
10.1 Fonctions DMX 10.1.2 Mode 4 canaux Valeur DMX Fonction 10.1.1 Mode 1 canal Canal 1: part de rouge 0 – 255 luminosité, rouge Valeur DMX Fonction Canal 2: part de vert éteinte 0 – 255 luminosité, vert 1 – 4 couleur 1 (rouge) Canal 3: part de bleu 5 –... -
Page 30: Structure Du Menu
10.2 Structure du menu Menu principal Version Firmware MENU DOWN ENTER Température, par exemple 29 °C Réception infrarouge marche arrêt Mode Slave Gestion par la musique Mode (Sound) Sou1/ 2 Sensibilité micro (Sensitivity) SEN0… SEN9 Mode projecteur de couleurs luminosité, blanc luminosité, bleu Fréquence éclairs stroboscope... -
Page 31: Elementi Di Comando E Collegamenti
Indice Proiettore a LED Queste istruzioni sono rivolte a utenti con co- Elementi di comando e collegamenti . 31 noscenze base dei comandi DMX . Vi preghiamo di leggerle attentamente prima della messa in 1.1 Telecomando a infrarossi . . . . . . . . . 32 funzione e di conservarle per un uso futuro . -
Page 32: Telecomando A Infrarossi
1.1 Telecomando a infrarossi (Fig . 2) 2 . dopo una caduta o dopo eventi simili sus- siste il sospetto di un difetto; Tasto Funzione 3 . l’apparecchio non funziona correttamente . Spegnere e riaccendere tutti i LED Per la riparazione rivolgersi sempre ad un’of- Funzionamento DMX, digitazione dell’in- dirizzo di start DMX con i tasti numerici ficina competente . -
Page 33: Montaggio
4 Montaggio Per l’alimentazione di un ulteriore proiettore si può usare la presa d’uscita tensione POWER Sistemare l’apparecchio sempre in modo che OUT (9) se la corrente assorbita nel suo totale durante il funzionamento sia garantita una non supera la corrente nominale del fusibile del circolazione sufficiente dell’aria . -
Page 34: Comando Tramite Il Menu
7 Funzionamento senza unità ☞ attenzione alla corretta polarità ( Indica- zione ⊕ e ⊖ nel portabatterie) . di comando DMX In caso di mancato uso prolungato con- 7.1 Proiettore a colori e stroboscopio viene togliere le batterie per non danneggiare il telecomando nel caso le batterie perdes- In questo modo, il proiettore emette costante- sero . -
Page 35: Programmi A Svolgimento Automatico
7.2 Programmi a 2) Con il telecomando si può modificare la sen- sibilità del microfono per mezzo dei tasti UP svolgimento automatico e DOWN . Si possono scegliere due programmi: In alternativa, tramite la voce AUTO 1 = Sequenza di colori con dissolvenze sottomenu, con il tasto UP o DOWN impo- AUTO 2 = Sequenza di colori senza dissolvenze stare la sensibilità... -
Page 36: Comando Dmx
8 Comando DMX dal numero dei canali di comando disponibi- li sull’unità di comando luce . Informatevi nel DMX è l’abbreviazione di Digital Multiplex e capitolo 10 .1 circa le funzioni possibili e scegliete permette il comando digitale di più apparecchi quindi il numero dei canali: DMX tramite un’unica linea di comando . -
Page 37: Ulteriori Funzioni
9 Ulteriori funzioni 10 Dati tecnici Protocollo di comando: . . . DMX 512 9.1 Disattivare il ricevitore IR Numero canali DMX: ..1, 4, 5 o 8 Per escludere un comando involontario per Lampadine: ... . 12 × LED RGBW mezzo del telecomando a infrarossi, è... -
Page 38: Funzioni Dmx
10.1 Funzioni DMX 10.1.2 Modo a 4 canali Valore DMX Funzione 10.1.1 Modo a 1 canale Canal 1: Componente rosso 0 – 255 Luminosità, rosso Valore DMX Funzione Canal 2: Componente verde spenta 0 – 255 Luminosità, verde 1 – 4 Colore 1 (rosso) Canal 3: Componente blu 5 –... -
Page 39: Struttura Del Menu
10.2 Struttura del menu Menu principale Versione firmware MENU DOWN ENTER Temperatura, p. es. 29°C Ricezione infrarossi Funzionamento slave Comando tramite musica Modo (Sound) Sou1/ 2 Sensibilità del microfono (Sensitivity) SEN0… SEN9 Funzionamento proiettore a colori Luminosità, bianco Luminosità, blu Frequenza lampi dello stroboscopio St01…St99... -
Page 40: En Aansluitingen
Inhoud Ledschijnwerper Deze handleiding is bedoeld voor gebruikers Overzicht van bedienings elementen met basiskennis van de DMX-besturing . Lees de en aansluitingen . . . . . . . . . . . 40 handleiding grondig door, alvorens het apparaat in gebruik te nemen, en bewaar ze voor latere 1.1 Infraroodafstandsbediening . -
Page 41: Infraroodafstandsbediening
1.1 Infraroodafstandsbediening (afb . 2) 3 . wanneer het apparaat slecht functioneert . Het apparaat moet in elk geval worden her- Toets Functie steld door een gekwalificeerd vakman . alle leds uit- en opnieuw inschakelen • Trek de stekker nooit met het snoer uit het DMX-bedrijf, invoer van het DMX-start- adres met de cijfertoetsen (3 karakters) stopcontact, maar met de stekker zelf . -
Page 42: Ingebruikneming
WAARSCHUWING De schijnwerper moet des- ☞ ringhouder (2) niet overschrijdt ( typeplaatje) . kundig en veilig worden De aansluiting kan b .v . gebeuren via de netver- gemonteerd . Als hij op een lengkabel AAC-170 / SW . Zo kunt u meerdere plek wordt geïnstalleerd, PARL-12RGBW-apparaten met elkaar verbinden . -
Page 43: Bediening Via Het Menu
benaming ⊕ 7 Bediening zonder ☞ u de batterijen aanbrengt ( en ⊖ in de batterijhouder) . DMX-besturingsapparaat Als de afstandsbediening langere tijd niet wordt gebruikt, neemt u de batterijen eruit, 7.1 Kleurenstraler en stroboscoop zodat ze niet wordt beschadigd bij eventueel In deze modus straalt het apparaat constant in uitlopen van de batterijen . -
Page 44: Automatisch Lopende Programma's
7.2 Automatisch lopende programma’s 7.4 Master / slavebediening U hebt de keuze tussen twee programma’s: Meerdere apparaten PARL-12RGBW kunnen synchroon worden bediend . Daarbij neemt het AUTO 1 = kleursequentie met overgangen eerste apparaat (Master-apparaat) de besturing AUTO 2 = kleursequentie zonder overgangen over van de overige apparaten (Slave-appara- 1) Schakel het gewenste programma in met de ten) . -
Page 45: Dmx-Besturing
8 DMX-besturing ook van het aantal beschikbare besturingskana- len op de lichtregelaar . Lees in hoofdstuk 10 .1 DMX is de afkorting van Digital Multiplex, over de functies die u telkens ter beschikking en laat de digitale besturing van meerdere hebt, en selecteer daarna het aantal: DMX-apparaten via één gemeenschappelij- ke besturingsleiding toe . -
Page 46: Overige Functies
9 Overige functies 10 Technische gegevens Besturingsprotocol: ..DMX 512 9.1 Infraroodontvanger uitschakelen Aantal DMX-kanalen: ..1, 4, 5 of 8 Om onbedoelde bediening met infraroodaf- Verlichting: ... . 12 × RGBW-leds standsbediening uit te sluiten, kunt u de infra- van 8 W roodontvanger uitschakelen:... -
Page 47: Dmx-Functie
10.1 DMX-functie 10.1.2 4-kanaalmodus DMX-waarde Functie 10.1.1 1-kanaalmodus Kanaal 1: Roodaandeel 0 – 255 Helderheid rood DMX-waarde Functie Kanaal 2: Groenaandeel 0 – 255 Helderheid groen 1 – 4 kleur 1 (rood) Kanaal 3: Blauwaandeel 5 – 9 kleur 2 (groen) 0 –... -
Page 48: Menustructuur
10.2 Menustructuur Hoofdmenu Firmwareversie MENU DOWN ENTER Temperatuur, b.v. 29°C Infraroodontvangst Slave-bedrijf Muzieksturing Modus (Sound) Sou1/ 2 Microfoongevoeligheid (Sensitivity) SEN0… SEN9 Kleurenstralerbedrijf Helderheid wit Helderheid blauw Stroboscoop-flitsfrequentie St01…St99 Helderheid groen Helderheid rood Kleurenstralerbedrijf met vastgelegde kleuren Kleur (Colour) Co01… Co51 Stroboscoop-flitsfrequentie St01…St99 Automatische bediening Modus Aut1/ 2... -
Page 49: Conexiones
Contenidos Proyector de LEDs Estas instrucciones van dirigidas a usuarios con Elementos de Funcionamiento conocimientos básicos en control DMX . Lea y Conexiones . . . . . . . . . . . . . 49 atentamente estas instrucciones antes de utili- zar el aparato y guárdelas para usos posteriores . -
Page 50: Control Remoto Ir
• 1.1 Control remoto IR (fig . 2) No tire nunca del cable de corriente para desconectarlo de la toma, tire siempre del Botón Función enchufe . Desconexión y conexión de todos los LEDs • Modo DMX, entrada de la dirección de inicio Utilice sólo un paño suave y seco para la lim- DMX con los botones numéricos (3 dígitos) pieza;... -
Page 51: Puesta En Marcha
está disponible el cable alargador de corrien- ADVERTENCIA El proyector tiene que instalarse te AAC-170 / SW, por ejemplo . De este modo, de un modo seguro y mediante se pueden interconectar varios proyectores expertos . Cuando se instale el PARL-12RGBW . -
Page 52: Funcionamiento Mediante El Menú
7 Funcionamiento sin Si el control remoto no se utiliza durante un largo periodo de tiempo, quite la batería controlador DMX para prevenir daños en el control remoto por derrame de la batería . 7.1 Proyector de color y estroboscopio No deposite nunca las baterías gastadas En este modo, el proyector emite luz constan- en el contenedor normal . -
Page 53: Programas Automáticos
7.2 Programas automáticos el botón ENTER para confirmar su selección Hay dos programas disponibles: 2) En el control remoto, utilice los botones UP AUTO 1 = secuencia de colores con fundidos y DOWN para ajustar la sensibilidad del mi- AUTO 2 = secuencia de colores sin fundidos crófono . -
Page 54: Control Dmx
8 Control DMX pende de las funciones necesarias y, si procede, del número de canales de control disponibles DMX (Digital Multiplex) permite el control digi- en el controlador de luces . Ver apartado 10 .1 tal de varios aparatos DMX mediante una línea para las funciones disponibles y seleccione el de control común . -
Page 55: Funciones Adicionales
9 Funciones Adicionales 10 Especificaciones Protocolo de control: ..DMX 512 9.1 Desconexión del receptor IR Número de canales DMX: . 1, 4, 5 u 8 Para proteger el proyector contra el funciona- Fuente de luz: ..12 LEDs RGBW miento involuntario mediante el control remoto de 8 W IR, desconecte la recepción IR:... -
Page 56: Funciones Dmx
10.1 Funciones DMX 10.1.2 Modo 4 canales Valor DMX Función 10.1.1 Modo 1 canal Canal 1: componente rojo 0 – 255 Brillo del rojo Valor DMX Función Canal 2: componente verde Desactivada 0 – 255 Brillo del verde 1 – 4 Color 1 (rojo) Canal 3: componente azul 5 –... -
Page 57: Estructura Del Menú
10.2 Estructura del menú Menú principal Versión del firmware MENU DOWN ENTER Temperatura, p. ej. 29 °C Recepción IR conectada desconectada Modo Slave Control por música Modo (Sound) Sou1/ 2 Sensibilidad del micrófono (Sensitivity) SEN0… SEN9 Modo proyector de color Brillo del blanco Brillo del azul Frecuencia de destello... -
Page 58: Elementy Operacyjne Oraz Złącza
Spis treści Reflektor diodowy Niniejsza instrukcja przeznaczona jest dla użyt- Elementy operacyjne oraz złącza . . . 58 kowników posiadających co najmniej podsta- wową wiedzę na temat sterowania DMX . Przed 1.1 Pilot sterujący . . . . . . . . . . . . . . 59 rozpoczęciem pracy z urządzeniem, prosimy zapoznać... -
Page 59: Pilot Sterujący
1.1 Pilot sterujący (rys . 2) 3 . stwierdzono nieprawidłowe działanie . Naprawy urządzenia może dokonywać tylko Przycisk Funkcja przeszkolony personel . włączanie i wyłączanie wszystkich diod • Nie wolno odłączać zasilania ciągnąc za kabel, tryb DMX, wprowadzanie adresu należy zawsze chwytać za wtyczkę . startowego DMX za pomocą... -
Page 60: Przygotowanie Do Pracy
6 Obsługa UWAGA Urządzenie musi być zamontowa- ne w sposób bezpieczny i fachowy . Do wyboru trybu pracy oraz poszczególnych Jeśli ma pracować ponad ludźmi, funkcji z menu, służą przyciski MENU, UP, DOWN należy je dodatkowo zabezpieczyć i ENTER (7) . W rozdz . 10 .2 pokazano strukturę przed upadkiem np . -
Page 61: Sterowanie Poprzez Menu
7 Praca bez kontrolera DMX 6.2 Sterowanie poprzez menu Do wprowadzania ustawień służą przyciski MENU, UP, DOWN i ENTER (7) . 7.1 Kolorowy reflektor i stroboskop 1) Wcisnąć kilka razy przycisk MENU aż wska- Urządzenie może emitować stałe światło lub zanie wyświetlacza przestanie się... -
Page 62: Programy Automatyczne
7.2 Programy automatyczne 2) Na pilocie sterującym, za pomocą przycisków UP i DOWN ustawić czułość mikrofonu . Dostępne są dwa programy: Alternatywnie, ustawić czułość mikrofo- AUTO 1 = sekwencja kolorów z płynnym nu poprzez menu: wywołać polecenie sub- przechodzeniem menu , i za pomocą... -
Page 63: Sterowanie Dmx
8 Sterowanie DMX 8.3 Ustawianie adresu startowego W celu sterowania kilkoma reflektorami za po- DMX jest skrótem od Digital Multiplex i pozwa- mocą sygnału DMX, konieczne jest ustawienie la na cyfrowe sterowanie wieloma urządzenia- indywidualnych adresów startowych na po- mi DMX poprzez wspólną linię . Urządzenie szczególnych urządzeniach . -
Page 64: Dodatkowe Funkcje
9 Dodatkowe funkcje 10 Specyfikacja Protokół danych: ..DMX 512 9.1 Wyłączanie odbiornika IR Liczba kanałów DMX: ..1, 4, 5 lub 8 Możliwe jest wyłączenie sterowania pilotem w Źródło światła: ..12 × 8 W diod RGBW menu np . -
Page 65: Funkcje Dmx
10.1 Funkcje DMX 10.1.2 Tryb 4-kanałowy Wartość DMX Funkcja 10.1.1 Tryb 1-kanałowy Kanał 1: kolor czerwony 0 – 255 jasność czerwonego Wartość DMX Funkcja Kanał 2: kolor zielony wyłączone 0 – 255 jasność zielonego 1 – 4 Kolor 1 (czerwony) Kanał... -
Page 66: Struktura Menu
10.2 Struktura menu Menu główne Wersja firmware’a MENU DOWN ENTER Temperatura, np. 29 °C Odbiornik IR wł. wył. Tryb slave Sterowanie muzyką Tryb (Sound) Sou1/ 2 Czułość mikrofonu (Sensitivity) SEN0… SEN9 Kolorowy reflektor jasność białego jasność niebieskiego Częstotliwość błysków stroboskopu St01…... - Page 68 Læs nedenstående sikkerhedsoplysninger op- mærksomt igennem før ibrugtagning af enhe- den . Bortset fra sikkerhedsoplysningerne hen- vises til den engelske tekst . Sikkerhedsoplysninger Hvis enheden skal tages ud af drift for Denne enhed overholder alle relevante EU-direk- bestandigt, skal de afleveres på en gen- tiver og er som følge deraf mærket brugsstation, for at undgå...
- Page 69 Ge akt på säkerhetsinformationen innan enhe- ten tas i bruk . Skulle ytterliggare information behövas kan den återfinnas i Manualen för andra språk . Säkerhetsföreskrifter Om enheten ska tas ur drift slutgiltigt, ta Denna enhet uppfyller alla relevanta direktiv den till en lokal återvinningsanläggning inom EU och har därför fått märkning .
-
Page 70: Suomi
Ole hyvä ja huomioi joka tapauksessa seuraa- vat turvallisuuteen liittyvät seikat ennen laitteen käyttöä . Laitteen toiminnasta saa lisätietoa tar- vittaessa tämän laitteen muunkielisistä käyttö- ohjeista . Turvallisuudesta Kun laite poistetaan lopullisesti käytös- Tämä laite täyttää kaikki siihen kohdistuvat tä, vie se paikalliseen kierrätyskeskuk- EU-direktiivit ja sille on myönnetty hyväk- seen jälkikäsittelyä... - Page 71 MONACOR INTERNATIONAL GmbH & Co. KG • Zum Falsch 36 • 28307 Bremen • Germany Copyright by MONACOR INTERNATIONAL. All rights reserved. A-1567.99.02.08.2017 ©...
Need help?
Do you have a question about the PARL-12 RGBW and is the answer not in the manual?
Questions and answers