Table of Contents
Advertisement
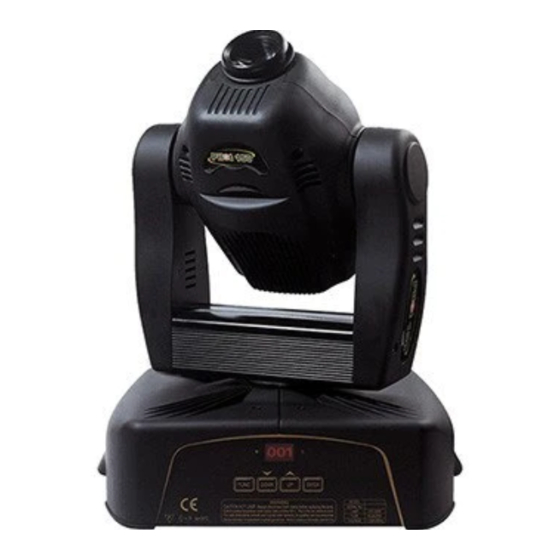
PILOT 150
PR-2150
This product manual contains important information about the safe installation and
use of this projector. Please read and follow these instructions carefully and keep this
manual in a safe place for future reference.
PEARL RIVER LIGHT & ACOUSTICS INDUSTRIAL LTD.
Yingbin Road, Dashi Panyu, Guangzhou, 511430 China
http://www.pr-lighting.com
Advertisement
Table of Contents

Related Manuals for Pure Reliability PILOT 150 PR-2150

Summary of Contents for Pure Reliability PILOT 150 PR-2150
- Page 1 PILOT 150 PR-2150 This product manual contains important information about the safe installation and use of this projector. Please read and follow these instructions carefully and keep this manual in a safe place for future reference. PEARL RIVER LIGHT & ACOUSTICS INDUSTRIAL LTD. Yingbin Road, Dashi Panyu, Guangzhou, 511430 China http://www.pr-lighting.com...
-
Page 2: Table Of Contents
This manual (1 PCS) INTRODUCTION Thank you for purchasing our PILOT 150 PR-2150. This product manual contains important information about the safe installation and use of this projector. Please read and follow these instructions carefully and keep this manual in a safe place for future reference. -
Page 3: Safe Usage Of The Projector
SAFE USAGE OF THE PROJECTOR When unpacking and before disposing of the carton check there is no transportation damage before using the projector. Should there be any damage caused by transportation, consult your dealer and do not use the apparatus. The projector is for Indoor use only, IP20. -
Page 4: Installing The Projector
INSTALLING THE PROJECTOR Fixing Bracket Hole M8x25 M8x25 Bolt Bolt Pass safety fixing through these holes The projector should be mounted via its bracket using one M12 bolt. The bracket itself attaches to the underside of the projector with two (2) M8x25 bolts provided. Always ensure that the projector is firmly anchored to avoid vibration and slipping whilst operating. -
Page 5: Power Supply - Mains
POWER SUPPLY – MAINS L = BROWN E = GREEN/YELLOW FUSE HOLDER N = BLUE FUSE F6.3A/250V Use the plug provided to connect the mains power to the projector paying attention to the voltage and frequency marked on the panel of the projector. It is recommended that each projector is supplied separately so that they may be individually switched on and off. -
Page 6: Setup Options - Projector Configuration
DMX TERMINATOR At the last fixture in the chain, the DMX output has to be connected with a DMX terminator. This prevents electrical noise from disturbing and corrupting the DMX control signals. The DMX terminator is simply an XLR connector with a 120Ω (ohm) resistor connected across pins 2 and 3, which is then plugged into the output socket on the last projector in the chain. -
Page 7: Dmx Control Channel Functions
To control the projector with a DMX controller the DMX start address must be set. Ensure that none of the Stand-Alone options are set or they will interfere with correct DMX operation. DMX CONTROL CHANNEL FUNCTIONS The PILOT 150 uses 8 DMX channels. They are listed in the following table. CHANNEL DMX VALUE DESCRIPTION... -
Page 8: Maintenance
MAINTENANCE If the projector’s lens becomes damaged or broken it should be replaced. If the lamp becomes damaged or deformed in any way it must be replaced. If the light from the lamp appears dim this would normally indicate that it is reaching the end of its life and it should be changed at once, old lamps run to the extremity of their life can explode. -
Page 9: Keeping The Projector Clean
KEEPING THE PROJECTOR CLEAN To ensure the reliability of the projector it should be kept clean. It is recommended that the fans should be cleaned every 15 days. The lens and dichroic colour filters should also be regularly cleaned to maintain an optimum light output. -
Page 10: Technical Data
TECHNICAL DATA VOLTAGES: 100/120/200/220/230/240V AC, 50Hz or 60Hz To Order. POWER CONSUMPTION: 280W @ 220V LAMP: Type : HTI 150W/DX discharge lamp. Colour Temperature: 6500ºK Socket: GY9.5 Manufacturers Rated Lamp Life: 750 Hours COLOURS: 9 Dichroic colours plus white GOBOS: 7 interchangeable, rotating gobos, with 4 extra supplied as standard. -
Page 11: Electrical Diagram
LIGHT OUTPUT 1200 lux 300 lux 133 lux 75 lux 48 lux 13º BEAM DIAMETER Ø1.01m Ø2.1m Ø3.15m Ø4.2m Ø5.25m ELECTRICAL DIAGRAM DC 24V LOWER FAN GOBO GOBO COLOUR SHUTTER TILT WHEEL ROTATION WHEEL UPPER FAN MOTOR MOTOR MOTOR MOTOR MOTOR MOTOR ORANGE... -
Page 12: Component Order Codes
COMPONENT ORDER CODES FOR PR-2150 NAME PART NO. REMARK 040020035 240V/50Hz 100V/200V/230V 040020037 TRANSFORMER 50/60Hz 100V/120V/220V 040020033 50/60Hz CAPACITOR 140010011 20µF/AC370V 040070027 240V/50Hz BALLAST 040070022 220V-230V/50-60Hz 040090017 240V/50Hz IGNITOR 040090014 230V/50Hz 040090018 200V/60Hz THERMOSTAT 190010066 75ºC LAMP 100050014 HTI 150W/DX TOUCH SWITCH 191010028 FAN IN BASE...
Need help?
Do you have a question about the PILOT 150 PR-2150 and is the answer not in the manual?
Questions and answers