TESTO 174 Instruction Manual
Hide thumbs
Also See for 174:
- User manual ,
- Instruction manual (100 pages) ,
- Instruction manual (56 pages)
Table of Contents
Advertisement
Advertisement
Table of Contents

Related Manuals for TESTO 174


Summary of Contents for TESTO 174
- Page 1 174 · Datenlogger Bedienungsanleitung testo 174 · Data loggers Instruction manual testo 174 · Enregistreur de données Mode d'emploi testo 174 · Data logger Manual de instrucciones testo 174 · Data logger Istruzioni per l'uso testo 174 · Data logger...
-
Page 2: Table Of Contents
1 Contents Contents Contents ....................19 Safety and the environment..............20 2.1. About this document ..............20 2.2. Ensure safety.................21 2.3. Protecting the environment............21 Specifications ..................22 3.1. Use ....................22 3.2. Technical data ................22 First steps ....................24 4.1. Releasing/securing data logger .............24 4.2. Inserting batteries ................25 4.3. -
Page 3: Safety And The Environment
2 Safety and the environment Pos: 2 /TD/Überschriften/2. Sicherheit und Umwelt @ 0\mod_1173774719351_79.doc @ 292 @ 1 @ 1 Safety and the environment Pos: 3 /TD/Überschriften/2.1 Zu diesem Dokument @ 0\mod_1173775252351_79.doc @ 346 @ 2 @ 1 2.1. About this document Pos: 4 /TD/Sicherheit und Umwelt/Zu diesem Dokument/VerwendungVerwendung (Standard) @ 0\mod_1173775068554_79.doc @ 337 @ 5 @ 1 >... -
Page 4: Ensure Safety
Do not use any force. Pos: 8 /TD/Sicherheit und Umwelt/Sicherheit gewährleisten/testo 174-175/spannungsführende Teile 174 @ 5\mod_1263289587021_79.doc @ 54795 @ @ 1 > Never use the instrument to measure on or near live parts. -
Page 5: Specifications
Pos: 15 /TD/Überschriften/3.2 Technische Daten @ 0\mod_1176211088437_79.doc @ 704 @ 2 @ 1 3.2. Technical data Pos: 16 /TD/Leistungsbeschreibung/Technische Daten/testo 174-T @ 5\mod_1263220133966_79.doc @ 54661 @ 5 @ 1 testo 174T Characteristic Values Probe type... - Page 6 2004/108/EC, complies with the directives in accordance with the standard EN 12830 24 months, warranty conditions: see website Warranty www.testo.com/warranty Pos: 17 /TD/Leistungsbeschreibung/Technische Daten/testo 174-H @ 5\mod_1263219406290_79.doc @ 54630 @ 5 @ 1 testo 174H Characteristic Values Probe type NTC temperature sensor and internal...
-
Page 7: First Steps
2004/108/EC Pos: 18 /TD/Überschriften/5. Erste Schritte @ 0\mod_1173774895039_79.doc @ 319 @ 1 @ 1 First steps Pos: 19 /TD/Erste Schritte/testo 174-neu/Datenlogger entsichern/sichern @ 5\mod_1263215698078_79.doc @ 54536 @ 255 @ 1 4.1. Releasing/securing data logger The data logger is delivered secured. -
Page 8: Inserting Batteries
4 First steps 4.2. Inserting batteries 1. Place the data logger on its front. 2 Open battery compartment cover on the rear of the data logger by turning to the left and remove it. Use a coin for this. 3. Insert supplied batteries (3 V button cell, CR 2032 lithium) so that the + pole is always visible. -
Page 9: Connecting Data Logger To Pc
4 First steps Pos: 21 /TD/Erste Schritte/testo 174-neu/Datenlogger an PC anschließen Hardware @ 5\mod_1263211400814_79.doc @ 54217 @ 2 @ 1 4.3. Connecting data logger to PC 1. Install testo ComSoft software. The software is available in the Internet as a free download requiring registration: www.testo.com/download-center. -
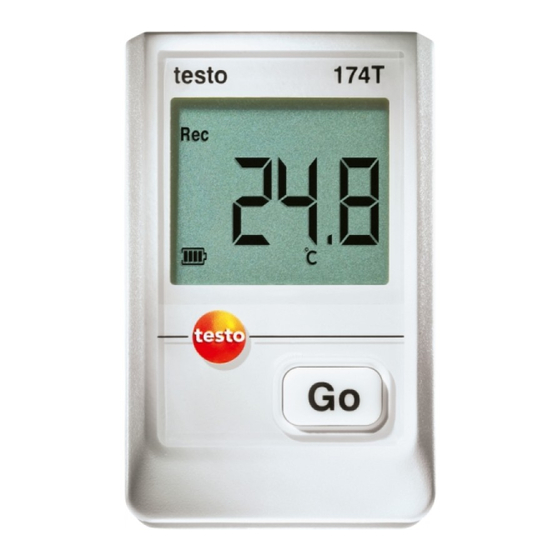
Page 10: Display And Control Elements
5 Display and control elements Display and control elements 5.1. Display Depending on the operating status, various information may be shown in the display. A detailed depiction of the information that can be called up can be found in the quick instruction manual that is included with every data logger. -
Page 11: Key Functions
0 °C (approx. 2 seconds at -10 °C, approx. 6 seconds at -20 °C) for technical reasons. This does not influence the measuring accuracy. Pos: 23 /TD/Produktbeschreibung/Übersicht/testo 174-neu/Tastenfunktionen @ 5\mod_1263214477211_79.doc @ 54473 @ 2 @ 1 5.2. Key functions ✓... -
Page 12: Using The Product
These are shown in the specified sequence in the display. Pos: 24 /TD/Überschriften/6. Produkt verwenden @ 0\mod_1173774928554_79.doc @ 328 @ 1 @ 1 Using the product Pos: 25 /TD/Produkt verwenden/testo 174-neu/Hinweis Datenlogger programmieren @ 5\mod_1264769275750_79.doc @ 56853 @ 2 @ 1 6.1. Programming data logger In order to adapt the programming of your data logger to your individual requirements, you require the testo ComSoft software. -
Page 13: Maintaining The Product
7 Maintaining the product Pos: 28 /TD/Überschriften/7. Produkt instand halten @ 0\mod_1173789831362_79.doc @ 397 @ 1 @ 1 Maintaining the product Pos: 29 /TD/Produkt instand halten/testo 174-neu/Batterien wechseln @ 5\mod_1263216748788_79.doc @ 54568 @ 2 @ 1 7.1. Changing the batteries The running measurement program is stopped when the battery is changed. -
Page 14: Cleaning The Instrument
9. Reconfigure data logger or install the old stored configuration, see separate testo ComSoft instruction manual. The data logger is once again ready for use. Pos: 30 /TD/Produkt instand halten/testo 174-neu/Gerät reinigen @ 5\mod_1267614722447_79.doc @ 59663 @ 2 @ 1 7.2. Cleaning the instrument... -
Page 15: Tips And Assistance
Pos: 32 /TD/Überschriften/8.1 Fragen und Antworten @ 0\mod_1177402017078_79.doc @ 1093 @ 2 @ 1 8.1. Questions and answers Pos: 33 /TD/Tipps und Hilfe/Fragen und Antworten/testo 174-neu @ 5\mod_1263220827298_79.doc @ 54693 @ @ 1 Question Possible causes/solution - - - - The sensor of the data logger is defective. - Page 17 AG Postfach 1140, 79849 Lenzkirch Testo-Straße 1, 79853 Lenzkirch Telefon: (07653) 681-0 Fax: (07653) 681-100 E-Mail: info@testo.de Internet: http://www.testo.com 0970 1743 de en fr es it pt 02...
Need help?
Do you have a question about the 174 and is the answer not in the manual?
Questions and answers