Table of Contents
Advertisement
Aquaversa
About the Aquaversa Drinking Water System
•
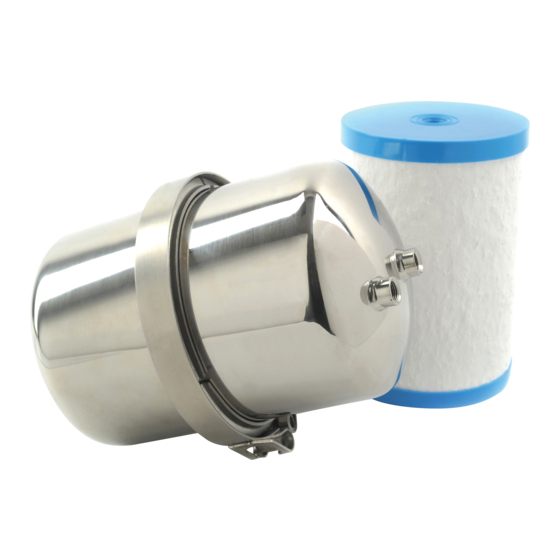
The Multipure Aquaversa Drinking Water System (MP750) is designed
for use on the countertop next to the sink, below the sink, or inline with
other devices.
•
If installation or operation assistance is required, please contact your
Multipure Independent Builder. If the Independent Builder is unavailable,
please contact Multipure Customer Service at 1.800.622.9206.
Before You Begin
Please read this manual before proceeding with the installation and use
of your system. Installation, operation, and maintenance requirements are
essential to the performance of your system – failure to follow any instructions
or operating parameters contained herein may lead to product damage
or product failure.
Installation Guide
1
Advertisement
Table of Contents

Summary of Contents for Aquaversa MP750
-
Page 1: Installation Guide
Aquaversa Installation Guide About the Aquaversa Drinking Water System • The Multipure Aquaversa Drinking Water System (MP750) is designed for use on the countertop next to the sink, below the sink, or inline with other devices. • If installation or operation assistance is required, please contact your Multipure Independent Builder. - Page 2 • Replacement filters can be purchased directly from Multipure. For the latest prices, please visit our website at http://www.multipure.com/store/. • Check for compliance with any state or local laws and regulations before use. • If you are installing with a Below Sink Kit, proceed to section Below Sink Installation (Pg •...
-
Page 3: Water Supply
1/2” slip joint nut water supply line with riser Adapta Valve in 3/8” configuration Adapta Valve 3/8” configuration tubing threading adapter from faucet angle stop valve Adapta Valve v-band 1/2” configuration knob water supply line with threading adapter Adapta Valve in 1/2” configuration riser angle stop valve... - Page 4 Below Sink Kit Components Included with the Below Sink Kit are the following components: Adapta Valve: Used to connect the DWS to the cold water line below the sink. The 3/8” red tubing connects the Adapta Valve to the 3/8” Inlet fitting on the DWS housing.
- Page 5 If you have an extra hole in your sink for a spray hose, you may also choose to disconnect the spray hose and use that existing hole for the Aquaversa faucet. Use the hammer to gently tap the center punch on the sink location where the hole is to be drilled.
- Page 6 If you have a granite countertop: CAUTION: Granite surface materials are extremely hard and can easily crack or chip. Use extreme caution when drilling. Multipure is not responsible for any damages resulting from faucet installation. Place a towel or basin under the sink, directly under the location of the intended faucet hole.
- Page 7 Complete Faucet Assembly with Blue Tubing (MC653) small black washer cover plate countertop large black washer plastic washer lock washer wing nut blue tubing...
- Page 8 Installing the Capacity Monitor Faucet NOTE: In addition to the blue plastic tubing attached to the faucet. A separate piece of blue tubing is included for connection between the housing OUTLET port and the Filter Monitor Unit INLET port. Faucets with Capacity Monitor Include: Spout Faucet handle...
- Page 9 From the sink / countertop: Place the large rubber washer (#9) over the faucet hole. Place the LED Display Plate (#7) on top of the large rubber washer. Feed the attached black cable down through the hole in the sink. Rotate the LED Display Plate so that the indicator light will be easy to see.
- Page 10 Select a clean, convenient mounting location on a wall beneath the sink, allowing sufficient space for placement of the FMU. Peel off the paper backing from the second hook-and-loop connector strip and attach it to the desired wall location. Attach the FMU to the wall using the two hook-and-loop connector strips.
- Page 11 Using the 3/8” configuration: The 3/8” configuration is used on a water supply line with a 3/8” slip joint. The 3/8” configuration is typically installed at the bottom of the riser at the angle stop valve. Using the 1/2” configuration: The 1/2”...
- Page 12 1/2” slip joint nut Adapta Valve riser 3/8” slip joint nut angle stop valve Threading Adapter Water supply line before installation Adapta Valve 1/2” configuration riser threading adapter Adapta Valve 3/8” riser configuration threading adapter angle stop valve stop valve angle water supply line with Adapta water supply line with Adapta...
- Page 13 Connect the Fittings to the Housing Connect the included Inlet fitting (MC730-RED) to the system housing’s labeled Inlet port. Rotate the fitting clockwise, first by hand, then using a wrench, to tighten onto the system. Connect the included Outlet fitting (MC720-BLU) to the system housing’s labeled Outlet port.
- Page 14 Connect the Tubing to the Filter Monitor Unit (Capacity Monitor Kit ONLY) Fully insert the blue plastic tubing from the Aquaversa OUTLET into the adapter (#15) on the INLET (#5) side of the FMU; the tubing should typically be inserted 5/8” into the adapter. The inlet side is the side from...
- Page 15 NOTE: When pushing the tubing into the adapter, you will encounter some resistance. This does not mean that the tube is fully inserted. Continue to push firmly until the tubing is inserted as far as possible (roughly 5/8” into the adapter). OUTLET INLET Fully insert the blue plastic tubing from...
-
Page 16: Countertop Installation
Countertop Installation (Countertop Kit Required) Overview & Part Numbers Part Description Item # Part # MC6400ASBL Hose and Diverter Valve Housing top MCL500 Black rubber cushion (inside housing top) MC252 MC253 V-band with knob Carbon Block Filter cartridge O-ring MC351S MCB500 Housing bottom Short acrylic base... - Page 17 Acrylic Base: Used to hold the Aquaversa upright on the countertop. The Aquaversa is placed on the acrylic base with the ports and tubing facing down, so that the tubing can feed through the openings at the side of the acrylic base.
- Page 18 If this applies, attach the long adapter, part# MC257, to the opening of the faucet spout/sprayer, and then attach the diverter valve to the adapter. The Aquaversa Diverter Valve Attachment may need to be repositioned on the sink to with adapter allow enough room for sprayer faucet use.
-
Page 19: Inline Installation
Angle Stop Valve or water shutoff valve counter-clockwise to engage the flow of water through the pipes. Turn the handle on the Aquaversa faucet to start the flow of filtered water. iii. Allow water to flow through the DWS and the faucet for 30 minutes. -
Page 20: Warranty
Allow water to flow through the DWS and filtered water spout for 30 minutes. This purges any air and loose carbon from the system. iii. Press the left button to select the unfiltered water spout, and then turn off the faucet. Check all connections to make sure that there are no leaks. -
Page 21: Troubleshooting
Warranty is valid only if the DWS is operated within conditions listed herein. The warranty begins from the date of purchase. Faucets: Parts: Note: On the return policy, Warranty: 12 Months Warranty: N/A customer will receive Return Policy: 30 days Return Policy: 30 days refund minus the shipping and handling fees paid. - Page 22 Notes...
- Page 23 Notes...
- Page 24 Taste The Difference ® 7251 Cathedral Rock Drive, Las Vegas, NV 89128 702.360.8880 • 800.622.9206 • www.multipure.com 660-60-8036/0717...
Need help?
Do you have a question about the MP750 and is the answer not in the manual?
Questions and answers