Advertisement
Table of Contents
Advertisement
Table of Contents
Troubleshooting

Related Manuals for Pride Mobility raptor series


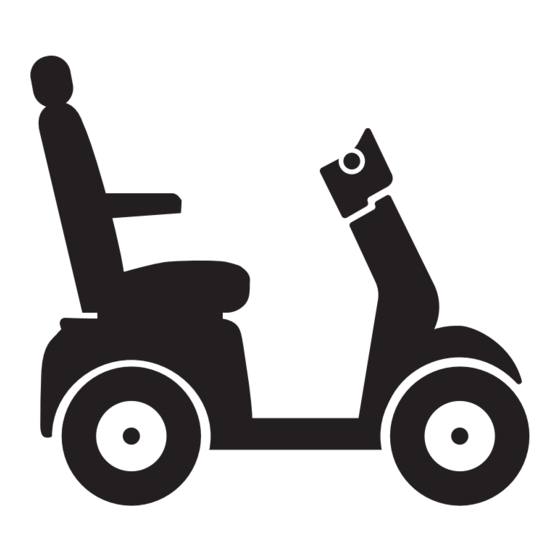
Summary of Contents for Pride Mobility raptor series
- Page 1 OPERATION COMFORT RAPTOR SERIES MAINTENANCE BATTERY CHARGING OWNER’S MANUAL...
- Page 2 On the product, this icon is represented as a black symbol with a red circle and red slash. ntended The intended use of the Pride Mobility Products device is to provide mobility to persons limited to a seated position that have the capacity of operating a scooter.
-
Page 3: Table Of Contents
C O N T E N T S SAFETY ......................4 YOUR SCOOTER ....................7 III. BATTERIES AND CHARGING ................14 OPERATION ......................20 COMFORT ADJUSTMENTS ................22 VII. BASIC TROUBLESHOOTING ................24 VIII. CARE AND MAINTENANCE ................26 Raptor... -
Page 4: Safety
I . S A F E T Y PRODUCT SAFETY SYMBOLS The symbols below are used on the scooter to identify warnings, mandatory actions, and prohibited actions. It is very important for you to read and understand them completely. NOTE: There are more warnings identified and explained in the Consumer Safety Guide that is included with your scooter. -
Page 5: Your Scooter
I . S A F E T Y GENERAL MANDATORY! Do not operate your new scooter for the first time without completely reading and understanding this owner’s manual and the Consumer Safety Guide. Your scooter is a state-of-the-art life-enhancement device designed to increase mobility. We provide an extensive variety of products to best fit the individual needs of the scooter user. - Page 6 I . S A F E T Y BRAKING INFORMATION Your scooter is equipped with these powerful brake systems: „ Regenerative: Uses electricity to rapidly slow the vehicle when the throttle control lever returns to the center/stop position. „ Disc Park Brake: Activates mechanically after regenerative braking slows the vehicle to near stop or when power is removed from the system for any reason.
- Page 7 I I . Y O U R S C O O T E R TILLER CONSOLE The tiller console houses all controls needed to drive your scooter, including the throttle control lever, forward-reverse switch, hi-low switch, and the handbrake. See figure 1. PROHIBITED! Do not expose the tiller console to moisture.
-
Page 8: Ii. Your Scooter
I I . Y O U R S C O O T E R Hi-Low Switch This switch toggles the scooter’s speed between HIGH and LOW. „ Press the Hi-Low switch to the “H” position to set the speed adjustment to High. „... - Page 9 I I . Y O U R S C O O T E R Turn Signal Buttons „ Switch the turn signal button in the appropriate direction to activate it. The turn signal lights will flash on your scooter. „ After toggling the turn signal switch, it will return to the center neutral position. „...
- Page 10 I I . Y O U R S C O O T E R Speed Indicator The LCD Screen displays your current traveling speed. The Hi-Low setting determines the maximum scooter speed. When set to Low, the speed will be half of the maximum speed at the Hi setting. Battery Condition Indicator When the key is turned to the “on”...
- Page 11 I I . Y O U R S C O O T E R Tiller Adjustment See V. “Comfort Adjustments”. Key Switch „ Insert the key into the key switch and turn it clockwise to power up (turn on) your scooter. „...
- Page 12 I I . Y O U R S C O O T E R Motor/Transaxle Assembly The motor/transaxle assembly is an electromechanical unit that converts electrical energy from your scooter’s batteries into the controlled mechanical energy that drives the scooter’s wheels. Anti-Tip Wheels The anti-tip wheels are an integral and important safety feature of your scooter.
- Page 13 I I . Y O U R S C O O T E R Batteries The batteries store electrical energy that powers your scooter. They are located in the rear shroud beneath the scooter’s rear storage compartment. See III. “Batteries and Charging” for information on how to charge your scooter batteries.
-
Page 14: Batteries And Charging
I I I . B AT T E R I E S A N D C H A R G I N G BATTERIES AND CHARGING Your scooter requires two long-lasting, 12-volt, deep-cycle batteries that are sealed and maintenance- free. They are recharged by an off-board charging system. „... -
Page 15: Iii. Batteries And Charging
I I I . B AT T E R I E S A N D C H A R G I N G Follow these easy steps to charge the batteries: 8-14H Figure 9. Battery Charging Procedures Diagram WARNING! The LED lights on the charger indicate different charger conditions at various times. If the LED does not indicate that charging is complete within 24 hours, unplug the charger from the outlet and contact your Provider. - Page 16 I I I . B AT T E R I E S A N D C H A R G I N G How often must I charge the batteries? Two major factors must be considered when deciding how often to charge your scooter’s batteries: „...
- Page 17 I I I . B AT T E R I E S A N D C H A R G I N G What type and size of battery should I use? Your scooter requires two deep-cycle batteries. We recommend only sealed, maintenance-free types such as AGM or Gel-Cell.
- Page 18 I I I . B AT T E R I E S A N D C H A R G I N G How do I change a battery in my scooter? MANDATORY! Battery posts, terminals, and related accessories contain lead and lead compounds.
- Page 19 I I I . B AT T E R I E S A N D C H A R G I N G IDENTIFICATION KEY 1. Bolts 2. Storage Bin Figure 10. Battery Changing NOTE: If you encounter a damaged or cracked battery, immediately enclose it in a plastic bag. Contact your local waste disposal agency or your authorized Pride Provider for instructions on disposal and battery recycling, which is our recommended course of action.
-
Page 20: Operation
I V. O P E R AT I O N BEFORE GETTING ONTO YOUR SCOOTER „ Have you fully charged the batteries? See III. “Batteries and Charging.” „ Is the manual freewheel lever in the drive (rearward) position? Never leave the manual freewheel lever pushed forward unless you are manually pushing your scooter. -
Page 21: Iv. Operation
I V. O P E R AT I O N NOTE: Your scooter’s reverse speed is slower than that of the forward speed you preset with the speed adjustment switch or on the LCD control panel. GETTING OFF OF YOUR SCOOTER 1. -
Page 22: Comfort Adjustments
V. C O M F O R T A D J U S T M E N T S Manual Recline Seatback Adjustment IDENTIFICATION KEY If your scooter is equipped with a manual recline Jam Nut seatback, you can adjust the seatback angle up Armrest Angle Adjustment Screw to 100˚... -
Page 23: V. Comfort Adjustments
V. C O M F O R T A D J U S T M E N T S TILLER HEIGHT ADJUSTMENT The height of the tiller console can be adjusted up or down to a comfortable driving level. To adjust the tiller height: 1. -
Page 24: Basic Troubleshooting
V I I . B A S I C T R O U B L E S H O O T I N G Any electromechanical device occasionally requires some troubleshooting. However, most of the problems that may arise can usually be solved with a bit of thought and common sense. Many of these problems occur because the batteries are not fully charged or because the batteries are worn down and can no longer hold a charge. -
Page 25: Vii. Basic Troubleshooting
V I I . B A S I C T R O U B L E S H O O T I N G What if all the systems on my scooter seem to be dead? „ Make certain that the key is in the “on” position. „... -
Page 26: Wheel Replacement
V I I I . C A R E A N D M A I N T E N A N C E Your scooter requires a minimal amount of care and maintenance. If you do not feel confident in your ability to perform the maintenance listed below, you may schedule inspection and maintenance at your authorized Pride Provider. -
Page 27: Viii. Care And Maintenance
V I I I . C A R E A N D M A I N T E N A N C E ABS PLASTIC SHROUDS „ If your scooter has a body shroud with a glossy finish, the body shroud has been sprayed with a clear sealant coating. - Page 28 V I I I . C A R E A N D M A I N T E N A N C E STORING YOUR SCOOTER If you plan on not using your scooter for an extended period of time, it is best to: „...
- Page 29 N O T E S Raptor...
- Page 30 N O T E S Raptor...
- Page 32 Please fill out the following information for quick reference: Provider: Address: Telephone: Purchase Date: Serial # UDI Label (if applicable)
Need help?
Do you have a question about the raptor series and is the answer not in the manual?
Questions and answers