Table of Contents
Advertisement
Quick Links
GM ONSTAR LAN DATA BUS INTERFACE
GMOS-LAN-01
Installation Instructions
Not compatible with amplified sound systems
* READ IMPORTANT WARNING ON PAGE 1
The GMOS-LAN-01 is
chimes that are normally lost when the OEM radio is removed. It
also provides a 12 volt accessory output for proper aftermarket
radio operation. THE GMOS-LAN-01 also PROVIDES a MUTE,
PARKING BRAKE, VSS OR SPEED SENSE, AND A REVERSE OUT-
PUT TO MAKE INSTALLING AN AFTERMARKET NAVIGATIONAL
RADIO SIMPLER AND LESS TIME CONSUMING.
Buick
• Enclave 2007-11
• Lucerne 2006-10
Cadillac
• DTS 2006-10
• SRX 2007-09
Chevrolet
• Avalanche 2007-10
• Aveo 2009-10 *
• Equinox 2007-09
• Express 2008-10
• Impala 2006-10
• Monte Carlo 2006-07
• Silverado (new body)
2007-11
• Suburban 2007-10
• Tahoe 2007-11
• Traverse 2009-11
877-312-4547
© COPYRIGHT 2004-2010 METRA ELECTRONICS CORPORATION Rev. 12-1-10
BEFORE ATTEMPTING ANY INSTALLATION
designed to retain Onstar and retain the warning
PPLIC TIONS
GMC
•Acadia 2007-11
•Savanna 2008-10
•Sierra (New body) 2007-11
•Yukon / XL 2007-10
Hummer
•H2 2008-09
Pontiac
•Torrent 2007-09
• Vibe 2010 *
*( Only required for retention of Onstar-
NAV outputs not applicable)
Saturn
•Outlook 2007-09
•Vue 2008-09
Suzuki
•XL-7 2007-09
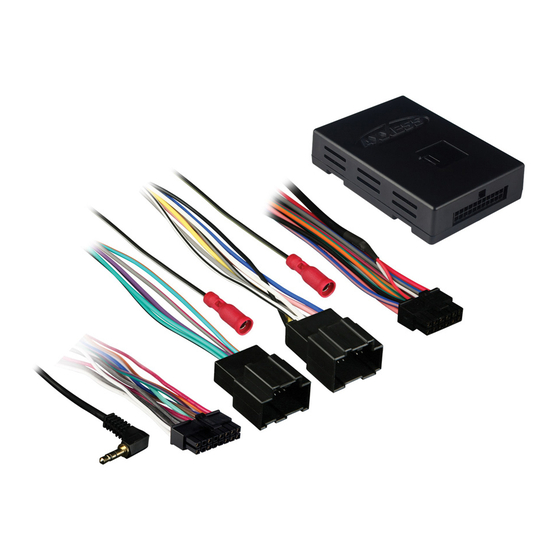
INTERFACE COMPONENTS
• GMOS-LAN-01 Interface
• 14 pin harness with stripped leads
• 12 pin to 30 pin GM harness
www.solidsignal.com
Advertisement
Table of Contents

Related Manuals for Axxess GMOS-LAN-01


Summary of Contents for Axxess GMOS-LAN-01
-
Page 1: Installation Instructions
OEM radio is removed. It also provides a 12 volt accessory output for proper aftermarket radio operation. THE GMOS-LAN-01 also PROVIDES a MUTE, PARKING BRAKE, VSS OR SPEED SENSE, AND A REVERSE OUT- PUT TO MAKE INSTALLING AN AFTERMARKET NAVIGATIONAL RADIO SIMPLER AND LESS TIME CONSUMING. - Page 2 GMOS-LAN-01 * READ IMPORTANT WARNING BEFORE ATTEMPTING ANY INSTALLATION * IMPORTANT WARNING THIS PRODUCT INCLUDES INSTRUCTIONS FOR INSTALLATION WHICH MUST BE CAREFULLY FOLLOWED. THE INSTRUCTIONS ARE WORDED IN SUCH A MANNER TO ASSUME THAT THE INSTALLER IS CAPABLE OF COM- PLETING THESE TYPE OF ELECTRONIC INSTALLATIONS.
- Page 3 GMOS-LAN-01 TOOLS REQUIRED FOR INSTALLATION • Cutting Tool • Tape • Crimping Tool • Connectors (ie: butt-connectors, bell caps, etc.) INSTALLING THE INTERFACE * Important: Before beginning any of the following, disconnect the negative battery terminal to prevent acci- dental short circuit.
- Page 4 GMOS-LAN-01...
- Page 5 2. Connect the Blue/Pink wire to the VSS or speed sense wire of the aftermarket navigation radio. 3. Connect the Green/Purple wire to the reverse wire of the aftermarket navigation radio. When completed, plug the 14 pin harness into the GMOS-LAN-01. CONNECTIONS TO BE MADE ON THE 30 PIN GM HARNESS: 1.
- Page 6 3. The black/yellow and black/white wire is for the Onstar volume adjustment. This will be discussed in the Onstar and Chime Level Adjustment section of this instruction. When completed, plug the 12 pin harness into the GMOS-LAN-01. FINAL WIRING CONNECTIONS...
- Page 7 GMOS-LAN-01...
- Page 8 GMOS-LAN-01 INSTALLING THE GMOS-LAN-01 1. With all connections completed, plug the 14 and 12 pin harnesses into the GMOS-LAN-01. 2. Reconnect the negative battery terminal. 3. Plug the 30 pin GM harness into the vehicle side harness, and plug the aftermarket radio harness into the aftermarket radio.
Need help?
Do you have a question about the GMOS-LAN-01 and is the answer not in the manual?
Questions and answers