Table of Contents
Advertisement
Available languages
Available languages
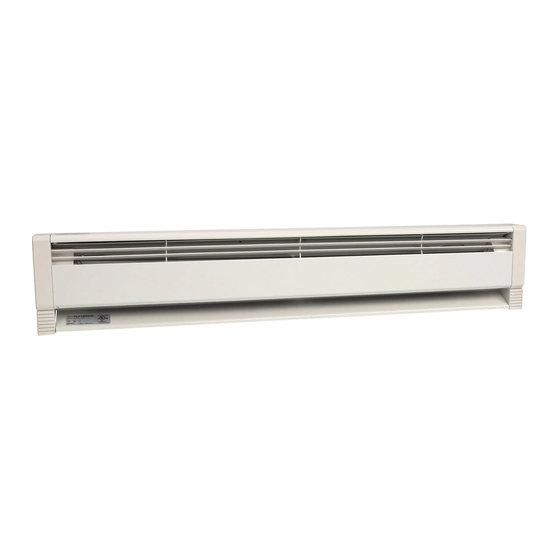
PLF Series
Electric/Hydronic
Baseboard Heaters
Installation & Maintenance Instructions
Dear Owner,
Congratulations! Thank you for purchasing this new heater manufactured by a division of Marley
Engineered Products. You have made a wise investment selecting the highest quality product in the heat-
ing industry. Please carefully read and follow the installation and maintenance directions shown in this
manual. You should enjoy years of efficient heating comfort with this product from Marley Engineered
Products... the industry's leader in design, manufacturing, quality and service.
Read Carefully - This instruction sheet contains vital infor-
mation for the proper installation, use and efficient opera-
tion of the heater. Carefully read the manual before instal-
lation, operation, or cleaning of the heater. Failure to
adhere to the instructions could result in fire, electric
shock, death, serious personal injury or property damage.
Save these instructions and review frequently for continu-
ing safe operation and instructing future users.
WARNING: HAZARD OF FIRE OR ELECTRICAL SHOCK.
1. Keep all electrical cords, foam filled articles, drapes,
bedding and other household furnishings away from
contact with heater. It is recommended all items be kept
a minimum of six (6") inches (152mm) from heater.
2. Do not install baseboard heater below electrical conve-
nience receptacles (outlets).
1
... The Employees of
Marley Engineered Products
WARNING
!
3. Do not install baseboard heater against paperboard or
low density fiberboard surfaces.
4. Do not recess heater in wall.
5. The installation must comply with applicable local, and
National Electrical Code and utility requirements.
6. Do not remove or by-pass thermal cutout.
7. To reduce the risk of fire, do not store or use gasoline
or other flammable vapors and liquids in the vicinity of
the heater.
8. Personal injury or death could result from electric
shock. Disconnect all power to heater at main panel
before attempting to install or service this heater.
9. Supply voltage must be the same as heater voltage.
Check heater nameplate and supply voltage before
energizing.
10. Supply wiring must be suitable for 90°C.
SAVE THESE INSTRUCTIONS
Advertisement
Table of Contents

Related Manuals for Fahrenheat PLF500


Summary of Contents for Fahrenheat PLF500
- Page 1 PLF Series Electric/Hydronic Baseboard Heaters Installation & Maintenance Instructions Dear Owner, Congratulations! Thank you for purchasing this new heater manufactured by a division of Marley Engineered Products. You have made a wise investment selecting the highest quality product in the heat- ing industry.
- Page 2 IMPORTANT CAUTION CAUTION CERTAIN FABRICS DISCOLOR IN TIME FROM INDIRECT SUNLIGHT AND HEATER MAY BE INSTALLED ABOVE THE FLOOR SUCH AS ATOP A BASE- BOARD. HOWEVER, THE POWER SUPPLY MUST ENTER THE HEATER NORMAL ROOM TEMPERATURE - MOSTLY ORGANIC AND SYNTHETIC THROUGH THE KNOCKOUT IN THE BACK OF THE HEATER IF INSTALLED MATERIAL.
-
Page 3: Wiring Diagram
JUNCTION BOX JUNCTION BOX END POWER SUPPLY CABLE SCREW Figure 5. Routing of Power Supply Cable HEATER 9. Position the heater on the wall and locate wall studs. Drill, punch, or use nail dri- Figure 3. Removal of End Cap ver to put holes through the enclosure back (above the element) at stud loca- tions. -
Page 4: Limited Warranty
3. If the power supply is to enter through the end of the heater series so that the ing. If operating, disconnect power and check wiring. If none are operating then end cap can be installed after the heaters are installed, continue “Installation of turn the thermostats to highest setting and wait 3 to 5 minutes. - Page 5 PLF Série Homologué U.L. et C-UL Radiateurs Électriques à Dossier E37116 Caloporteur Liquide Notice d’installation et d’entretien Cher utilisateur, Félicitations ! Nous vous remercions d'avoir fait l'acquisition de ce nouveau radiateur fabriqué par une division de Marley Engineered Products. Vous avez fait un bon investissement en choisissant un appareil de qualité...
- Page 6 AVERTISSEMENT ATTENTION ATTENTION CERTAINS TISSUS (SYNTHÉTIQUES OU, PARTICULIÈREMENT, LE RADIATEUR PEUT ÊTRE POSÉ AU-DESSUS DU PLANCHER, NATURELS) SE DÉCOLORENT À LA TEMPÉRATURE DE LA PIÈCE PAR EXEMPLE AU-DESSUS D’UNE PLINTHE. LE CAS ÉCHÉANT, LORSQU’ILS REÇOIVENT UN ÉCLAIRAGE NATUREL INDIRECT. LA TOUTEFOIS, FAITES PASSER LES CÂBLES D’...
-
Page 7: Schéma De Câblage
BOÎTE DE JONCTION COUVERCLE LATÉRAL DE LA BOÎTE DE CÂBLE JONCTION D'ALIMENTATION Figure 5. Acheminement du câble d’alimentation RADIATEUR a. Panneaux de plâtre : Utilisez des chevilles élastiques ou des boulons à Figure 3. Dépose du couvercle latéral ailettes. b. Poteaux : Utilisez des vis n° 12 à tête ronde pénétrant d’au moins 3/4 po DÉCROCHEZ LE REBORD SUPÉRIEUR DU COUVERCLE DES (19mm) dans le poteau. - Page 8 4. Si le branchement doit être fait dans une boîte de jonction intermédiaire de la 3. Laissez les radiateurs chauffer de façon continue pendant environ 1/2 h. file, il est plus simple d’effectuer les connexions avant de fixer les radiateurs au Pendant un certain temps après la mise en service d’un radiateur, le propriétaire mur.
- Page 9 Serie PLF Calentadores eléctricos de zóca- lo rellenos con líquido ARCHIVO #E37116 Instrucciones de instalación y mantenimiento Estimado propietario: ¡Felicitaciones! Gracias por adquirir este nuevo calentador fabricado por una división de Marley Engineered Products. Ha hecho una inversión sensata al seleccionar el producto de la más alta calidad en la industria de la calefacción.
- Page 10 IMPORTANTE PRECAUCIÓN PRECAUCIÓN CIERTAS TELAS SE DECOLORAN CON EL TIEMPO POR LA INCIDENCIA EL CALENTADOR PUEDE INSTALARSE ENCIMA DEL PISO COMO, POR INDIRECTA DE LA LUZ DEL SOL Y POR LA TEMPERATURA NORMAL DE LA EJEMPLO, ENCIMA DE UN ZÓCALO. SIN EMBARGO, LA FUENTE DE HABITACIÓN - EN SU MAYORÍA MATERIAL ORGÁNICO Y SINTÉTICO.
- Page 11 CAJA CE CONEXIONES TAPA DE LA CAJA DE CONEXIONES CABLE DE ALIMENTACIÓN TORNILLO Figura 5. Tendido del cable de alimentación CALENTADOR c. Paredes de mampostería: Utilice tornillos #12 de cabeza redonda con anclajes por Figura 3. Remoción de la tapa del extremo expansión, de plomo, plástico o fibra.
-
Page 12: Diagrama De Cableado
4. Si la fuente de alimentación va a suministrar la energía a los calentadores a operando, coloque los termostatos en el ajuste más alto y espere de 3 a 5 min- través de la caja de conexiones adyacente a otro calentador, es más fácil utos.
Need help?
Do you have a question about the PLF500 and is the answer not in the manual?
Questions and answers