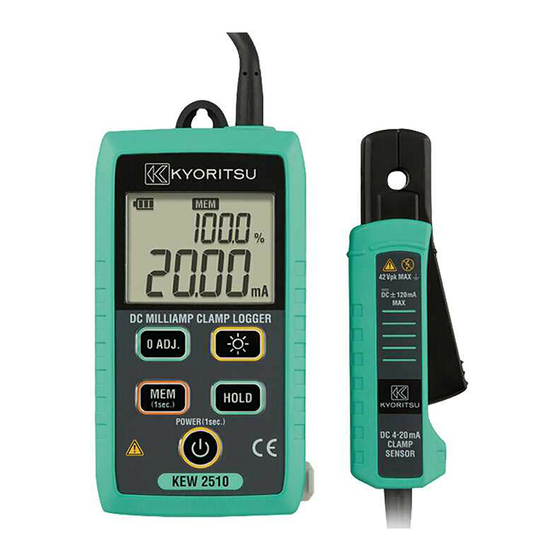
Summary of Contents for KYORITSU KEW 2510
- Page 1 Instruction Manual DC Milliamp Clamp Logger KEW 2510 .800.561.8187 information@itm.com www. .com...
-
Page 2: Table Of Contents
Contents 1.Safety warnings …………………………………………………… 1 2.Features …………………………………………………………… 4 3.Specifications …………………………………………………… 4 4.Instrument layout ………………………………………………… 6 5.Preparation ………………………………………………………… 6 6.Getting started …………………………………………………… 7 6-1 Zero-adjustment ………………………………………… 7 6-2 Measurement …………………………………………… 7 7.Other functions …………………………………………………… 8 7-1 Data Hold function ……………………………………… 8 7-2 Auto-power-off function………………………………… 8 7-3 Backlight &... -
Page 3: Safety Warnings
It is essential that the above instructions are adhered to. Failure to follow the above instructions may cause injury, instrument damage and/or damage to equipment under test. Kyoritsu is by no means liable for any damage resulting from the instrument in contradiction to these cautionary notes. - Page 4 ● Do not install substitute parts or make any modifications to the instrument. Return the instrument to your local KYORITSU distributor for repair or re-calibration in case of suspected faulty operation. ●Do not try to replace batteries if the surface of the instrument is wet.
- Page 5 # CAUTION ● Do not expose the instrument to direct sunlight, high temperature, humidity or dew. ● This instrument is not water/ dust-proof. Do not use it in a dusty environment or where it will get wet. ● Always power off the instrument after use. Remove batteries if the instrumentis to be stored and will not be in use for a long period.
-
Page 6: Features
2.Features ●Measure 4 to 2 0 mA instrumentation signal ● Measure 0 to 10 0 mA DC current without breaking the loop ●LED light for illuminating the measurement spot ●Auto-power-off function ●Percentage (%) span ● Analog output function to output the measured results to a recorder or digital multi-meter ●Data hold function ●Memory function stores up to 192 0 0 0 records... - Page 7 ●Applicable standards IEC6 10 10 -1 Measurement CAT O (Other), Pollution degree 2 IEC6 10 10 -2 -0 3 2 IEC6 13 2 6 -1 (EMC) IEC6 0 5 2 9 IP4 0 EN5 0 5 81 RoHS Directive ●Display Liquid crystal display (See also “4 .
-
Page 8: Instrument Layout
4.Instrument layout LED light Main unit Clamp sensor Transformer jaws External supply Polarity mark connection terminal Barrier Light button Zero adjustment Trigger (0 ADJ.) button Memory (MEM) button Analog output Power button terminal Data hold button Memory mark Zero adj. mark Bluetooth®mark Sub display Battery mark... -
Page 9: Getting Started
6.Getting started # WARNING ●Do not clamp onto an un-insulated conductor. ● Always use analog output cord MODEL7 2 5 6 , specially designed to this instrument, when using analog output function. # DANGER ● Keep your fingers and hands behind the barrier during a measurement. -
Page 10: Other Functions
※% (Span) display The sub display shows percentage value as the basis of 4 mA is 0 % and 2 0 mA is 10 0 %. (at 2 0 mA range only) The table at the right shows the Measured Percentage values (mA)... -
Page 11: 7-3 Backlight & Led Light
7−3 Backlight & LED light Press the Light button to turn on/ off the LED light and LCD backlight. These lights automatically turn off after two minutes. To disable the automatic light timeout, hold down the Light button while powering on the instrument. -
Page 12: Communication Function/ Application Software
※ When number of records exceeds 10 0 0 0 , the sub display doesn’ t give numerical indication but just shows “>9999” . ※ A short press, 1 sec or less, displays the pre-set recording interval and number of records. Do not press the button 1 sec or longer for confirmation, otherwise recording will start/ end. -
Page 13: Ac Adapter Power Supply
●Application software (KEW Windows for 2 510 ) This special application enables data download, analysis and instrument configuration via PC. Refer to the supplied software installation manual and install the application in your PC. For the details, see the manual for “KEW Windows for 2 510 ” by clicking the icon to be created in the desktop after installation. -
Page 14: Battery Replacement
10.Battery replacement # WARNING ● Ensure that the clamp sensor is disconnected from the object under test, and that the instrument is powered off when opening the battery compartment cover for battery replacement. ● Disconnect the AC adapter and analog output cord from the instrument.


Need help?
Do you have a question about the KEW 2510 and is the answer not in the manual?
Questions and answers