Table of Contents
Advertisement
Quick Links
Advertisement
Table of Contents

Summary of Contents for TKH Group Security Solutions HSD820v2H3-E
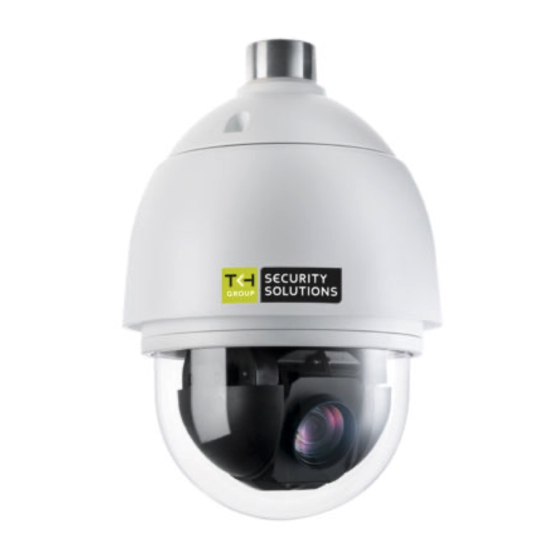
- Page 1 HSD820v2H3-E Full HD IP speed dome camera...
- Page 2 Note: To ensure proper operation, please read this manual thoroughly before using the product and retain the information for future reference. Copyright © 2017 Siqura B.V. All rights reserved. HSD820v2H3-E User Manual v1 (170604-1) AIT55 Nothing from this publication may be copied, translated, reproduced, and/or published by means of printing, photocopying, or by any other means without the prior written permission of Siqura.
-
Page 3: Table Of Contents
Connect via web browser ..............Find the unit with Device Manager ............Change network settings with Device Manager ......... Log on to the unit ................Install Viewer ..................The HSD820v2H3-E web interface ............Home ......................Layout ....................Functions .................... PTZ Panel ................... - Page 4 Contents 6.3.1.5 IPv6 address configuration ............6.3.2 QoS ....................6.3.3 SNMP ..................... 6.3.4 UPnP ....................DDNS ....................Mail ....................FTP ....................HTTP ....................Events ....................6.8.1 Application ..................6.8.1.1 Alarm trigger actions ..............6.8.1.2 Specifying file name conventions ..........6.8.2 Motion Detection ................
- Page 5 Contents 8.10 Camera - Misc1 ................... 8.11 Camera - Misc2 ................... 8.12 Camera - Profile .................. 8.13 Camera - Default ................. Appendix: Enable UPnP ................Appendix: Delete the existing Viewer software ......... Appendix: Set Up Internet Security ............Appendix: NTCIP Configuration ..............Supported conformance groups .............
-
Page 6: About This Manual
Where to find more information At www.tkhsecurity.com/support-files, you will find PDF versions of the manuals written for the HSD820v2H3-E. We advise you to make sure that you have the latest version of this manual. For the technical specifications, download the product datasheet. - Page 7 About this manual We like to hear from you! Customer satisfaction is our first priority. We welcome and value your opinion about our products and services. Should you detect errors or inaccuracies in this manual, we would be grateful if you would inform us. We invite you to offer your suggestions and comments via t.writing@tkhsecurity.com.
-
Page 8: Safety And Compliance
This chapter provides cautions on what to do and what not to do when working with or handling your HSD820v2H3-E unit. It also offers information on product compliance with environmental regulations and explains how to dispose of the product at the end of its service life. - Page 9 Optical safety The following optical safety information applies to HSD820v2H3-E models with SFP interface. This product complies with 21 CFR 1040.10 and 1040.11 except for deviations pursuant to Laser Notice No. 50, dated June 24, 2007. This optical equipment contains Class 1M lasers or LEDs and has been designed and tested to meet IEC 60825-1:1993+A1+A2 and IEC 60825-2:2004 safety class 1M requirements.
-
Page 10: Protection Against Overvoltage
Safety and compliance Non-video signal lines must use appropriate shielded Cat 5 cabling (S-FTP), or at least an equivalent. Ensure that all electrically connected components are carefully earthed and protected against surges (high voltage transients caused by switching or lightning). Electrostatic discharge (ESD) can damage or destroy electronic components. -
Page 11: Cautions
Safety and compliance Overvoltage Category according IEC 60950-22 Mains-operated outdoor equipment shall be suitable for the highest Overvoltage Category expected in the installation location. The Overvoltage Category for outdoor equipment can be higher than for indoor equipment. This outdoor enclosure and the internal camera equipment is designed for overvoltage category II. -
Page 12: Compliance
Safety and compliance Do not use strong or abrasive detergents to clean the camera Use a dry cloth to clean the camera when it is dirty. If the dirt is hard to remove, use a mild detergent and wipe gently. To clean the lens, use lens tissue or a cotton tipped applicator and ethanol. -
Page 13: Product Overview
HD pictures (1080p) for highly detailed surveillance footage. High-speed dome The HSD820v2H3-E high-speed PTZ dome camera has a 30x autofocus zoom lens with 12x digital zoom. Precision 400° per second pan and tilt drive technology offer almost instant preset positioning. - Page 14 By combining streaming video with duplex audio and alarm over IP, the HSD820v2H3-E provides all the interfaces necessary for any IP CCTV application. By offering analogue video out, the HSD820v2H3-E is a hybrid solution that can provide video for a local public view monitor or DVR.
-
Page 15: Access The Webpages
4.7 The HSD820v2H3-E web interface................20 System requirements You can log on to the web interface of your HSD820v2H3-E unit from a PC which is on the same subnet as the unit. The browsing PC must meet the system requirements given in the table below and the browser must support ActiveX controls. -
Page 16: Connect Via Web Browser
To connect to the unit via your web browser Open your web browser. Type the IP address of the HSD820v2H3-E in the address bar, and then press ENTER. The factory-set IP address of the HSD820v2H3-E is in the 10.x.x.x range. It is printed on a sticker on the unit. -
Page 17: Change Network Settings With Device Manager
With Device Manager, you can directly change the network settings of the HSD820v2H3-E. To assign a static IP address Go to the list of detected devices, and then right-click the entry for the HSD820v2H3-E. Click Change Network Settings. In Change Network Settings, click Static IP. -
Page 18: Log On To The Unit
Wait one minute, and then rescan the network. You can identify the device by its MAC address. To access the webpages of the HSD820v2H3-E, double-click its entry in the list of found devices. Note: A DHCP server must be installed on the network in order to provide DHCP network support. -
Page 19: Install Viewer
Access the webpages To create a strong password ● Use at least eight characters ● Do not include your real name, user name, company name, or other personal information ● Do not use complete words that can be found in a dictionary ●... -
Page 20: The Hsd820V2H3-E Web Interface
Access the webpages The HSD820v2H3-E web interface On successful login, the Home page of the HSD820v2H3-E is shown. Camera settings and functions are organised on five tabs found across the top of this page: Home, System, Streaming, PTZ&IMAGE, and Logout. -
Page 21: Home
5.1 Layout.........................21 5.2 Functions......................22 5.3 PTZ Panel......................24 Layout HSD820v2H3-E home page The Home page of the HSD820v2H3-E is made up of the camera preview, function buttons and video streaming information. Button Function Sets image display to standard size... -
Page 22: Functions
See details about the current video and audio Languages The webpages of the HSD820v2H3-E can be displayed in German, English, French, Italian and Simplified Chinese. Select the desired language from the Languages list in the upper-right corner of the page. - Page 23 Home Pan/Tilt control You can right-click the camera view to select the screen mode for pan/tilt control. ● In Emulated joystick mode, you can left-click the camera view and then drag the pointer in any direction to pan/tilt the camera. Camera rotation stops on releasing the mouse button.
-
Page 24: Ptz Panel
Home Info In Normal View mode, you can double-click the camera view to display the Info box. This contains information about the current video, audio and stream parameters. PTZ Panel Home page with PTZ panel The PTZ panel offers an intuitive and convenient interface for easy camera operation. You can use this panel to pan, tilt, zoom, and focus the camera, control the iris, and set the pan tilt speed (1 = slowest, 10 = fastest). -
Page 25: System Settings
System settings On the System tab, Administrators can set and modify the system parameters of the HSD820v2H3-E. In This Chapter 6.1 System........................26 6.2 Security.......................27 6.3 Network.......................35 6.4 DDNS........................42 6.5 Mail........................43 6.6 FTP........................44 6.7 HTTP........................45 6.8 Events.........................45 6.9 Storage management.................... 57 6.10 Recording......................61... -
Page 26: System
System settings System System > System Clicking the System option in the left-hand panel displays the host name, time zone, and time synchronisation settings of the HSD820v2H3-E. Remember to press Save after changing any settings. 6.1.1 Host name Specify a name to identify the camera on the network. If the alarm function is enabled and set to send alarm messages by mail or FTP the host name entered here is displayed in the alarm message. -
Page 27: Time Format
System settings 6.1.4 Time format To set a time format On the System tab, click System in the menu on the left. In the Time format list, select the desired format. Options: [yyyy/mm/dd], [dd/mm/yyyy] Click Save. The date and time format shown above the live video window are changed according to the selected format. -
Page 28: User
System settings 6.2.1 User System > Security > User 6.2.1.1 Admin password The default user name is Admin. The default password is 1234. User name and password are case sensitive. CAUTION: MAKE SURE YOU CHANGE THE DEFAULT PASSWORD WHEN YOU OPEN THE WEB INTERFACE FOR THE FIRST TIME. -
Page 29: Add And Manage User Accounts
System settings Note: The following characters are valid: A-Z, a-z, 0-9, ! # $ % & ' - . @ ^ _ ~ Click Save. The web interface prompts the administrator to relog on to the camera with the new password. -
Page 30: Http Authentication Setting
This function is disabled by default. Users can freely open an RTSP connection to the HSD820v2H3-E and extract a video stream. This may be undesirable from a security perspective. Therefore, it is possible to restrict access to the camera to users with a valid account. -
Page 31: Https
System settings In the Security submenu, click User. In the Type list under Streaming Authentication Setting, click disable. Click Save. Users are not required to provide a name and password for authentication. 6.2.2 HTTPS System > Security > HTTPS HTTPS, SSL, and TLS Hypertext Transfer Protocol Secure (HTTPS) allows secure connections between the IP camera and the web browser using Secure Socket Layer (SSL) or Transport Layer Security (TLS), which protect camera settings and user name / password information from eavesdropping. -
Page 32: Create And Install A Signed Certificate
System settings Field Description Country Enter a 2-letter combination code to indicate the country the certificate will be used in. For example, type “US” to indicate the United States. State or province Enter the local administrative region. Locality Enter other geographical information. Organisation Enter the name of the organisation to which the entity identified in “Common Name”... -
Page 33: Ip Filter
System settings 6.2.3 IP filter System > Security > IP filter Using the IP filter, you can deny/allow access to the IP camera from specific IP addresses. Up to 256 IP addresses may be specified. To enable the IP filter On the System tab, click Security in the menu on the left. -
Page 34: Ieee 802.1X
6.2.4 IEEE 802.1X System > Security > IEEE 802.1X The HSD820v2H3-E is allowed to access a network protected by 802.1X/EAPOL (Extensible Authentication Protocol over LAN). Users need to contact the network administrator to obtain certificates, User IDs, and passwords. 6.2.4.1 CA certificate The CA certificate is created by the Certificate Authority (CA) for validation purposes. -
Page 35: Network
6.3.1.1 Obtain an IP address automatically HSD820v2H3-E cameras are configured to use a fixed IP address by default. Administrators can set the camera to obtain its IP address via the Dynamic Host Configuration Protocol (DHCP). -
Page 36: Modify The Fixed Ip Address
System settings Note: When an IP address changes, cameras using DHCP can always be identified by their MAC address, found on the label of the camera. You are advised to keep the MAC address on record for future identification. To obtain the IP address via DHCP On the System tab, click Network in the menu on the left. -
Page 37: Use Pppoe
System settings 6.3.1.3 Use PPPoE The Point-to-Point Protocol over Ethernet (PPPoE) enables users to transfer data securely. To use PPPoE On the System tab, click Network in the menu on the left. In the Network submenu, select Basic. Click Use PPPoE. Specify the PPPoE user name and password. -
Page 38: Qos
System settings In the Network submenu, select Basic. Under IPv6 Address Configuration, select Enable IPv6. Click Save. The IPv6 IP address is displayed. 6.3.2 System > Network > QoS DiffServ and QoS Differentiated Services (DiffServ, or DS) is a method for adding Quality of Service (QoS) to IP networks. -
Page 39: Snmp
System > Network > SNMP With the Simple Network Management Protocol (SNMP), part of the internet protocol suite, the HSD820v2H3-E can be monitored and managed remotely by a network management system. SNMP v1/v2 To enable the version of SNMP to use, select the appropriate check box. - Page 40 Select Enable SNMP v3. Click Save. Traps for SNMP v1/v2/v3 Traps are used by the HSD820v2H3-E to send messages to a management system to report important events or status changes. To use traps Select Enable traps. In the Trap address box, type the IP address of the management server.
-
Page 41: Upnp
Enable UPnP. Enable UPnP port forwarding When UPnP port forwarding is enabled, the HSD820v2H3-E is allowed to open the web server port on the router automatically. Note: To enable this function, ensure that your router supports UPnP and that the function is activated. -
Page 42: Ddns
System settings DDNS System > DDNS The Dynamic Domain Name System (DDNS) allows a host name to be constantly synchronised with a dynamic IP address. In other words, it allows those using a dynamic IP address to be associated with a static domain name so that others can connect to it by name. To use DDNS From the Network page, set the camera to acquire its IP address via DHCP, as described in section Obtain an IP address automatically. -
Page 43: Mail
System settings Mail System > Mail (example settings) On the Mail page, administrators can configure SMTP settings for sending an email via the Simple Mail Transfer Protocol (SMTP) when an alarm is triggered. SMTP is a protocol for exchanging email messages between servers. SMTP is a relatively simple, text-based protocol, where one or more recipients of a message are specified and the message text is transferred. -
Page 44: Ftp
System settings System > FTP Administrators can configure the camera to send messages to one or two specific File Transfer Protocol (FTP) sites when an alarm is triggered. For FTP server details, contact your network administrator or network service provider, or install FTP software on a PC on the same network as the camera. -
Page 45: Http
System settings HTTP System > HTTP An HTTP Notification server can listen for notification messages from IP cameras triggered by events. Alarm-triggered and motion detection notifications can be sent to the specified HTTP server. See also pages such as Application, Motion Detection, and Tampering for HTTP Notification settings. -
Page 46: Application
Application System > Events > Application HSD820v2H3-E cameras provide four digital alarm inputs and two digital alarm outputs to be used with alarms and their specified trigger actions. For information about the alarm pin definition and connecting alarm devices, see the HSD820v2H3-E Installation Manual. -
Page 47: Alarm Trigger Actions
For more information, see sections Mail, FTP, and/or HTTP. Enable alarm output The HSD820v2H3-E provides two alarm outputs. They can be enabled by selecting Enable alarm output 1 and Enable alarm output 2. Note: The output state is determined by any combination of the alarm inputs (digital input and motion detection). - Page 48 System settings Note: Normally, the range of the Pre-trigger buffer is 1-20 frames. This range will change accordingly if the MJPEG frame rate on the Video frame rate page is 6 or slower. With the Post-trigger function, users can set a certain amount of images to be uploaded after the triggering of the alarm input.
-
Page 49: Specifying File Name Conventions
Send HTTP notification An HTTP Notification Server can listen for notification messages from IP cameras. The HSD820v2H3-E can send alarm- and motion detection-triggered notifications to the server selected in the HTTP address list. For information on HTTP configuration, see section HTTP. -
Page 50: Motion Detection
System settings Enter a file name for the uploaded images. For example, image.jpg. A suffix will be added unless Overwrite is selected. ● Add date/time suffix An incremented sequence number and the date and time of when an image is captured are added to the end of the file name. - Page 51 System settings The Motion Detection function supports up to four sets of Motion Detection settings. To enable and configure a Motion Detection set On the System tab, click Events in the menu on the left, and then click Motion detection. In the Motion Detection list, click the Motion Detection set that you want to configure.
-
Page 52: Motion Detection Area
System settings 6.8.2.1 Motion detection area Per Motion Detection set, up to ten motion detection windows can be added. A red frame is displayed in the camera view around the selected detection area. These areas can be added removed, moved, and/or resized. Motion detection with two windows configured To add a motion detection area ●... -
Page 53: Network Failure Detection
System > Network failure detection Ping request The network failure detection function enables the HSD820v2H3-E to test the connection between the camera and a target host on the network (for example, an NVR, VMS, or Video Server). The camera can ping the remote machine - that is, send data packets to it, with configurable intervals to determine if it is accessible and responding. -
Page 54: Periodical Event
System settings Detection Type The IP address you specify here will be pinged at the interval entered for "every n minutes". Range: 1-99 minutes. Triggered Action Select the desired trigger actions which are to be performed in the event of an alarm. For more information, see Alarm trigger actions in section Application. -
Page 55: Manual Trigger
System settings 6.8.5 Manual trigger System > Events > Manual trigger On the Manual trigger page, administrators can activate manual alarm triggering and define the actions to be taken when the user clicks the Manual Trigger button on the Home page. Manual Trigger Click On or Off to enable or disable the Manual trigger, respectively. -
Page 56: Audio Detection
System settings 6.8.6 Audio detection System > Events > Manual trigger The Audio detection function allows the camera to detect audio and trigger alarms when the audio volume in the detected area reaches/exceeds the defined sensitivity threshold value. To enable Audio detection On the System tab, click Events in the menu on the left. -
Page 57: Storage Management
System settings Storage management Recorded video can be stored on a microSD card inserted into the camera or on a network share. 6.9.1 SD Card System > Storage management > SD Card You can implement local recording using a microSD/SDHC card up to 64 GB. On the Storage Management page, administrators can view capacity information of the microSD/SDHC card and a recording list with all the recording files that are saved on the memory card. - Page 58 System settings - and/or - ● Under Triggered action on the Application, Motion detection, Network failure detection, Tampering, Manual trigger, or Audio detection webpage, select Record video clip. When the recording mode is set to Always (consecutive recording) and microSD/SDHC card recording is also allowed to be triggered by events, the system will immediately start recording to the memory card once events occur.
-
Page 59: Network Share
Network Share System > Storage management > Network Share The HSD820v2H3-E supports recording video to a network share. On the Network Share page, administrators can view capacity information of the network share and a recording list with all the recording files that are saved on the network share. Administrators can also format the network share and implement automatic recording cleanup. - Page 60 System settings Warning: Formatting the network share erases all information on the share. Be sure to save a copy of any information on the share you need to keep before reformatting. See Recording list below for more information. On the Recording page, set a recording schedule. - and/or - Under Triggered action on the Application, Motion detection, Network failure detection, Tampering, Manual trigger, or Audio detection webpage, select Record video clip.
-
Page 61: Recording
System settings Files can be removed, sorted, and downloaded. To remove a file Click on the selected file. Press the Remove button. The file is deleted from the network storage. To sort the files by name and date ● Click Sort. To save or view a recording file In the Recording list, select a file. -
Page 62: Schedule
System settings Under Recording Storage, click SD Card or Network Share. Select Only during time frame. On the schedule overview, click on the row (1-10) representing the schedule you wish to configure. To add days to the schedule, select the appropriate check boxes. Specify the start time and duration of the recording. -
Page 63: File Location
6.12 File location System > File location The HSD820v2H3-E offers JPEG snapshot and MJPEG recording functionality. Users can specify a storage location for the snapshots and live video recordings. The default storage location is C:\. Note: To implement the Snapshot and Recording functions, users working with Windows 7 or Windows 10 must run Internet Explorer as administrator (right-click the IE browser icon and select "Run as Administrator"). -
Page 64: View Information
System settings 6.13 View information Via the View information option in the left-hand pane, administrators can access the camera log file, display user information, and get an overview of the camera parameters and their current values. 6.13.1 Log file System > View information > Log file The system log provides useful information about the configuration and connections after system launch. -
Page 65: User Information
System settings 6.13.2 User Information System > View information > User information The Administrator can view each added user’s login information and privileges. See also section User. To view the list of user accounts ● On the System tab, click View information in the menu on the left, and then click User information. -
Page 66: Parameters
6.13.3 Parameters System > > View information > View parameters The HSD820v2H3-E camera's parameters are stored in its configuration file. To view the system parameters ● On the System tab, click View information in the menu on the left, and then click Parameters. -
Page 67: Factory Default
System settings 6.14 Factory default System > Factory default The Factory default page enables administrators to reset the camera to the default factory settings. To perform a full restore to the default factory settings On the System tab, click Factory default in the menu on the left. Click Full Restore. -
Page 68: Software Version
System settings 6.15 Software version System > Software version To display software version of the camera ● On the System tab, click Software version in the menu on the left. Version information is shown in the web browser. Note that version numbers appearing in your webpage may differ from the numbers shown in the example above. -
Page 69: Software Upgrade
On the Windows Start Menu, click Control Panel, and then click Programs and Features. In the programs list, select the Viewer add-on, and then click Remove to uninstall the existing Viewer. Reopen your web browser, relog on to the HSD820v2H3-E, and then allow the automatic download and installation of Viewer. -
Page 70: Maintenance
System settings 6.17 Maintenance System > Maintenance Administrators can use this page to export configuration files (.bin) to a specified location for future use. To export the configuration file On the System tab, click Maintenance in the menu on the left. Press Export. -
Page 71: Video And Audio Streaming
Video and audio streaming This chapter describes the Streaming tab which can be used to view and modify settings related to video format, video compression, video text overlay, video OCX protocol, video frame rate, and audio transmission mode. Note: The Streaming tab can be accessed by administrators only. In This Chapter 7.1 Video format...................... -
Page 72: Video Resolution
Video and audio streaming 7.1.1 Video resolution The HSD820v2H3-E has quad-stream capability for simultaneous streaming of H.264/H.264 or H.264/MJPEG. Full HD 1080p streaming with a D1 second stream or dual 720p streaming is possible. To set up the video resolution On the Streaming tab, click Video format in the menu on the left. -
Page 73: Profile
Video and audio streaming 7.1.4 H.264 Profile Users can set each H.264 profile to Baseline Profile, Main Profile, or High Profile according to the compression needs. The default setting is Main Profile. To set an H.264 profile On the Streaming tab, click Video format in the menu on the left. In the H.264-x list, select the desired profile. -
Page 74: Video Text Overlay
Video text overlay Streaming > Video text overlay The HSD820v2H3-E features programmable on-screen display (OSD) facilities. Date and time information, a subtitle, the name of the current preset, a text string, and an image (such as a logo) can be displayed as overlays over the camera images. - Page 75 Video and audio streaming Include subtitle: up to three text boxes can be used. Include preset title: adds the name of the current camera preset. Include text string: type the text you wish to add. Align the text(s) as necessary and drag the text box(es) to the desired position on the preview.
-
Page 76: Video Ocx Protocol
Video and audio streaming Video OCX Protocol Streaming > Video OCX protocol On the Video OCX Protocol page, users can select a protocol for streaming media over the network to the webpages via the Viewer application. Protocol Description RTP over UDP Real-Time Transport Protocol, using UDP transport, lessens network delay and is required for two-way audio streams. -
Page 77: Video Frame Rate
Video and audio streaming Video frame rate Streaming > Video frame rate On the Video frame rate page, the administrator can set the MJPEG, H.264-1, H.264-2, H. 264-3, and H.264-4 frame rate - that is, the number of frames per second. The default frame rate depends on the selected TV system (see PTZ&IMAGE >... -
Page 78: Audio
Video and audio streaming Audio Streaming > Audio On the Audio page, administrators can select the transmission mode and bit rate for audio streams. To configure audio settings On the Streaming tab, click Audio in the menu on the left. Under Transmission Mode, select one of the following options: Full-duplex –... - Page 79 Video and audio streaming Whereas higher bit rates allow for better audio quality, they also require more bandwidth. Click Save. To enable audio recording Under Recording to Storage, click Enable if you wish to add audio when recording video to the SD card or network share. Click Save.
-
Page 80: Ptz&Image
PTZ&IMAGE From the PTZ&IMAGE tab, users can view a live video stream, control the PTZ functions, and configure camera parameters. In This Chapter 8.1 Preset......................... 80 8.2 Cruise......................... 82 8.3 Autopan.......................83 8.4 Sequence......................85 8.5 Home........................86 8.6 Tilt Range......................87 8.7 Privacy Mask...................... - Page 81 PTZ&IMAGE HSD820v2H3-E cameras support 256 preset points. To set a preset point On the PTZ&IMAGE tab, click Preset in the menu on the left. Position the pointer on the live view pane. Keeping the left mouse button pressed, move the camera to the desired view by dragging the (red) pointer.
-
Page 82: Cruise
PTZ&IMAGE > Cruise A cruise is a route formed with manual operation (through adjusting the pan and tilt position), which can be stored and recalled to execute repeatedly. The HSD820v2H3-E supports up to eight programmable cruise paths. To record a cruise path On the PTZ&IMAGE tab, click Cruise in the menu on the left. -
Page 83: Autopan
PTZ&IMAGE > Autopan Autopan is the motion of scanning an area horizontally so the dome camera captures a horizontal view. The HSD820v2H3-E supports up to four programmable autopan paths. To record an autopan path On the PTZ&IMAGE tab, click Autopan in the menu on the left. - Page 84 PTZ&IMAGE Move the camera to the desired end point of the autopan. Click the Set button of End point. To execute a defined autopan path On the PTZ&IMAGE tab, click Autopan in the menu on the left. Under Autopan run, select the desired autopan path from the Autopan path list. Press Run.
-
Page 85: Sequence
PTZ&IMAGE> Sequence The sequence function executes prepositioning of the pan, tilt, zoom, and focus features in a certain sequence for a camera. The HSD820v2H3-E supports up to eight sequence lines. Up to 64 points can be specified for each sequence line. -
Page 86: Home
PTZ&IMAGE The sequence is continuously repeated. To stop running a sequence ● Drag the (red) mouse pointer across the live view pane in any direction. The current sequence stops and is no longer repeated. Dwell time The dwell time is the duration time the dome remains at a sequence point. The dome will go to the next sequence point when the dwell time expires. -
Page 87: Tilt Range
Tilt Range PTZ&IMAGE > Tilt Range The tilt range of the HSD820v2H3-E is adjustable from minimum -10° to maximum +190°. Note: The tilt angle range is between -10° to +100° when the Flip function on the Camera - Misc1 page is set to Off or M.E. The tilt angle range is between -10° to +190° when the Flip function on the Camera - Misc1 page is set to Image. -
Page 88: Privacy Mask
Note: When a privacy mask has been set and enabled, the Flip function on the Camera - Misc1 page is disabled. The HSD820v2H3-E supports up to 16 privacy masks. To set a privacy mask On the PTZ&IMAGE tab, click Privacy Mask in the menu on the left. -
Page 89: Camera - Exposure
PTZ&IMAGE In the Mask (1-16) text box, enter the number of the mask you wish to edit, and then click Edit. The camera adopts the position and angle used when the mask was set initially. Make the required changes as described above. Click Set. -
Page 90: Camera - Wb
PTZ&IMAGE In this mode, the iris setting is fixed. The minimum iris opening can be adjusted from F4.8 to F19. The minimum shutter speed can be set from 1/30 to 1 sec (NTSC) or 1/25 to 1 sec (PAL). AGC (Auto Gain Control) will function automatically depending on the light conditions of the subject but will be limited according to the Max Gain setting. - Page 91 PTZ&IMAGE Light source Colour temperature in °K Cloudy sky 6000 to 8000 Noon sun and clear sky 6500 Household lighting 2500 to 3000 75 W bulb 2820 Candle flame 1200 to 1500 Auto The camera detects a colour temperature range and calculates an optimal white balance. The Auto White Balance mode is suitable for light sources with colour temperature ranges from 2700 to 7500 K.
-
Page 92: Camera - Misc1
PTZ&IMAGE 8.10 Camera - Misc1 PTZ&IMAGE > Cam - Misc1 On the Camera - Miscellaneous Setups Menu 1 (Misc1) page, users can set various camera parameters including Backlight Compensation, Sharpness, Exposure Compensation, Image Flip, Digital Zoom, Speed by Zoom, and Day/Night. Backlight Compensation (BLC) enhances the visibility of objects in the foreground of an image when there is a bright light in the background. -
Page 93: Digital Zoom
PTZ&IMAGE Note: To make the dome camera tilt between a specific range, such as -10° to +100° or -10° ~ +190°, go to the Tilt Range page to set the tilt angle range. Otherwise, the dome camera will tilt 90° as the default setting. The Image mode (digital image flip mode) enables users to keep tracking the objects seamlessly. -
Page 94: Camera - Misc2
PTZ&IMAGE 8.11 Camera - Misc2 PTZ&IMAGE > Camera - Misc2 On the Camera - Miscellaneous Setups Menu 2 (Misc2) page, users can set various camera parameters. To enhance video display, the wide dynamic range (WDR) function solves high contrast or changing light issues by taking the best of two pictures with different exposure settings. - Page 95 (at the expense of some sharpness) even in low light conditions. 3DNR In addition to 2D Noise Reduction, the HSD820v2H3-E also includes 3DNR which generates enhanced noise reduction. Stabilizer The HSD820v2H3-E has a built-in image stabiliser to prevent vibrations from disrupting a camera view or footage, such as those caused by wind in pole-mount installations.
-
Page 96: Camera - Profile
PTZ&IMAGE 8.12 Camera - Profile PTZ&IMAGE > Camera - Profile Combinations of camera settings, such as those made on the Exposure, WB, Misc1, and Misc2 pages, can be stored as profiles which can be used for specific scenarios with different time schedules. -
Page 97: Camera - Default
PTZ&IMAGE The camera adopts the settings associated with the profile. To return to the factory-default values On the Camera - Profile page, click to open the Num list. Click Normal. Click Load. To delete a profile On the Camera - Profile page, click to open the Num list. In the Num list, select the profile to be deleted. -
Page 98: Appendix: Enable Upnp
Appendix: Enable UPnP With UPnP enabled in Windows, it is possible to see TKH Security devices in Windows Explorer. You can double-click a device to open its webpages. To enable UPnP In Control Panel, click Network and Sharing Center. In the left pane, click Change advanced sharing settings. Under the relevant network profile, click Turn on network discovery. -
Page 99: Appendix: Delete The Existing Viewer Software
Appendix: Delete the existing Viewer software Viewing camera images in the HSD820v2H3-E webpages requires Viewer software. You are strongly advised to remove a previous installation of the Viewer add-on from your computer before initial access to the camera over the network or when you encounter an "A new version is available"... -
Page 100: Appendix: Set Up Internet Security
Under Security level for this zone, click the Default Level button. Click OK to confirm the setting. Close the browser window, and start a new session later to access the HSD820v2H3-E. To modify ActiveX Controls and Plug-ins settings Start Internet Explorer (IE). -
Page 101: Appendix: Ntcip Configuration
SNMP MIB........................103 Supported conformance groups The HSD820v2H3-E firmware supports all the mandatory parts and some of the optional parts (see table below) of the NTCIP CCTV specification as laid down in the NTCIP 1205:2001 v01.08 document. This means that - in terms of section 4 of this document - the following conformance groups are supported. -
Page 102: Cctv Configuration
Appendix: NTCIP Configuration CCTV configuration The CCTV Configuration conformance group consist of objects that specify the configuration parameters of a CCTV. For details, refer to NTCIP 1205. Conformance requirement within the group is mandatory. ● rangeMaximumPreset ● rangePanLeftLimit ● rangePanRightLimit ●... -
Page 103: Snmp Mib
Appendix: NTCIP Configuration SNMP MIB NTCIP has its own SNMP MIB. This database is used to store information, which is used to control cameras and other devices in the transportation management system. An electronic version of the MIB is available from a NEMA FTP site. To get access to the FTP site, send your name, organisation name, and email address to ntcip@nema.org, and request access. -
Page 104: Index
Index About this manual........6 Factory default........67 Access the webpages......15 Features..........13 Add and manage user accounts....29 File location........... 63 Admin password........28 Find the unit with Device Manager.... 16 Advanced settings........37 FTP............44 Alarm trigger actions.......47 Functions..........22 Appendix: Delete the existing Viewer software.......... - Page 105 Specifying file name conventions....49 Storage management......57 Streaming Authentication Setting....30 Supported conformance groups....101 System..........26 System requirements......15 System settings........25 The HSD820v2H3-E web interface.....20 Tilt Range..........87 Time format...........27 Time synchronisation......27 Time zone..........26 UPnP.............41 Use PPPoE..........37 User............. 28 User Information........
Need help?
Do you have a question about the HSD820v2H3-E and is the answer not in the manual?
Questions and answers