Table of Contents
Advertisement
Quick Links
Lighting Controls – FLX S lighting console
FLX S24 & FLX S48
User Manual
Version 1
Correct as per ZerOS Version 7.9.3
This product must be earthed
Apparatets stikprop skal tilsluttes en stikkontakt med jord, som giver forbindelse til stikproppens jord.
Laite on liitettävä suojakoskettimilla varustettuun pistorasiaan
Apparatet må tilkoples jordet stikkontakt
Apparaten skall anslutas till jordat uttag
Zero 88 FLX S Lighting Console – User Manual
Page 1 of 47
Advertisement
Table of Contents

Related Manuals for Eaton FLX S24


Summary of Contents for Eaton FLX S24
-
Page 1: User Manual
Lighting Controls – FLX S lighting console FLX S24 & FLX S48 User Manual Version 1 Correct as per ZerOS Version 7.9.3 This product must be earthed Apparatets stikprop skal tilsluttes en stikkontakt med jord, som giver forbindelse til stikproppens jord. -
Page 2: Table Of Contents
Effects ............. 14 Introduction ............4 Palettes ..............14 Speed, Size, Offset and Rotation Encoders .... 15 FLX S24 & FLX S48 ............4 Cues & Playbacks .......... 16 ZerOS (Operating Software) .......... 4 Phantom ZerOS (offline editor) ........4 Playbacks .............. - Page 3 User fixture types............28 Ethernet basics ............45 DMX – introduction ............29 IP Addresses ............45 DMX channels (and DMX start address) ....29 Subnet Masks ............45 DMX universes ............29 Switch vs Crossover ..........45 16 bit channels ............29 DHCP ...............
-
Page 4: Introduction
This manual describes the operation of the FLX S lighting Console. For detailed information on each function, the FLX S24 & FLX S48 manual has been divided into chapters - one for each FLX S consoles are easy to learn and simple to use - major area of the console Throughout this manual the delivering all the features you need at an affordable price. -
Page 5: External Display
“Palettes” desktop RigSync The Palettes desktop shows the four attribute windows When FLX S is first plugged into a lighting rig, “RigSync” (Colour, Beam, Position and Effects) in each corner. will set it up automatically and continue working in the background to ensure FLX S and your rig are always synchronised and problem free. -
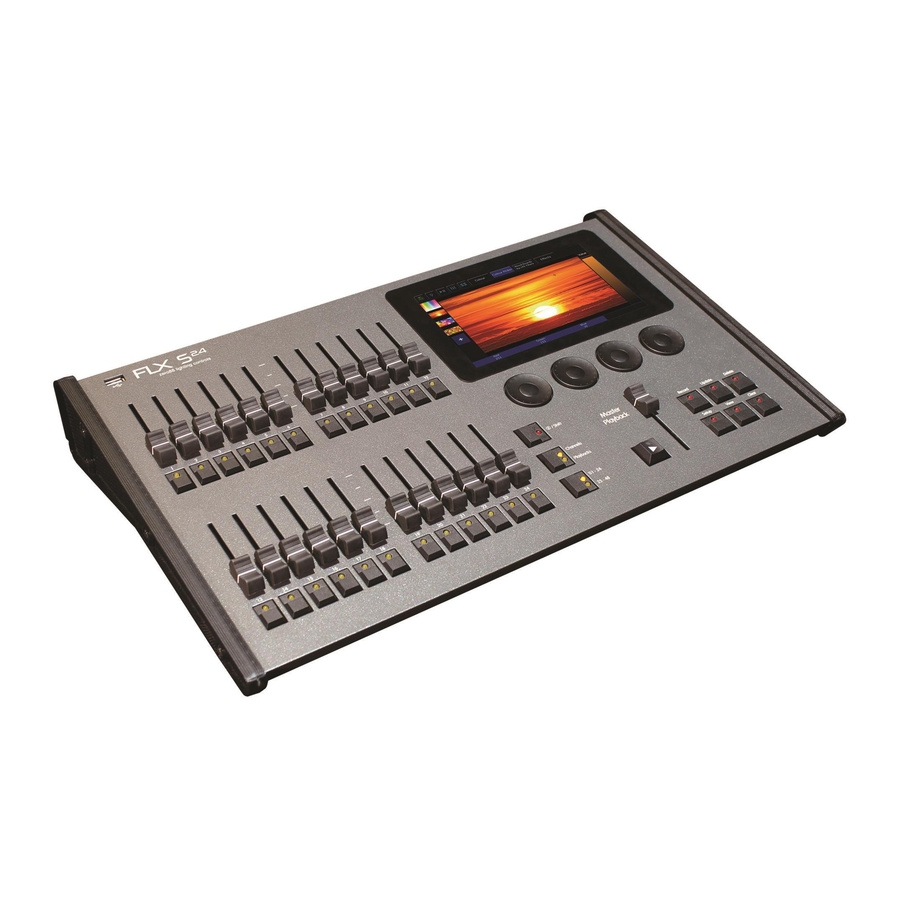
Page 6: Front Panel - Flx S24
Front panel – FLX S24 Multi-Touch Monitor Multi- Function Faders (MFFs) Encoder Wheels “Z” / shift Master Command & Playback Function Keys Front panel – FLXS 48 Multi-Touch Monitor Multi- Function Faders (MFFs) Encoder Wheels Ⓩ / shift Command &... - Page 7 Page The page button allows you to switch between faders 1 – 24 and faders 25 – 48 on FLX S24, or faders 1 – 48 and faders 49 – 96 on FLX S48. Switching between “Channels” and “Playbacks”...
-
Page 8: Controlling Intensities
(two pages of 24 channels on the Groups window. Selecting “All – Dimmers” will also FLX S24, and two pages of 48 channels on the FLX S48). highlight “Odd – Dimmers”, “Even – Dimmers” etc, as by Grey outline boxes in the Output Window show which set selecting “All –... -
Page 9: Recording Groups
Recording groups You can create your own groups of fixtures, eg Blinders, FOH movers, PARs on LX3 etc. Simply select the fixtures that you wish to be in the group using either the channel buttons or syntax, ensure you are viewing the groups window, and then press Record followed by touching an empty group This records whichever group you touch on the touch screen. -
Page 10: Controlling Attributes
” on page 35 for more Controlling Attributes Attribute Settings (Colour, Beamshape, Position information). The intensity of all fixtures, no matter what they are, is Central encoder button controlled in the same way – as described on the previous On parameters with discrete values (such as colour wheel, pages. -
Page 11: Palettes
Palettes Each attribute on the FLX S24 console has 48 palettes (Colour, Beam, Position and Effect). Each attribute on the FLX S48 console has 96 palettes. A palette stores all the values of a fixture (or group of fixtures) required to create a particular look on stage. For... -
Page 12: Updating Palettes
Updating Palettes Colour To update a palette it is often easiest to activate the palette first by selecting your fixtures and touching the palette. Palettes Now, make the changes you want, and then press Update The desk provides the following standard colour palettes followed by touching the relative palette .This updates for fixtures with CMY or RGB colour mixing: White, Red, whichever palette you touched on the touch screen. -
Page 13: Multi-Touch On The Picker
where the colours might be used, and gives a selection of several colours that work well together for that mood. Some moods have more than one selection of colours, such as “Moonlight” which has “Realistic” & “Romantic” selections. “Colour Picker” screen It’s possible to replace the colour picker with a photograph or image, allowing you to select colours from that. -
Page 14: Position
Position Effects Palettes Effects are different than the other four attributes, in that The desk generates a single Home Position palette which they do not directly control features and parameters of the sets the Pan and Tilt parameters to a value of 50%. fixtures patched. -
Page 15: Speed, Size, Offset And Rotation Encoders
Speed, Size, Offset and Rotation Encoders When you press effect, the effect parameters are assigned to the control wheels. If you apply different effects to different parameters of the fixtures (e.g. Rainbow and Circle) you can use the Speed wheel to control the speed of all the effects in one go. When multiple effect palettes are being used together (for example, Circle, Chaser, and Rainbow, Each palette can be adjusted separately by pressing Effect to cycle... -
Page 16: Cues & Playbacks
Each playback can store a single cue, or multiple cues. time. By default, pressing one of the buttons will open the The FLX S24 has 49 playbacks and the FLX S48 has 97. Playback’s Settings window for quick access. However this Both can store a total of 10,000 cues. -
Page 17: Advanced Playbacks
faders. A popup will appear to confirm this action. Deleting 75% on another active playback, it will output at 75%. Playbacks cannot be undone. As that playback is pulled down, the intensity will reduce to 50%, but stay at 50% as that becomes the Advanced Playbacks highest value for that fixture. -
Page 18: Chase
triggering at specified level and fading automatically. the button changes to Revert from Chase , and additional This is great for building playbacks which move fixtures options appear in the chase tab, split into six parts as out into the audience – as the fader moves up, the detailed below. -
Page 19: Raise And Lower
Please note: “Tap Tempo” functionality is available under “Button Trigger / Release Level Function” in the General Tap on any playback which is a chase. The level at which the playback is triggered or released, in %. If set to 10%, the playback will not be triggered Alternately, “Use Global BPM”... - Page 20 playback, they will move to the first cue they are used in. When disabled, they the fixtures go dark for the last time in the playback, they will not move. Fade Time The time with which FLX S fades the attributes that move on dark.
-
Page 21: Cues
Cues Recording cues Once you have set up a look that you like, by selecting fixtures and adjusting their parameters as described in the previous chapters, you can then record that state into a cue. To see the cues being recorded, it is recommended that the Playback Window is displayed. -
Page 22: Adjusting Fade Times
Fixture, Attribute & Parameter Filters updated / deleted / inserted (this is sometimes called a “Block Cue” or “Blocked Cue”). These options filter which values are and aren’t stored into cue. First, “Fixtures” define which Alternatively, pressing Shift & Record together fixtures are to be recorded. -
Page 23: Copying Cues
Once the cue is outputting, make the changes required (using the MFFs, encoder wheels or touchscreen). To record the changes to the current cue, press Update and then press the relevant GO/Play button for the cue you wish to update (such as the Master Playback button). The cue will inherit the new information and the update will be complete. -
Page 24: Cue Settings
Cue Settings different cue. If this field is empty, FLX S will automatically select cues sequentially. Cue Setting can be changed via the “Cue Setup” window. To open this, press Settings button of the cue required, Don’t Move on Dark settings under the settings column of the Playback Window. -
Page 25: Jumping To A Cue (Go To Cue)
Jumping to a cue (Go To cue) Macros To jump to a specific cue, simply scroll to in on the touchscreen and touch it so it’s selected in yellow and then FLX S supports “Fixture Macros” which are used for fixture press the Playback’s Go button. -
Page 26: Key
Intensity Ⓩ Key This encoder is available when fixtures are selected, and can be used to alter the intensities of all the The Ⓩ Key places a range of quick access settings & selected fixtures. This intensity adjustment is relative, functions on the internal display and encoder wheels. - Page 27 Examples of valid commands are below: … 1 @ 1 0 0 Enter … This sets the intensity of channel 1 to 100%. … 2 And 3 @ 7 5 Enter … This sets the intensity of channels 2 and 3 to 75%. …...
-
Page 28: Patching - Introduction
Patching – introduction Zero 88 Fixture library ZerOS includes the Zero 88 Fixture Library. This is a library which contains information for around 6000 fixtures, When FLX S is first plugged into a lighting rig, “RigSync” including how they work, what parameters they have, what will set it up automatically and continue working in the their default vales are etc. -
Page 29: Dmx - Introduction
DMX – introduction DMX universes The 512 DMX channels down a single cable is known as a DMX is the primary method we use to control lighting “DMX Universe”. Therefore, when more than 512 channels fixtures such as dimmers, moving lights, LEDs and smoke are needed, a second DMX Universe is required to be machines etc. -
Page 30: Setup
column header button which is labelled “Change all Setup Names”. To enter Setup, press the Setup key on the front panel. Whilst within Setup, the LED in the Setup key will be lit. Navigate through Setup using the column of options on the left hand side of the screen. - Page 31 Changing fixture type (fixture swapout) This function allows you to change with fixture type from the Zero 88 library you are using. It is useful if a mistake has been made (wrong model or mode, for example) but also allows for a complete swap-out of the physical fixtures from one type to another, for example if there’s a fault and you can’t get an identical replacement fixture.
- Page 32 The desk will ask you to confirm the deletion and then remove the fixtures from the show file. This includes modifying all cues, groups and palettes to remove all references to this fixture. This action cannot be undone. Fixture 4 has an address of 4, but also has two duplicates –...
-
Page 33: Add Fixtures
Add fixtures To add fixtures, such as additional dimmers, LEDs, moving lights, effect machines etc, you need to use the “Add Fixtures” window, which is the second option within the Setup window. Press Add Fixtures on the left hand side of the display. -
Page 34: System Settings
System Settings displayed in the same place you touch the monitor. Press Enter to confirm and return to System Settings. System Settings within the Setup menu allows you to change various settings that affect the ZerOS system, such A number of external touchscreens are supported by FLX as monitor settings or switch between the various modes S48. -
Page 35: Attribute Settings (Colour, Beamshape, Position)
“HTP” means the channel faders will only affect a Attribute Settings (Colour, Beamshape, Position) channel if they are higher than anything else affecting These options allow you to change various settings for that channel (so, if a channel is programmed at 50% in each attribute. -
Page 36: Tracking Options
“Fan Middle” will fan from the middle fixture, so the “Basic” (default) means that cues are programmed with middle fixture’s parameter doesn’t change, the first exactly the lighting state seen on stage. The cue will half of the fixtures will change in one direction only contain the changes required from the previous cue to make this lighting state, and uses the “Smart (again, scaling as you move away from the middle... -
Page 37: Inputs & Outputs
Inputs & Outputs Defaults Inputs and Outputs within the Setup menu allows you to Defaults within the Setup menu allows you to change the manage the DMX Output of the FLX S. This screen does default times and settings given when you program Cues. not cover networking, which is covered in other areas Changing the default settings will never change Cues within Setup. -
Page 38: Default Times
Default Times Save Show These settings change the default times that cues are The FLX S Lighting Console will save the show recorded with. Both the default fade and default delay of automatically to its internal memory at regular intervals. the Intensity, Colour, Beamshape and Position attributes External copies of the show data can be saved to a USB can be changed in this window. -
Page 39: Phantom Zeros
ZerOS Showfile Load File This is the default option, and should be used in most The single “Load File” window can load several different circumstances. These can be loaded back into the console types of files: or loaded onto any other console running ZerOS (for ultimate compatibility, it is suggested that both consoles ZerOS Showfiles are running the same software version). -
Page 40: User Fixture Types
User Fixture Types Clear Options User Fixture Types are files created when a required Clear options allows you to clear certain areas of the fixture is not included within the Zero 88 Fixture Library. console, or reset the console back to factory settings. These files are loaded into the console using the same method as detailed within “ZerOS Showfiles”. -
Page 41: Remote (Mobile Apps)
To enable access to the console from “EtherN.8”, “EtherN.2” and “1 Universe Ethernet Box” by these apps, change “Remote” to “Enabled”. Eaton. NOTE – FLX S should not be connected to the Internet You’re wireless network should already include security measures to ensure unauthorised access isn’t possible,... -
Page 42: Streaming Acn (Sacn)
Transmit Art-Net Streaming ACN (sACN) This option enables or disables Art-Net transmission. Streaming ACN is another lighting protocol which sends DMX data over Ethernet. The protocol allows for multiple Transmit Mode DMX universes to be sent over a single Ethernet cable. This allows you to switch between “Broadcast”... -
Page 43: Wings And Zerowire
Wings and ZeroWire It is possible to use the Enttec Playback Wing as an additional fader/playback wing for the ZerOS consoles. Each key and fader can be assigned individually to allow a truly configurable accessory, and multiple wings can be supported simultaneously. -
Page 44: Visualisation
WYSIWYG Visualisation Recent versions of WYSIWYG support Art-Net directly. For Party visualisation packages allow you to preview your older versions of WYSIWYG (Release 21 or greater) follow lighting through a 3D emulator when you don’t have these instructions: access to the venue. Most accept Art-Net or streaming ACN directly (see pages 41 and 42 respectively), but FLX WYSIWYG Installation S also includes specific support for Capture, WYSIWYG... -
Page 45: Networking Basics
IP Addresses Networking Basics IP Addresses are a devices identity on an Ethernet network. The address indicates where the device is located Ethernet basics and in combination with the Subnet Mask, indicates what The FLX S supports various Ethernet communication the desk can see, and vice-versa. -
Page 46: Technical Information
Technical Information Troubleshooting Power supply Fixtures not responding? FLX S is supplied with an external power supply, which is If your fixtures and dimmers are not responding to the connected to FLX S via a 2.1mm DC barrel connector desk, check: (center positive). -
Page 47: Basic Maintenance
Basic maintenance Reporting a problem FLX S is designed to be relatively maintenance free, Before reporting a problem to Zero 88, please obtain as however a few simple steps can prolong the life of your many of the following pieces of information as possible: hardware.
Need help?
Do you have a question about the FLX S24 and is the answer not in the manual?
Questions and answers