Pioneer VSX-D812 Operating Instructions Manual
Audio/video multi-channel receiver
Hide thumbs
Also See for VSX-D812:
- Operating instructions manual (73 pages) ,
- Operating instructions manual (72 pages)

Related Manuals for Pioneer VSX-D812


Summary of Contents for Pioneer VSX-D812
- Page 1 AUDIO/VIDEO MULTI-CHANNEL RECEIVER SINTOAMPLIFICATORE AUDIO/VIDEO MULTICANALE VSX-D712 VSX-D812 VSX-D912 Operating Instructions Istruzioni per l’uso...
-
Page 2: Installing The Receiver
This product is for general household purposes. Any failure due to use for other than household purposes (such as long-term use for business purposes in a restaurant or use in a car or ship) and which requires repair will be charged for even during the warranty period. -
Page 3: Table Of Contents
Connecting the speakers (VSX-D812/D912) ....23 Speaker terminals ....24 A and B speaker systems. - Page 4 (VSX-D812/D912 only) . . .61 Erasing all of your programmed settings (VSX-D812/D912 only) ..62 Clearing all the remote control settings ......62 Direct function .
-
Page 5: Before You Start
Before you start Chapter 1: Before you start Checking what’s in the box Please check that you've received the following supplied accessories: • AM loop antenna • FM wire antenna • Dry cell batteries (AA size IEC R6) x2 • Remote control •... -
Page 6: Operating Range Of Remote Control Unit
Before you start Incorrect use of batteries may result in such hazards as leakage and bursting. Observe the following precautions: • Never use new and old batteries together. • Insert the plus and minus sides of the batteries properly according to the marks in the battery case. -
Page 7: 02 5 Minute Guide
5 minute guide Chapter 2: 5 minute guide Introduction to home theater You are probably used to using stereo equipment to listen to music, but may not be used to home theater systems that give you many more options (such as surround sound) when listening to soundtracks. -
Page 8: Listening To Surround Sound
Use a video cord to connect your receiver to the TV using the jacks as shown below. Optical cable DIGITAL OUT ¡ ¢ STANDBY/ON DVD player VIDEO OUT * The illustration shows the VSX-D812/D912, but connections for the VSX-D712 are the same. DIGITAL Coaxial cable (CD-R/TAPE/MD) DIGITAL (TV /... -
Page 9: Connect Speakers
A complete setup of speakers is shown here (six speakers for the VSX-D712, and eight for the VSX-D812/D912), but everyone’s home setup will vary. Simply connect the speakers you have in the manner shown below. The receiver will work with just two stereo speakers (the front speakers in the diagram) but using at least three speakers is recommended, and a complete setup is best. - Page 10 VSX-D812/D912 Powered subwoofer VSX-D812/D912 only • To use the speaker on your TV as the center speaker (C), connect the CENTER PREOUT jack on this unit to the audio input jack on your TV. In this case the center speaker shown is unnecessary.
- Page 11 (and as shown below), connecting the positive wire to the right channel (+) terminal, and the negative wire to the left channel (–) terminal. VSX-D812/D912 Plug in the receiver and switch it on, followed by your DVD player, your subwoofer and the TV.
-
Page 12: Using The Quick Setup
When a subwoofer was detected in step 2, you can cycle between the following choices: 7.1ch* * VSX-D812/D912 only If a subwoofer wasn’t detected in step 2, you can cycle between the following choices: 7.0ch* * VSX-D812/D912 only •... - Page 13 5 minute guide Press ENTER. Use the MULTI JOG dial to choose your room size. Depending on the distance of your speakers from the listening position, choose between small, medium, or large (S, M or L), M being an average-sized room. Press ENTER.
-
Page 14: Quick Surround Sound Setup
Quick surround sound setup Chapter 3: Quick surround sound setup VSX-D912 only Automatically calibrating your listening area (MCACC) The Multi-Channel Acoustic Calibration (MCACC) system measures the acoustic characteristics of your listening area, taking into account ambient noise, speaker size and distance, and tests for both channel delay and channel level. - Page 15 Quick surround sound setup • ERR Fch – Check the front speaker connections. • ERR Sch – Check the surround or surround back speaker connections. • ERR SW – Make sure the subwoofer has been switched on and volume on the subwoofer is turned up.
-
Page 16: Connecting Up
Connecting up Chapter 4: Connecting up • Before making or changing any connections, switch off the power and disconnect the power cord from the AC outlet. Audio/Video cords Use audio/video cords (not supplied) to connect the audio/video components and a video cord to connect the monitor TV. -
Page 17: Connecting Digital Components
The VSX-D712 has three digital inputs on the rear panel (two coaxial inputs and an optical input) and both the VSX-D812 and VSX-D912 have four (two coaxial inputs and two optical inputs). Connect your digital components to the rear panel as shown below. -
Page 18: Connecting Audio Components
When connecting your equipment, always make sure the power is turned off and the power cord is disconnected from the AC outlet. • The arrows indicate the direction of the audio signal. CD player CD-R/Tape/MD deck * The illustration shows the VSX-D812/D912, but connections for the VSX-D712 are the same. This receiver* OUTPUT DIGITAL ANTENNA... -
Page 19: Connecting Dvd Multi-Channel Components
AUDIO This receiver* * The illustration shows the VSX-D812/D912, but connections for the VSX-D712 are the same. • The multi-channel input can only be used when DVD 5.1 ch (VSX-D712) or DVD 7.1 ch (VSX- D812/D912) is selected (see page 42). -
Page 20: Connecting Video Components
(or Satellite tuner) OUTPUT VIDEO DVD or LD player * The illustration shows the VSX-D812/D912, but connections for the VSX-D712 are the same. Connecting to the front panel video terminal Front video connections are accessed via the front panel using the VIDEO button. There are... -
Page 21: Connecting Antennas
Connecting up Connecting antennas Connect the AM loop antenna and the FM wire antenna as shown below. To improve reception and sound quality, connect external antennas (see Using external antennas below). Always make sure that the receiver is switched off and unplugged from the wall outlet before making or changing any connections. -
Page 22: Connecting The Speakers (Vsx-D712)
Connecting up Connecting the speakers (VSX-D712) A complete setup of six speakers (including the subwoofer) is shown below, but everyone’s home setup will vary. Simply connect the speakers you have in the manner shown below. The receiver will work with just two stereo speakers (the front speakers in the diagram) but using at least three speakers is recommended, and a complete setup is best. -
Page 23: Connecting The Speakers (Vsx-D812/D912)
Connecting up Connecting the speakers (VSX-D812/D912) A complete setup of eight speakers (including the subwoofer) is shown below, but everyone’s home setup will vary. Simply connect the speakers you have in the manner shown below. The receiver will work with just two stereo speakers (the front speakers in the diagram) but using at least three speakers is recommended, and a complete setup is best for surround sound. -
Page 24: Speaker Terminals
Connecting up • When using the speaker on your TV as the center speaker (C), connect the CENTER PREOUT jack on this unit to the audio input jack on your TV. In this case the center speaker shown is unnecessary. •... - Page 25 Connecting up • Place the center speaker above or below the TV so that the sound of the center channel is localized at the TV screen. • If possible, place the surround speakers slightly above ear level. • Try not to place the surround speakers further away from the listening position than the front and center speakers.
-
Page 26: Connecting Additional Amplifiers
This receiver has more than sufficient power for any home use, however it is possible to add additional amplifiers to every channel on the VSX-D812/D912 or the surround back channel of the VSX-D712. Make the connections shown below to add amplifiers to power your speakers. -
Page 27: Power Cord Caution
A damaged power cord can cause a fire or give you an electrical shock. Check the power cord once in a while. When you find it damaged, ask your nearest Pioneer authorized service center or your dealer for a replacement. -
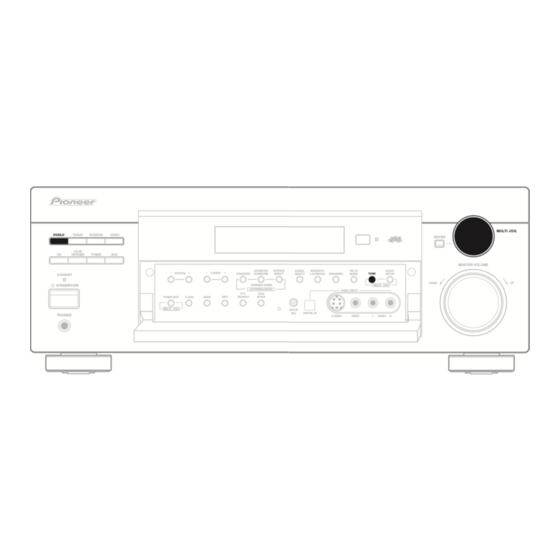
Page 28: Controls And Displays
Controls and displays Chapter 5: Controls and displays Front panel DVD/LD TV/SAT VCR/DVR VIDEO CD-R/ TAPE/MD TUNER STANDBY STANDBY / ON PHONES STANDBY/ON Switches the receiver between on and standby. Input select buttons Press to select an input source. STANDBY indicator Lights when the receiver is in standby. - Page 29 Controls and displays STATION +/– buttons Selects station presets when using the tuner (page 55). 10 TUNING +/– buttons Selects the frequency when using the tuner (page 52). 11 LISTENING MODE buttons STANDARD Press for Standard decoding and to switch between the various Pro Logic II and Neo:6 options (page 37).
-
Page 30: Display
Controls and displays Display SIGNAL SELECT indicators Lights to indicate the type of input signal assigned for the current component: AUTO Lights when AUTO signal select is on. Depending on the source, this lights when a signal with surround back channel encoding is detected. - Page 31 Controls and displays 11 Speaker indicator Shows the speaker system currently in use. 12 EON When the EON mode is set. the EON indicator lights, but during actual reception of an EON broadcast the EON indicator will flash. indicator indicator lights to inform you that the currently tuned station carries the EON data service.
-
Page 32: Remote Control
Controls and displays Remote control RECEIVER INPUT SELECT MULTI CONTROL DVD/LD TV / SAT CD-R/TAPE ADVANCED STANDARD SURROUND SELECT LEVEL EFFECT MUTE RECEIVER CONTROL MASTER VOLUME TOP MENU SETUP TUNE ENTER AUDIO TUNE MCACC SETUP RETURN BAND DISPLAY CLASS CHANNEL RECEIVER RECEIVER This switches between standby and on for this... - Page 33 Controls and displays FL DIMMER Dims or brightens the display. MASTER VOLUME +/– Use to set the listening volume. Receiver and component control buttons (Press the corresponding MULTI CONTROL button first to access). These controls function according to the component you’ve selected. TOP MENU Displays the disc ‘top’...
- Page 34 Controls and displays D.ACCESS After pressing, you can access a radio station directly using the number buttons (page 52). Number buttons Use the number buttons to directly select a radio frequency (page 52) or the tracks on a CD, DVD, etc. CHANNEL +/–...
-
Page 35: Playing Sources
Playing sources Chapter 6: Playing sources Introduction to Sound Modes There are three basic sound options: Stereo/ Direct (STEREO/DIRECT), Standard (STAN- DARD) or Advanced Surround (ADVANCED SURROUND). Stereo/Direct When you select STEREO or DIRECT, you will hear the source through just the front left and right speakers (and possibly your subwoofer depending on your speaker settings). -
Page 36: Advanced Surround Modes
Playing sources Neo:6 Music (MUSIC) This mode gives 6.1 channel surround sound and is suitable for music. The Neo:6 Music mode plays the stereo source as is through the front left/right speakers, and generates a natural, ambient surround and center sound. Advanced Surround modes These are designed to be used with multi- channel surround sound audio/visual... -
Page 37: Listening To Multi-Channel Playback
• This receiver can only play back Dolby Digital, PCM (32kHz–96 kHz) and DTS digital signal formats (however, only the VSX-D812 and VSX-D912 can decode DTS 96kHz/24 bit signal formats). With other digital signal formats, set to ANALOG. • You may get digital noise when a LD or CD player compatible with DTS is playing an analog signal. -
Page 38: Using Stereo/Direct
Playing sources Start playback of the component you selected in step 1. • You can’t use the STANDARD mode with 96kHz PCM or DTS 96kHz/24-bit stereo sources. Using Stereo/Direct When you select STEREO or DIRECT, you will hear the source through just the front left and right speakers (and possibly your subwoofer depending on your speaker settings). -
Page 39: Using The Surround Back Channel
Playing sources Using the Surround Back Channel (SB CH) • Default setting: SB ON (VSX-D812/D912), SB OFF (VSX-D712) You can have the receiver automatically switch to Dolby Digital EX or DTS-ES decoding for 6.1 encoded sources (SB AUTO), or you can choose to listen to other kinds of sources (for example, 5.1 encoded... -
Page 40: Using The Virtual Surround Back
• You can only use the Virtual Surround Back mode if the Surround back speaker setting on page 45 is set to SB or SB SW (VSX-D812/D912 only). • You can’t adjust the surround back channel level when you’re listening to the virtual surround back channel. -
Page 41: Using Midnight And Loudness Listening
Playing sources Using Midnight and Loudness listening The Midnight listening feature allows you to hear effective surround sound of movies at low volume levels. The effect automatically adjusts according to the volume at which you’re listening. The Loudness listening feature can be used to get good bass and treble from music sources at low volume levels. -
Page 42: Selecting The Multi-Channel Analog Inputs
Playing sources Start playback of the component you selected in step 1. Selecting the multi-channel analog inputs If you have connected a decoder or a DVD player with multi-channel analog outputs to this receiver (page 19), you must select the analog multi-channel inputs for surround sound playback. -
Page 43: Setting Up
Setting up Chapter 7: Setting up Choosing your receiver setup To ensure the best possible surround sound, be sure to complete the following set up operations. This is particularly important when using DTS and Dolby surround. You only need to make these settings once (unless you change the placement of your current speaker system or add new speakers, etc.). -
Page 44: Speaker Setting
Dual mono setting (page 48) Isolate one channel when listening to discs with dual mono encoding. Surround back channel input setting (VSX-D812/D912 only) (page 48) Specify the number of surround back analog inputs you have connected. Digital input settings (page 48) Specify the components to be assigned to the digital inputs (below). -
Page 45: Surround Back Speaker Setting
FL-CS-SS FL-CL-SS FL-CL-S FL-CS-SL Surround back speaker setting • Default setting: S (VSX-D812/D912), (VSX-D712) You must let the receiver know if surround back speaker(s) have been connected, and how big they are. The size you choose (large or small) determines how much bass is sent from the receiver to the speakers. -
Page 46: Lfe Attenuator Setting
Setting up We recommend setting this to 200Hz if your S speakers are smaller bookshelf-type speakers. • to specify the crossover frequency for your small speakers (100 Hz, 150 Hz or 200 Hz). 100Hz 200Hz 100Hz Sends bass frequencies below 100 Hz to the subwoofer (or L speakers). -
Page 47: Front Right Speaker Distance Setting
(within the range of 0.1 m to 9.0 m). • When SB SW (VSX-D812/D912 only) or SB is selected in the surround back speaker setting, the surround back speaker distance can’t be set. -
Page 48: Dynamic Range Control Setting
Lch 1.R ch2 Surround back channel input setting (VSX-D812/D912 only) • Default setting: SB 2ch IN You only have to make this setting if you are using a seperate component for decoding DVDs, and the component has only one surround back channel output. -
Page 49: Manually Calibrating Your Listening Area (Mcacc)
• Default settings: TV • to assign the optical digital 1 input (DVD, TV, CD, CDR, VCR or OFF). Optical digital 2 (VSX-D812/D912 only) • Default setting: CDR • to assign the optical digital 2 input (DVD, TV, CD, CDR, VCR or OFF). - Page 50 Setting up Press RECEIVER. Press MCACC SETUP. The MCACC system uses the left front speaker as a reference point to calibrate the speaker level and channel delay. The front left speaker tone and the target speaker (the one that you’re trying to adjust) tone will sound in turns, so you can judge which needs to be louder.
-
Page 51: Setting Separate Channel Levels For Listening Modes
Setting up Setting separate channel levels for listening modes • Default setting: 0 dB In addition to the MCACC setup, you can also set relative channel levels from the listening position using the method below. Using CH SELECT (see tip below), it is also possible to set separate channel levels for each of the listening modes. -
Page 52: Using The Tuner
Using the tuner Chapter 8: Using the tuner Listening to the radio The following steps show you how to tune in to FM and AM radio broadcasts using the automatic (search) and manual (step) tuning functions. If you already know the frequency of the station you want, see Tuning directly to a station below. -
Page 53: Saving Station Presets
Using the tuner Press the TUNER button to select the tuner. Use the BAND button to change the band (FM or AM), if necessary. Each press switches the band between FM and AM. Press D.ACCESS (Direct Access). Use the number buttons to enter the frequency of the radio station. -
Page 54: Naming Station Presets
Using the tuner Press T.EDIT (TUNER EDIT). The display shows ST. MEMORY, then a blinking memory class. 99.50 Press CLASS to select one of the three classes then press ST +/– (STATION +/–) to select the station preset you want. You can also use the the MULTI JOG dial (front panel) to select a station preset. -
Page 55: Listening To Station Presets
Using the tuner Listening to station presets You will need to have some presets stored to do this. See Saving station presets on page 53 if you haven’t done this already. Press TUNER to select the tuner. Press CLASS to select the class in which the station is stored. -
Page 56: Displaying Rds Information
Using the tuner PHONE IN – Public expressing their views by phone TRAVEL – Holiday-type travel rather than traffic announcements LEISURE – Leisure interests and hobbies JAZZ – Jazz COUNTRY – Country music NATION M – Popular music in a language other than English OLDIES –... -
Page 57: An Introduction To Eon
Using the tuner Press the BAND button to select the FM band. RDS is only possible in the FM band. Press the PTY SEARCH button. SEARCH shows in the display. Use the MULTI JOG dial to select the program type you want to hear. Press ENTER to search for the program type. -
Page 58: Clearing All Stations From The Rds And Eon Searches
Using the tuner Clearing all stations from the RDS and EON searches The receiver will automatically register an identifying marker (called a PI code) for any station you input into the memory classes which can receive RDS or EON data. If you want to remove the currently memorized stations from RDS and EON searches, you can do it by erasing the PI codes. -
Page 59: Making Recordings Making An Audio Or A Video Recording
Making recordings Chapter 9: Making recordings Making an audio or a video recording You can make an audio or a video recording from the built-in tuner, or from an audio or video source connected to the receiver (such as a CD player or TV). Keep in mind you can’t make a digital recording from an analog source or vice- versa, so make sure the components you are... -
Page 60: Controlling The Rest Of Your System
Controlling the rest of your system Chapter 10: Controlling the rest of your system Setting the remote to control other components There are several ways to set your remote to control the other components in your system. The easiest way to do this is to assign the component’s manufacturer preset code (starting on page 67) to one of the MULTI CONTROL buttons on the remote control. -
Page 61: Programming Signals From Other Remote Controls (Vsx-D812/D912 Only)
Use the number buttons to enter the preset code. You can find the preset codes on page 67 (VSX-D712) and page 68 (VSX-D812/912). The LED blinks again after you enter the code. If the correct code has been input the power of the component being input will turn on or off. -
Page 62: Erasing All Of Your Programmed Settings (Vsx-D812/D912 Only)
MULTI CONTROL buttons, RECEIVER CONTROL and MASTER VOLUME buttons. Erasing all of your programmed settings VSX-D812/D912 only This erases all of the buttons you have programmed (in Programming signals from other remote controls, above) and restores the button to the factory default. -
Page 63: Controls For Tvs
Controlling the rest of your system Controls for TVs This remote control can control components after entering the proper codes or teaching the receiver the commands (see Setting the remote to control other components on page 60 for more on this). Use the MULTI CONTROL buttons to select the component. Button(s) Function Switches the DTV on or off. -
Page 64: Controls For Other Components
Controlling the rest of your system Button(s) Function Switches DTV on or off. Use to select closed captioning with DTV. Number Use to select a specific TV channel. Buttons +10 button Use to add a decimal point when selecting a specific TV channel. - Page 65 Controlling the rest of your system Button (s) Function Pause playback or recording. Start playback. Hold down for fast forward playback. Hold down for fast reverse playback. Stops playback (on some models, pressing this when the disc is already stopped will cause the disc tray to open). Number Directly access tracks on a program source.
- Page 66 Controlling the rest of your system Button (s) Function TOP MENU Displays the disc ‘top’ menu of a DVD. AUDIO Changes the audio language or channel. GUIDE Displays/changes the subtitles on multilingual DVDs. Components DVD/DVR Player DVD/DVR Player DVD/DVR Player...
-
Page 67: Preset Code List (Vsx-D712 Only)
GOLDSTAR 650 ZENITH 014 JVC 613 THOMSON 015 FUNAI 640 SONY 016 (video game) GRANDIENTE 657 PIONEER 000, 008 PIONEER 600, 651, 231 STB (SATELLITE/CATV) Manufacturer Code Manufacturer Code SONY 101, 102 JERROLD 716 HITACHI 109 S.ATLANTA 706, 708 DENON 110... -
Page 68: Preset Code List (Vsx-D812/D912 Only)
Controlling the rest of your system Preset Code List (VSX-D812/D912) You should have no problem controlling a component if you find the manufacturer in this list, but please note that there are cases where codes for the manufacturer in the list will not work for the model that you are using. - Page 69 Manufacturer Code RADIO SHACK 6032 PIONEER 4001 RCA 6033 SAMSUNG 6034, 6035 SCIENTIFIC ATLANTA Manufacturer Code 6036 , 6037, 6038 PIONEER 8001, 8002, 8003 SIEMENS 6039, 6040 DENON 8004 SONY 6041 JVC 8005 TOSHIBA 6042, 6043 KENWOOD 8006 TOCOM 6044...
-
Page 70: Additional Information
Investigate the other components and electrical appliances being used. If the trouble cannot be rectified even after exercising the checks listed below, ask your nearest Pioneer authorized service center or your dealer to carry out repair work. Problem The power does not turn on. - Page 71 Additional information Problem Remedy Broadcast stations cannot be • Connect an outdoor antenna (refer to page 21). selected automatically. No sound from surround or • Refer to Speaker setting on page 44 to check the speaker settings. center speakers. • Refer to Manually calibrating your listening area (MCACC) on page 49 (with the VSX-D912, you can do this using the Quick surround sound setup on page 14) to check the speaker levels.
-
Page 72: Resetting The Main Unit
Additional information Problem Can’t operate the remote control. The display is dark or off. • If the unit does not operate normally due to external effects such as static electricity disconnect the power plug from the outlet and insert again to return to normal operating conditions. -
Page 73: Specifications
Surround ....100 W per channel (1kHz, 1.0 %, 8 Surround Back... 100 W per channel (VSX-D812/D912 only) (1kHz, 1.0 %, 8 Input (Sensitivity/Impedance) CD, VCR/DVR, CD-R/TAPE/MD, DVD/LD, TV/SAT. -
Page 74: Miscellaneous
VSX-D712 ......250 W VSX-D812/D912 ....280 W In standby . - Page 75 Additional information...
-
Page 76: Installazione Del Ricevitore
SCOLLEGATA DALLA PRESA AL MURO QUANDO L’APPRECCHIO RIMANE INUTILIZZATO PER UN CERTO PERIODO DI TEMPO. Questi prodotti, VSX-D712 e VSX-D812/D912 sono conformi al DM 28/8/1995, Nº548, ottemperando alle prescrizioni di cui al DM 25/6/1985 (par. 3, All. A) e DM 27/8/1987 (All. - Page 77 Collegamento dei diffusori (VSX-D812/D912) ....23 Terminali dei diffusori ....24 Sistema di diffusori A e B .
- Page 78 (solo per VSX-D712) ....67 Elenco dei codici di preselezione (VSX-D812/D912) ....68 11 Altre informazioni Soluzione dei problemi .
-
Page 79: Informazioni Preliminari Controllo Degli Accessori In Dotazione
Informazioni preliminari Capitolo 1: Informazioni preliminari Controllo degli accessori in dotazione Si prega di controllare di aver ricevuto i seguenti accessori in dotazione: • Antenna AM a telaio • Antenna FM a filo • Pile a secco (Formato AA/IEC R6) x 2 •... -
Page 80: Campo Operativo Del Telecomando
Informazioni preliminari Importante L’utilizzo errato delle pile può avere conseguenze pericolose come perdita di liquido ed esplosione. Osservare le seguenti precauzioni: • Non utilizzare mai una batteria nuova ed una vecchia allo stesso tempo. • Inserire le pile con il polo positivo ed il negativo orientati come indicato dai segni all’interno del comparto pile. -
Page 81: Guida In 5 Minuti
Guida in 5 minuti Capitolo 2: Guida in 5 minuti Introduzione al teatro casalingo Se l’utilizzo di un apparato stereo per l’ascolto della musica è probabilmente un’abitudine quotidiana, ancora non si è familiarizzato con i sistemi di teatro casalingo che offrono un maggior numero di opzioni (quale il suono surround) per l’ascolto di colonne sonore. -
Page 82: Per Ascoltare Il Suono Surround
Utilizzare un cavo video per collegare il ricevitore al televisore servendosi delle prese jack, come mostrato nella pagina successiva. Cavo ottico DIGITAL OUT ¡ ¢ STANDBY/ON Lettore DVD VIDEO OUT * L’illustrazione mostra il VSX-D812/D912, ma i collegamenti del riguardanti il VSX-D712 sono gli stessi. Televisore DIGITAL Cavo coassiale DIGITAL (CD-R/TAPE/MD) - Page 83 Guida in 5 minuti Collegare i diffusori. Viene qui illustrata una serie completa di diffusori (sei diffusori per il VSX-D712 e otto per il VSX- D812/D912) in ogni caso, la configurazione varia da casa a casa. Basta collegare i diffusori nella maniera descritta qui in seguito.
- Page 84 AUDIO VSX-D812/D912 Subwoofer alimentato Solo per VSX-D812/D912 • Per utilizzare il diffusore sul televisore come diffusore centrale (C), collegare la presa jack CENTER PREOUT del presente apparecchio alla presa jack di ingresso audio del televisore. In questo caso il diffusore centrale illustrato non è necessario.
- Page 85 Guida in 5 minuti VSX-D812/D912 Collegare e accendere successivamente il ricevitore, il lettore DVD, il subwoofer ed il televisore. Assicurarsi di aver impostato l’entrata video sul televisore al presente ricevitore. Nel caso in cui si verifichino delle difficoltà, controllare il manuale fornito in dotazione con il televisore.
-
Page 86: Per Utilizzare La Configurazione Rapida
Qualora, alla fase 2, sia stato rilevato un subwoofer, è possibile selezionare una delle seguenti opzioni: 7.1ch* * Solo per VSX-D812/D912 Qualora, alla fase 2, non sia stato rilevato alcun subwoofer, è possibile selezionare una delle seguenti opzioni: 7.0ch* * Solo per VSX-D812/D912 •... - Page 87 Guida in 5 minuti Premere ENTER. Utilizzare il selettore MULTI JOG per scegliere le dimensioni dell’ambiente. In base alla distanza dei diffusori dalla posizione di ascolto, scegliere tra Piccolo, Medio o Grande (S, M o L), dove M corrisponde ad un ambiente di dimensioni medie.
-
Page 88: Impostazione Rapida Del Suono Surround (Solo Per Vsx-D912)
Impostazione rapida del suono surround Capitolo 3: Impostazione rapida del suono surround Solo per VSX-D912 Regolazione automatica dell'area di ascolto (MCACC) Il sistema di regolazione acustica multicanale (Multi-Channel Acoustic Calibration) (MCACC) misura le caratteristiche audio dell'area d'ascolto, tenendo in considerazione il rumore presente nell'area, la dimensione e la distanza dei diffusori, e prova il livello e il tempo dei ca- nali. - Page 89 Impostazione rapida del suono surround Disattivare l'alimentazione e verificare il problema indicato dal messaggio ERR (vedi di seguito), quindi riprovare ad eseguire l'impostazione automatica del suono surround. • ERR MIC – Verificare il collegamento del microfono. • ERR Fch – Verificare i collegamenti del diffusore anteriore.
-
Page 90: Collegamento
Collegamento Capitolo 4: Collegamento Importante • Prima di effettuare o modificare i collegamenti, spegnere l’apparecchio o scollegare il cavo di alimentazione dalla presa a muro di corrente alternata (CA). Cavi audio/video Utilizzare cavi audio/video (non forniti in dotazione) per collegare i componenti audio/ video e un cavo video per collegare il monitor del televisore. -
Page 91: Collegamento Di Componenti Digitali
Il VSX-D712 possiede tre entrate digitali sul pannello posteriore (due entrate coassiali ed una ottica), e entrambi i modelli VSX-D812 e VSX-D912 prevedono quattro (due entrate coassiali e due ottiche). Collegare i componenti digitali al pannello posteriore come mostrato in seguito. -
Page 92: Collegamento Di Componenti Audio
• Le frecce indicano la direzione del segnale audio. Lettore CD CD-R/Piastra a cassette/Vano MD * L’illustrazione mostra il VSX-D812/D912, ma i collegamenti del riguardanti il VSX-D712 sono gli stessi. Ricevitore* OUTPUT DIGITAL... -
Page 93: Collegamento Di Componenti Per Un Dvd A Multicanali
S-VIDEO PLAY AUDIO Ricevitore* * L’illustrazione mostra il VSX-D812/D912, ma i collegamenti del riguardanti il VSX-D712 sono gli stessi. Nota • È possibile utilizzare l’entrata multicanale unicamente quando viene selezionato DVD 5.1 ch (VSX-D712) o DVD 7.1 ch (VSX-D812/D912) (vedere pagina 42). -
Page 94: Collegamento Di Componenti Video
TV (o via satellite) OUTPUT VIDEO Lettore DVD (o lettore LD) * L’illustrazione mostra il VSX-D812/D912, ma i collegamenti del riguardanti il VSX-D712 sono gli stessi. Collegamento al terminale video del pannello anteriore È possibile accedere ai collegamenti del video anteriore mediante il pannello anteriore agendo sul pulsante VIDEO. -
Page 95: Collegamento Delle Antenne
Collegamento Collegamento delle antenne Collegare l’antenna AM a telaio e l’antenna FM a filo come illustrato nella pagina successiva. Per migliorare la ricezione e la qualità del suono, collegare delle antenne esterne (vedere Utilizzo di antenne esterne qui di seguito). Assicurarsi sempre che il ricevitore sia spento e staccato dalla presa a muro prima di effettuare o modificare qualsiasi collegamento. -
Page 96: Collegamento Dei Diffusori (Vsx-D712)
Collegamento Collegamento dei diffusori (VSX-D712) Viene qui di seguito illustrata una serie completa di sei diffusori (subwoofer incluso), ma la configurazione varia da casa a casa. Basta collegare i diffusori nella maniera descritta qui in seguito. Il ricevitore potrà funzionare anche solo con due diffusori stereo (i diffusori anteriori riportati nel diagramma), ma, a garanzia di un suono surround ottimale, si consiglia di utilizzarne e completamente almento tre. -
Page 97: Collegamento Dei Diffusori (Vsx-D812/D912)
Collegamento Collegamento dei diffusori (VSX-D812/D912) Viene qui di seguito illustrata una serie completa di otto diffusori (subwoofer incluso), ma la configurazione varia da casa a casa. Basta collegare i diffusori nella maniera descritta qui in seguito. Il ricevitore potrà funzionare anche solo con due diffusori stereo (i diffusori anteriori riportati nel diagramma), ma, a garanzia di un suono surround ottimale, si consiglia di utilizzarne e completamente almento tre. -
Page 98: Terminali Dei Diffusori
Collegamento Nota • Quando si utilizza un diffusore sul televisore come il diffusore centrale (C), collegare la presa CENTER PREOUT del presente apparecchio alla presa di entrata audio del televisore. In questo caso il diffusore centrale illustrato non è necessario. •... - Page 99 Collegamento non si dispone di diffusori schermati magneticamente e si notano distorsioni nel colore dell’immagine televisiva, allontanare i diffusori dal televisore. • Sistemare il diffusore centrale sopra o sotto il televisore in modo che il suono del canale centrale sia localizzato in corrispondenza dello schermo del televisore.
-
Page 100: Collegamento Di Amplificatori Supplementari
Collegamento di amplificatori supplementari Il presente ricevitore ha una potenza più che sufficiente per qualsiasi uso domestico, tuttavia è possibile aggiungere amplificatori supplementari a ciascun canale sul VSX-D812/D912 o il canale surround back del VSX-D712. Eseguire i collegamenti illustrati qui di seguito per aggiungere amplificatori in modo da alimentare i diffusori. -
Page 101: Precauzioni Riguardanti Il Cavo Di Alimentazione
Funzionamento di altri componenti Pioneer Collegando un cavo di controllo (opzionale), è possibile puntare i telecomandi di altri componenti Pioneer verso il sensore remoto del ricevitore. I segnali del telecomando vengono ricevuti dal sensore remoto del presente apparecchio ed inviati ad altri dispositivi mediante il morsetto CONTROL OUT del ricevitore. -
Page 102: Comandi E Display
Comandi e display Capitolo 5: Comandi e display Pannello anteriore DVD/LD TV/SAT VCR/DVR VIDEO CD-R/ TAPE/MD TUNER STANDBY STANDBY / ON PHONES STANDBY/ON Scorre tra il modo di accensione e quello di attesa del ricevitore. Tasti per la selezione dell’ingresso Premere per selezionare una fonte d'ingresso. - Page 103 Comandi e display Tasti STATION +/– Seleziona le stazioni preselezionate quando si utilizza il sintonizzatore (pagina 55). 10 Tasti TUNING +/– Seleziona la frequenza quando si utilizza il sintonizzatore (pagina 52). 11 Tasti LISTENING MODE STANDARD Premere per effettuare la decodificazione standard e scorrere tra le varie opzioni Pro Logic II e Neo:6 (pagina 37).
-
Page 104: Display
Comandi e display Display Indicatori SIGNAL SELECT Si illuminano per indicare il tipo di segnale in entrata assegnato per il corrente componente: AUTO Si illumina quando la selezione del segnale AUTO è attivata. A seconda della fonte, si illumina quando viene ravvisato un segnale con il canale surround posteriore decodificato. - Page 105 Comandi e display SLEEP Si illumina quando il ricevitore è in modalità autospegnimento. 10 RF ATT Si illumina quando è attivo l'attenuatore RF (vedere pagina 52). 11 Indicatore dei diffusori Mostra il sistema dei diffusori attualmente in uso. 12 EON Una volta impostato il modo EON, l’indicatore EON si illumina, ma durante la ricezione vera e propria di una trasmissione EON...
-
Page 106: Telecomando
Comandi e display Telecomando RECEIVER INPUT SELECT MULTI CONTROL DVD/LD TV / SAT CD-R/TAPE ADVANCED STANDARD SURROUND SELECT LEVEL EFFECT MUTE RECEIVER CONTROL MASTER VOLUME TOP MENU SETUP TUNE ENTER AUDIO TUNE MCACC SETUP RETURN BAND DISPLAY CLASS CHANNEL RECEIVER RECEIVER Scorre tra il modo di accensione e quello di attesa del ricevitore. - Page 107 Comandi e display EFFECT +/– Aggiunge o sottrae la quantità di effetti con diversi modi di ascolto avanzato (pagina 38). FL DIMMER Rende più oscuro o più chiaro il display. MASTER VOLUME +/– Utilizzare per impostare il volume di ascolto. Tasti del ricevitore e di controllo componenti (Per accedervi, premere innanzitutto il relativo pulsante MULTI...
- Page 108 Comandi e display RF ATT Utilizzare per abbassare il livello di entrata di un segnale radio troppo potente o che presenta interferenze che causano quindi distorsioni del ricevitore (pagina 52). DISPLAY Per commutare il display tra nome predefinito della stazione, frequenza e dati RDS durante l’utilizzo del sintonizzatore.
-
Page 109: Riproduzione Delle Fonti
Riproduzione delle fonti Capitolo 6: Riproduzione delle fonti Introduzione ai modi audio Esistono tre opzioni sonore basiche: Stereo/ Diretto (STEREO /DIRECT), Standard (STAN- DARD) o Advanced Surround (ADVANCED SURROUND). Stereo/Diretto Se si seleziona STEREO o DIRECT, si perce- pirà la fonte solo dai diffusori anteriori sinistri e destri (ed eventualmente dal subwoofer a seconda dell’impostazione dei diffusori). -
Page 110: Modi Advanced Surround
Riproduzione delle fonti Neo:6 Cinema (CINEMA) Il presente modo offre un suono surround a 6.1 canali ed è idoneo per film. Il modo Neo:6 Cinema offre una buona separazione dei canali per le colonne sonore dei film. Neo:6 Music (MUSIC) Il presente modo offre un suono surround a 6.1 canali ed è... -
Page 111: Scelta Del Segnale Di Entrata
• Il presente ricevitore può unicamente riprodurre formati di segnali digitali Dolby Digital, PCM (32kHz–96kHz) e DTS (tuttavia, solo i modelli VSX-D812 e VSX- D912 possono decodificare i formati dei segnali DTS 96kHz/24 bit). Con altri formati di segnali digitali, situarsi su ANALOG. -
Page 112: Utilizzo Dei Modi Stereo/Diretto
Riproduzione delle fonti Premere STANDARD. Se la fonte è decodificata con Dolby Digital, DTS o Dolby Surround, il corretto formato di decodificazione verrà selezionato automatica- mente e mostrato sul display. Se si ascolta una fonte a due canali, ad ogni pressione si modifica il display come segue: MOVIE (2 Pro Logic II) -
Page 113: Utilizzo Del Canale Surround Posteriore (Surround Back Channel) (Sb Ch)
• Il canale surround posteriore non può essere utilizzato qualora Impostazione di un diffusore surround posteriore a pagina 45 sia impostata su SB o SB SW (solo per VSX-D812/D912). • Con le fonti DTS 96kHz/24 bit non è possi- bile ascoltare il canale surround poste- riore. -
Page 114: Utilizzo Della Modalità Virtuale Surround Posteriore (Virtual Surround Back) (Vsb)
(Virtual Surround Back) qualora Impostazione di un diffusore surround posteriore a pagina 45, è impostata su SB o SB SW (solo per VSX-D812/D912). • Non è possibile regolare il livello del canale surround posteriore durante l'ascolto del canale stesso. -
Page 115: Utilizzo Del Modo Di Ascolto Midnight E Loudness
Riproduzione delle fonti Utilizzo del modo di ascolto Midnight e Loudness La proprietà di ascolto Midnight consente di ascoltare l’audio surround effettivo dei film a bassi livelli di volume. L’effetto si regola auto- maticamente secondo il volume al quale si sta ascoltando. -
Page 116: Selezione Delle Entrate Analogiche Multicanali
Riproduzione delle fonti Avviare la riproduzione del compo- nente nel passo 1. Selezione delle entrate analogiche multicanali Se si è collegato un decodificatore o un lettore DVD con uscite analogiche multica- nali al presente ricevitore (pagina 19), è necessario selezionare le entrate analogiche multicanali per la riproduzione del suono surround. -
Page 117: Configurazione
Configurazione Capitolo 7: Configurazione Scelta di configurazione per il ricevitore Assicurarsi di completare le seguenti operazioni di configurazione per garantire il miglior suono surround possibile. Questo è di particolare importanza se si utilizza il DTS e il Dolby Surround. È necessario effettuare queste impostazioni una sola volta (a meno che non si cambi l’ubicazione del sistema dei diffusori o se ne aggiungano dei nuovi, ecc). -
Page 118: Impostazione Dei Diffusori
Impostazione dual mono (pagina 48) Isolare un canale durante l’ascolto di un disco con codificazione dual mono. Impostazione di una entrata del canale surround posteriore (solo per VSX-D812/ D912) (pagina 48) Specificare il numero di ingressi analogici surround posteriori collegati. -
Page 119: Impostazione Di Un Diffusore Surround Posteriore
FL-CL-SS FL-CS-SS FL-CL-S FL-CS-SL Impostazione di un diffusore surround posteriore • Impostazione implicita: S (VSX-D812/ D912), (VSX-D712) È necessario informare il ricevitore del colle- gamento dei diffusori surround posteriori e delle dimensioni di questi. Dalle dimensioni scelte (grandi o piccole) vengono determinati i bassi inviati dal ricevitore ai diffusori. -
Page 120: Impostazione Attenuatore Di Lfe
Configurazione Si consiglia di impostarlo a 200Hz se i diffu- sori S hanno dimensioni inferiori a quelle per scaffali. • Usare per specificare la frequenza di crossover dei diffusori piccoli (100 Hz, 150 Hz o 200 Hz). 100Hz 200Hz 100Hz Inviare le frequenze dei bassi inferiori ai 100 Hz al subwoofer (o ai diffusori L). -
Page 121: Impostazione Della Distanza Del Diffusore Anteriore Destro
Configurazione Nota Nota • Se si è selezionato C nell’impostazione dei diffusori, non è possibile impostare la distanza centrale. Impostazione della distanza del diffusore anteriore destro • Impostazione implicita: 2 m Impostare la distanza tra il diffusore anteriori destro e la posizione di ascolto. •... -
Page 122: Impostazione Del Controllo Della Gamma Dinamica
Impostazione di una entrata del per impostare il canale surround posteriore (solo per VSX-D812/D912) • Impostazione implicita: SB 2ch IN Si deve eseguire questa impostazione solo se si sta utilizzando un componente separato per decodificare DVD e questo componente posiede solo una uscita del canale surround posteriore. -
Page 123: Regolazione Manuale Dell'area D'ascolto (Mcacc)
• Utilizzare per assegnare l’entrata digitale ottica 1 (DVD, TV, CD, CDR, VCR o OFF). Digitale ottica 2: (solo per VSX-D812/D912) • Impostazione implicita: CDR • Utilizzare per assegnare l’entrata digitale ottica 2 (DVD, TV, CD, CDR, VCR o OFF). - Page 124 Configurazione Premere RECEIVER. Premere MCACC SETUP. Il sistema MCACC utilizza il diffusore ante- riore sinistro come punto di riferimento per regolare il livello del diffusore e il tempo del canale. Il tono del diffusore anteriore sinistro e del diffusore di destinazione (quello che si sta regolando) suoneranno in sequenza, in modo tale possiate decidere quale dovrà...
-
Page 125: Impostazione Dei Livelli Separati Dei Canali Per Le Modalità D'ascolto
Configurazione Impostazione dei livelli separati dei canali per le modalità d'ascolto • Impostazione implicita: 0 dB Oltre all'impostazione MCACC, è possibile impostare i relativi livelli dei canali dalla posi- zione d'ascolto, utilizzando il metodo qui di seguito indicato. Utilizzando CH SELECT (vedi suggerimento qui di seguito), è... -
Page 126: Utilizzo Del Sintonizzatore
Utilizzo del sintonizzatore Capitolo 8: Utilizzo del sintonizzatore Per ascoltare la radio La procedura seguente mostra come sintoniz- zarsi sulle trasmissioni FM e AM utilizzando le funzioni di sintonizzazione automatica (ricerca) e manuale (graduale). Se si conosce di già la frequenza della stazione desiderata, vedere il paragrafo Sintonizzare direttamente su una stazione, qui di seguito riportato. -
Page 127: Sintonizzare Direttamente Su Una Stazione
Utilizzo del sintonizzatore Sintonizzare direttamente su una stazione A volte si conosce già la frequenza della stazione che si desidera ascoltare. In questo caso si può semplicemente digitare la frequenza direttamente mediante i tasti numerici sul telecomando. Premere il tasto TUNER per selezionare il sintonizzatore. -
Page 128: Per Assegnare Un Nome Alle Stazioni Preselezionate
Utilizzo del sintonizzatore Premere T.EDIT (TUNER EDIT). Sul display appare ST. MEMORY, quindi lampeggia una categoria della memoria. 99.50 Premere CLASS per selezionare una delle tre categorie, quindi premere ST +/– (STATION +/–) per selezionare la stazione preselezionata desiderata. È possibile inoltre utilizzare il selettore MULTI JOG (pannello anteriore) per selezionare una stazione preselezionata. -
Page 129: Per Ascoltare Le Stazioni Preselezionate
Utilizzo del sintonizzatore Per ascoltare le stazioni preselezionate Per procedere in questo senso, è necessario che alcune preimpostazioni siano state memorizzate. Qualora tale operazione non sia stata effettuata, fare riferimento al paragrafo Per memorizzare le stazioni preselezionate a pagina 53. Premere TUNER per selezionare il sintonizzatore. -
Page 130: Visualizzazione Delle Informazioni Rds
Utilizzo del sintonizzatore OTHER M – Musica di altro genere non appartenente alle categorie precedenti WEATHER – Bollettini meteorologici FINANCE – Report sul mercato azionario, commercio, trading, ecc. CHILDREN – Programmi per bambini SOCIAL – Programmi di interesse sociale RELIGION – Programmi a carattere religioso PHONE IN –... -
Page 131: Ricerca Di Programmi Rds
Utilizzo del sintonizzatore Ricerca di programmi RDS Una delle funzioni più utili dell’RDS è la capa- cità di cercare un particolare tipo di programma radio. È possibile cercare uno qualsiasi dei tipi di programmi elencati alla pagina prece- dente. ADVANCED TUNING STATION STANDARD... -
Page 132: Utilizzo Del Sistema Eon
Utilizzo del sintonizzatore Utilizzo del sistema EON STATION TUNING TUNER EDIT CLASS BAND MULTI JOG Premere il tasto BAND per selezionare la banda FM. É possibile attivare la modalità EON solamente nella banda FM. Premere EON MODE per selezionare una delle modalità ammesse. Premere ripetutamente il pulsante per commutare tra: •... -
Page 133: Per Eseguire Una Registrazione
Per eseguire una registrazione Capitolo 9: Per eseguire una registrazione Per eseguire una registrazione audio o video È possibile eseguire una registrazione audio o video dal sintonizzatore incorporato o da una fonte audio o video collegata al ricevitore (come un lettore CD o un televisore). Ricordarsi che non è... -
Page 134: Controllo Del Resto Del Sistema
Il LED si illumina. Utilizzando i tasti numerici, immettere il codice preselezionato. I codici preselezionati sono riportati a pagina 67 (VSX-D712) e a pagina 68 (VSX-D812/D912). Dopo aver immesso il codice, il LED lampeggerà nuovamente. -
Page 135: Programmazione Di Segnali Provenienti Da Altri Telecomandi (Solo Per Vsx-D812/D912)
Al termine, premere RECEIVER. Programmazione di segnali provenienti da altri telecomandi Solo per VSX-D812/D912 Se i codici di preselezione non sono disponibili per i propri componenti, o se i codici di preselezione disponibili non funzionano correttamente, è possibile... -
Page 136: Cancellazione Di Tutte Le Impostazioni Programmate (Solo Per Vsx-D812/D912)
RECEIVER ,il tasti MULTI CONTROL, RECEIVER CONTROL e MASTER VOLUME. Cancellazione di tutte le impostazioni programmate Solo per VSX-D812/D912 Con questo procedimento si cancellano tutti i tasti programmati (vedi Segnali di Programmazione di segnali provenienti da altri telecomandi sopra riportato)e si ripristina il pulsante all'impostazione di fabbrica. -
Page 137: Comandi Del Televisore
Controllo del resto del sistema Comandi del televisore Il presente telecomando consente di controllare i componenti dopo aver digitato i codici adeguati o aver programmato i comandi del ricevitore (vedere Impostare il telecomando per controllare altri componenti a pagina 60 per ultiriore informazioni ). Premere i tasti MULTI CONTROL per selezionare il componente. - Page 138 Controllo del resto del sistema Tasto/i Funzione Utilizzare per scegliere i comandi GIALLI su un menu DTV. E/CYAN Premere per ottenere informazioni sui programmi DTV. Accende o spegne il DTV. Utilizzare per selezionare il closed captioning del DTV. Tasti UseUtilizzare per selezionare un determinato canale del numerici televisore.
-
Page 139: Comandi Di Altri Componenti
Controllo del resto del sistema Comandi di altri componenti Il presente telecomando consente di controllare i componenti dopo aver digitato i codici adeguati o aver programmato i comandi del ricevitore (vedere Impostare il telecomando per controllare altri componenti a pagina 60 per ultiriore informazioni ). Premere i tasti MULTI CONTROL per selezionare il componente. - Page 140 Controllo del resto del sistema Tasto/i Funzione Tasti Accesso diretto alle tracce di una fonte di programma. numerici Utilizzare i tasti numerici per navigare nel display su schermo. Tasto +10 Seleziona le tracce di numero superiore a 10 (per esempio, premere +10, quindi 3 per selezionare la traccia 13).
- Page 141 GOLDSTAR 650 ZENITH 014 JVC 613 THOMSON 015 FUNAI 640 SONY 016 (videogioco) GRANDIENTE 657 PIONEER 000, 008 PIONEER 600, 651, 231 STB (SATELLITE/CATV) Produttore Codice Produttore Codice SONY 101, 102 JERROLD 716 HITACHI 109 S.ATLANTA 706, 708 DENON 110...
-
Page 142: Elenco Dei Codici Di Preselezione (Vsx-D812/D912)
Controllo del resto del sistema Elenco dei codici di preselezione (VSX-D812/D912) Se il produttore è compreso in questo elenco, non dovrebbero esserci problemi per l'azionamento di un componente. Tenere tuttavia presente che in alcuni casi i codici dei produttori elencati non funzioneranno con il modello da voi utilizzato. In altri casi, dopo aver assegnato il codice preselezionato adeguato, sarà... - Page 143 RADIO SHACK 6032 PIONEER 4001 RCA 6033 SAMSUNG 6034, 6035 SCIENTIFIC ATLANTA 6036, 6037, 6038 Produttore Codice SIEMENS 6039, 6040 PIONEER 8001, 8002, 8003 SONY 6041 DENON 8004 TOSHIBA 6042, 6043 JVC 8005 TOCOM 6044 KENWOOD 8006 ZENITH 6045, 6046...
-
Page 144: Altre Informazioni
Controllare gli altri componenti e gli apparecchi elettrici usati. Se non si riesce a risolvere il problema neppure dopo aver eseguito i controlli che seguono, rivolgersi al centro assistenza Pioneer più vicino o al proprio rivenditore per la riparazione. Problema L’apparecchio non si... - Page 145 Altre informazioni Problema Rimedio Le stazioni radio non possono • Collegare un’antenna esterna (rimettersi alla pagina 21). essere selezionate automaticamente. Non viene emesso alcun • Per verificare l’impostazione dei diffusori, fare riferimento a suono dai diffusori surround Impostazione dei diffusori a pagina 44. posteriori.
-
Page 146: Reset Dell'unità Principale
Altre informazioni Problema Non viene emesso alcun suono o questo è accompagnato da disturbi quando si riproduce materiale in formato DTS. Durante la riproduzione, quando un lettore CD compatibile con DTS esegue una ricerca, si emettono dei rumori molesti. Il telecomando non funziona. • Sostituire le batterie (rimettersi alla pagina 5). Il display è... -
Page 147: Caratteristiche Tecniche
Surround ....100 W per canale (1kHz, 1,0 %, 8 Surround posteriori ..100 W per canale (solo per VSX-D812/D912) (1kHz, 1,0 %, 8 Entrate (Sensibilità/Impedenza) CD, VCR/DVR, CD-R/TAPE/MD, DVD/LD, TV/SAT. -
Page 148: Vari
VSX-D712 ......250 W VSX-D812/D912 ....280 W Nel modo di attesa . - Page 149 Altre informazioni...
- Page 152 253 Alexandra Road, #04-01, Singapore 159936 TEL: 656-472-1111 PIONEER ELECTRONICS AUSTRALIA PTY. LTD. 178-184 Boundary Road, Braeside, Victoria 3195, Australia, TEL: (03) 9586-6300 PIONEER ELECTRONICS DE MEXICO S.A. DE C.V. Blvd.Manuel Avila Camacho 138 10 piso Col.Lomas de Chapultepec, Mexico,D.F. 11000 TEL: 55-9178-4270 <TNGNW/03B00001>...
Need help?
Do you have a question about the VSX-D812 and is the answer not in the manual?
Questions and answers