
Related Manuals for Aviosys IP Power 9258 DS


Summary of Contents for Aviosys IP Power 9258 DS
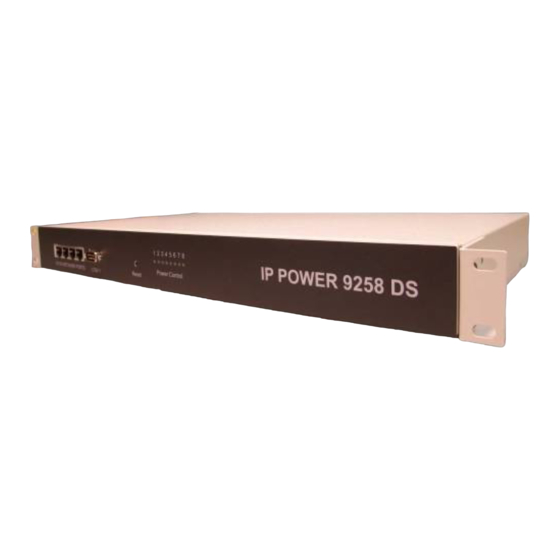
- Page 1 IP Power 9258 DS User Manual Firmware Version: 1.0 Date Released: 01/20/2009 - 1 -...
- Page 2 IMPORTANT NOTICE 1. IP Power 9258 DS was designed for indoor use, we carry no responsibility for possible damages caused by outdoor use, especially in the rain. 2. Please use the power adapter provided by the dealer, we carry no responsibility for the possible damage from using power adapters not .
-
Page 3: Table Of Contents
Table of Content 1.) WELCOME ......................5 Introduction ..............................5 Minimum System Requirements......................... 5 2.) PRODUCT OVERVIEW...................6 Features ................................. 6 Specification ..............................6 Package Contents ............................7 3.) INTERFACE DESCRIPTION................8 Front View..............................8 Rear View..............................9 Rear View ..............................9 4.) QUICK START GUIDE..................10 Quick Hardware Setup .......................... - Page 4 8.) WEB INTERFACE..................19 Connection to your Device ......................... 19 The Control Console........................... 19 Power Setup ..............................20 Power Controls ............................20 System Configuration..........................21 System Setup ............................21 DDNS ..............................23 E-mail ..............................24 Schedule Ports 1-4 & Ports 5-8........................ 25 IP Service..............................
-
Page 5: Welcome
1.) Welcome Introduction The IP Power 9258 DS is a state of the art Power Distribution Unit (PDU) & Remote Power Control (RPC) system. The 9258 DS can be used for various applications including: Power Management, Server Management, Internet Controllable Timer, System Integration and much more. -
Page 6: Product Overview
2.) Product Overview Features 1. Dual Switch Design for extra safety and protection 2. HUB function four 4 RJ45 connections 3. Auto-ping (Watch dog) Device Auto Restart / Reboot. 4. Supports: RJ45(HUB), TCP/IP, Http API, Web Server, SMTP Server, DDNS, Log file, CNT, XML 5. -
Page 7: Package Contents
Package Contents 1.) 9258 DS Unit x 1 2.) 9258 DS Installation CD 3.) Extra Fuse x 1: Located in the power input of the 9258 Pro Refer to installing fuse section 4.) RJ45 Cable x 1 (Optional) 5.) Input Power Cable x 2 (Optional) - 7 -... -
Page 8: Interface Description
3.) Interface Description Front View Front View 4 Port Ethernet Hub: Connect up to 4 separate devices with the built in hub. 1 Serial Ports: Serial Port 1: Regular Speed Reset Button: To reset to original manufacture settings, hold down the reset button with a pen or a pin for 15 seconds until will hear a long beep sound. -
Page 9: Rear View
Rear View Rear View Rear View 8 Output Power Ports: Connect up to 8 separate devices that will be controlled by the 9258 DS. Ports 1-4 2 Input Power Ports: The input power sends power to the 2 sets o 9258. -
Page 10: Quick Start Guide
4.) Quick Start Guide Quick Hardware Setup *Before you plug in the device make sure you have the appropriate input plugs. * For 220-250V, please use power cable that can support 10A current. Max Output Current: (total of each four outlets) 10A, (each outlet) 6A. * For 100-120V, please use power cable that can support 15A current. -
Page 11: Hardware Setup
* Remember that to access your device from the outside network, you will need to port forward the IP Address of your device. 5.) Hardware Setup 1.) Connect the IP Power 9258 DS to a HUB or Router with a RJ45 network cable. 2.) Connect the HUB or Router to the internet (May through ADSL/XDSL modem). -
Page 12: Software Setup
6.) Software Setup The software for the device is located on the Media Link-IP Family CD that came with the device. IP Power Pack is located on the main page of the CD. Please follow the directions carefully and install the necessary files The IP Power Necessary Software: IP Edit IP Power Center... -
Page 13: Using Ip Edit
2.) Once the CD has started, go to the IP Power section and click and install the following: IPedit: IP Family Program used to search, access, modify basic configurations of IP Family products. IP Power Center: Multiple IP Power device manager to control the ON and OFF of the managed devices. (For IP Power 9258 Ping , 9280, 9211, 9222.) IOTracker: Device to Device control with Firewall bypass technology. - Page 14 2.) Open IPEdit and any device in the same network should automatically be detected and listed in the local devices sections. The devices will need to be setup correctly through IPEdit so that you can properly access the device. 3.) Setup the Device: All devices will need to be on the same network if not the device cannot be accessed and will not be detected.
- Page 15 9.) Hit yes to confirm and Enter the login and password for the Device to Approve changes 10.) Then hit the rescan button on IPEdit to confirm the changes have been made. b. Custom Setup (Advance Users) 1.) Highlight the device on the local devices section and on the right side of IPEdit all network information on the device will be displayed.
- Page 16 2.) To setup the device, type in the correct Gateway and IP Address. The gateway address: Gateway Address: The gateway address can be obtained in Windows under the network connections page IP Address: Make sure the first 3 sections of the IP Address matches the gateway address.
-
Page 17: Ip Service
4.) Then hit the rescan button on IPEdit to confirm the changes have been made IP Service How to use IP Service on IPEdit: IP service allows the user to directly connect to his / her device through the internet without having to remember long confusing IP Address. -
Page 18: Hardware Interface
3.) Once you have been connected search for your device by typing in at least the first 3 letters that you named your device with. Then hit the search button. 4.) Double click on your device and a Internet Explorer window will appear connecting directly to your device. -
Page 19: Web Interface
Connection to your Device Once you have the 9258 DS setup correctly. Open IPEdit and double click on your IP Power 9258 DS. A Internet Explorer browser screen pop up with the login screen for the 9258 DS. Default IP: 192.168.1.100 (When 9258 DS is connected to PC directly) -
Page 20: Power Setup
Power Setup Power Controls The Power Controls setting allows you to control the devices that are connected to the 9258 DS. Name: The name field allows you to enter a name of the Power that you are controlling. Simple type in the name of the device next to the outlet that it is connected to, then hit apply. - 20 -... -
Page 21: System Configuration
Control: Control allows the user to actively control the device on each port. To turn off or turn on the device, select the control you want then hit the apply button Timer: The timer allows you to turn On or Off your device with a delay. Please view the example below: Power 1: The device will turn on when you hit the apply button and after 5 seconds the device will be turned off. - Page 22 IP Address: The IP Address of the 9258 DS can be specified here. If you are using a hub or router, the IP address may be selected for you already. Otherwise you can manually select the IP Address here. Subnet Mask: The Subnet Mask Address of the 9258 DS can be specified here. If you are using a hub or router, the IP address may be selected for you already.
-
Page 23: Ddns
DDNS The DDNS section allows you to setup the 9258 DS with a DDNS server (i.e. www.dyndns.com). The the server has been setup correctly, enter the necessary information into the 9258 DS DDNS settings. DDNS Server IP: Input IP Address of the DDNS server. Your Domain: Type in the Domain Name that you selected for your DDNS server DDNS Username: Enter the DDNS Username DDNS Password: Enter the corresponding Password for your DDNS account... -
Page 24: E-Mail
E-mail The 9258 DS has an e-mail function that can be used in various scenarios and conditions. When a power port is activated or deactivated, the device will send an email. When the scheduler is used the device will also send emails when ports are activated or deactivated. -
Page 25: Schedule Ports 1-4 & Ports 5-8
Schedule Ports 1-4 & Ports 5-8 The scheduler function allows you automatically control the device(s) without having to login. This function allows you to turn on or turn off, cycle power of your devices at scheduled times. To use the this function some key parameters must be set correctly. Power Date: Input the date for the device to activate power controls. -
Page 26: Ip Service
Frequency: Select the number of times this event will be activated (Disable, Just Once, Everyday, Workdays, Weekend) Disable: Disables the scheduler Just Once: Activates the schedule only once Everyday: Activates everyday until schedule has been deactivated Workdays: Activates every week from Monday – Friday until deactivated Weekend: Activates every week on Saturday &... -
Page 27: Ping
Ping The Auto-ping functionality allows the 9258 DS to check if the device have malfunctioned or needs to be restarted. If the device is no working correctly the 9258 Ping will activate the action that you have selected to reinstate the state of the device Outlet: A description of which on let to use Ping function Enable: Disable or Enable ping settings Ping Address: Specify the IP Address to Ping... - Page 28 Please view the example below for more details: In the picture above: 5.) Power1 Ping function is enabled 6.) The 9258 DS will ping the web address www.sample.com 7.) If there is a response within the Ping Response Time the 9258 DS will send another ping signal the set Ping Time Interval which is 3 seconds for this example.
-
Page 29: Network Wakeup
Network Wakeup The network wakeup function is used to boot up a computer that has the Wake on Lan functionality. Just enter the MAC address of the target computer and the 9258 DS will be able to turn on the device. Change Password The change password page allows you to change your password for the 9258 DS. -
Page 30: Time Change
3.) Once you have clicked continue the 9258 DS will take you to the update page. 4.) Browse for the update file 5.) Hit the update button and wait for as least 1 minute for the upgrade to complete. Time Change The change time feature allows you to change time of your device by setting the time or selecting a NTP server. -
Page 31: Controlling The Device
9.) Controlling the Device CGI HTTP Commands CGI Commands allow you to easily integrate the 9258 DS with other systems and programs. Please read the instructions carefully on how to use the Http:// Commands To use http:// Commands open up a web browser and type in the command that you would like to use. -
Page 32: Get Time Command
http://192.168.1.42/Set.cmd?user=admin+pass=12345678+CMD=GetVersion Response Message: Version:V1.025 Get Time Command Command: GetSysClock Format: http://xxx.xxx.x.xxx/Set.cmd?user=admin+pass=12345678+CMD=GetSysClock Example: http://192.168.1.9/Set.cmd?user=admin+pass=12345678+CMD=GetSysClock Response Message: YR:2008 MO:01 DATE:05 HR:11 MN:38 SEC:42 Set Time Command Command: SetSysClock+Y=YYYY+M=MM+D=DD+h=HH+m=MM+S=SS Date Parameters Y=Year in YYYY format M=Month in MM format D=Day in DD format Time Parameter H=Hour in HH (24 hour Military Format) M=Minutes in MM format... -
Page 33: Set Device Dns Command
Command: SetFactory+GATEWAY=xxx.xxx.x.xxx+Confirm=FactoryOnly Format: http:192.168.1.100/Set.cmd?user=admin+pass=12345678+CMD=SetFactory+GATEWAY=xxx. xxx.x.xxx+Confirm=FactoryOnly Example: http:192.168.1.100/Set.cmd?user=admin+pass=12345678+CMD=SetFactory+GATEWAY=19 2.168.1.1+Confirm=FactoryOnly Response Message: Gateway: 192.168.1.1 Set Device DNS Command Command: SetFactory+DNS=xxx.xxx.x.xxx+Confirm=FactoryOnly Format: http://xxx.xxx.x.xxx/Set.cmd?user=admin+pass=12345678+CMD=SetFactory+DNS=xxx.xxx.x.x xx+Confirm=FactoryOnly Example: http:192.168.1.100/Set.cmd?user=admin+pass=12345678+CMD=SetFactory+DNS=202.103. 225.68+Confirm=FactoryOnly Response Message: DNS:202.103.225.68 Turn DHCP ON/OFF Command: SetFactory+DHCP=x+Confirm=FactoryOnly Format: http://xxx.xxx.xxx/Set.cmd?user=admin+pass=12345678+CMD=SetFactory+DHCP=(0=off 1=on)+Confirm=FactoryOnly Example: http:192.168.1.100/Set.cmd?user=admin+pass=12345678+CMD=SetFactory+DHCP=1+Conf irm=FactoryOnly Response Message: DHCP: 0 DHCP: 1 View Log Command... -
Page 34: Serial Com (Rs-232) Control
Format: http://xxx.xxx.x.xxx/Set.cmd?user=admin+pass=12345678+CMD=GetLog+Num=01~50 Example: http://192.168.1.42/Set.cmd?user=admin+pass=12345678+CMD=GetVersion Log No. 1 Newest Log Log No. 50 Oldest Log Response Message: Sample Log: Power1:ON Power2:ON Power3:OFF Power4:OFF Power5:OFF Power6:OFF Power7:OFF Power8:ON Socket1:TurnOn Socket2:TurnOn Socket3:TurnOff Socket4:TurnOff Socket5:TurnOff Socket6:TurnOff Socket7:TurnOff Socket8:TurnOn LogNO.1 PortState:83-PortAct:ffTime:2008-12-16 17:02:54 What this log shows: Status of Powers 1-8 Status of Sockets 1-8 Log NO.1... - Page 35 3.) Set the "Bits per second" as 19200 at COM1 (Must at COM1) 4.) Turn off the device then turn it back on and the screen will display the following information: - 35 -...
-
Page 36: Xml Functionality
10.) XML Functionality The 9258 DS supports XML. Before you can start using it you will need to enable it by using the http command: http://xxx.xxx.x.xxx/Set.cmd?user=admin+pass=12345678+CMD=EnableXML Once the XML is enabled you should see a message that says: EnableXML Once XML has been enabled to access the XML type in the command: http://xxx.xxx.x.xxx/info.xml The XML commands are listed below: http://xxx.xxx.x.xxx/info.xml... -
Page 37: Frequently Asked Questions (F.a.q)
11.) Frequently Asked Questions (F.A.Q) Q1: How do I reset the device back to manufacturer default values? Ans: In the front panel of the 9258 DS, there is a reset feature that will reset the device back to manufacturer default settings. Take a pen or small pin, then press and hold for about 10-15 seconds.
Need help?
Do you have a question about the IP Power 9258 DS and is the answer not in the manual?
Questions and answers