Table of Contents
Advertisement
Advertisement
Table of Contents

Related Manuals for C Spire R772

Summary of Contents for C Spire R772
- Page 1 C Spire Wireless 4G LTE Portable Wi-Fi Hotspot R772 User Guide...
-
Page 2: Table Of Contents
Your Device at a Glance ....................... 2 Insert USIM Card ........................3 Insert and Charge the battery ....................4 Power the R772 On and Off ....................6 Activate Your Device ......................6 C Spire Account Information and Help ................6 C Spire Account Passwords .................... - Page 3 Wi-Fi Profile ........................21 Connected Devices ......................22 The Settings Menu .......................24 Connection Options ......................24 Network Setting ........................25 Security Setting ........................26 VPN Passthrough ......................28 Advanced Settings ......................28 General Settings ........................28 Updates ..........................31 The Help Menu ........................34 About ..........................34 User Guide ........................34 Regulatory Information ......................36 Appendix 1: Glossary ........................39...
-
Page 4: Get Started
With the 4G LTE Portable Wi-Fi Hotspot, you can access C Spire Wireless 4G LTE network for faster uploads, downloads from your computer. Built-in Wi-Fi tethering function allows you to share up to 100Mbps LTE connection with other Wi-Fi equipped devices such as laptops, tablets, smart phones, and more. -
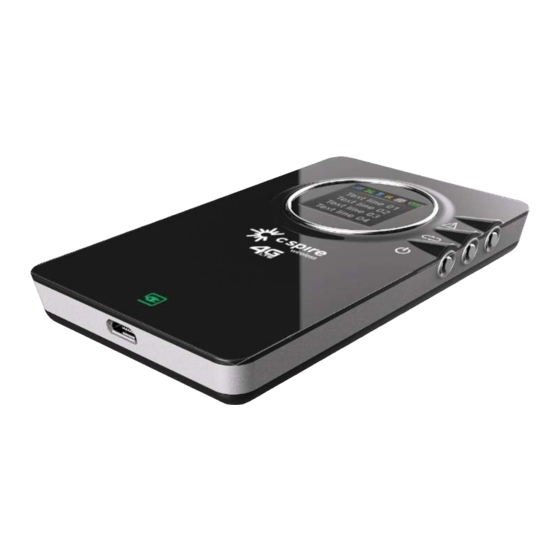
Page 5: Your Device At A Glance
Your Device at a Glance The 4G LTE Portable Wi-Fi Hotspot (R772) package includes: Travel Charger Quick Start Guide R772 Main Set Pouch Battery Pack USB Cable The 4G LTE Portable Wi-Fi Hotspot (R772) Components: Components Functions Description ① Color LCD display... -
Page 6: Insert Usim Card
The pre-configured network name (SSID) and Wi-Fi Admin password are printed on a label inside the back cover of the device. password label Insert USIM Card Please ensure that the C Spire USIM card has been inserted prior to use. -
Page 7: Insert And Charge The Battery
1. To open the USIM cover located on the back, press down firmly(1), and drag down(2) as indicated in the image below. 2. Insert the USIM card as shown in the picture. 3. Replace the cover by pressing down until you hear a click sound. Insert and Charge the battery To insert and charge the battery, follow the below steps. - Page 8 3. Replace the cover, and press the four sides of the battery cover until it clicks into each notch. 4. Connect the one end of the USB cable to the travel charger and also connect the other end of the USB cable to the micro USB port on the bottom side of the device. 5.
-
Page 9: Power The R772 On And Off
Just insert C Spire SIM card into the SIM slot on the back side of the R772 device. ● If you received your device in the mail and it is for a new service account or a new line of service, it is designed to activate automatically. -
Page 10: Manage Your Account
Manage Your Account Manage your C Spire account from your computer or any phone. Online: cspire.com ● Access your account information. ● Check your data usage. ● View and pay your bill. ● Enroll in C Spire online billing and automatic payment. -
Page 11: Using The R772, Portable Wi-Fi Hotspot
3. Select the Wi-Fi signal named “C Spire Portable WI-Fi Hotspot XXXX” where XXXX is the last four digit of Wi-Fi MAC ID found on the device sticker. 4. Once connected to the Wi-Fi network from the R772, you can open the internet browser in your computer and start surfing. -
Page 12: Opening The Web Browser Interface
Interface features. Device User Interface The R772 has a graphic color LCD window and three functional buttons for user interaction. The LCD window displays various icons and text messages to show device status to the users. The three functional buttons allow the users to control the device functions and messages displayed on the LCD window. -
Page 13: Buttons On The Side
Roaming This icon appears when the device is currently roaming. Buttons R772 has three buttons located on the right upper side of the device. Alert / Message Button Check Used Data Button Power Button Buttons Names Description Alert / Message This button is used to display or to control alert messages that were received or self-generated. - Page 14 Press and hold Power off animation displays for 2 seconds and goes off. button for 3 seconds No 4G LTE SIM Insert or replace C Spire 4G LTE SIM card card or SIM card error No 4G LTE SIM card found Signal The device is searching for service.
- Page 15 Data usage Press button Press button once to display the data display once. usage. “xxxx MB used since [date]” message 2.52 MB used Since 09/07/2012 appears for 10 seconds and return to main screen unless the button is pressed again to return to the main display. Data usage Press and hold While the data usage is displayed, press and...
- Page 16 June 17, 2012 13:25 pm C Spire Wireless Roaming icon When the device roams into other network display than C Spire home network, roaming icon will appears. June 17, 2012 13:25 pm C Spire Wireless Battery icon The longer the battery bar means the more display battery power left.
-
Page 17: Your Device's Web Browser Interface
Your Device’s Web Browser Interface This section contains information on your device’s browser interface. The Browser Interface Opening the Browser Interface The Landing Page Connecting to the Network Device and network menu The check usage menu The Wi-Fi menu The setting menu The help menu The Browser Interface The Web browser interface is a Web-based connection manager for your device. - Page 18 The main menu appears down across the top of the browser interface and allows for ease of Web browser interface navigation. Information regarding your current network connection can be seen in the Network Connection Box displayed down the left side of the main page. This box displays both 3G and 4G service signals which are available.
-
Page 19: Connecting To The Network
Automatic connection mode and preferred service mode can be set from “Setting” menu in the main menu bar. ● Service Type: Displays service type your modem currently acquires. ● Signal strength bar: Displays your current signal strength. Supports 0- 6 levels of signal strength. -
Page 20: The Device & Network Menu
The Device & Network Menu The Device & Network menu allows you to view information about your device and network status. General Device and Network Information General Device ● Device Name – name of the device... -
Page 21: 4G Lte Device And Network Information
● Device Description – description of the device ● Manufacturer – manufacturer of the device ● Modem Model – model name of the device ● Hardware Version – hardware version ● CM Version – current CM version General Network ● IP Address – the current Internet Protocol address of the device ●... -
Page 22: 3G Device And Network Information
● Phone Number (Mobile Data Number (MDN)) – the public ID for your specific wireless service ● MSID (IMSI_S) – internal ID C Spire uses to identify your account ● Home Carrier ID – ID of the network operator ● PRL Version – used to verify that your Preferred Roaming List is the most current 3G Network ●... -
Page 23: The Check Usage Menu
The Check Usage Menu The Check Usage menu allows you to review your usage history online. Please ensure that you have an Internet connection. Selecting the Check Usage menu displays your wireless data usage to date. To reset usage data, click the reset button. If “Yes”... -
Page 24: The Wi-Fi Menu
The Wi-Fi Menu The Wi-Fi menu allows you to review and change your 4G LTE Mobile Hotspot Wi-Fi tethering configuration. In order to see the Wi-Fi menu, login as Administrator . The default administrator password is “admin”. You can change the default Administrator password from the Setting menu. -
Page 25: Connected Devices
6. Click Save Connected Devices When you open the “Connected Devices” you can see the devices currently connected to R772 through Wi-Fi connection. The Connected device section has the following ; ... - Page 26 Date/Time – The date/time the device was detected by the network. Click Refresh button to renew the connected device list.
-
Page 27: The Settings Menu
The Settings Menu The Settings menu allows you to set various setting options including Connection Options, Network Setting, Security Settings, VPN Passthrough, and Advanced Settings. In order to see all setting menu except for Connection Options, you have to login Admin with the password first. -
Page 28: Network Setting
Enable Auto Connection 1. Select or clear the Enable Auto Connection check box. 2. Click Save. Note: If you click Connect, Enable Auto Connection will be cleared automatically regardless of whether Enable Auto Connection was selected before rebooting the device. Change Your Connection Options 1. -
Page 29: Security Setting
● Enable DHCP Server – Enable it to automatically assign IP address to other Wi-Fi client devices. ● Start DHCP Address – Your device will assign IP address form this IP address ● End DHCP Address Range – The range of IP addresses that your device can assign to other Wi-Fi client devices. - Page 30 Port Forwarding ● IP Address – Enter IP address to forward ● Protocol– Both / UDP / TCP ● External Port – Enter external port range ● Internal Port – Enter internal port range ● Comment – Enter comments for the port forwarding setting Firewall ●...
-
Page 31: Vpn Passthrough
● Enable DMZ – check to enable DMZ feature ● DMZ Address – enter DMZ address ● Click Save. Important: Changing security settings can result in connection malfunction. Please refer to your service provider’s recommendation. VPN Passthrough When you open the VPN Passthrough, the following choices are available: ●... - Page 32 Advanced Settings Password The Advanced Settings Password allows you to change the Administrator login password. To change your password: 4. Enter the original password in the Original Password field. (factory default password is admin) 5. Enter your new password in the New Password field. 6.
- Page 33 Manual Configuration Selecting the Manual Configuration tab displays the following options: Manual Configuration consists of two submenus (LTE Configuration / 3G Configuration). LTE Configuration The LTE Configuration box allows you to change the 4G LTE profile. To modify the LTE profile: 3.
-
Page 34: Updates
Important: Changing 3G profile can result in 3G connection malfunction. Please refer to your service provider’s recommendation. Updates When you open the Updates menu, it displays the following options: Automatic Version Check If the box “Enable notification” is checked, the Web User Interface will provide the pop up dialog notification for new SW update available. - Page 35 Check System Upgrade The Check System Upgrade box reflects your current software version and allows you to upgrade the Web browser interface as needed. To get the latest Web browser interface: 1. Click Check Now. 2. If the current version is the latest, you will see the followign dialog: click OK. If a newer version is available, you will see the following dialog: 3.
- Page 36 2. You will see the pop up dialog announcing update appears. Click Yes to update. 3. You will see the dialog showing update progress. Important: The SW upgrade takes a few minutes. DO NOT unplug the device before the browser refreshes the page automatically or if the refresh dialog is still open.
-
Page 37: The Help Menu
The Help Menu The Help menu allows you to view system information and the online user guide. About When you open the About, it displays the following device information: ● System Name – the current system name ● CM Version – the current Web browser interface version User Guide When you open User Guide, it downloads the user guide on the host system. -
Page 39: Regulatory Information
Regulatory Information WARRANTY Manufacture’s Limited One-Year Warranty: Franklin Wireless (the company) warrants to the original retail purchaser of this device, that should product or any part thereof, during normal consumer usage conditions, be defective in material or workmanship that results in product failure within the first twelve (12) month period from the date of purchase, such defects will be repaired or replaced (with new or refurbished) product at the Company’s discretion, without charge for parts and labor directly related to the defect(s). -
Page 40: Sar Information
FCC ID: RB2-R772. Additional information on Specific Absorption Rates (SAR) can be found on the Cellular Telecommunications Industry Association (CTIA) web-site at http://www.wow-com.com. * In the United States and Canada, the SAR limit for mobile modems used by the public is 1.6 watts/kg (W/kg) averaged over one gram of tissue. -
Page 41: Fcc Compliance Information
and used in accordance with the instructions, may cause harmful Interference to radio communications. However, there is no guarantee that interference will not occur in a particular Installation. If this equipment does cause harmful interference to radio or television reception, which can be determined by turning the equipment off and on, the user is encouraged to try to correct the interference by one or more of the following measures: Reorient or relocate the receiving antenna. -
Page 42: Appendix 1: Glossary
Appendix 1: Glossary 1X: Internet at lower speed than EV-DO. Technical max speed is 153kbps. 3G: Third generation, referring to the 3 generation wireless cellular technology. 4G: Fourth Generation, referring to the 4th generation of wireless celluar technology. ... - Page 43 LAN: Local Area Network. A type of network that lets a group of computers, all in close proximity (such as inside an office building), communicate with one another. It does not use common carrier circuits though it can have gateways or bridges to other public or private networks.
- Page 44 WPA/WPA2: Wi-Fi Protected Access. A security protocol for wireless 802.11 networks from the Wi-Fi Alliance.
Need help?
Do you have a question about the R772 and is the answer not in the manual?
Questions and answers
I lost my manual book and I would like u send it to me in my email