
Summary of Contents for Frosty Keg KEG6000B
- Page 1 KEGERATOR BEER KEG REFRIGERATOR (6 CU. FT.) MODELS: KEG6000, KEG6000B OPERATING MANUAL Copyright 2010 DTX International...
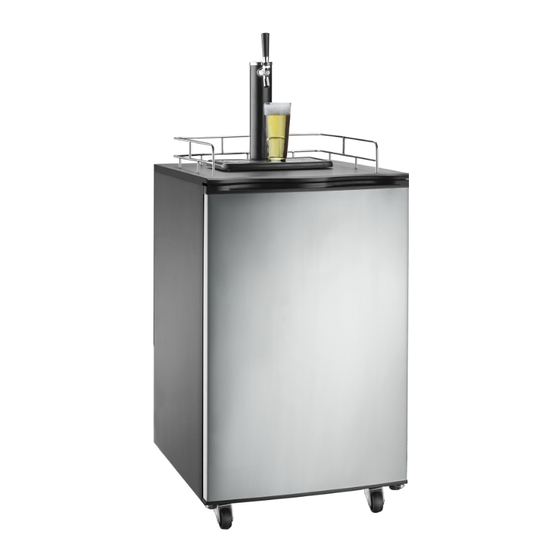
- Page 2 F R O S T Y K E G F R O S T Y K E G K E G 6 0 0 0 K E G 6 0 0 0 Easy Setup & Installation Easy-Pull Beer Dispenser 6.0 cubic feet/170 liters/44.9 gallons 21.3”W x 26.6”D x 33.2”H Handy Guardrail (with casters)
-
Page 3: General Safety Precautions
IMPORTANT - All persons that will operate this equipment must read and become thoroughly competent with all operating procedures and safety precautions. Misuse of this equipment may result in death, GENERAL SAFETY PRECAUTIONS 1. You will need this manual for the safety warnings 9. -
Page 4: Location Recommendations
IMPORTANT - All persons that will operate this equipment must read and become thoroughly competent with all operating procedures and safety precautions. Misuse of this equipment may result in death, WARNINGS & DANGER NOTICES WARNING: Because of inherent dangers from faulty or inferior cords, avoid the use of extension cords. When you cannot avoid their use, be sure that the cord is a 3-wire cord with a 3-prong grounded plug. - Page 5 KEGERATOR PARTS FROSTY KEG PARTS LIST CO CANISTER DRIP TRAY WRENCHES CO CANISTER STRAP DUAL GAUGE REGULATOR CASTERS AND WASHERS BEER TOWER PLUG BEER TOWER SPIGOT HANDLE GUARDRAIL EXTRA WASHERS, BEER CHOKE FLOAT, ALLEN WRENCH, CO LINE WASHERS KEG COUPLER...
- Page 6 KEGERATOR FLOW AND PARTS SAVE THESE INSTRUCTIONS Copyright 2010 DTX International...
-
Page 7: Removing Packaging
UNPACKING YOUR KEGERATOR Be sure that you are thoroughly familiar with the assembly and installation process before turning on your kegerator. IMPORTANT! You should position your unit in an upright position and allow to sit for at least 8-10 hours before plugging into an outlet. This will allow any refrigerant that has moved to settle back to where it should be before operation. -
Page 8: Guardrail Installation
KEGERATOR ASSEMBLY BEER TOWER INSTALLATION To install the beer tower (page 5, L), first, thread the rubber gasket over the beer line (M) and seat over the notches on the base of the dispenser assembly so that it lays flat (Figure A). Note: While not required, we recom- mend the use of the black rubber gasket when installing the beer tap. - Page 9 KEGERATOR ASSEMBLY CO REGULATOR INSTALLATION Proper installation of your CO regulator and a thorough understanding of CO canisters is essential to the safe use of this product. Review and follow instructions for handling CO cylin- ders and this section in particular to ensure your safety and the safety of others.
- Page 10 KEGERATOR ASSEMBLY Co REGULATOR INSTALLATION CONTINUED... The knob may turn by hand, but if needed, use a pair of grips or pliers (Figure I) get it started and then open by hand all the way to the left (Figure J). Next, attach the regulator to the CO canister as shown in Figure K.
- Page 11 TAPPING THE KEG INSTALLING KEG TAP ON SINGLE BARREL TYPE KEG This kegerator’s coupler (page 5, E) is compatible with a ¼ pony keg sized barrel and a ½ barrel full size (U.S.A.). The kegerator is capable of holding a 5 gallon cornelius keg and a 5 gallon D system keg, you may discover that you will need to use an alternate keg coupler.
- Page 12 KEGERATOR OPERATION To begin using your kegerator you will need to attach the CO line and the beer line to the keg. First, after double-checking to ensure that the silver end of the CO line has a washer installed and that the keg coupler’s CO connection’s hat-shaped washer is in place, attach the silver end of the CO line to the CO connection on the keg coupler (Figure V).
- Page 13 KEGERATOR OPERATION Locate the keg board (page 5, R) which is the white plastic raised bump board which you initially removed from the bottom floor of the kegerator during unpack- ing. Replace the keg board in the bottom of the kegerator, raised bump side down (Figure AB).
-
Page 14: Maintenance And Storage
MAINTENANCE & STORAGE CLEANING & MAINTENANCE To clean the lines and tap, first: TURN OFF CO2. 2. Next, wipe the outside of the kegerator, clean drip tray and around guardrail. Clean the inside of the cabinet by wiping with a damp cloth. Clean gasket on door to help eliminate trapped, spilled beer which could produce mold and mildew. - Page 15 Click below to find more Mipaper at www.lcis.com.tw Mipaper at www.lcis.com.tw...
Need help?
Do you have a question about the KEG6000B and is the answer not in the manual?
Questions and answers