Huawei AR150 SERIES Quick Start Manual
Enterprise routers
Hide thumbs
Also See for AR150 SERIES:
- Configuration manual (221 pages) ,
- Configuration manual - device management (132 pages) ,
- Product description (239 pages)

Related Manuals for Huawei AR150 SERIES


Summary of Contents for Huawei AR150 SERIES
-
Page 1: Quick Start Guide
Huawei AR150&200 Series Enterprise Routers Quick Start Guide Issue Date 2012-06-10 HUAWEI TECHNOLOGIES CO., LTD. - Page 2 All other trademarks and trade names mentioned in this document are the property of their respective holders. Notice The purchased products, services and features are stipulated by the contract made between Huawei and the customer. All or part of the products, services and features described in this document may not be within the purchase scope or the usage scope.
-
Page 3: About This Document
Indicates a tip that may help you solve a problem or save time. Provides additional information to emphasize or supplement NOTE important points of the main text. Issue 03 (2012-06-10) Huawei Proprietary and Confidential Copyright © Huawei Technologies Co., Ltd. - Page 4 Based on 01 (2011-12-30), this issue has the following updates: The power outage survival description is added to the rear panel of AR207V&AR207V-P. AR207G-HSPA+7. Changes in Issue 01 (2011-12-30) Initial commercial release. Issue 03 (2012-06-10) Huawei Proprietary and Confidential Copyright © Huawei Technologies Co., Ltd.
-
Page 5: Table Of Contents
4 Connecting to the Internet......................30 4.1 Going Online Using a Static IP Address......................31 4.2 Going Online Using a Dynamic IP Address.....................33 5 How to Obtain Documentation and Technical Support............36 6 FAQs...............................37 Issue 03 (2012-06-10) Huawei Proprietary and Confidential Copyright © Huawei Technologies Co., Ltd. -
Page 6: Ar150/200 Overview
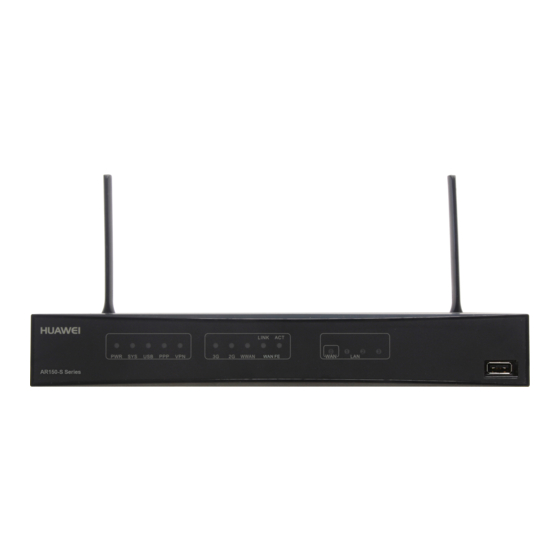
1.3 Indicator Description This section describes the indicators on the AR150/200 front panel. 1.4 Physical Specifications This section describes the physical specifications and system configuration of the AR150/200. Issue 03 (2012-06-10) Huawei Proprietary and Confidential Copyright © Huawei Technologies Co., Ltd. -
Page 7: Naming Rule
8: G.SHDSL C1: Composed of one to four upper-case letters, indicating value- added functions. l W: WLAN l V: Voice l G: 3G l E: Enhanced edition Issue 03 (2012-06-10) Huawei Proprietary and Confidential Copyright © Huawei Technologies Co., Ltd. -
Page 8: Device Structure
Series Model Port Port 1 FE 4 FE SL2+ 4 FE Anne xA/M AR150 Series SL2+ 4 FE Anne ATM and 1G.S 4 FE 158E HDSL modes Issue 03 (2012-06-10) Huawei Proprietary and Confidential Copyright © Huawei Technologies Co., Ltd. - Page 9 (SRST) AR200 Series Voice ports: 4FXS+1FX SL2+ 8 FE Survivable Anne remote xA/M site telephony (SRST) ATM and 1G.S 8 FE 208E HDSL modes Issue 03 (2012-06-10) Huawei Proprietary and Confidential Copyright © Huawei Technologies Co., Ltd.
- Page 10 8: cable retention clip 9: Four FXS ports 10: FXO port 11: PoE port 12: SIM card slot 13: 3G antenna Table 1-2 describes the attributes of G.SHDSL interfaces. Issue 03 (2012-06-10) Huawei Proprietary and Confidential Copyright © Huawei Technologies Co., Ltd.
-
Page 11: Indicator Description
Other models: None 3G port indicator l An AR207G-HSPA+7 provides three indicators that indicating 3G, 2G, and WWAN. l Other models of the AR150/200 provide no 3G port indicator. Issue 03 (2012-06-10) Huawei Proprietary and Confidential Copyright © Huawei Technologies Co., Ltd. - Page 12 Figure 1-7 shows the AR208E appearance. Figure 1-5 AR158E front panel 2 3 4 5 6 Figure 1-6 AR207V-P front panel 2 3 4 5 6 Issue 03 (2012-06-10) Huawei Proprietary and Confidential Copyright © Huawei Technologies Co., Ltd.
- Page 13 Indicator Color Description Green If the indicator is steady on, the PoE power supply is normal. If the indicator is off, no PoE power supply is available. Issue 03 (2012-06-10) Huawei Proprietary and Confidential Copyright © Huawei Technologies Co., Ltd.
- Page 14 If the indicator is off, the WAN port is not transmitting or receiving data. green If the indicator is steady on, a link is connected to the LAN port. Issue 03 (2012-06-10) Huawei Proprietary and Confidential Copyright © Huawei Technologies Co., Ltd.
- Page 15 Number 8: FE0 can be used as a WAN port so that double WAN ports can be provided. l Number 9: Only the AR207V and AR207V-P provide this indicator. l Numbers 11, 12 and 13: Only the AR207G-HSPA+7 provides these indicators. Issue 03 (2012-06-10) Huawei Proprietary and Confidential Copyright © Huawei Technologies Co., Ltd.
-
Page 16: Physical Specifications
512 MB 512 MB AR156 2-core: 533 MHz 512 MB 512 MB AR157 2-core: 533 MHz 512 MB 512 MB AR158E 2-core: 533 MHz 512 MB 512 MB Issue 03 (2012-06-10) Huawei Proprietary and Confidential Copyright © Huawei Technologies Co., Ltd. - Page 17 512 MB 512 MB AR207V-P 2-core: 533 MHz 512 MB 512 MB AR208E 2-core: 533 MHz 512 MB 512 MB AR207G-HSPA+7 2-core: 533 MHz 512 MB 512 MB Issue 03 (2012-06-10) Huawei Proprietary and Confidential Copyright © Huawei Technologies Co., Ltd.
-
Page 18: Product Installation
This section describes how to connect AR150/200 series products. 2.4 Powering on the Device This section provides the checklist used to check the AR150/200 before powering on it. Issue 03 (2012-06-10) Huawei Proprietary and Confidential Copyright © Huawei Technologies Co., Ltd. -
Page 19: Installation Preparations
Floating nut mounting bar ESD wrist strap Accessories M4 screw: fixes brackets to Floating nut Rubber pad chassis M6 screw: fixes chassis into Bracket Ground cable cabinet Remote Antenna Issue 03 (2012-06-10) Huawei Proprietary and Confidential Copyright © Huawei Technologies Co., Ltd. -
Page 20: Installing The Device
Before placing the AR150/200 on the desk, attach rubber pads onto each of the four recessed corner areas on the bottom of the chassis. AR207G-HSPA+7 needs two whip antennas, which must be vertical to the desktop. (Only applies to 3G models). Issue 03 (2012-06-10) Huawei Proprietary and Confidential Copyright © Huawei Technologies Co., Ltd. - Page 21 Hammer the hollow wall anchors into the drilled holes. Screw the mounting screws into the wall anchors using a screwdriver. Leave the screws protruding 2 mm from the wall. Issue 03 (2012-06-10) Huawei Proprietary and Confidential Copyright © Huawei Technologies Co., Ltd.
- Page 22 Install the antennas of the 3G model downwards and vertical to the ground. Connect the power adapter. Place the power adapter on a nearby horizontal surface, but do not hang it under the equipment. Issue 03 (2012-06-10) Huawei Proprietary and Confidential Copyright © Huawei Technologies Co., Ltd.
- Page 23 (providing interfaces). Install two rack-mounting brackets. It is recommended that you install the rack-mounting brackets close to the rear panel (providing interfaces). Issue 03 (2012-06-10) Huawei Proprietary and Confidential Copyright © Huawei Technologies Co., Ltd.
- Page 24 Hold the chassis with one hand while using the other hand to secure the lower panel screw and then the upper one with a screwdriver. Issue 03 (2012-06-10) Huawei Proprietary and Confidential Copyright © Huawei Technologies Co., Ltd.
-
Page 25: Connecting The Device
2.3 Connecting the Device This section describes how to connect AR150/200 series products. AR150/200 series of non-3G models have the same connection modes. The AR207V is used as an example. Issue 03 (2012-06-10) Huawei Proprietary and Confidential Copyright © Huawei Technologies Co., Ltd. - Page 26 Quick Start Guide 2 Product Installation Figure 2-1 AR207V connection AR150/200 series of 3G models have the same connection modes. The AR207G-HSPA+7 is used as an example. Issue 03 (2012-06-10) Huawei Proprietary and Confidential Copyright © Huawei Technologies Co., Ltd.
- Page 27 On an AR158E or AR208E, the WAN port is a G.SHDSL port, which connects to a cable with RJ45 connectors. 3: Voice port cable, which is connected to a telephone with a telephone line (RJ11 connectors). Issue 03 (2012-06-10) Huawei Proprietary and Confidential Copyright © Huawei Technologies Co., Ltd.
-
Page 28: Powering On The Device
The cables in the cabinet are not crossed and the cables View outside the cabinet are bundled. Both ends of signal cables are clearly labeled and the label View text is in the same direction. Issue 03 (2012-06-10) Huawei Proprietary and Confidential Copyright © Huawei Technologies Co., Ltd. - Page 29 Status If the indicator is green, the system power supply is normal. If the indicator blinks green once every 2s (0.5 Hz), the system is running properly. Issue 03 (2012-06-10) Huawei Proprietary and Confidential Copyright © Huawei Technologies Co., Ltd.
-
Page 30: Logging In To The Router
This section describes how to log in to the router through the console port. 3.3 Logging In to the Router Using Telnet This section describes how to log in to the router using Telnet. Issue 03 (2012-06-10) Huawei Proprietary and Confidential Copyright © Huawei Technologies Co., Ltd. -
Page 31: Logging In To The Router Through The Web Network Management System
The default user name and password are admin. You can create new users or modify the user name and password in the page System Management > User Management. ----End Issue 03 (2012-06-10) Huawei Proprietary and Confidential Copyright © Huawei Technologies Co., Ltd. -
Page 32: Logging In To The Router Through The Console Port
HyperTerminal. Enter the name of the new connection in the Name text box and click OK, as shown in Figure 3-2. Figure 3-2 Creating a connection Step 3 Select the console port used and click OK, as shown in Figure 3-3. Issue 03 (2012-06-10) Huawei Proprietary and Confidential Copyright © Huawei Technologies Co., Ltd. - Page 33 3 Logging In to the Router Figure 3-3 Selecting the console port Step 4 Click Restore Defaults and click OK, as shown in Figure 3-4. Figure 3-4 Setting communication parameters Issue 03 (2012-06-10) Huawei Proprietary and Confidential Copyright © Huawei Technologies Co., Ltd.
-
Page 34: Logging In To The Router Using Telnet
Step 5 Enter the default user name and password admin. If the user interface is displayed, you logged in successfully. When you log in for the first time, the following information is displayed: Username:admin Password: <Huawei> ----End Issue 03 (2012-06-10) Huawei Proprietary and Confidential Copyright © Huawei Technologies Co., Ltd. -
Page 35: Connecting To The Internet
This section describes how to go online using a static IP address allocated by a carrier. 4.2 Going Online Using a Dynamic IP Address This section describes how to go online using a dynamic IP address. Issue 03 (2012-06-10) Huawei Proprietary and Confidential Copyright © Huawei Technologies Co., Ltd. -
Page 36: Going Online Using A Static Ip Address
Step 2 Set broadband connection parameters. Set Next to Static IP. NOTE The IP address, subnet mask, default gateway, and the primary DNS server are provided by the carrier. Issue 03 (2012-06-10) Huawei Proprietary and Confidential Copyright © Huawei Technologies Co., Ltd. - Page 37 Step 3 Set LAN access parameters. NOTE By default, Layer 2 Ethernet interfaces of the AR150 or AR200 join VLAN 1 and the IP address of VLANIF 1 is 192.168.1.1/24. Issue 03 (2012-06-10) Huawei Proprietary and Confidential Copyright © Huawei Technologies Co., Ltd.
-
Page 38: Going Online Using A Dynamic Ip Address
IP address to connect to the Internet. Configure RouterA using the web network management system so that LAN users can access the Internet. Issue 03 (2012-06-10) Huawei Proprietary and Confidential Copyright © Huawei Technologies Co., Ltd. - Page 39 Step 1 Click Wizard in the navigation tree to open the following page. Click Next to access the Configure the Broadband Connection page. Step 2 Set broadband connection parameters. Set Connection mode to Dynamic IP. Issue 03 (2012-06-10) Huawei Proprietary and Confidential Copyright © Huawei Technologies Co., Ltd.
- Page 40 View the configurations on the Finish Configuration Wizard page. To confirm the configurations, click Finish. To modify the configurations, click Previous. If you quit the wizard without clicking Finish, the configurations will not take effect. ----End Issue 03 (2012-06-10) Huawei Proprietary and Confidential Copyright © Huawei Technologies Co., Ltd.
-
Page 41: How To Obtain Documentation And Technical Support
Huawei customer service center (CSC) for help. Email: support@huawei.com You can also visit http://support.huawei.com, click Contact Us in the lower area of the page, and select the country to obtain contact information about Huawei local office. Issue 03 (2012-06-10) Huawei Proprietary and Confidential Copyright ©... -
Page 42: Faqs
A super administrator is provided, which is a level-3 user with the user name and password as admin. You can log in as the admin user using Telnet. Issue 03 (2012-06-10) Huawei Proprietary and Confidential Copyright © Huawei Technologies Co., Ltd.