Table of Contents
Advertisement
Quick Links
Advertisement
Table of Contents

Related Manuals for Pioneer DVD-V7300D


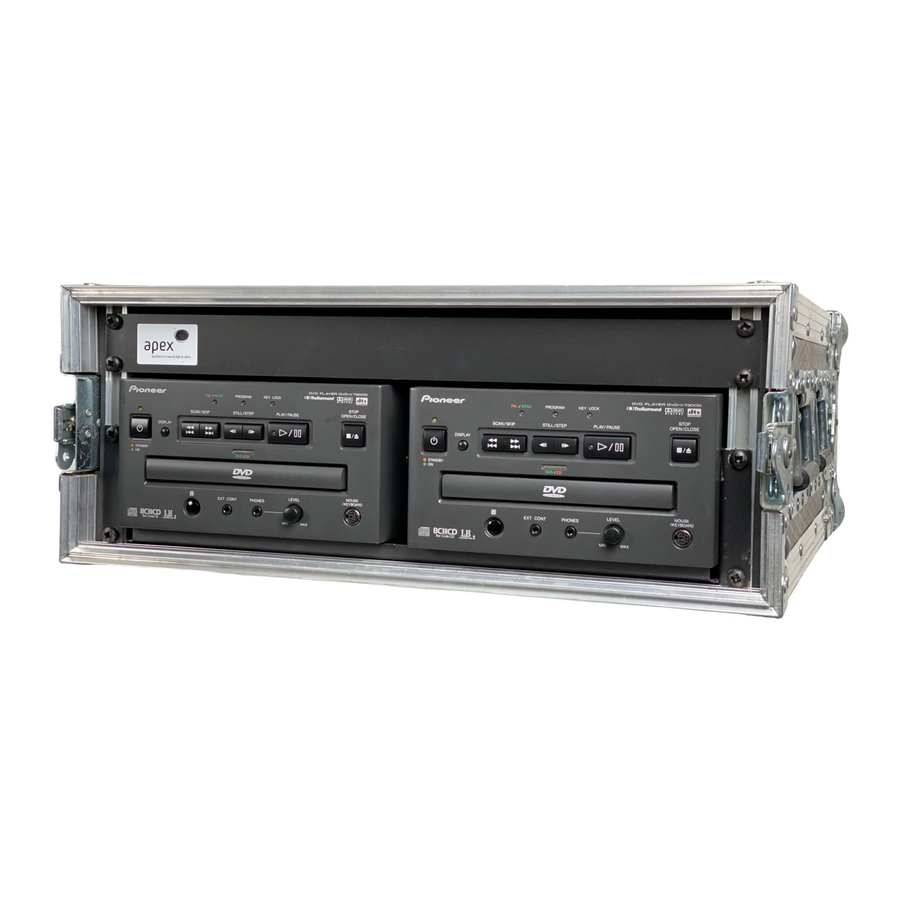
Summary of Contents for Pioneer DVD-V7300D
- Page 1 DVD PLAYER DVD-V7300D Operating Instructions...
- Page 2 IMPORTANT The lightning flash with arrowhead symbol, within an equilateral triangle, is intended to alert the user to the presence of uninsulated "dangerous voltage" within the product's enclosure that may be of suffi- cient magnitude to constitute a risk of electric shock to persons.
- Page 3 IMPORTANT CAUTION This product contains a laser diode of higher class than 1. To ensure continued safety, do not remove any covers or at- tempt to gain access to the inside of the product. Refer all servicing to qualified personnel. The following caution label appear on the player.
- Page 4 Deutsch WICHTIG VORSICHT Dieses Gerät enthält eine Laserdiode mit einer höheren Klasse als 1. Um einen stets sicheren Betrieb zu gewährleisten, weder irgendwelche Abdeckungen entfernen, noch versuchen, sich zum Geräteinneren Zugang zu verschaffen. Alle Wartungsarbeiten sollten qualifiziertem Kunden- dienstpersonal überlassen werden. Die folgenden Warnungsetiketten sind am DVD-Spieler angebracht.
-
Page 5: Before Using
• This player is not suitable for commercial use. Before using Thank you for buying this Pioneer product. Please read through these operating instructions so you will know how to operate your model properly. After you have finished reading the instructions, put them away in a safe place for future reference. - Page 6 Component Features and Functions 1. High-reliability, high-endurance player This player features a high-performance brushless spin- dle motor, and the mechanical components have been sealed against heat and dust, giving this unit improved reliability. 2. PAL/NTSC dual playback DVD discs in either the PAL format or the NTSC format can be played back.
-
Page 7: Table Of Contents
Contents Remote Control Operations ... 16 Playing DVDs, CDs, and Video CDs..16 Chapter (Track) skip forward/skip back ... 18 Stopping playback and switching power off ... 18 Searching for a desired scene (SEARCH) ... 19 Still frame/Frame advance/Frame reverse ... 20 Slow motion Play ... -
Page 8: Operating Environment
÷ When multiple players are connected in parallel, a high surge cur- rent will be impressed on the units when external power is first turned on. Please consult your Pioneer dealer regarding ratings for the power switch to be used. -
Page 9: Manipulation Des Disques
÷ Lorsque plusieurs lecteurs sont raccordés en parallèle, un courant de pointe élevé sera sorti aux appareils lorsque la tension externe est tout d’abord appliquée. Consultez votre distributeur Pioneer pour les caractéristiques nominales de l’interrupteur d’alimentation à utiliser. ÷ N’installez pas le lecteur dans un meuble fermé. Cela provoquerait des dommages internes lorsque la température interne s’élève. - Page 10 ÷ Wenn mehrere Player parallel angeschlossen sind, werden die Geräte beim erstmaligen Einschalten der externen Stromversorgung einem hohen Stromstoß ausgesetzt. Bitte den Pioneer-Fachhändler zu den minimalen Kennwerten des zu verwendenden Stromschalters konsultieren. ÷ Den Player nicht in einem durch Türen verschlossenen HiFi-Schrank aufstellen.
-
Page 11: Spostamento Del Lettore
PIONEER. I pulitori per lenti sono in vendita, ma devono venire usati con particolare cura, dato che possono danneggiare la lente. -
Page 12: Manejo De Los Discos
÷ Cuando se conecten en paralelo múltiples reproductores, al conectar por primera vez la alimentación externa se aplicará a las unidades una corriente inicial alta. Consulte a su concesionario Pioneer en cuanto a los valores nominales para la conmutación de la alimentación que se vaya a utilizar. -
Page 13: Disc Types Compatible With This Unit
Disc types compatible with this unit ÷ The marks shown below are found on disc labels or on disc jackets. ÷ This player can play all discs bearing the marks below with- out the read for an adaptor. ÷ This player can play discs recorded in either PAL or NTSC format. -
Page 14: Names And Functions
Names and Functions 7 Remote control unit STD-BY (Stand by)/ON button REPEAT button DISPLAY button RPT (Repeat) A-B button RECALL button AUDIO button MEMORY button ANGLE button SUBTITLE button MENU button TOP MENU button SETUP button Number buttons (0-9, >10) * When using a wired remote control unit (sold separately: CU-V155), the reading of the names of some of the keys needs to be changed. -
Page 15: Front Panel
EXIT SYNC IN COMPONENT VIDEO OUT SIGNAL Video output connector (BNC) Component video output Lights when repeat play, program play or command stack function is operated DVD PLAYER DVD-V7300D DOLBY D I G I T A L STOP OPEN/CLOSE STOP OPEN/CLOSE button §... -
Page 16: Remote Control Operations
Basic Operations Remote Control Operations Wireless Remote Operation When operating the remote control, point it at the remote sen- sor located on the player’s front panel. The remote control can be used up to 7 m from the player and within a 30° angle each side of the sensor. - Page 17 DVD. Video CD When the menu screen has been displayed DVDs and Video CDs, depending on the disc, feature se- lection menus. This player lets you choose a desired title and music by selecting from a menu. 7During DVD playback Press to select the selected ENTER...
-
Page 18: Chapter (Track) Skip Forward/Skip Back
Chapter (Track) skip forward/skip back DVD. Video CD Skipping forward to the next chapter (track) NEXT Press ÷ Press to skip forward to the next chapter (track). ÷ ¡ on the front panel has the same function. ¢ DVD. Video CD Skipping back to the previous chapter (track) PREV... -
Page 19: Searching For A Desired Scene (Search)
Searching for a desired scene (SEARCH) DVD. Direct search with title numbers during playback TITLE/CHP FRM/TIME Press during playback. Title : Selecting title numbers directly with the number buttons. Title : ÷ When selecting title number 3, press ÷ When selecting the title number 10, press SEARCH Press ÷... -
Page 20: Still Frame/Frame Advance/Frame Reverse
Searching for a desired scene (SEARCH) DVD. Video CD Searching by time/frame number (Time search/Frame search) FRM/TIME Press to select the frame input mode or the time input mode. ÷ With Video CD, only time search is available. Frame : 0/219113 Select the desired time/frame number with the number buttons. -
Page 21: Slow Motion Play
Slow motion Play DVD. Video CD Forward slow playback STEP Press and hold during playback. To change the speed of slow playback During slow playback, slow playback speed can be adjusted to any one of four speeds by pressing Slow STEP For DVD STEP1 (... -
Page 22: Program Play
Program Play The contents of one disc can be arranged in the desired order. Programming is possible up to a maximum of 24 steps. DVD. MEMORY Press three times. PROGRAM is displayed on the television screen. ENTER Press The program screen is displayed. Program Chapter Program Title Current: Title... - Page 23 DVD. Video CD To stop program play CLEAR Press during play. Normal playback starts from the chapter/track currently playing. Notes ÷ When the disc table is opened, the program will be com- pletely erased. With DVD, a program that you want to save can be recorded in this player (page 24).
-
Page 24: Viewing Disc Information
Program Play DVD. Recording the program (program memory) This player can record DVD programs up to a maximum of 24 discs, even if the disc is removed. When a program is recorded, program playback starts when the same disc is played back next. - Page 25 Viewing disc information during playback DISPLAY Press repeatedly during play- back. When pressed, the following kind of disc information is displayed in the upper part of the screen. DVD. When pressed once, the present frame information is dis- played. Present title number - Present chapter number Elapsed time of the title 1–1 1.19 Play...
-
Page 26: Switching The Angle Of The Image (Multi-Angle)
Switching the Angle of the Image (Multi-Angle) DVD. With DVDs featuring recordings of pictures shot from dif- ferent angles, you can choose any desired viewing angle during playback. The mark is placed on the jacket of a DVD that has multiple angles. If the mark is displayed during ANGLE... -
Page 27: Switching The Audio During Playback
Switching the Audio during Playback DVD. When a DVD with audio that has been recorded in multi- ple languages is being played back, the audio played back can be changed. AUDIO Press while playing back the DVD. The currently selected audio is displayed. AUDIO Press again. -
Page 28: Index Of The Graphical User Interface (Gui)
Index of the Graphical User Interface (GUI) On this player, various settings can be selected while watching menu screens. Here we will explain how to access menu screens. Because menu screen access differs according to the type of disc being used, or the playback mode (stop mode etc.), refer to the following menu map when accessing. -
Page 29: Operating The Initial Setup Menu
Operating the Initial Setup Menu DVD. Video CD CD.. The initial setup menu enables various settings to be made. The basic operating method for the initial setup menu and the locations of the buttons used are explained next. 7 Displaying the initial setup menu STD-BY/ON Press When the power has been turned on, proceed to... -
Page 30: Selecting The Aspect Ratio
Selecting the aspect ratio DVD. The images which appear in the TV Regular TV (4:3) Image recorded on DVD 16:9 discs 4:3 discs Wide TV (16:9) Image recorded on DVD 16:9 discs 4:3 discs NOTE When following operation is operated during playback in the letter box or Pan & Scan modes, the screen size is forcibly changed to the wide-screen mode ÷... -
Page 31: Changing Visual Setting
Changing visual settings DVD. Switching still pictures Eliminating the burriness of a picture when the DVD has paused, and viewing the picture clearly is possible. SETUP Press The initial setup menu is displayed. Select [Video]. Select [Still Picture]. Press the cursor button (right direction). - Page 32 Changing visual settings DVD. Selecting the position of the The OSD position of the initial startup screen such as “Play” or “Stop”, etc. which this player displays can be set to suit the type of television. Set the screen ratio of the DVD disc to 4:3. (for details check the disc jacket, etc.) SETUP Press...
-
Page 33: Setting The Language
Setting the Language Some DVD discs have multiple subtitles and audio tracks and have a function that enables the user to select the one he/ she wants to suit his/her needs. The settings related to the various languages and subtitles in (Language) of the initial setup screen are explained here. - Page 34 Setting the Language 7 When (Other) is selected by the subtitle language/ audio language/ DVD language setting Operate while viewing the language code table on page 44. Select [Other]. ENTER Press The language setting screen is displayed. Example) Audio Language is displayed Audio1 Video Language...
-
Page 35: Setting The Dvd Menu Language
DVD. Setting the DVD menu language Some DVDs have a menu. Select the language from this menu. This setting cannot be set during playback. SETUP Press The initial setup menu is displayed. Select [Language]. Select [DVD Language]. Press the cursor button (right direction). - Page 36 Setting the Language DVD. Setting the language of the subtitles with enforced display Some DVDs enforce the display of subtitles even when subti- tle display “Off” has been selected. However, the language of the subtitles can still be selected in the normal way. This setting cannot be changed during playback.
-
Page 37: Setting Viewing And Listening Restrictions (Parental Lock)
Setting viewing and listening restrictions (Parental Lock) Some DVDs that contain violent scenes incorporate viewing restriction levels (great and small). This information is displayed on the disc jacket. If the level of this player has been set to a level lower than the level of a disc, (it is not possible to view and listen to that disc.) For example, if the level of this player has been set to 6, a special code number has to be input before discs of levels 7 and 8 can be played back. -
Page 38: Changing The Code Number
Setting viewing and listening restrictions (Parental Lock) DVD. When a DVD with a set Parental Lock level is loaded When a DVD with a set Parental Lock level is loaded, pass- word input screen may be displayed. Playback cannot be started until the password has been correctly input. -
Page 39: Making The Ordinary Settings
Making the ordinary settings DVD. Video CD Setting the screen saver The screen saver is a function to prevent the burning in (the afterglow phenomenon) of an image when the same image has been displayed for a long time such as during a pause. SETUP Press The initial setup menu is displayed. -
Page 40: Setting The Digital Output
Setting the Digital Output The type of digital signal that corresponds to the amplifier connected to this player can be selected. Be careful because noise may occur when the appropriate setting is not made. Read this together with the operation manual of the amplifier that you have. DVD. - Page 41 DVD. 96 kHz PCM Output When the connected amplifier supports 96 kHz, set to (96 kHz). This setting cannot be changed during playback. SETUP Press The initial setup menu is displayed. Select [Audio 1]. Select [96kHz PCM Out]. Press the cursor button (right direction).
-
Page 42: Setting To Optimize The Audio Quality
Setting the Digital Output DVD. Video CD Setting the Digital Output Can be set so that an audio signal is not output from the dig- ital audio output terminal. SETUP Press The initial setup menu is displayed. Select [Audio 1]. Select [Digital Out]. - Page 43 TruSurround and Virtual Dolby Digital This player, by means of the TruSurround* technology of SRS Labs Inc., processes surround encoded stereo au- dio and multi-channel audio and reproduces Virtual Sur- round with only the two front speakers. Particularly, when the playback audio is Dolby Digital multi-channel audio, the Virtual Dolby Digital function automatically works, and a surround sound with a greater sense of presence will be reproduced.
-
Page 44: Returning To The Default Settings At The Time Of Shipment
Returning to the default settings at the time of shipment DVD. Video CD All the settings can be returned to the default state at the time of shipment. When this operation is performed, all the data stored in the memory (page 24) will be simultaneously erased. Be sufficiently careful before returning to the default settings. -
Page 45: Advanced Feature Operations
Control method using the mouse is explained in this section. ÷ Barcode/command stack function Various barcodes or commands used to control the DVD-V7300D can be stored in this player’s memory in advance. Memorized content can be recalled for successive or step by step execution. -
Page 46: Video Blackboard Function
÷ Video blackboard function Using the mouse and keyboard, pictures, lines and characters (alphabet, numbers, symbols) can be drawn during video playback or displayed alone. Free lines can be drawn on the picture during playback, and pre-drawn drawings or characters can be superimposed on the image and displayed at a specified position during playback. -
Page 47: Adv. Setup Menu Settings
EXTERNAL SYNC AV SYNC COMPENSATE Above picture indicates the initial settings. In order to set up the unique functions of the DVD-V7300D, there are settings for 15 parameters that are made by the remote control unit. 1 WEEKLY TIMER The time for turning the power on and off can be set for each day of the week;... -
Page 48: Player Control Panel
ADV. SETUP MENU settings 9 REV STEP/REV PLAY This selects the image units for reverse play. VOBU: This depends on the disc being played back, but usu- ally reverses in blocks of 0.4 - 1 second. Frame: Reverses at intervals of one frame. 0 PLAYER CONTROL PANEL This selects the display mode of the icon panel that can be controlled with a mouse. -
Page 49: Player Control Using A Mouse
Player control using a mouse Mouse operation is possible by connecting a PS/2 mouse and turning power ON. DVD. Video CD Button Selection You can use the mouse to select DVD Menu buttons and but- tons displayed on the screen. When the mark cursor is placed on a button, it changes mark. -
Page 50: Weekly Timer Function Operation/Display
Weekly timer function operation/display ADV.SETUP page 1/2 WEEKLY TIMER POWER ON START TITLE PLAY MODE Single REPEAT MODE BAUD RATE 4800bps TRAY LOCK BLACKBOARD LOCK STACK MODE OSD REV STEP/REV PLAY VOBU ADV.SETUP page 1/2 WEEKLY TIMER POWER ON START TITLE PLAY MODE Single REPEAT MODE... -
Page 51: Setting The Weekly Timer
00–04–29 08:15.00 (1/3) RETURN ENTER TIMER ON/OFF 1.TOP MENU 2.TITLE 3.BARCODE/COMMAND STACK CLEAR ENTER TIMER ON/OFF 10 30 1.TOP MENU 2.TITLE 3.BARCODE/COMMAND STACK CLEAR ENTER TIMER ON/OFF 10 30 17 45 1.TOP MENU 2.TITLE 3.BARCODE/COMMAND STACK CLEAR ENTER ÷ Select ENTER on the screen to enter the setting and exit the screen. -
Page 52: Clearing The Set Time
Weekly timer function operation/display TIMER ON/OFF 10 30 1.TOP MENU 2.TITLE 3.BARCODE/COMMAND STACK CLEAR TIMER ON/OFF 10 30 1.TOP MENU 2.TITLE 3.BARCODE/COMMAND STACK CLEAR TIMER ON/OFF 10 30 1.TOP MENU 2.TITLE 3.BARCODE/COMMAND STACK CLEAR For your reference Memorized data is not erased even if AC power cord is unplugged. - Page 53 TIMER ON/OFF 10 30 1.TOP MENU 2.TITLE 3.BARCODE/COMMAND STACK 00–04–29 ÷ Select ENTER on the screen to enter the setting and exit the screen. Select RETURN to cancel the setting and return to the previous screen. ADV.SETUP WEEKLY TIMER POWER ON START TITLE PLAY MODE REPEAT MODE BAUD RATE...
- Page 54 Weekly timer function operation/display TIMER ON/OFF 1.TOP MENU 2.TITLE 3.BARCODE/COMMAND STACK Blink CLEAR « Blink TIMER ON/OFF 1.TOP MENU 2.TITLE 3.BARCODE/COMMAND STACK CLEAR « Display changes TIMER ON/OFF 1.TOP MENU 2.TITLE 3.BARCODE/COMMAND STACK CLEAR « TIMER ON/OFF 1.TOP MENU 2.TITLE 3.BARCODE/COMMAND STACK Blink CLEAR...
- Page 55 Example 1) 00–04–29 08:15.00 (1/3) 07 30 12 00 T01 : C01 13 00 17 30 T02 : C01 RETURN List display Example 2) 00–04–29 08:15.00 (1/3) 07 30 17 30 T01 : C01 RETURN List display Example 3) 00–04–29 08:15.00 (1/3) 07 30 07 30...
- Page 56 Weekly timer function operation/display Example 5) When the following settings are selected for the same day. Result Example 6) When the following settings are selected for the same day. Result Example 7) When the following settings are selected for the same day. Result Example 8) When the following settings are selected for the same day.
-
Page 57: Power On Start Function
Power on start function ADV.SETUP WEEKLY TIMER POWER ON START TITLE PLAY MODE REPEAT MODE BAUD RATE TRAY LOCK BLACKBOARD LOCK STACK MODE OSD REV STEP/REV PLAY POWER ON START 1.TOP MENU 2.TITLE In the case of 1 3.BARCODE/COMMAND STACK In the case of 2 In the case of 3 POWER ON START... - Page 58 Power on start function POWER ON START 1.TOP MENU 2.TITLE 3.BARCODE/COMMAND STACK GROUP ADV.SETUP WEEKLY TIMER POWER ON START TITLE PLAY MODE REPEAT MODE BAUD RATE TRAY LOCK BLACKBOARD LOCK STACK MODE OSD REV STEP/REV PLAY Setting the Barcode/Com- mand stack ÷...
-
Page 59: Barcode/Command Stack Function
Barcode/Command stack function This player can be used as follows using the Barcode stack/ Command stack function ÷ Commands in the barcode book included with the disc can be memorized in the player in advance. (Barcode stack func- tion.) ÷ Barcodes can be set using the provided remote control for discs that do not have barcodes, or for commands that you want to use that are not provided with barcodes. -
Page 60: Barcode/Command Stack Setting
Barcode/Command stack setting Barcode/Command screen BARCODE/COMMAND BC/COMMAND STACK GROUP 001/001 001 PLAY 002 03:123000–129000 003 05:03–07 ALL CLEAR? YES NO BC/COMMAND STACK GROUP 001: 001 TITLE SEARCH FRAME MARK FRAME SUBTITLE AUDIO ANGLE SAVE DEL EXIT LASERBARCORD and DVD barcodes. The stored commands can be recalled for either successive or step-by-step execu- tion. -
Page 61: Direct Setting Using A Barcode Reader
BC/COMMAND STACK GROUP 001: 001 PLAY BC/COMMAND STACK GROUP 004: 006 WAIT 000sec. DVD. Direct setting using a barcode reader Read a barcode with a barcode reader. Send it to the player. Example 1) Read “PLAY” and send it. Example 2) Read “Play Title 8 Chapters 5 to 12 with Subtitle 3, Audio 2 and Angle 1”... -
Page 62: For Your Reference
Barcode/Command stack setting Display when the example on the right is input Note The difference between search frames and mark frames can- not be set to 24 frames or less. The entry must be 25 frames or greater. Display when the example on the right is input For your reference To play chapter 7 till the end as shown in Example 4), enter... - Page 63 BC/COMMAND STACK GROUP 001: 001 TITLE Item display SEARCH FRAME 000000 MARK FRAME - - - - - - SUBTITLE AUDIO ANGLE SAVE DEL EXIT DISPLAY Press switches over to the following display BC/COMMAND STACK GROUP 001/ 001 001 SUBTITLE 01 AUDIO 2 ANGLE 3 002 03:10000–15000 List display SAVE DEL...
-
Page 64: To Use Only The Chapter Search Or Frame Search
Barcode/Command stack setting Example 7) Inputting a command to jump to another group. 1. When the TITLE number BC/COMMAND STACK GROUP 004: 003 GO TO GROUP - 000 2. The display changes to To change a previously input “GO TO GROUP” command RECALL group number, press during Detailed or List display, and... -
Page 65: Command Stack
DVD. Saving Barcode/ Command stack When input has been completed to the end using the ex- ample operation, the barcode stack/command stack in- put screen for the next step appears in a few seconds. BC/COMMAND STACK GROUP 001: 001 TITLE SEARCH CHAPTER MARK SUBTITLE... - Page 66 Barcode/Command stack setting DVD. Correcting a previously input Barcode/ Command Stack Example) To change the Audio setting of step 003 from 2 to 1 MEMORY Press ÷ “BARCODE/COMMAND” is displayed. ENTER Press ÷ The Barcode/Command Stack screen is displayed. Select “NO” with ÷...
-
Page 67: Grouping Some Barcode/Command Stacks
Grouping some Barcode/Command Stacks BARCODE/COMMAND BC/COMMAND STACK GROUP 001/001 001 PLAY 002 03:123000–129000 003 05:03–07 ALL CLEAR? YES NO BC/COMMAND STACK GROUP 001: 004 TITLE SEARCH MARK SUBTITLE AUDIO ANGLE SAVE DEL BC/COMMAND STACK GROUP 001/001 001 PLAY 002 03:123000–129000 003 05:03–07 SAVE DEL BC/COMMAND STACK GROUP 002: 001... -
Page 68: Deleting A Group
Grouping some Barcode/Command Stacks DVD. Switching the Barcode/ Command Stack group Press ÷ “BARCODE/COMMAND” is displayed. BC/COMMAND STACK GROUP 001/002 001 PLAY 002 03:123000–129000 003 05:03–07 03 2 1 Press ÷ The Barcode/Command Stack screen is displayed. SAVE DEL EXIT Select “NO”... - Page 69 BC/COMMAND STACK GROUP 001/001 001 PLAY 002 03:123000–129000 003 05:03–07 03 2 1 SAVE DEL EXIT BC/COMMAND STACK GROUP 001/ 001 001 PLAY 002 03:123000–129000 003 05:03–07 03 2 1 SAVE DEL EXIT BC/COMMAND STACK GROUP 001/ 001 001 PLAY 002 03:123000–129000 003 05:03–07 03 2 1...
-
Page 70: Dividing A Previously Input Group
Grouping some Barcode/Command Stacks DVD. Dividing a previously input group BARCODE/COMMAND Press ÷ “BARCODE/COMMAND” is displayed. Press BC/COMMAND STACK GROUP 001/001 ÷ The Barcode/Command Stack screen is displayed. 001 PLAY 002 03:123000–129000 003 05:03–07 03 2 1 ALL CLEAR? YES NO BC/COMMAND STACK GROUP 001: 004 Select “NO”... - Page 71 BC/COMMAND STACK GROUP 001/ 001 001 PLAY 002 03:123000–129000 003 05:03–07 03 2 1 SAVE DEL EXIT BC/COMMAND STACK GROUP 001/ 001 001 PLAY 003 03:123000–129000 004 05:03–07 03 2 1 SAVE DEL EXIT BC/COMMAND STACK GROUP 002: 001 TITLE SEARCH FRAME 123000...
- Page 72 Grouping some Barcode/Command Stacks DVD. Joining two Barcode/ Command Stack groups Press BARCODE/COMMAND ÷ “BARCODE/COMMAND” is displayed. BC/COMMAND STACK GROUP 004/004 001 PLAY Press 002 03:123000–129000 003 05:03–07 03 2 1 ÷ The Barcode/Command Stack screen is displayed. ALL CLEAR? YES NO Select “NO”...
- Page 73 BC/COMMAND STACK GROUP 003/ 004 001 02:000150–002050 002 06:22–23 SAVE DEL EXIT BC/COMMAND STACK GROUP 003/ 003 001 02:000150–002050 002 06:22–23 003 PLAY 004 03:123000–129000 005 05:03–07 03 2 1 SAVE DEL EXIT BC/COMMAND STACK GROUP 003/ 003 001 02:000150–002050 002 06:22–23 003 PLAY 004 03:123000–129000...
-
Page 74: Using A Barcode/Command Stacks
Using a Barcode/Command Stacks Switching the command group Recall screen Switching the command step Recall screen DVD. Recalling/executing barcode commands in memory To excute a barcode command group: Load the disc to excute them. Press Press BC/COMMAND STACK GROUP 001: 001 Input the number of the command group to be recalled/executed using the numeric buttons. - Page 75 BC/COMMAND STACK GROUP 001/ 003 001 PLAY 002 03:123000–129000 003 05:03–07 03 2 1 DVD. Recalling/executing previously input barcode/command stack from the list view RECALL Press DISPLAY Press ÷ This displays a list of commands. Select a group by pressing ÷...
-
Page 76: Character Input/Output Drawing (Dvd Video Blackboard)
Character Input/Output drawing (DVD video blackboard) P IONEER_ Input “PIONEER” P IONEER_ NOTE The system cannot enter this mode during display of the player control panel. The video blackboard function of this unit allows you to draw characters and pictures just like on a blackboard. The drawn characters and pictures can be displayed alone or superim- posed on the disc video. -
Page 77: Using The Drawing Tools
Drawing tool DVD. Using the drawing tools ÷ Use the mouse’s left button to select icon below. (LINE):Draws a straight line. (BOX): This tool can be switched by click- COLR SAVE UNDO EXIT ing to a tool for drawing a line-en- closed rectangle, solid-painted rectangle or a rectangle the out- side of which is painted. -
Page 78: Details On The Blackboard
Character Input/Output drawing (DVD video blackboard) GROUP 001 DISPLAY AREA GROUP 001 001 R–3, RED 02-015.29~015.36 A GROUP 001 001 R–3, RED 02-015.29~015.36 A GROUP 001 001 R–1, YLW 02-002.41~032.06 002 B–3, GRN 01-027.30~035.08 DVD. Saving characters or pictures Click SAVE ÷... -
Page 79: To Change The Display Mode
Indicator on the top of right GROUP 001 001 R–3, RED 02-015.29~015.36 A Notes ÷ It takes time to draw a graphical image, so if you are using it to hide part of the video image, the image-drawing IN point must be set sufficiently in advance of the desired scene. -
Page 80: Grouping Video Blackboards
Grouping video blackboards Step GROUP 001 001 R–1, 002 B–3 Select the group BLACKBOARD GROUP 001: 000 BLACKBOARD GROUP 001: 000 NOTE The system cannot enter this mode during display of the player control panel. DVD. Grouping blackboards Blackboards can be registered by dividing them into groups Group according to the disc and title to enable selective use later. - Page 81 Select the step Select the group GROUP 001 001 R–1, 02-002. 002 B–3, 01-027. Example Time Flow (Start point) (End point) (Start point) (Start point) (End point) (Start point) (End point) DVD. Recalling/executing previously input blackboards while observing their list 41~032.06 RECALL Press...
-
Page 82: Video Text Retrieval
÷ Input the external synchronizing signal before playback of the DVD disc. Synchronization will not operate if input is done after playback is started. ÷ In cases where two or more DVD-V7300D units are externally syncronized and their videos are started simultaneously for frame-synchronized playback, turn off AV SYNC COMPENSATE on the ADV. SETUP menu. The external sync function works only with DVD play: it does not work with any other operation. -
Page 83: How To Display Total Hours Played And Power On Time
How to display total hours played and power on time DVD. Video CD This unit is capable of displaying the total play time and power ON time as the working condition and maintenance timing information. The play time and power ON time can be displayed as de- scribed below. -
Page 84: Connecting The Player
5V 100mA. Do not use a mouse or key- board with a current drain exceeding the rating of 100mA. 2 keyboard models and “Y” cables may not be compat- ible with this unit. For details, please consult PIONEER technical support. “Y” cable... - Page 85 Connection example 1 ÷ Television (monitor TV) ÷ Control Computer ÷ Sync Generator ÷ Please also refer to the manual for the TV (monitor TV) that you are connection to. Computer Connect one or the other RS-232C INTERFACE CONNECTOR Set this switch “ON”...
- Page 86 Connect to the Component Video input ÷ The description of the component video input connectors may differ de- pending on the TV set or monitor. ÷ If the color of the picture is thin or something wrong, adjust the color setting of the TV you are connection to.
- Page 87 AV receiver with digital input for Dolby Digital. *Make this connection when using this unit with Pioneer’s VSA-E06, VSA-E07 AV amplifier. ÷ Connect this unit’s digital output PCM/ ÷ Select whether or not to use the coaxial digital output according to the amplifier’s input jack.
- Page 88 Connection example 3 AV amplifier ÷ Connect this player’s audio output jacks to an amplifier’s CD, LD, AUX or other audio input jacks. (Do not connect to PHONO jacks.) ÷ Connect this player’s video output jack to the amplifier’s video input jack. ÷...
-
Page 89: Using A Laser Barcode Scanner (Sold Separately)
Using a Laser Barcode Scanner (Sold Separately) Using a Laser Barcode Scanner (Sold Separately) Laser Barcode Scanner Laser Barcode Scanner To use the optional LaserBarcode Scanner (UC-V108BC or To use the optional LaserBarcode Scanner (UC-V108BC or UC-V109BC) in the wired mode to transmit signals, connect UC-V109BC) in the wired mode to transmit signals, connect the LaserBarcode scanner’s connection cord to the player’s the LaserBarcode scanner’s connection cord to the player’s... -
Page 90: Troubleshooting
PIONEER authorized service center. Power does not come on. Connect the power cord to the outlet properly (page 86 - 89). -
Page 91: Terms
Regional restriction codes are built in to DVD players and DVD discs for each sales region. If the regional restriction codes of the DVD player does not match one of the regional restriction codes of the DVD disc, playback is not possible. -
Page 92: Specifications
Specifications General System ... DVD system and Compact Disc digital audio system Power requirements ... AC 220-240 V, 50/60 Hz Power consumption ... 15 W Power consumption in standby mode ... 0.8W Weight ... 4.5 kg Dimensions ... 210 (W) x 412 (D) x 119 (H) mm (Not including protruding cables, etc.) Operating temperature ... -
Page 93: Technische Daten
Deutsch Technische Daten Allgemeines System ... DVD-System und digitales Compact Disc-Audiosystem Stromversorgung ... 220 - 240 V Wechselspannung, Leistungsaufnahme ... 15 W Leistungsaufnahme im Bereitschaftsmodus ... 0,8 W Gewicht ... 4,5 kg Abmessungen ... 210x 412 x 119 mm (B x T x H) (Ausschließlich hervorstehender Kabel usw.) Betriebstemperatur ... - Page 94 Español Especificaciones Generalidades Sistema ... Sistema de DVD y sistema de audio digital de disco compacto Alimentación ... CA 220-240 V, 50/60 Hz Consumo ... 15 W Consumo en el modo de espera ... 0,8 W Peso ... 4,5 kg Dimensiones ...
- Page 96 PIONEER ELECTRONICS AUSTRALIA Pty Ltd: www.pioneeraus.com.au PIONEER CORPORATION PIONEER ELECTRONIC [EUROPE] N.V. Multimedia Division: PIONEER House, Hollybush Hill STOKE POGES, SLOUGH SL2 4QP UK TEL: 44-1-753-789-789 FAX: 44-1-753-789-880 <99K00JF0G00> 4-1, Meguro 1-Chome, Meguro-ku, Tokyo 153-8654, Japan Printed in Japan/Imprimé au Japon...