Table of Contents
Advertisement
Advertisement
Table of Contents
Troubleshooting

Related Manuals for Native Instruments Audio 2 DJ


Summary of Contents for Native Instruments Audio 2 DJ
- Page 1 OPERATION MANUAL...
- Page 2 The information in this document is subject to change without notice and does not represent a commitment on the part of Native Instruments GmbH. The software described by this document is subject to a License Agreement and may not be copied to other media. No part of this publication may be copied, reproduced or otherwise transmitted or recorded, for any purpose, without prior written permission by Native Instruments GmbH, hereinafter referred to as Native Instruments.
- Page 3 Germany Native Instruments GmbH Schlesische Str. 28 D-10997 Berlin Germany info@native-instruments.de www.native-instruments.de Native Instruments North America, Inc. 5631 Hollywood Boulevard Los Angeles, CA 90028 sales@native-instruments.com www.native-instruments.com © Native Instruments GmbH, 2009. All rights reserved.
- Page 4 1 Welcome to AUDIO 2 DJ! Thank you for purchasing the AUDIO 2 DJ ! The AUDIO 2 DJ is a studio-quality audio interface that connects to your computer via high-speed USB 2.0. With its professional features it is also a perfect match for your laptop-based DJ applications: ►...
- Page 5 Native Instruments. ► Do not expose the AUDIO 2 DJ to rain, and do not use it near water or in damp or wet conditions. Also, never place anything on top of the controller, and be careful that no objects or liquids of any kind enter the unit.
-
Page 6: Important Notes
Do not use excessive force on the buttons, knobs, switches or connectors. ► When cleaning the AUDIO 2 DJ hardware, use a soft, dry cloth. Do not use paint thin- ner, solvents, cleaning fluids, or chemically-impregnated wiping cloths. 2.3 Important Notes ►... -
Page 7: System Requirements
3 System Requirements For latest system requirements, compatibility and support of the latest operating systems please see our website at: www.native-instruments.com/audio2dj AUDIO 2 DJ – 7... - Page 8 This chapter provides step-by-step instructions explaining how to install the drivers and software needed for using the AUDIO 2 DJ . To make use of the AUDIO 2 DJ , you need to install its driver first. The driver handles Do not connect the AUDIO 4 DJ...
- Page 9 4.1 Installing the AUDIO 2 DJ Driver on Windows XP and Windows Vista Do not connect the AUDIO 2 DJ to your computer until the installation of the driver is completed! Place the installation DVD-ROM in your computer’s CD/DVD-ROM drive.
- Page 10 6. Select the Windows Program Folder you would like to add AUDIO 2 DJ shortcuts to. To use the default path, just click “Next.” To set a custom folder, type in a path and name, then click “Next.” The InstallAware Wizard will prompt you to begin the configuration by clicking “Next.”...
- Page 11 9. Once the installation has been performed successfully, click “Finish.” 10. After the installer has finished running, connect the AUDIO 2 DJ to a USB 2.0 port You cannot install the AUDIO You cannot install the AUDIO on your computer, using the USB cable included in the package. Windows will identify 2 DJ on a USB 1.1 port –...
- Page 12 4.2 Uninstalling the AUDIO 2 DJ Drivers on Windows XP and Windows Vista Windows XP To uninstall the AUDIO 2 DJ drivers from your computer: Open “Control Panel” and choose “Add/Remove Software.” 2. Choose “Native Instruments Audio 2 DJ Driver” from the list.
- Page 13 You cannot install the AUDIO You cannot install the AUDIO Connect the AUDIO 2 DJ to a USB 2.0 port on your computer using the USB cable 2 DJ on a USB 1.1 port – a 2 DJ on a USB 1.1 port – a provided in the AUDIO 2 DJ box.
- Page 14 8. Mac OS X will prompt you to authenticate the installation. To authenticate, enter the name and corresponding password of a user who has administrator privileges. 9. The next screen informs you about the progress of the installation procedure. AUDIO 2 DJ – 14...
- Page 15 10. Once the installation has been performed successfully, you will be prompted to restart your Mac. Click “Restart” to restart your computer. 11. After you have restarted your computer, the AUDIO 2 DJ should be ready to use. 4.4 Uninstalling the AUDIO 2 DJ Drivers on Mac OS X To uninstall the AUDIO 2 DJ drivers from your computer, delete the following files manually: ►...
- Page 16 Uninstalling the Control Panel on Windows XP and Windows Vista The Control Panel can be uninstalled along with the driver of the AUDIO 2 DJ . Please follow the instructions on uninstalling the AUDIO 2 DJ driver given in chapter 4.2 “Uninstalling the...
- Page 17 Registering the AUDIO 2 DJ is not mandatory. Nevertheless, registration is recommended, as it can be helpful in case of a support inquiry or a theft. To register your AUDIO 2 DJ on the Native Instruments website, use the serial number from the product activation sticker inside your AUDIO 2 DJ product package.
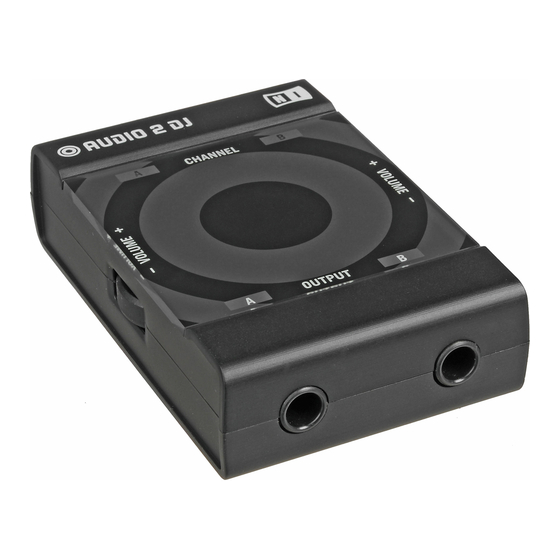
- Page 18 6 AUDIO 2 DJ Hardware In this chapter you will learn about the AUDIO 2 DJ ’s controls and connectors. We will refer to some of the terms introduced here later on, so please use the information provided in the following sections as a reference.
- Page 19 The AUDIO 2 DJ hardware device is the external connector between your computer and any peripheral equipment used for audio playback, such as headphones, a DJ mixer, an amplifier or active speakers. Here is an overview of the AUDIO 2 DJ’s connectors and controls:...
- Page 20 DJ mixer to either output. If you want to connect the AUDIO 2 DJ to a device that does not offer ¼" input sockets, e.g. a DJ-mixer or hi-fi amplifier, use the cable (¼" jack to RCA) provided in the AUDIO 2 DJ box. Please note: Connecting the AUDIO 2 DJ to powered speakers may require additional cables and ¼"...
-
Page 21: Volume Controls
1 and 2 - Volume Controls Use the Volume Controls to adjust the output level of the corresponding output channels. Volume Control 1 corresponds to output channel A while Volume Control 2 corresponds to output channel B. AUDIO 2 DJ – 21... - Page 22 Back Panel: USB port 1 - USB 2.0 Port This port connects the AUDIO 2 DJ to your computer. The USB 2.0 connection handles data transmission and provides bus power to your AUDIO 2 DJ. No external power supply is needed.
-
Page 23: Status Leds
These LEDs monitor the connection and output activity of the AUDIO 2 DJ: ► When connecting the Audio 2 DJ the LEDs light up shortly to indicate that the audio device has been detected by the computer. If the LEDs stay lit, no valid driver for the AUDIO 2 DJ could been found. - Page 24 6.6 AUDIO 2 DJ Technical Specifications GENERAL INTERFACE SPECIFICATIONS Output (D/A) Channels Sampling Rate 44.1, 48, 88.2, 96 KHz Bit Resolution Converter Cirrus Logic Output Specifications Line Headphone* Cross Talk 87 dBu 87 dBu 100 Ohms unbalanced Impedance 8... 600 Ohms (Load) 200 Ohms balanced 9.3 dBu 4.26 V rms,...
- Page 25 2. In the “Sound” control panel, select the Playback tab. 3. Select the AUDIO 2 DJ’s pair of outputs (Ch A, Out 1|2 or Ch B, Out 3|4) that you want to set as default by clicking the corresponding entry.
- Page 26 2. From the Hardware panel, select “Sound.” 3. In the “Sound” control panel, select the Output tab. 4. Select the AUDIO 2 DJ ’s entry from the list of available devices. 5. Click OK to confirm your selection and close the panel.
- Page 27 7.2 Using the AUDIO 2 DJ with TRAKTOR In the following sections you will learn how to set up and use the AUDIO 2 DJ for DJing with Native Instruments TRAKTOR products. Please note that we will refer to all products from the TRAKTOR product line simply as TRAKTOR because the functions described are identical in all TRAKTOR product versions.
- Page 28 0 dB. Adjust the output vol- ume of the Audio 2 DJ with the Volume Control for Output A on the left side of the AUDIO 2 DJ. 11. Turn the M...
- Page 29 7.2.1 “Laptop-Only TRAKTOR Setup.” 2. Connect your DJ controller to a USB port on your computer. To use the AUDIO 2 DJ with a DJ-controller, connect the devices as pictured above. 3. Start TRAKTOR. 4. Select the Start Setup Wizard entry from TRAKTOR ’s Help menu.
- Page 30 7.2.3 TRAKTOR Setup with an external DJ Mixer Physical Setup Make sure the volume controls of your AUDIO 2 DJ , the master output volume of your DJ mixer, and the amplifier (or the pair of powered speakers) connected are turned down! 2.
- Page 31 4. Adjust the output volume of the AUDIO 2 DJ with the Volume Control for Output A on the left side of the AUDIO 2 DJ until the input level meter on the DJ mixer reads 0 dB input level.
- Page 32 On Windows operating systems, the Control Panel allows you to change the performance settings of the AUDIO 2 DJ . To open the Control Panel: click on Start > All Programs > Native Instruments > Audio 2 DJ Driver > Control Panel.
- Page 33 32 and 64 ms. Click on “OK” to confirm your changes and to close the Control Panel. Buffer Format In this area of the Control Panel, you can select the sample rate that the AUDIO 2 DJ handles audio streams at. The value selected here always applies to all audio input and output streams.
- Page 34 USB streaming errors. It does not provide any options or settings, as these can be configured from within the audio software you want to use the AUDIO 2 DJ with. You can access the Control Panel by selecting it from the Mac OS X system preferences.
-
Page 35: Troubleshooting
► Check the Native Instruments website for information. ► Make sure that the AUDIO 2 DJ hardware is connected to a USB 2.0 port of your computer. ► Make sure that the AUDIO 2 DJ is connected directly to an USB port of the computer and not through a USB hub. - Page 36 If you do not know whether or not you have previously installed the drivers of the AUDIO 2 DJ to your computer, it is advisable, to start the setup program of the AUDIO 2 DJ. If the setup program states that it will first uninstall the drivers, you already have installed the drivers on your computer.
- Page 37 9.3.1 USB 2.0 required The AUDIO 2 DJ is an USB 2.0 interface and will not work at all on an USB 1.0/1.1 port. In addition, although the minimum power specified for a USB 2.0 port is 500 mA, we have seen a few cases where the USB 2.0 ports on certain computers do not meet the...
- Page 38 9.3.3 Using a powered USB 2.0 hub It is best to connect the AUDIO 2 DJ directly to a USB 2.0 port on your computer. However, in certain situations a powered USB hub can also be a solution if you are having problems connecting your AUDIO 2 DJ to an onboard USB port.
- Page 39 9.3.5 Disable USB Energy Saving Mode (Windows only) If the AUDIO 2 DJ is causing crashes or performing badly on a Windows machine, disable power management to the USB hubs first; XP turns this on by default.
- Page 40 9.3.6 Update the Driver ► Check the Native Instruments website regularly for updates of the AUDIO 2 DJ driver. 9.4 How to avoid Ground Loops Ground loops are a common problem within any environment where multiple electrical devices are connected to the same power circuit. In complex setups the cause(s) of the noise can be difficult to find.
- Page 41 IRQ stands for Interrupt Request. This is the way in which Windows allocates resources to the various devices and ports in your system. If your AUDIO 2 DJ is on a port that shares an IRQ with other devices, you may have an IRQ conflict. This means your sound card is not re- ceiving the resources it needs to function properly.
- Page 42 If the IRQ number listed next to any of these ports is sharing with other devices in your system, you may have an IRQ conflict. Attach the AUDIO 2 DJ to another USB port. 8. If this does not work, and your computer is a desktop, you may be able to change the IRQ allocation from within the system BIOS (depending on your motherboard).
-
Page 43: Getting Help
10 Getting Help Native Instruments provides various sources of support and information to registered users. provides various sources of support and information to registered users. 10.1 Readme/Knowledge Base/Technical Support Readme Always read the “Readme” file found on the installation CD. It contains important informa- tion and all last minute changes that could not be included in this manual. - Page 44 A description of your setup, including all hardware and software involved ► The exact model and technical specifications of your computer 10.2 Forum Check out the Traktor forum to discuss all aspects of f AUDIO 2 DJ and TRAKTOR LE with with other users: www.native-instruments.com/djforums 10.3 Updates...
- Page 45 However, typical computers are generally not set up for low latency; attempting to play in real time with the AUDIO 2 DJ will probably prove unsatisfying due to the delay. Any computer-based audio system has some delay between the audio input and output.
- Page 46 Control Panel.” 11.4 Different Types of ASIO It is extremely important to use the ASIO driver written for the AUDIO 2 DJ. There are also generic ASIO drivers, typically called (for Windows) ASIO DirectX Full Duplex Driver or ASIO Multimedia Driver. If you’re not sure which one to use, try them all, and choose the one with the lowest latency.
Need help?
Do you have a question about the Audio 2 DJ and is the answer not in the manual?
Questions and answers