
Related Manuals for Lifetime 65009


Summary of Contents for Lifetime 65009
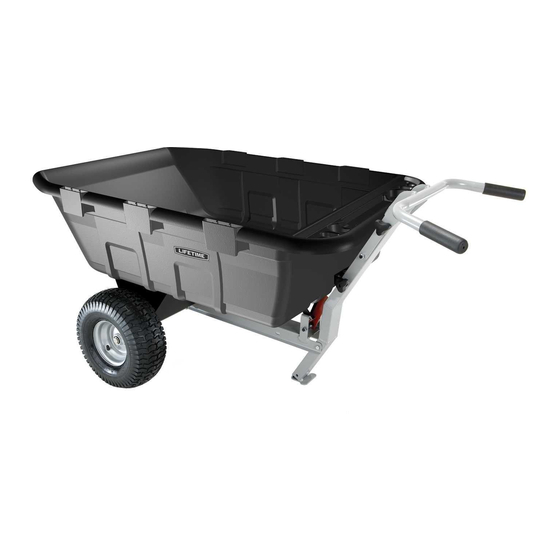
- Page 1 MODEL N° 65009 OWNER’S MANUAL Keep this Identification Number in case you need to contact our Customer Service Department.
-
Page 2: Safety Instructions
REGISTER YOUR LIFETIME PRODUCT TODAY! There are benefi ts to registering your Lifetime product. With our new online product registration form, it’s fast and easy! Register with us at www.lifetime.com and enjoy these great benefi ts: promotions! But you will need to provide a sales receipt to verify your product purchase date before warranty service will be provided. - Page 3 BEFORE BEGINNING ASSEMBLY *Two adults required to complete assembly* (+ one adult suggested as an instruction reader) Only adults should set up the product. Do not allow children in the set-up area until assembly is complete. TOOLS REQUIRED FOR THIS ASSEMBLY 1/2"...
- Page 4 ASSEMBLY GUIDES Refer to the following areas throughout the instructions to assist in the assembly process: TOOLS AND HARDWARE REQUIRED FOR THIS PAGE This area is located at the top, left-hand corner of the page and indicates which tools and hardware are needed to complete the assembly steps on a page.
- Page 5 PARTS & HARDWARE LIST Description Quantity Description Quantity BJU Tub-to-Axle/Frame Assembly Hardware Main Parts BZZ 65009 Metal Parts Kit BJS 65009 Yard Cart Hardware BJT Axle/Frame Assembly Hardware BJV Handle Bars-to-Tongue Assembly Hardware HARDWARE IDENTIFIER AXLE/FRAME ASSEMBLY HARDWARE [BJT] Wheel Spacing Bracket...
- Page 6 HARDWARE IDENTIFIER TUB-TO-AXLE/FRAME ASSEMBLY HARDWARE [BJU] (CONTINUED) Threaded Knob Backing Plate HANDLE BARS-TO-TONGUE ASSEMBLY HARDWARE [BJV] Hardware is actual size Handle Bar Spacer Threaded Knob Clevis Pin Cotter Key...
- Page 7 PARTS IDENTIFIER MAIN PARTS Wheel 65009 METAL PARTS KIT [BZZ] Tongue Handle Bars...
- Page 8 AXLE/FRAME ASSEMBLY HARDWARE REQUIRED Wheel Spacing Bracket METAL PARTS REQUIRED OTHER PARTS REQUIRED Wheel TOOLS REQUIRED Needle-Nosed Pliers 7/16” Socket Wrench Safety Glasses...
- Page 9 TOOLS AND HARDWARE REQUIRED FOR THIS PAGE AXLE/FRAME ASSEMBLY Axle (AVK) through Axle Weldment (AVM) and slide one Wheel Spacing Bracket (AVP) shown. A-Frame (AVN) as shown. Slide a Wheel (AMU) Retainer Ring (AVQ) in the grooves at the ends Note: The valve stem goes toward the outside of the Garden Cart.
- Page 10 TOOLS AND HARDWARE REQUIRED FOR THIS PAGE *AVT *AVS 7/16” Step 1.2 for second Wheel. Note: You may need to push on the other end of the Axle to expose the groove at the other end of the Axle. Since the bearings are sealed, it is not necessary to grease the bearings using the grease fitting.
- Page 11 TUB-TO-AXLE/FRAME ASSEMBLY HARDWARE REQUIRED Threaded Knob Backing Plate...
- Page 12 TUB-TO-AXLE/FRAME ASSEMBLY METAL PARTS REQUIRED Tongue PLASTIC PARTS REQUIRED TOOLS REQUIRED 1/2” Wrench Needle-Nosed Pliers Plain Screwdriver 9/16” Wrench Safety Glasses...
- Page 13 TOOLS AND HARDWARE REQUIRED FOR THIS PAGE 1/2” TWO ADULTS REQUIRED FOR THIS STEP TUB-TO-FRAME ASSEMBLY Turn Tub (AVJ) 5/16” x 1” Round Slotted Bolts (AVV) 5/16”Flat Washers (AVU) 5/16” Lock Washers (AVW), 5/16” Threaded Hex Nuts (AVX).
- Page 14 TOOLS AND HARDWARE REQUIRED FOR THIS PAGE 1/2” Lock Bracket (AWA) over the two holes towards the front 5/16” x 1” Round Slotted Bolts (AVV) 5/16”Flat Washers (AVU) 5/16” Lock Washers (AVW) 5/16” Threaded Hex Nuts (AVX). AVX AVW Note: Do not tighten Nuts yet.
- Page 15 TOOLS AND HARDWARE REQUIRED FOR THIS PAGE 1/2” NO HARDWARE REQUIRED FOR THIS STEP the 5/16” threaded Hex Nuts (AVX).
- Page 16 TOOLS AND HARDWARE REQUIRED FOR THIS PAGE Latch Spring (AVY) Latch Handle (AVZ).
- Page 17 TOOLS AND HARDWARE REQUIRED FOR THIS PAGE 9/16” 3/8” x 1 1/2” Spacer (AWB) 3/8” x 4 1/4” Hex Head Bolt (BJX) 3/8” Nylock Nut (AAA).
- Page 18 TOOLS AND HARDWARE REQUIRED FOR THIS PAGE 9/16” Tongue (AVO) 3/8” Plastic Flat Washer (AWC) 3/8” x 4” Hex Head Bolt (ABE) 3/8” Nylock Nut (AAA).
- Page 19 TOOLS AND HARDWARE REQUIRED FOR THIS PAGE 1/2” 5” Backing Plate (AWF) over the two holes towards the 5/16” x 1” Round Slotted Bolts (AVV) through the holes. Place the Tongue Mounting Bracket (BJW) 5/16” Lock Washers (AVW) 5/16” Threaded Hex Nuts (AVX).
- Page 20 HANDLE BARS-TO-TONGUE ASSEMBLY HARDWARE REQUIRED Hardware is actual size Handle Bar Spacer Threaded Knob Clevis Pin Cotter Key METAL PARTS REQUIRED Handle Bars TOOLS REQUIRED 9/16” Wrench Safety Glasses...
- Page 21 TOOLS AND HARDWARE REQUIRED FOR THIS PAGE 5” Place the Handle Bars (AVL) 3/8” x 5” Carriage Bolt (AWE) through the upper holes and secure with a Threaded Knob (AWD).
- Page 22 TOOLS AND HARDWARE REQUIRED FOR THIS PAGE 9/16” 5” Handle Bar Spacers (AWH) 3/8” x 5” Hex Head Bolt (AWG) through the Handle Bar forks, Spacers and Tongue. Secure Handle Bars to Front Tongue 3/8” Nylock Nut (AAA).
- Page 23 TOOLS AND HARDWARE REQUIRED FOR THIS PAGE Clevis Pin (AWI) through the hole at the top of the Tongue and secure it with a Cotter Key (AWJ).
- Page 24 YARD CART DEPLOYMENT YARD CART DEPLOYMENT Handle Bar Assembly Tongue with Threaded Knob. Axle Weldment WARNING Watch for pinch points as serious injury could occur.
- Page 25 YARD CART DEPLOYMENT Carriage Bolt through holes in forks and Tongues and secure with Threaded Knob.
- Page 26 YARD CART DEPLOYMENT backwards.
- Page 27 BUILD WALL EXTENSIONS BUILD WALL EXTENSIONS WARNING To avoid serious injuries: • Do not ride in or on cart. • Do not exceed 650 lbs. • Reduce load on hills or slippery surfaces. • Do not exceed 10 mph. • Do not fill gas can while gas can is in garden cart. ADVERTENCIA Para evitar lesiones graves: •...
- Page 28 ALL WARRANTY CLAIMS MUST BE ACCOMPANIED BY A SALES RECEIPT. REPORT PRODUCT DEFECTS IN WRITING TO: Please include your dated sales receipt and photographs of damaged parts. To register the product, visit our Web site at www.lifetime.com www.lifetime.com...
- Page 29 ENHANCE YOUR LIFETIME ® PURCHASE BY ADDING ACCESSORIES OR OTHER GREAT PRODUCTS To purchase accessories or other Lifetime Products, visit us at: www.lifetime.com Or call: 1-800-424-3865...
Need help?
Do you have a question about the 65009 and is the answer not in the manual?
Questions and answers