Table of Contents
Advertisement
Quick Links
Advertisement
Table of Contents

Summary of Contents for LUMIPro 2017
-
Page 1: Part I-Overview
LUMIPro 2017 User’s Guide... -
Page 2: Part Ii-Toolbox
Congratulations, you now own the finest professional-grade lighting sys- tem in the virtual world—LUMIPro 2017! Obviously you’re ready to do more than take snapshots, and with LUMIPro, you will soon discover just how indispensable professional lighting is to any photographer looking to achieve the very best rusults. -
Page 3: Table Of Contents
LUMIPro 2017 Table of Contents What’s New ....................4 Main HUD Overview ................5 APPENDICES Popouts Overview ..................6 The LCD Control Panel Overview ............7 FAQs for New Users ...................ii The Power Strip ................... 8 FAQs for Existing Users ................iii Lighting ...................... -
Page 4: What's New
What’s New! SO WHAT’S NEW???? As always, LUMIPro strives to exceed itself with every release, and LUMIPro 2017 is no exception. Here’s all things great and small that’s new or improved: HUD Control of Lights! You knew it was coming; that Updated HUD Interface! The main LCD window has Scenes! If you’re not new to LUMIPro, you know the... -
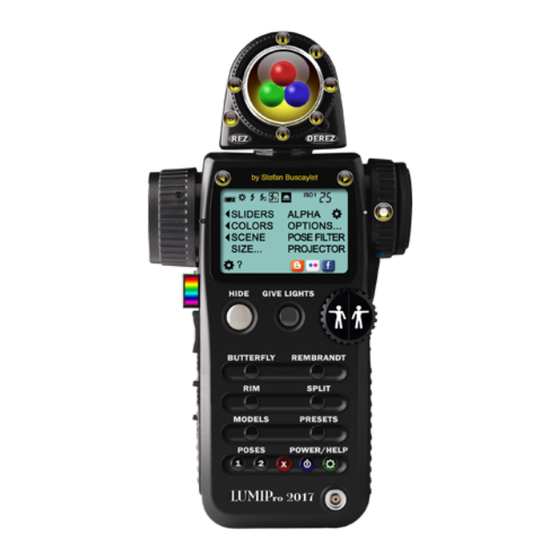
Page 5: Main Hud Overview
Click here to jump to the Toolbox section to learn more. items inside LUMIPro. There are two different LCD Control Panel options; the Modern view is shown, and a click on the The Model gear icon flips the display to the legacy LCD panel for those Sitting directly below the Toolbox is the model controller. -
Page 6: Popouts Overview
Popouts Overview Popout Menus Preset lights are a great way to get started, both with LUMIPro, and even when you’ve mastered LUMIPro and are just setting up a new shoot. It’s useful to start from a good point, and then customize lights and colors to achieve exactly the shot that is tickling your imagination. -
Page 7: The Lcd Control Panel Overview
The LCD Panel - Overview The LCD Panel is where you access the control features and some of the deeper tools inside LUMIPro 2017. There are two LCD screens, and while there is some crossover, they each have unique features and methods of managing LUMIPro’s tools. Let’s look at a side-by-side comparison to get a feel for what’s available. The functions will be covered in greater detail in later sections (just click on “Sliders”... -
Page 8: The Power Strip
The Power Strip New for LUMIPro 2017 is the Power Strip. As part of the overall cleanup of the HUD, we decided to make things a little clearer, and to add a little more functionality to LUMIPro 2017. Now you can work faster and more efficiently, and still have time to go shopping at the end of a session! Pose Groups 1 and 2. -
Page 9: Lighting
Give Lights LUMIPro’s wearable lights use an invisible prim to attach to the avatar’s chin. They come in three delicious flavors: Cherry Red, Lime Green, and Berry Blue. You can also just call them simply red, green, and blue balls. We don’t mind. While any light can be used to light your here, there, or everywhere, the standard setup uses the lights in the following way:... -
Page 10: Lighting Presets
LUMIPro 2017 Lighting Presets We know that the world of the photographer can sometimes be hectic, and there are times when you just need lights that look good right now. To this end, we’ve created four lighting presets based on real-world professional and artistic lighting techniques, used by masters of light for centuries. -
Page 11: Moving Lights
If you really want to, you can attach wearable lights from earlier versions (because ball touching in 2017 is not sup- ported), but we recommend the new, improved joystick controller. See below for more info on how to use this... -
Page 12: Intensity
1.0, which is full brightness, down to 0, which is the same thing as “off. ” You’ve seen this in action many times, when somebody will come into a store and blind everybody in sight. They’ve got several lights on at once, and they’re all at full strength. With LUMIPro, you can set the intensity for each wearable light, and each projector individually. The images below were taken based on the Butterfly preset. -
Page 13: Radius
LUMIPro 2017 Lighting - Radius The Radius of a light is how far out from the center it will shine. Keep in mind that the size of your wearable lights has no bearing on the actual radius of the light itself. The images below will give you an idea of how much space is lit with a few different radii. -
Page 14: Falloff: 0
LUMIPro 2017 Lighting - Falloff In the real world, light follows what’s called the Inverse Square Law—the intensity is inversely proportional to the square of the distance from the source. What that means in English is that when your model is twice the distance from a light source, they will receive only 1/4 of the illumination; at three times the distance, they’ll receive 1/9th the illumination, and at four times the distance, only 1/16 as much light. -
Page 15: The Toolbox And The Joystick
The Toolbox and the Joystick Sitting atop the LUMIPro HUD is the Toolbox. It features a large central virtual joystick surrounded by smaller positioning buttons, the Flipper that switches joystick modes from Ball Movement to Eye Gazer to Sit Ball positioner to Projector controller, and back again. The REZ and DEREZ buttons open a menu to let you rez things in-world. Using these tools, you can rez and position virtually unlimited projector lights and eye gazers, and add new dimensions to your virtual photography. - Page 16 Projector Mode New for LUMIPro 2017! Now you can con- The original LUMIPro tool is the Eye Gazer. The Sit Ball is one of those tools that you The Projector is a powerful tool, a strong, trol yours or your model’s lights right from By rezzing a controllable prim, controllable wonder how you ever lived without.
-
Page 17: Lighting Control
The Light Control LUMIPro has always made it possible to adjust your model’s lights: by clicking in the direction you wanted them to move, you could position the lights to shine exactly where needed. While this was a good solution, it still required the photographer to leave the set-up scene, and zoom in on the model — which prevented seeing how the lighting would look in context. -
Page 18: High Resolution Eye Gazer
High Resolution Eye Gazer LUMIPro’s High Resolution Eye Gazer was designed to let you adjust your model’s eyes anywhere, even on sims where rezzing is not permitted. This is a huge boon to the photographer who likes to take their “studio” with them, and wants to take advantage of the abundance of beautiful sims available in Second Life. Accessing the High Resolution Gazer is simply a matter of clicking the Flipper until the Gazer mode is activated. -
Page 19: Rezzable Eye Gazer
Rezzable Eye Gazer LUMIPro’s High Resolution Eye Gazer is very good at positioning your eyes. With 121 separate eye positions, you’re virtually assured of finding the right position for your model’s gaze, and it’s especially useful on no-rez sims. There are times, though, when even that’s not enough. If you are looking for more fine-tuned gazing, or perhaps want all the models looking at the same thing , the Rezzable Eye Gazer is the solution. -
Page 20: Sit Ball
The Sit Ball LUMIPro instituted the Sit Ball back in version 3.1, and it was a revolution for in-world photographers and models. No longer tied to the tyranny of the pose ball, LUMIPro users could place their models anywhere, and position them freely. With the addition of the Sit Ball controller in LUMIPro 2016, photographers can now control the Sit Ball right from the HUD! No more losing the shot because you had to cam out to find and adjust the Sit Ball. -
Page 21: Projector
Projectors LUMIPro Projectors deliver focused, directional, shadow-casting light that can really make your pictures pop. LUMIPro 2017 gives you the option of letting you or your model wear pro- jectors, or lets you rez them in-world. They are both controllable with the HUD, and have the exact same feature set, but there are distinct advantages to each method. Worn projectors are attached to the avatar’s nose, and will move with the model so they’ll never be out of the spotlight—a perfect choice, or example, on the catwalk, or perhaps doing a theatrical production. -
Page 22: Projectors-Rotation
LUMIPro 2017 Projectors - Rotation Rotation adds a new spin on your bulbs and gobos, by spinning it around at the speed of your choosing. This has a couple of clear advantages: when you’re trying to find just the right position for the light from a bulb to fall on the model the way you envision, and the stock projection isn’t where it needs to be, you can rotate it slowly until it’s in the perfect location. -
Page 23: Projectors-Locking Rezzables
HUD will control anything rezzed for the selected model. In either the Projector mode or the Eye Gazer mode in the Toolbox, clicking the Joystick arrows will move every- thing rezzed the same amount, in the same direction. To stop that from happening, LUMIPro uses a convenient locking mechanism: your mouse. For example, if you have two projectors and an Eye Gazer rezzed, it might look something like this: If you’ve directed your model to use the Eye Gazer, and then want to adjust the color of the... -
Page 24: Projectors-The Anatomy Of A Scene
LUMIPro 2017 Projectors - The Anatomy of a Scene There are 6 lights in the scene below: two rezzed projectors—one inside the house casting the light that’s spilling through the door and adding a halo effect to the model; and another that’s up high and to the left, out of the picture, with a faded blue light to simulate nighttime. -
Page 25: Sliders And Colors
Sliders and Colors In the original versions of LUMIPro, light levels, saturation, and other variables were set using buttons and menus (see Page 15, Panel 2 for details). Starting with LUMIPro 3.4, slider pan- els were added that lets you use intuitive slide controls to set the levels for Color, Intensity, Radius, Falloff, and Alpha (transparency) of your lights rezzables. We also feature a full selec- tion of color palettes based on the Lee catalog (click here to see them all). -
Page 26: Scene Presets
There are three factors that all shoots have in common—from the old Daguerreotypes to today’s high-speed digital film—and there’s an iconic phrase to define it: “Lights, camera, action!” LUMIPro 2017 gets in on that action with the new Preset Save/Restore panel. Here’s how to use it:... -
Page 27: Restoring
Step 1: Select What To Save/Restore Because LUMIPro 2017 stores each component of a scene separately, you can choose to restore any or all functions. If you loved the lights and camera from Scene 1 and the pose from Scene 2, you can re- store just those components from Scene 1, then add just the pose from Scene 2. -
Page 28: Preset Options Menu
LUMIPro 2017 Scene Options Menu With as many features a panel like Scene Save/Restore offers, some way to mange those becomes very important. For this, we give you the Scene Options Menu that lets you perform a lot of important and useful functions. To access this menu, click on the Gear icon as shown, and it will open the Scene Options menu below: The Scene Options menu gives you the following choices: 1. -
Page 29: Managing Models
Managing Models When you attach a LUMIPro 2017 HUD, you are automatically selected as the default model. If you only take selfies, you can skip right over this section. If you ever work with models, though, you’ll be happy to know that you can manage up to 10 models (including yourself) at once (insert joke about herding cats here). That might be a lot to manage, but LUMIPro 2017 makes easy work of it;... -
Page 30: Hide, Give Lights, And Poses
HUD full of poses but aren’t sure what will work best for is made partially invisible). of LUMIPro. You can send as many lights as you want to your shot yet, and just let inspiration take you where it will. -
Page 31: Poses
Starting From Scratch The very first thing you want to do when getting LUMIPro 2017 is make a backup copy. If you haven’t already done so, take a moment and do that now. We’ll wait. Done? Great! The next thing we want to do is create an empty HUD. In your inventory, double-click the HUD you copied. This will attach the HUD to the right side of your screen, in the optimal posi- tion. -
Page 32: Cataloging Poses
You may have a HUD that’s loaded with your favorite poses, but don’t want to flip through all of them every time you have a shoot. There are a couple ways LUMIPro 2017 makes your job simpler, and we’ll cover those next. -
Page 33: Backup And Restoring
LUMIPro 2017 Backing Up and Restoring Once you’ve got your HUD loaded and ready, the very next thing you should do is create a backup! This will not only save your bacon if SL eats your HUD, it will also help you keep your inventory under control—your backup will store all your poses in one place, so they won’t need to rattle around in folders. -
Page 34: Appendices
LUMIPro 2017 Appendices... -
Page 35: Faqs For New Users
Q: I have seen a few different lighting and pose systems in SL. What makes LUMIPro the right choice? A: Simply put, because LUMIPro is the best there is. Yes, there are some systems that let you store a few poses, and some that will control a couple lights. There are even some that have tried to copy LUMIPro. -
Page 36: Faqs For Existing Users
Tips and Hints - FAQs for Existing Users Do you have questions? Good! We have answers! LUMIPro has lots of parts and pieces, and if you had no questions, that means either you’re a complete expert and we’ d have to hire you (or already have), a genius with a photographic memory who’s read the manual front to back, or just blissed out on taking pictures and is happy with LUMIPro presets, poses, and col-... - Page 37 Q: I tried to attached my HUD to another spot on my screen, and it is now all distorted. HELP! A: To make it so that LUMIPro behaves well when hidden (by not just making it one giant, invisible prim that gets in the way or worse), it moves most of its parts out of the viewing area.
-
Page 38: Lighting Colors
Lighting - Colors LUMIPro features eighteen different palettes that are preset and ready to use, based on professional lighting gel sets with such colorful names as “Oklahoma Yellow” or “Ice and a Slice. ” We’re quite comfortable using names like “red, ” or maybe “orange” when we’re feeling frisky, but for those that like wander out in the Light Golden Straw, the Lee color gel names for these presets appear above the sliders when the Advanced button is clicked. - Page 39 Worn or rezzed, projectors share a couple unique features: Bulbs and Gobos. Think of the Bulb like might think of a slide projector with several different slides. In both cases, a bright light is shown through a film, resulting in an image being projected on a screen. In LUMIPro 2017, each preset is the equivalent of one slide. Below are all the bulb choices available:...
-
Page 40: Projector Gobos
LUMIPro 2017 Projectors - Gobos Unlike a Bulb, which shines through a transparent texture, a Gobo is a solid pattern placed between the light and the screen, it’s sole purpose being to cast a shadow; think of it like some- body at the theater making bunny shadows on the screen. - Page 41 LUMIPro 2017 Projectors - Gobos herringbone honeycomb iris ironwork jagged leaded leaves lemons LUMIPro ornamental palm frond screen skull n bones skylight viii...
- Page 42 LUMIPro 2017 Projectors - Gobos spherical sun gate sunflower tree 2 tree 1 vegas warehouse window wroght iron...
-
Page 43: Zooming
LUMIPro 2017 Tips and Hints - Zooming One of the easiest things you can do to improve the look of your portraits is to get away from the default zoom level SL gives you. It’s designed for walking around and shopping, and is guaranteed to make you look less than your best. -
Page 44: Adjusting Lights
Now compare it to Figure 2. While editing in place may be unintuitive, the beauty of LUMIPro 2017 is that the lights stay put relative to the model no matter how crazy the pose you’re in might get. Once you’ve set... -
Page 45: Tidbits
• Working in no-script sims can be a nightmare, but here’s a good tip: make sure you and your model(s) are fully geared up with LUMIPro 2017 scripted wearables (lights, projectors, and the LUMIPro 2017 HUD) before you enter the script-prohibiting sim. -
Page 46: Credits
-Photo by Karol Lyric -Photo by Dai Aloix Many many thanks to our users, fans, pose contributors, and the dedicated team of folks who helped make LUMIPro the first AVI Award Winner for Best Photography/Media Tool, 2015! Beta Testers Many thanks to all our Beta Testers, whose diligence and suggestions helped make LUMIPro 2017 possible! Pose Contributors for LUMIPro 2017 Strokerz Toyz, Pics n Poses, ...: Something New :... - Page 47 • Stop animating works. LumiPro 3.1 Lumipro 3.0 0.71 Introduced at SLCC 2011 - 8/13/2011 Lumipro 2.02 5/15/2010 - power rez issue fixed. 100m hud capability, • Animation gazer system. LumiPro 3.0 0.90 Lumipro 2.01 4/18/2010 - fixed lighting permission issue •...
-
Page 48: Part Iii-Lights
Quick Start Tutorial—Part I This Quick Start Tutorial will have you up and running with LUMIPro 2017 as quick as can be! We’ll cover it in 4 basic steps: selecting and preparing a model, posing and lighting them, preparing and taking a photo, and finally, storing your session. Even if you’ve used LUMIPro before, you might find this useful for learning some of the new layouts and features as well. - Page 49 Step 7. Rez a Sit Ball. Click the REZ button, and from the menu click the Sit Ball button. A LUMIPro Sit Ball will be rezzed in front and above your selected model; have them left-click and sit on it. They’ll be sitting in mid air.
- Page 50 LUMIPro 2017 Quick Start Tutorial—Part III Now that you’ve got your model placed, posed, and lit, they’re right where you want them. Now we’re going to fine-tune the lighting, find a good camera angle, and set the eyes. Be pre- pared for fewer fiddly bits and more creativity;...
- Page 51 LUMIPro 2017 Quick Start Tutorial—Part IV We have one more light to add before we shoot, and that’s a projector. Projectors have the unique ability to cast shadows as well as light up a model. We’ll use one here to give the scene a little atmosphere using colors and shadows that you just can’t get with lights alone.
- Page 52 LUMIPro 2017 Quick Start Tutorial—Part V It’s fun time! Now that your shot is framed, it’s almost time to capture the soul of your model. But wait; they say the eyes are the windows to the soul, and right now they’re gazing off into the distance, and flitting around like a mead-drunk bumblebee.
- Page 53 You might also save the setup of your favorite shots just in case your model wants another shoot with a different wardrobe. The possibilities are endless. Step 22. In the LCD area of the LUMIPro HUD, locate and click on the Scene Step 23.
- Page 54 Quick Start Tutorial—Epilogue While LUMIPro can’t work miracles, it can go a very long way to making your photos go from good to great! If you’re new to LUMIPro, or even if you’re an experienced and high- ly-skilled LUMIPronarian, do yourself a favor and read the manual; it’s filled with all sorts of great information that can really make a difference in your photography. Not convinced yet? Take a look at the Before and After pics below.
Need help?
Do you have a question about the 2017 and is the answer not in the manual?
Questions and answers