Advertisement
Quick Links
Folding Bicycle Trainer
Thank you for purchasing the Performance Travel Trac 2000™ portable trainer.
The Travel Trac 2000™ was designed to provide maximum stability and ease of
use in a convenient, portable folding trainer.
This trainer offers many notable features which make it a good choice for your
training needs:
• Extremely stable and rigid design.
• Easy setup and bicycle installation.
• Spring loaded resistance positioning system to prevent
excessive tire wear.
• Quickly folds flat for storage and easy portability.
• Choice of resistance units available separately.
(A resistance unit is required for operation.)
Assembly:
1. Remove from the box and identify all parts for assembly. If you believe
parts are missing, please contact our technical service department for
assistance at 1-800-727-2453 from 9 am to 6pm EST.
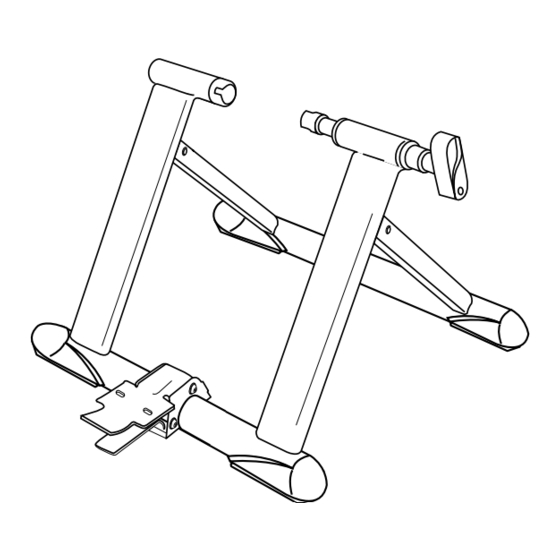
2. Assemble feet to legs as shown. (Fig. 1)
3. Assemble handle to axle support with a light tap as shown. (Fig. 1)
®
™
Advertisement

Related Manuals for Performance Travel Trac 2000


Summary of Contents for Performance Travel Trac 2000
- Page 1 Folding Bicycle Trainer Thank you for purchasing the Performance Travel Trac 2000™ portable trainer. The Travel Trac 2000™ was designed to provide maximum stability and ease of use in a convenient, portable folding trainer. This trainer offers many notable features which make it a good choice for your training needs: •...
- Page 2 (Fig. 2). See instructions included with your resistance unit. Tighten securely. A. Unlocked Bicycle Installation: 1. Set the Performance Travel Trac 2000™ on a flat, stable surface. B.Locked 2. Make sure that the bicycle’s rear wheel Fig. 3 skewer is tight.
- Page 3 Fig. 5 Fig. 4 5. Carefully lift your bike into position, 11. If the bike is not stable, make sure that aligning the rear wheel axle with the the QR lever is positioned correctly in axle support cups (Fig’s 4 & 5). the support cups, and the axle support 6.
- Page 4 2. Coil any resistance unit cables and hang over handle. 3. Grasp the Travel Trac 2000™ by the handle and lift. The legs should then fold, and the trainer is ready for transport or storage. Be careful to avoid pinching when the legs fold.
Need help?
Do you have a question about the Travel Trac 2000 and is the answer not in the manual?
Questions and answers