Table of Contents
Advertisement
Available languages
Available languages
1 9 0 8 0 3 4 4 0
A U T O M O T I V E
S O L U T I O N S
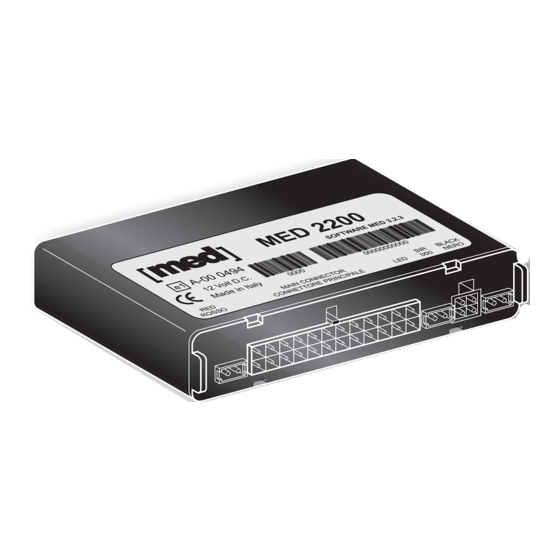
MED 2200
FEBBRAIO 2014
FEBRUARY 2014
SIR 050
CENTRALE DI ALLARME MODULARE
CON TELECOMANDO MED
MODULAR ALARM UNIT WITH
MED REMOTE CONTROL
ISTRUZIONE DI FUNZIONAMENTO - ITALIANO
USER'S GUIDE - ENGLISH
A.E.B. S.p.A.
a socio unico / a single member Company - Via dell'Industria, 20
COMPANY
WITH QUALITY SYSTEM
42025 - Corte Tegge - Cavriago (RE) - Italy
CERTIFIED BY
www.medautomotive.it
med è una divisione di /
a division of A.E.B. S.p.A.
BUREAU VERITAS
ISO 9001:2008
Ph.+39 0522 494486 - Fax +39 0522 494410 - e-mail: service@medautomotive.it
Advertisement
Table of Contents

Summary of Contents for MED 2200
- Page 1 WITH QUALITY SYSTEM 42025 - Corte Tegge - Cavriago (RE) - Italy CERTIFIED BY www.medautomotive.it med è una divisione di / a division of A.E.B. S.p.A. BUREAU VERITAS ISO 9001:2008 Ph.+39 0522 494486 - Fax +39 0522 494410 - e-mail: service@medautomotive.it...
- Page 2 ISTRUZIONE BREVE DI FUNZIONAMENTO INSERIMENTO SISTEMA TRAMITE TELECOMANDO CON SENSORE RADAR, SALITA VETRI E MODULI OPZIONALI ATTIVI Premere 1 volta il pulsante del telecomando. Conferma: 2 lampeggi indicatori di direzione, 2 segnali bitonali del cicalino (con sirena opzionale), chiusura porte, salita vetri, LED (spia rossa) acceso fisso, poi lampeggiante con sensore radar attivo.
- Page 3 Centrale Operativa, che in proprio dal proprietario del veicolo. Chiedete informazioni al Vostro installatore. ATTENZIONE Questa istruzione è riferita all'impianto completamente installato. Nell'istruzione sono indicate come MED 2200 anche le altre versioni, come ad esempio la MED 2200.B MED 2200.CE (senza sensore radar) o la (con chiavi elettroniche di inserimento / disinserimento sistema ed emergenza).
- Page 4 Per impostare o variare la velocità in marcia: - Raggiungere e mantenere la velocità desiderata. - Premere il pulsante del LED per circa 3 / 4 secondi, sino al temine della relativa segnalazione di conferma (alcuni veloci BIP bassi). Da questo momento, il BIP prolungato con l’accensione a luce fissa del LED avvisano al superamento della velocità...
- Page 5 Aprire la porta impiegando il sistema originale del veicolo. - Se il sistema era stato inserito col telecomando med, il sistema è in allarme. - Se era stato inserito con la chiave, è possibile disattivarlo entro 15 secondi evitando l’allarme da pulsanti, sensore radar e moduli.
- Page 6 - Utilizzare 4 cifre comprese tra 1 e 9. Il numero 0 non può essere utilizzato. - Non usare codici troppo semplici, quale, ad esempio: 1 - 1 - 1 - 1. - La procedura può essere interrotta in qualunque momento, accendendo la chiave quadro o attendendo 30 secondi.
- Page 7 UTILIZZO CODICE PRINCIPALE E PERSONALE Togliere l'etichetta (dalla PIN-CARD): apparirà il codice principale. Inserire e ruotare una volta la chiave quadro on/off (acceso / spento) per accendere il LED (spia rossa). Prima che si spenga, premere il pulsante del LED per il numero di volte pari alla prima cifra del codice;...
- Page 8 SENSORE RADAR Il microprocessore interno effettua il continuo monitoraggio del veicolo, adeguando costantemente i suoi parametri di funzionamento all'ambiente in cui si trova installato per meglio discriminare l'insorgere di effettivi allarmi da false segnalazioni. La funzione ANTISABOTAGGIO (antimascheramento ed antiaccecamento) consente il controllo costante dell'efficienza dei sensori e dei loro cavi, segnalandone manomissioni.
- Page 9 Le programmazioni completate e confermate restano attive anche a centrale non alimentata. L’installatore può effettuare tutte le programmazioni UTENTE / INSTALLATORE tramite lo speciale KIT SK ed un Personal Computer (da ufficio o portatile), utilizzando lo specifico SOFTWARE MED in versione 3.2.3 o successive.
- Page 10 FUORI SERVIZIO DEL SISTEMA Consigliato in occasione di permanenza dell'auto in officina, garage o quando il veicolo non deve essere protetto, per non lasciare il telecomando ed evitare errate manovre da parte di persone che non conoscono l'uso del sistema. Vedere PROGRAMMAZIONI. Il sistema in FUORI SERVIZIO non si inserisce e risponde ai tentativi di inserimento con 5 BIP e 5 lampeggi del LED.
- Page 11 PERSONALIZZAZIONE SUONO SIRENA IN ALLARME E' possibile personalizzare il suono della sirena principale in allarme variandolo a piacimento tra due diverse configurazioni presenti: Entrare in programmazione UTENTE - “personalizzazione suono sirena”. Una scaletta musicale, la riaccensione del LED ed il sibilo continuo del cicalino ne indicano l’inizio.
- Page 12 , predisposto per rilevare 2 zone concentriche: entrando in quella più esterna, si attiva un segnale di avviso per 5 secondi dal cicalino della sirena principale med; entrando in quella più interna, l’allarme. Inserendo il sistema, il pre-allarme è attivo dopo 30 / 50 secondi (salvo tempi più...
- Page 13 03 6414 ATTENZIONE: Le centrali di allarme della serie MED 2200 sono state predisposte e messe a punto secondo le caratteristiche t e c n i c h e i n d i c a t e n e l...
- Page 14 RIPRISTINO CONDIZIONI INIZIALI PROGRAMMATE IN FABBRICA Impostazione valori standard ANTIRAPINAAUTOMATICA: Attiva anche aprendo la porta con motore acceso Attivazione / Esclusione - impostazione standard IMMOBILIZZATORE DIGITALE MED 30.x (su linea MUX) Sostituzione centralina di allarme abbinata all’immobilizzatore della serie MED 30...
- Page 15 TEMPO APERTURA/CHIUSURA PORTE - COMFORT I tempi standard impostati per sono di 0,8 secondi. Sui veicoli con impianto “comfort” (chiusura simultanea dei vetri tramite la rotazione della chiave originale nel blocchetto serratura della porta), è possibile “automatizzare” la salita vetri all’inserimento del sistema allungando il tempo di chiusura porte o impiegando opportunamente l’uscita di stato come temporizzata, secondo le caratteristiche del veicolo.
- Page 16 INGRESSI RITARDATI ALL’INSERIMENTO DEL SISTEMA PULSANTI PORTE - RIFERITO A POSITIVO O NEGATIVO L’ingresso è ritardato all’inserimento del sistema (per i primi secondi, poi diviene istantaneo). Può avere un ritardo iniziale di 30 secondi (standard) o di 50 secondi, ed essere riferito a negativo positivo (segnala l’allarme quando riceve massa - impostazione standard) o a...
- Page 17 QUICK USER’S GUIDE SYSTEM ACTIVATION BY THE REMOTE CONTROL WITH ULTRASONIC SENSOR, WINDOWS CLOSING AND ACTIVE OPTIONAL MODULES: Press 1 time the button of the remote control. Confirmation : 2 direction indicators flashings, 2 two-tone signals of the buzzer (with optional siren), doors locking, windows closing, LED (red pilot lamp) lit fixed, then flashing with active ultrasonic sensor.
- Page 18 Ask your installer for more WARNING: These instructions are referred to the system completely installed. In the instructions are included all the other versions of MED 2200 such as for example 2200.B (without ultrasonic sensor) and MED 2200.CE (with electronic keys to activate/desactivate the system and emergency).
- Page 19 soft(slow) pressures desactivate it: each time confirmation with one BEEP and the LED relighting, followed by a high/low two tone signal for confirmation. To set or change the speed during the running: - Reach and keep the chosen speed. - Press the LED button for about 3 / 4 seconds till the confirmation signaling (some quick, low BEEPS) ends.
- Page 20 Open the door using the original vehicle's system (original key). - If the system was activated by the med remote control, the system alarms. - If it was activated using the key it is possible to desactivate it within 15 seconds avoiding the alarm from the buttons, the ultrasonic sensor and the additional modules.
- Page 21 PAIRING/CUTTING OUT OF THE REMOTE CONTROLS: With the system in off position, enter the EMERGENCY CODE (MAIN CODE or PERSONAL one) as shown on the PIN CARD. When the confirmation BEEPS end and the LED is switched on fixed again, within 20 seconds press for three times consecutively the button of each remote control to be activated or to keep working, waiting each time the LED relighting and the BEEP from the buzzer.
-
Page 22: Alarm Functions
ALARM FUNCTIONS When the system is activated the alarm is given/signalised by the siren, the direction indicators, the LED and the additional warning horns. Cycles of about 25 seconds, with cut off by the remote control or the emergency procedure. DOORS, BONNET AD BOOT OPENING: 2 different inputs are available: - Instantaneous on the system activation. - Page 23 ABSORPTION SENSOR It detects the switching on of a courtesy lamp with a capacity not lower than 5 W. WARNING: the feeding RED wire of the central unit must be connected to the basis of the service fuses. - The buttons have to be always connected, because the roof lamp sometimes could not always work correctly (burnt-out or switched off).
- Page 24 The installer can make all the USER/INSTALLER's programmings by means of the special SK K IT and a Personal Computer (office or laptop), using the specific MED SOFTWARE 3.2.3 r following versions. USER'S OPTIONAL PROGRAMMINGS on duty - standard setting...
- Page 25 OUT OF ORDER OF THE SYSTEM Suggested in case the vehicle has to stay in the repair shop, garage, or when the vehicle does not need to be protected, in order to avoid leaving the remote control or avoid an incorrect use by persons who don't know the system.
- Page 26 CUSTOMIZING OF THE SIREN SOUND when alarming With the following procedure it is possible to choose between 2 different configurations for the main siren: Enter into the USER's programming - “siren sound customizing”. A musical sequence, the relighting of the LED and the continuous whistle of the buzzer indicate the start.
- Page 27 ZONE hyperfrequency, preset to detect 2 concentric areas: entering the first, external one a warning signal coming from the buzzer of the med main siren is activated for 5 seconds; entering the second, more internal area the alarm is activated).
- Page 28 (interferences and noises) 10R - 03 6414 with the number: WARNING: MED 2200 central units are projected and set according to the p r o d u c t t e c h n i c a l...
- Page 29 It's active also when the door is opened with started engine AUTOMATIC ANTI HI-JACK FUNCTION: Activation / Cutting out - standard setting MED 30.x DIGITAL IMMOBILIZER (on MUX line) Replacement of the alarm central unit paired with the immobilizer of the MED 30...
- Page 30 DOORS LOCKING/UNLOCKING TIME - COMFORT The standard preset times are 0,8 seconds With vehicles having a “comfort” equipment (simultaneous windows closing by turning the original key in the door lock block), it is possible “to automate” the windows closing on the system activation delaying the doors locking time or using the status output as timed, according to the vehicle's features.
- Page 31 DIGITAL IMMOBILIZER CENTRAL UNIT REPLACEMENT The installation or the replacement of the immobilizers on the MUX line (for example, MED 30.x series) don't need any pairing with the central unit. Also the replacement of the central unit made within the first 20 startings doesn't require any specific operation.
- Page 32 S O L U T I O N S NUMERO DI OMOLOGAZIONE e APPROVAL NUMBER e VERSIONE SPECIALE SPECIAL VERSIONS MED 2200.B senza MTR 2200 MONTAGGIO - ASSEMBLING INSTRUCTIONS Ø2.5 mm MONTAGGIO SENSORE RADAR RIVESTIMENTO without RADAR SENSOR DEL MONTANTE...
-
Page 33: Caratteristiche Tecniche
WITH QUALITY SYSTEM 42025 - Corte Tegge - Cavriago (RE) - Italy CERTIFIED BY www.medautomotive.it med è una divisione di / a division of A.E.B. S.p.A. BUREAU VERITAS ISO 9001:2008 Ph.+39 0522 494486 - Fax +39 0522 494410 - e-mail: service@medautomotive.it... -
Page 34: Technical Features
WITH QUALITY SYSTEM 42025 - Corte Tegge - Cavriago (RE) - Italy CERTIFIED BY www.medautomotive.it med è una divisione di / a division of A.E.B. S.p.A. BUREAU VERITAS ISO 9001:2008 Ph.+39 0522 494486 - Fax +39 0522 494410 - e-mail: service@medautomotive.it... - Page 36 NUMBER:_ ___________________________ Descrizione dell'ALLARME secondo la direttiva europea 95/56/CE: Description of the ALARM as per european standards 95/56/EC: Modello, Type Matricola, Registration MED 2200 SIR 050 / SIR 050.NA SENSORE RADAR, Yes - Sì No - No RADAR SENSOR ALTRO / OTHER Applicare nei riquadri le etichette adesive fornite in confezione con i dati indicati e completare il modulo.
Need help?
Do you have a question about the 2200 and is the answer not in the manual?
Questions and answers