Tigertronics SignaLink USB Installation And Operation Manual
Hide thumbs
Also See for SignaLink USB:
- Installation & operation manual (12 pages) ,
- Installation & operation manual (14 pages)
Advertisement
Grants Pass, Oregon
- INTRODUCTION -
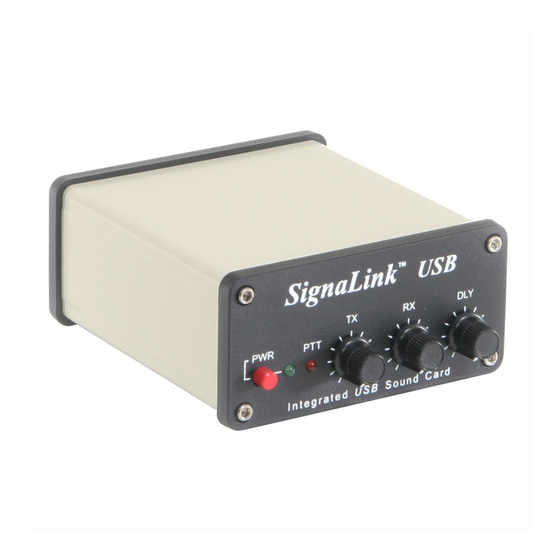
The SignaLink USB combines the legendary performance of
our SL-1+ with a state of the art built-in low-noise sound card.
This innovative design offers many advantages over
traditional sound card interfaces that must use the computer s
sound card. These include optimal performance, greatly
simplified installation and operation, and the ability to easily
run multiple interfaces on one computer at the same time.
The SignaLink USB supports virtually all sound card Digital
and voice modes. This includes legacy modes such as
RTTY, SSTV and CW, as well as today's most popular
modes like PSK31, JT65, WINMOR and EchoLink.
Performance on all modes has been optimized by the use of
special low-noise parts and careful design techniques, while
convenient front panel controls let you adjust your Transmit
Audio, Receive Audio and Transmit delay "on the fly".
The SignaLink USB is designed and manufactured using
only the highest quality components. Assembly is done
using state-of-the-art robotic production equipment. Strict
testing of every unit, and our high level of quality control
insures you of a premium quality product that will provide
many years of dependable service. A great deal of effort has
gone into the design and manufacture of the SignaLink USB,
and we think you ll agree that we have offered a level of
innovation, quality, and value that cannot be beat!
- INSTALLATION OVERVIEW -
The SignaLink USB is easy to install and operate. However,
if it is not installed and operated correctly, you will not
realize its best performance and in extreme cases you can
damage your other equipment.
important that you take the time to read these installation
instructions carefully to avoid any possible problems.
154 Hillview Drive Grants Pass, Oregon 97527
Sales: (541) 474-6700 Fax: (541) 474-6703
Installation & Operation
Therefore, it is very
SignaLink
TM
The SignaLink USB will be installed in a few simple steps.
First, you will configure it for use with your radio by
installing one of our optional Plug & Play Jumper Modules,
or the supplied jumper wires inside the unit. Next, you will
connect the SignaLink USB to your radio and then to your
computer s USB port which will automatically start the
driver installation. Once the driver installation has been
completed
you
will
communication program, and then verify that your radio is
setup properly. You'll then be ready to get on the air. If after
completing the installation you have any difficulty, please
refer to the Troubleshooting section at the end of this
manual. It covers most of the common problems that you
might run into. Technical Support for the SignaLink is also
available if you need it. Please see the Technical Support
section of this manual for more information.
- WHAT YOU WILL NEED -
The SignaLink USB is supplied with everything needed to
connect it to your computer and radio. If you choose to
configure your SignaLink with the supplied jumper wires
instead of one of our optional jumper modules, then you may
find a pair of needle-nosed pliers to be helpful. If the jumper
settings for your radio are not available on our web site or
CD, then you will need a multi-meter to verify your radio
wiring. You will need a communication program for testing
when the installation is complete. We have supplied some of
the most popular programs on our software CD. You can
also download additional software from the SignaLink
Software page of our website at www.tigertronics.com.
- OPENING THE SIGNALINK USB CASE -
IMPORTANT
To reduce the risk of damage by static
electricity, we strongly suggest grounding yourself with an
anti-static wrist strap before opening the SignaLink's case.
If you don't have a wrist strap available, then you can drain
any static buildup that may be present by momentarily
touching your computer or radio chassis (or other grounded
metal object). If you're going to be moving around or getting
out of your chair during the installation, then you should
ground yourself again before touching the SignaLink.
To open the SignaLink USB, you will need to open the front
of the unit while leaving the three knobs attached. This can
be done by removing the four front Allen screws with the
supplied Allen wrench, and CAREFULLY sliding the circuit
board and front cover forward. To avoid damaging the
1
USB
www.tigertronics.com
configure
Windows
and
the
Advertisement
Table of Contents

Related Manuals for Tigertronics SignaLink USB


Summary of Contents for Tigertronics SignaLink USB
- Page 1 The SignaLink USB is easy to install and operate. However, if it is not installed and operated correctly, you will not To open the SignaLink USB, you will need to open the front realize its best performance and in extreme cases you can of the unit while leaving the three knobs attached.
- Page 2 If you SignaLink USB so that each line can be connected to the find the settings for your radio listed there, then please appropriate matching line inside the SignaLink.
-
Page 3: Connecting The Radio
Mic connector. For Data or Accy Port cables, this connection is virtually always on the The SignaLink USB has an Auxiliary Audio jack ( Aux ) on back of the radio. There is usually only one matching... -
Page 4: Connecting The Computer
NOTE: These instructions are written for the most current your computer only AFTER you have installed the jumper sound card chipset used in the SignaLink USB but they will module or jumper wires, and connected the radio cable. also work fine for the earlier chipset. Note that the earlier... - Page 5 "Default Communication Device" (indicated by a telephone handset icon), that is OK. You can set another device (such Before you operate your SignaLink USB on the air, you will as a modem) as the Default Communication Device if you'd need to adjust its PLAYBACK and RECORDING software...
- Page 6 Please check the Digital Operations section of your radio manual for any additional setup information that may be needed. If the SignaLink USB is connected to your radio s Mic jack, then set the radio to USB or LSB as...
- Page 7 MUST be set to 50%. If these are drop-down menu below the speaker icon and select not set correctly, then the SignaLink USB's PTT "Speakers (USB Audio Codec)" as shown below in LED will NOT turn on, and you will be unable to Figure 5.
- Page 8 In the "Properties" window that opens, select the "Levels" tab as shown below in Figure 9. This concludes the setup of the SignaLink USB, radio and computer. At this point the system should be ready to use. If you are new to digital operation, then we suggest starting...
- Page 9 Please take some time to read your communication program's documentation and seek help The SignaLink USB has three special jumpers that can be from an online source or a fellow Ham if you need help enabled to provide higher Transmit and Receive Audio getting started.
-
Page 10: Limited Warranty
If you encounter a problem that you cannot resolve with the SignaLink (not software) and you have gone through the We have made every effort to make the SignaLink USB the best troubleshooting information available in this manual and on product possible. -
Page 11: General Specifications
SignaLink USB are set according to the RX Audio/Spkr - 3.5mm Mono Setting The Audio Levels procedure in this manual. If they are too low, then the SignaLink USB will NOT transmit. Computer Connector: USB 1.1/2.0/3.0 Compatible Standard USB "A"... - Page 12 · If you have installed a jumper module inside the SignaLink · If you have installed a jumper module inside the instead of jumper wires, then double-check that you have the SignaLink instead of jumper wires, then double-check that correct module installed, that it is properly configured, and that you have the correct module installed, that it is properly it is properly inserted in the jumper socket.
- Page 13 (Receive Audio is NOT present). for the SignaLink's USB's sound card is set at 50%. · Confirm that the SignaLink USB is powered ON and set · Verify that the radio s speech processor/compressor is the SignaLink's RX Knob to 100% (you'll need to readjust turned OFF.
- Page 14 SignaLink Software weak signals, sometimes even strong PSK31 signals cannot page of our web site at www.tigertronics.com. Note that the be copied at all because of multipath and Doppler Shift SignaLink software CD is NOT required for installation.
Need help?
Do you have a question about the SignaLink USB and is the answer not in the manual?
Questions and answers