Table of Contents
Advertisement
Quick Links
6
7
1
SCALE 2 : 5
DETAIL B
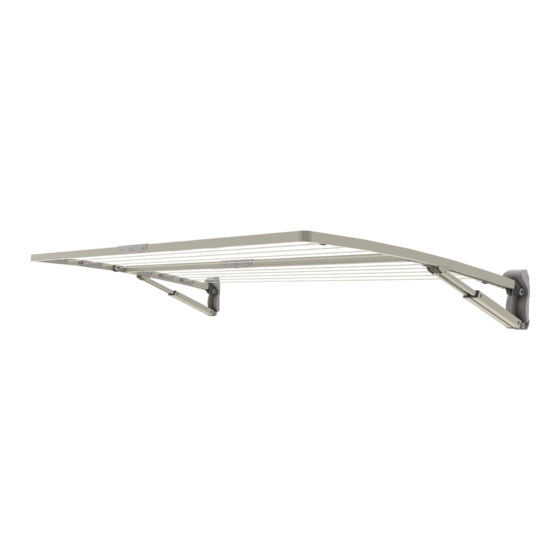
Premium Range
Supa Fold Clotheslines
Owner's Manual
8
ISSUE
REF.
1
A
B
9
1
0
REVISION
TO SUIT MODELS:
6
7
A
1
1
DATE
RFC
8
9
ISSUE
REF.
Hills Industries L
ABN 35 007 573 417
Home & Hardware Products
Unit H, 5 Butler Boulevard
Burbridge Business Park
Adelaide Airport
South Australia 5950
TM
Copyright
DO NOT SCALE DRAWING.
DIMENSIONS IN MILLIMETRES.
DWN.
C
©
2010
Advertisement
Table of Contents

Related Manuals for Hills Supa Fold Duo


Summary of Contents for Hills Supa Fold Duo
- Page 1 ISSUE REF. REVISION DATE DWN. TO SUIT MODELS: ISSUE REF. Supa Fold Duo Supa Fold Mono Hills Industries L ABN 35 007 573 417 Home & Hardware Products Unit H, 5 Butler Boulevard Burbridge Business Park Adelaide Airport South Australia 5950 SCALE 2 : 5 ©...
- Page 2 Introduction Congratulations Congratulations on the purchase of your Hills Supa Fold Folding Frame Clothesline, which will bring you many years of trouble free and efficient drying. Your Supa Fold can be either wall or post mounted. If you are planning to post mount, you will need to purchase a post kit (sold separately).
-
Page 3: Table Of Contents
7 Inner Spreader Bar – 8 Outer Spreader Bar 9 Spreader Joiner 10 Corner 11 Line Hex Key 5mm Hex Key 4mm Line Tie Off Cap Fasteners* *In the Supa Fold Duo model, the fasteners are located in the wall bracket assembly. * Supa Fold Duo model shown for reference... - Page 4 Installation Step 1 – Select a suitable location Your Supa Fold can be mounted to either a wall or post kit (sold separately). You must check to ensure you have sufficient space in your garden / yard to install your clothesline (Fig.
- Page 5 2.2 To re-attach, push the insert back into the bracket. Warning: When installing the brackets ensure the left and right labels are positioned correctly, as shown. Fig. 2 Supa Fold Mono Bracket Insert Assembled Dis-assembled Supa Fold Duo Bracket Insert Assembled Dis-assembled...
- Page 6 Installation Step 3 – Installing your mount brackets The following instructions are provided for installing your mount brackets to either; • Brick or masonry walls (step 4) • Stud walls (step 5) • Post Kits (step 6) Due to the range of wall construction materials available, or if you have any doubt, consult your local hardware store. • Install the left hand bracket first and use this to align the right hand bracket. • Hold each bracket against the wall, making sure they are aligned vertically and horizontally, and use them as templates to mark where to drill holes, (a spirit level and straight edge will help).
- Page 7 4.2 Mark the position of the mount bracket hole centres on the wall. If you are replacing an existing Hills Folding Frame product using the original fasteners, ensure they are suitable and still in good condition.
- Page 8 Installation Step 5 – Fixing to a stud wall 5.1 Double check to ensure you have sufficient clearance and the area is free from pipes and other obstructions. 5.2 Locate the vertical studs in your wall. 5.3 Determine if you need to adjust your product width. You may need to reduce the width of your Supa Fold to match existing stud centres, (refer to step 8 on page 12 for details).
- Page 9 Installation Step 6 – Fixing to a post kit Post kits for Supa Fold Folding Frame clotheslines are available as optional accessories. 6.1 Install and assemble the post kit as per the separate instructions provided with the kit. 6.2 Install the mount brackets as shown (Fig. 7). Fig.
-
Page 10: Spreader Joiner 2
Assembly Step 7 – Assemble the spreader bars 7.1 Dis-assemble the spreader handle from the spreader joiner using the hex key 4mm (Fig. 8). 7.2 Insert the spreader joiner into the spreader bar and then fasten with the spreader handle as shown (Fig. 9). Once the Joiner has been assembled to the first Spreader, fasten one of the screws to prevent the Joiner slipping in further during the assembly of the second Spreader. - Page 11 Again you may need to tap the end gently with a hammer as it’s designed to be a ‘tight’ fit (Fig. 11). Fig. 11 Ensure fastener hole is in correct orientation Supa Fold Duo The Supa Fold Duo has an outer (longer) and inner (shorter) spreader bar (Fig. 12). You must ensure the lengths of spreader bars match. Fig. 12 Inner (shorter)
-
Page 12: Corner
Assembly Step 8 – Adjusting the width of your Supa Fold Your Supa Fold width can be reduced to suit your specific installation needs or to align with existing stud centres. The standard mount hole centres for your Supa Fold model are shown in the table on page 6. - Page 13 Mount bracket Small fastener 5mm hex key Large fastener Strut * RH arm shown for reference Fig. 16 Fig. 17 Supa Fold Duo Mount bracket Small fastener 5mm hex key Large fastener Strut Outer arm * RH arm shown Inner arm...
- Page 14 Assembly Step 10 – Assemble corners into spreader bar 10.1 Remove corner caps by gently levering with a screwdriver (Fig. 18). 10.2 Insert and secure the corners into both ends of the spreader bar using hex key 5mm (ensure bolts are firmly tightened) (Fig. 19). Fig.
- Page 15 11.2 Insert the spreader bar and corners into the arm ends and secure using hex key 5mm (Fig. 21). Please note the correct handle orientation. 11.3 Snap on all corner caps with Hills logo up (Fig. 22). Fig. 20 ‘click’...
-
Page 16: Line
Each Supa Fold product has individual line configurations and threading patterns, as shown (Fig. 23). Each line is fastened to a line tie-off, then threaded through the line sleeves and tensioned/fastened to the other line tie-off. Fig. 23 Supa Fold Mono Line tie-off Line sleeves Line tie-off Supa Fold Duo Line tie-off Line sleeves Line tie-off Line tie-off Line sleeves Line tie-off... -
Page 17: Line Tie Off Cap
Line Assembly Step 12 – Continued 12.1 Thread a line tie off cap onto one 12.2 Insert the line into the slot of the line tie end of the PVC line. off saddle and through the side. Pull through 15cm+ of excess line for tensioning. 12.3 Loop the line around the groove in 12.4 Feed the line through the line the line tie off saddle. - Page 18 Line Assembly Step 12 – Continued 12.7 Insert the line into the slot of the last 12.8 Check that all the lines are tight and line tie off saddle, repeat the tie off. adjust and retension if necessary. 12.9 Trim off excess PVC line at dotted 12.10 Push PVC line end securely into line shown above.
- Page 19 Operation Step 13 – Using your Supa Fold To lower the clothesline (Fig. 24) A Loosely grip the spreader bar handle. B Raise the frame until you hear both struts ‘click’ once to indicate they have disengaged. C Now lower the frame gently to its folded position. To raise the clothesline (Fig.
-
Page 20: Fasteners* 4
Care and Maintenance Regularly inspect all components and check for wear and tear or damage. Ensure fasteners are secure. If there is any damage, parts should be replaced with original Hills spares. The Clothesline should be repaired before using again. Your Clothesline should be periodically wiped clean with a damp cloth and mild detergent. - Page 21 Unless any addition or attachment to this Hills Websites product has Hills specific approval or is sold as a Hills product the warranty on www.hillsproducts.com.au this product is waived. The product is Hills Branded Products designed to perform a specific task under www.hillsholdings.com.au...
- Page 22 Notes...
- Page 23 Notes...
- Page 24 Hills Holdings Limited A.B.N. 35 007 573 417 Issue March 2011 PD2991c...
Need help?
Do you have a question about the Supa Fold Duo and is the answer not in the manual?
Questions and answers