Table of Contents
Advertisement
Advertisement
Table of Contents
Troubleshooting

Summary of Contents for Rock-Ola QB8-PV
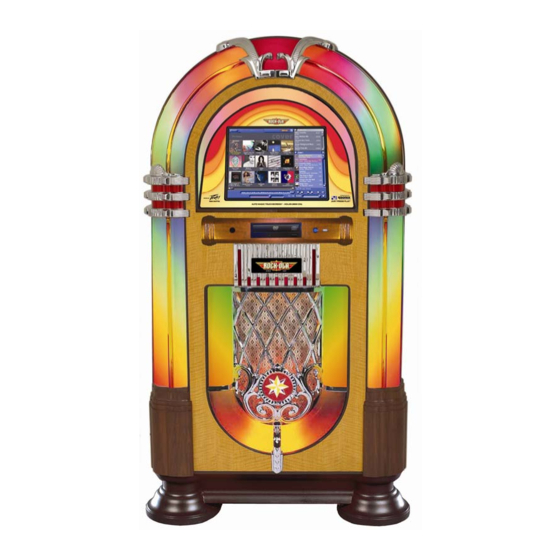
- Page 1 Nostalgic Music Center Version 2.1 ~ QB-PV Models Service & Parts Manual...
- Page 2 All Rights Reserved Rock-Ola Manufacturing Corporation 2335 208th Street, Torrance, CA 90501 This document contains information proprietary to Rock-Ola Manufacturing Corporation and may not be reproduced, published or distributed in any form or disclosed in whole or in part without...
-
Page 3: Safety Instructions
SAFETY INSTRUCTIONS IMPORTANT! Read these instructions. b. Keep these instructions. Follow all instructions. d. Do not use this apparatus near water. Clean only with dry cloth. Do not block any ventilation openings. Install in accordance with the manufacturer’s instructions. g. Do not install near any heat sources such as radiators, heat registers, stoves, or other apparatus (including amplifiers) that produce heat. - Page 4 Software. You may permanently transfer rights under this EULA only as part of a permanent sale or transfer of the Rock-Ola Digital Music Center, and only if the recipient agrees to this EULA. If the embedded Software is an upgrade, any transfer must also include all prior versions of the embedded Software.
- Page 5 All Media Guide Addendums This Rock-Ola Digital Music Center incorporates software and technology of All Media Guide, LLC (“AMG”). The AMG software and technology (collectively, the “AMG Technology”) allows End Users to access music-related data (“AMG Data”) over the Internet and otherwise from proprietary AMG databases (the “AMG Databases”) located on AMG servers (the “AMG Servers”) and to perform other functions.
-
Page 6: Table Of Contents
AT HOME WITH YOUR QB8-PV NOSTALGIC MUSIC CENTER..................9 SETTING UP YOUR QB8-PV NOSTALGIC MUSIC CENTER ..................13 ................................13 NTERNET ONNECTION ....................................13 OWER STARTING THE QB8-PV NOSTALGIC MUSIC CENTER FOR THE FIRST TIME............. 14 ................................14 ESTING ONNECTIVITY ................................16 OUCHSCREEN ASICS .................................... - Page 7 Now Playing Drop-Down Menu............................38 Adjusting Playback Volume..............................39 Using the Mute Control................................ 39 Annual Service ..................................40 Cleaning the Touch Screen ..............................40 AMPLIFIER DESCRIPTION AND OPERATION........................ 41 SERVICE AND MAINTENANCE............................46 Core Removal..................................46 Core Installation .................................. 46 Amplifier Removal................................
-
Page 8: Specifications Of The Nostalgic Music Center
Specifications of the Nostalgic Music Center Dimensions: Uncrated: Height 61” Width 33-1/2” Depth 28-3/8” Crated: Height 73” Width 39” Depth 32” Weight: Uncrated 329 lbs. Crated 395 lbs. Amplifier: Output Power: 450 wRMS /ch @ 2 ohms Protection: Speaker overload High temperature Over voltage Under voltage... -
Page 9: At Home With Your Qb8-Pv Nostalgic Music Center
At Home with your QB8-PV Nostalgic Music Center The heart of the QB8-PV Jukebox is the Qsonix Version 2.1 digital music management system. This latest version includes all the features of the original Nostalgic Music Center, allowing you to load, organize, and play your CD music collection with a touch of your finger tips on the screen. - Page 10 With its exceptional quality of craftsmanship and soft volume transitions in multiple modes. inside and out, your QB8-PV Nostalgic Music The touch-controlled graphic equalizer ensures Center features top-of-the-line components peak settings to suit your tastes.
-
Page 11: Front Door
Front Door Major Components 1. Touchscreen Monitor 2. Power Button 3. USB Connection 4. DVD/CD Drive... - Page 12 Major Component Location Open Cabinet and rear Cabinet Major Components 1. Computer Core. This is the heart of the Nostalgic 8. DVD/CD reader Music Center Jukebox. 9. Touchscreen Monitor Assembly 2. Power Distribution Box 10. Tweeter Speaker 3. Manual Holder 11.
-
Page 13: Setting Up Your Qb8-Pv Nostalgic Music Center
Setting Up Your QB8-PV Nostalgic Music Center Set-Up of your QB8-PV Nostalgic Music Center is easy. All components are installed and ready to go, you have only to Power Up supply the following: WARNING (Broadband) Internet Connection Use of adapters or removal of the... -
Page 14: Starting The Qb8-Pv Nostalgic Music Center For The First Time
Starting the QB8-PV Nostalgic Music Center for the First Time With your Nostalgic Music Center connected to power and broadband connected, you are ready to power-up and set-up the system so you can begin using it. The series of set up screens will instruct you step by step. - Page 15 trigger a connectivity check, which will display a screen Follow the suggestions and continue re-trying for a such as that illustrated below: connection until the connectivity test succeeds. When completed, you will be presented with the following screen: Testing Connectivity… Success In the event of a connection test failure, you would be When you have reached the “Connectivity –...
-
Page 16: Touchscreen Basics
DO hold your finger perpendicular to the screen, so that the Touchscreen Basics fingertip makes contact with the glass. The Nostalgic Music Center is operated from the touchscreen controller. Even if you have never worked with a touchscreen you will find that it is very simple— 90°... -
Page 17: Loading Your Cd Library
Loading Your CD Library Your new Nostalgic Music Center is delivered with a couple Automatic Loading CDs (Most of pre-loaded CDs, so you can jump right into the music Commercial CDs) while getting acquainted with the system features and setting up your own preferences. 1. -
Page 18: Using The Cd Loading Wizard (Self-Recorded, Compilation, Or Other "Not-Found" Cds)
Did you know you can use your own art or photographs as cover art? When you set up your TIP: QB8-PV on your home network, you’ll be able to Manual CD Loading Wizard share image files as well as music files! Launch the CD loading wizard. - Page 19 USB port located next to the power button on the door of the Music Center. No need to set-up—you can begin entering your information using the keyboard as you are prompted by the screen. USB Keyboard Connected to the QB8-PV...
-
Page 20: Nostalgic Music Center User Interface
Nostalgic Music Center User Interface 1 Menu Bar The Nostalgic Music Center user interface is divided into several main panels or areas that comprise the entire 2 Exit to Tool Box system. All of Nostalgic Music Center’s features are accessible from this primary interface. It’s simple, fast and 3 Album Browser Display fun to use. -
Page 21: Using The Qb8-Pv Nostalgic Music Center Touch Screen Menus
“Return to Last View” button next to it, and library, use the View Album mode. When this view is the “Rock-Ola” logo button, which gives you access to selected, a list of all of albums/CDs in your library will be setup and preferences. - Page 22 Use the scroll bars at the bottom of the list to quickly your music search and selection. Naturally, when you tap scroll through the albums. on a “style”, you’ll go directly to all of the CDs classified in the particular genre/style combination. Use the alpha-sorter bar in the lower part of the screen to jump quickly to albums by choosing them alphabetically.
- Page 23 (based on sort mode) beginning with “A”. 5. Search by Year The meta-data stored in the QB8-PV allows you to search View Search Mode music by the year. This is a great way to quickly compile a playlist for a themed party.
- Page 24 PC. Since the music is stored on the QB8-PV, all you need to do from here is tap on a field to go to the track!
-
Page 25: System Management From The Toolbox
1. Attach a clean 160 gigabyte hard drive to the system Toolbox – System Control Screen via the USB port next to the blue power button on the door of the QB8-PV. General Tab 2. Select BACKUP SYSTEM from the System Mangement >... -
Page 26: To Disable Protected Access
IMPORTANT! • You must use a 160 gigabyte hard drive to back up your system and library to. • It is recommended to back up your system at least every 6 months. That way, if your hard drive fails, you won’t have to re-load your entire library. -
Page 27: Date/Time
Enter the numeric password in the space provided and press enter. The music selection menu screen appears. Tap on the Toolbox logo to get to the Preferences tabs. Touch the Access tab to open the dialog. From the Access screen, select Protected Access. Tap the “Disable”... -
Page 28: Network Places
Enter the Subnet Mask information in the space provided. Some of the Nostalgic Music Center’s system functions allow you to use media and other resources that are Enter the Primary DNS information in the space provided. located on other devices in your network, such as music and picture files on your PC or other server. -
Page 29: Media Sharing
Media Sharing allows other devices such as PCs, media adapters and streaming clients to access the music files stored on your QB8-PV. When enabled, two network files Audio Quality Selection Screen shares are created. Music and compressed data that can be... - Page 30 Sync IMPORTANT! To sync your iPod with the QB8-PV, your portable device must be running the latest apple firmware. http://www.apple.com/downloads/ If your iPod is connected to the Music Center via the USB Playback Preference Screen port, this screen displays detailed information it.
-
Page 31: Information Tab
section if you need to setup again with new hardware, or Information Tab to change your preferences. The Information screen displays current settings and statistics about your Nostalgic Music System. Version (software) Available Space Database System ID IP Address System Up Time List Update System Stats (number of tracks, artists, albums, genres) From the information screen you have access to three vital... -
Page 32: Album Browser Display
Album Browser Fast Preview – This feature allows you to Display preview a track at any time – even when you’re listening to music in the “Now Playing” area. The album browser display is the part of Double-tap any track in either of the album the screen that shows you detailed information about your browsers. -
Page 33: Album Browser Controls
Add to End of Now Playing – You may also add an album to the end of the current playlist by dropping the Cue Bar Control album, or track onto the footer area as shown in the highlighted area of the illustration below. The “cue bar”... - Page 34 TIP: Use names for your playlists that are descriptive and Managing your Playlists – The Playlist Options provide you with a context such as style, mood, event, etc. Menu The Playlists drop-down Options Menu provides the tools you need to manage and get the most out of your custom Using your Playlists playlists.
-
Page 35: New (Add A New Playllist)
Move Up – Taping the “Move Up” button will move the New (Add a new Playllist) currently selected song up one position in the playlist. It’s easy to add a new playlist. Move Down – Taping the “Move Down” button will move the currently selected song down one position in the From the Playlist Menu, select the New Playlist option. -
Page 36: Using Drag-And-Drop To Edit Playlists
SYNC ALL – to, well, sync all the music on your music center. IMPORTANT! To sync your iPod with the QB8-PV, your portable device must be running the latest apple firmware. 2. From the list, move, select or de-select tracks to http://www.apple.com/downloads/... -
Page 37: Generate Playlist
Generate Playlist You can generate a playlist automatically—based on almost any criteria you can think of—by using the GENERATE PLAYLIST feature on the Playlist Option Now Playing Panel Menu. This feature uses the music’s stored meta data to make associations based on categorical descriptions, such The Now Playing panel is where any music that you want as style, theme, mood, etc. -
Page 38: Now Playing Drop-Down Menu
system will keep the currently playing track in the center of To Merge two Playlists: the list whenever possible. Note: Previously played items 1. Open the Now Playing Menu. will appear dimmed in a light grey color. 2. Select Clear Entire Playlist. (Otherwise, any tracks, Insertion Point –... -
Page 39: Adjusting Playback Volume
Turn off the equalizer anytime by invoking the pop-up Sound & Transport window and tapping “OFF.” Controls The volume and mute controls are located at the lower right corner of the screen, just below the transport controls and the Now Playing area. Adjusting Playback Volume From the Equalizer pop-up, you can adjust your settings for To adjust the volume of the currently playing song:... -
Page 40: Annual Service
Transport Controls Frequently Asked Questions Q: My system has stopped responding or is not operating properly, what should I do? A: If you experience any problems, you should reset the system using “reset” function “preferences/Information” screen, or recycle the power on the system. -
Page 41: Amplifier Description And Operation
Amplifier Description and Operation The Amplifier in the Music Center is a professional audio model PV-900 from Peavey Electronics, one of the most recognized names in music instrument and professional audio products. This product contains patented circuitry to limit distortion as well as unique cooling methods. More information on the PV-900 is in a separate manual along with a Peavey Warranty Registration Card. - Page 42 BASIC ONE ZONE CONNECTIONS EXTERNAL SPEAKERS External speakers may be connected to the terminals provided on the crossover. Up to 4 pairs of 8 ohm speakers may be connected. The impedance of the speaker is generally found on the back. If in doubt, do not connect more than 3 pairs to be safe.
- Page 43 EXTERNAL AUDIO SYSTEM Do NOT unplug or connect RCA plugs with the power amplifier(s) on. WARNING: The resuting hum or noise may damage the speakers. The Music center provides two line level output types for connecting to another audio system or to powered speakers.
- Page 44 TWO ZONE ADVANCED CONNECTIONS The Audio system may be easily converted from a 2 channel stereo system with 1 zone (volume control) to a 2 zone mono system by activating two switches and changing a plug. This allows for speakers to be placed outdoors or in another room with an independent volume control. For this scenario, the audio connections must be changed.
- Page 45 vibration of the drives and protect the cabinet. Full power is available to the external speakers therefore high efficiency speakers will be much louder than the jukebox. This is normal. The zone 1 slider will control the volume of the jukebox and the external speakers connected to CH 1 together.
-
Page 46: Service And Maintenance
Service and Maintenance Computer Core Amplifier Core Removal Be sure power is OFF. Unplug the machine. Amplifier hood (amp face is Open the door. under the hood) Disconnect all of the cables from the front of the Core. With a 3/8” nut driver or socket wrench loosen the four nuts securing the core. -
Page 47: Troubleshooting & Repair
Troubleshooting & Repair Circuit Breaker and Fuse Location Jukebox protected main switch/circuit breaker located on the back of the cabinet. The Power Amplifier has a circuit breaker on the back of it. See the Peavey manual for more information. Power Distribution Box - main switch with Circuit breaker Touch Monitor Service Documentation for the Touchmonitor is provided in a separate document. - Page 48 Block Diagrams...
-
Page 49: Troubleshooting Charts
Troubleshooting Charts Power Problems Fault Symptom Possible Cause • Main Power switch not on • Jukebox fails to operate at all when it is LED's on Amplifier all dark Plug not in wall outlet or plugged in and the blue power button LED's on remote interface dark Distribution Box •... -
Page 50: Amplifier Problems
Amplifier Problems Fault Symptom Possible Cause Amplifier "Dead" All Amplifier LEDs Dark Amplifier power cord unplugged NOTE: Be Sure a selection is playing. Screen should say, “Now Playing” Amplifier circuit breaker tripped Defective Amplifier Green POWER LEDs ON Input cables not connected Yellow COM LEDs Dark Red OTT LEDs Dark Cables to audio interface not connected... -
Page 51: Lighting Schematic
Lighting Schematic FL. LAMP BUBBLE TUBE HEATER BALLAST YELLOW 1.6K 10W BUBBLE TUBE FL. LAMP HEATER F14T12CW 15" (2PL) 1.6K 10W LIGHT ARCH RIGHT SIDE 11W ORANGE LAMP LIGHT BAR LEFT SIDE F6T5CW 9" RED (2) LIGHT LOGO LAMP RED (2) STAR LAMP 4 WATT CANDALABRA... -
Page 52: Accessories
Now you are ready to rip your CDs into the system! The Wireless Bridge (Linksys Model No. WGA54AG) may be purchased from Rock-Ola directly or off the A word about the kits...The jukebox does not need shelf at your local computer store. -
Page 53: Parts Catalog
Small Grill Assembly 61718-LF Bezel, CD Reader 58848 Small Grill Casting 61500-A-LF USB extension harness 58962-01 Rock-Ola Logo 57380 Casting - Upper Trim LH ST-11303 Speed Nut 3/16” 57381 Casting - Upper Trim RH 57382 Casting - Side Trim (6 pl) -
Page 54: Inside Door
Inside Door Item No. Part No. Description Item No. Part No. Description See next page Light Arch Assembly 57439-01 Light Arch Hanging Bracket (4 pl) See next page Light Bar Assembly 60702 Fluorescent Light Bracket (2 pl) 57448 Bubble Tube, Long Curve (2 pl) 60757 Lamp Socket (2 pl) 57449... -
Page 55: Front View
Arch Light Assembly # SV‐60765‐A Front View Back View Item No. Part No. Description Item No. Part No. Description 60696 Arch Light Frame 57431 Single Lamp Socket 57429 Lamp Bracket, RH 60207 Ballast, Workhorse 3 57430-01 Lamp Bracket, LH 57413 Terminal Strip, 2 pole 57434 Fluorescent Lamp F14T12CW 60739... -
Page 56: Inside Cabinet
Inside Cabinet Item Item Part No. Description Part No. Description SV-70202-A CPU Assembly 60007 Service Manual Holder 60884 Rubber Mount (4 pl) 60881-A Pivot Plate, Lock SV-61084-A Peavey PV-900 Amplifier, 115 volt 60699 Lock Arm SV-61732-A-LF Peavey PV-900 Amplifier, 230 volt 60697-A Cam Bolt 60880-A... -
Page 57: Outside Cabinet
ST-11296-K Key only Fan Filter Housing (no filter) Harnesses Part No. Description 61240-A Harness, Peavey Audio Input 61710-A-LF Harness, Speaker QB8-PV 60843-LF Shielded Audio harness 61515-1A-LF CDP Power Extension harness 61535-A IDE 4” round cable 57854-A-LF Ground strap harness 60729-A... - Page 58 Harnesses...
-
Page 59: Accessories
Accessories Part No. Description 02467 Wireless Bridge Kit 02466 Dial-Up Modem Kit... - Page 60 61743 Nostalgic Music Center Version 2.1 ~ QB-PV Models Service & Parts Manual...
Need help?
Do you have a question about the QB8-PV and is the answer not in the manual?
Questions and answers