
Related Manuals for Hach Lange DR 3900


Summary of Contents for Hach Lange DR 3900
- Page 1 DOC022.52.90323 DR 3900 USER MANUAL 04/2013 Edition 3A © HACH-LANGE GmbH, 2011, 2013. All rights reserved. Printed in Germany.
-
Page 3: Table Of Contents
Table of contents Section 1 Specifications ........................9 Section 2 General Information......................11 2.1 Safety information..........................11 2.1.1 Precautionary labels ........................ 11 2.1.2 RFID module (not available on all models) ................11 2.1.3 Chemical and Biological Safety ....................12 2.2 Overview of product.......................... 13 Section 3 Installation .......................... - Page 4 Table of contents 5.2 Instrument Setup ..........................27 5.2.1 Operator ID..........................27 5.2.1.1 Operator RFID tag (not available on all models) .............28 5.2.2 Sample ID..........................28 5.2.2.1 Sample ID with scanner method 1...................30 5.2.2.2 Sample ID with scanner method 2...................30 5.2.3 Sample ID and operator ID with the optional RFID Sample ID Kit (not available on all models) . 5.2.4 Security settings ........................31 5.2.4.1 Assign operator security level..................32 5.2.4.2 Deactivate password .......................34...
- Page 5 Table of contents 5.4 Stored Programs..........................56 5.4.1 Select a saved test/method; entering user-specific basic data ..........56 5.4.2 Stored programs options......................56 5.4.3 Use of program timers ......................57 5.4.4 Set the dilution factor ....................... 58 5.4.5 Run a standard adjust......................59 5.4.6 Set the chemical form ......................
- Page 6 Table of contents Section 6 Expanded programs......................73 6.1 User programs...........................73 6.1.1 Program a user method......................73 6.1.1.1 Single wavelength settings ....................75 6.1.1.2 Multi wavelength settings ....................76 6.1.1.3 Calibration settings for single and Multi Wavelength mode..........78 6.1.1.4 Store a user program.......................81 6.1.1.5 Additional user-defined parameters and functions ............81 6.1.2 "Free programming"...
- Page 7 Table of contents 6.8 System Checks..........................111 6.8.1 Instrument Information ......................111 6.8.2 Update the instrument software ..................... 111 6.8.3 Optical Checks........................112 6.8.3.1 Verification kit........................ 112 6.8.3.2 Test solution........................113 6.8.3.3 Wavelength check......................115 6.8.3.4 Stray light check......................115 6.8.3.5 Absorbance check ......................
- Page 8 Table of contents Section 10 Contact ..........................139 Section 11 Warranty, liability and complaints...................141 Appendix A Help Guide ........................143 A.1 Display of the Help Guide for stored programs................143 A.2 Display of the Help Guide for barcode programs................144 Index ..............................147...
-
Page 9: Section 1 Specifications
Section 1 Specifications These are subject to change without notice! Performance specifications Display mode Transmittance (%), Absorbance and Concentration Source lamp Halogen lamp Wavelength range 320–1100 nm Wavelength Accuracy ± 1.5nm (wavelength range 340–900 nm) Wavelength reproducibility ± 0.1 nm Wavelength resolution 1 nm Wavelength calibration... - Page 10 Specifications...
-
Page 11: Section 2 General Information
Section 2 General Information Safety information Read through the entire user manual carefully before you unpack the device, set up and put into operation. Pay attention to all danger and caution statements. Failure to do so could result in serious injury to the operator or damage to the equipment. To make sure that the protection provided by this instrument is not impaired, do not use or install this instrument in any manner other than that specified in these operating instructions. -
Page 12: Chemical And Biological Safety
General Information regions may contravene national laws. The manufacturer reserves the right also to obtain authorisation in other countries. In case of doubt, please contact the distributor. The DR 3900 contains an RFID module to receive and transmit information and data. The RFID module operates with a frequency of 13.56 MHz. -
Page 13: Overview Of Product
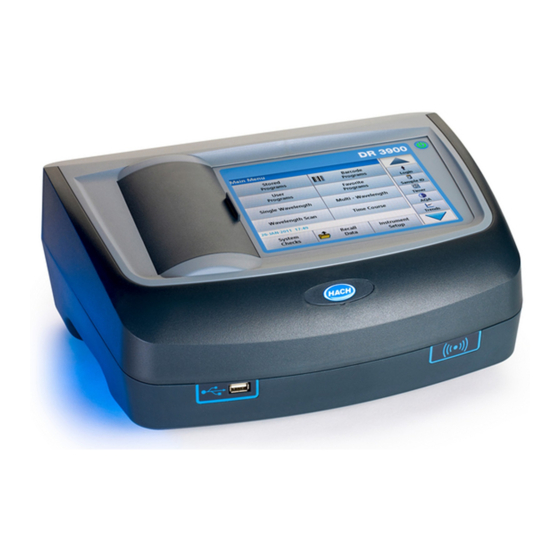
General Information Overview of product The DR 3900 is a VIS spectrophotometer with a wavelength range of 320 to 1100 nm. The instrument is delivered with a complete series of application programs and supports several languages. The spectrophotometer DR 3900 contains the following programs and operating types: •... - Page 14 General Information...
-
Page 15: Section 3 Installation
Section 3 Installation WA R N I N G Electrical and fire hazards. Only use the supplied benchtop power supply LZV844. Only qualified experts may perform the tasks described in this section of the manual, while adhering to all locally valid safety regulations. Unpack the instrument The DR 3900 Spectrophotometer comes packaged with the following items:... -
Page 16: Front And Back View
Installation Front and back view Figure 1 Front view USB port type A On/off switch Cell compartment cover RFID module (not available on all models) Touch screen... -
Page 17: Power Connections
Installation Figure 2 Back view Ethernet port USB port type A USB port type B Connection for benchtop power supply Power connections WA R N I N G Electrical and fire hazards. Only use the supplied benchtop power supply LZV844. 1. -
Page 18: Interfaces
USB memory stick or keyboard. A USB memory stick can be used to update the instrument software. The USB type B port is used for communications with a PC. The optional Hach Data Trans software (refer to Section 9, page 137) must be installed on the PC for data transfer. - Page 19 Installation Figure 3 Cell compartments Cell compartment for round cells (1) Cell compartment for rectangular cells (2) Figure 4 Cell adapter Cell adapter A: 10-mm rectangular cells/1-inch round cell...
-
Page 20: Installation Of Cell Adapter
Installation 3.6.2 Installation of cell adapter 1. Open the cell compartment. 2. Place the cell adapter into cell compartment (2) so that the arrow on the cell adapter points to the rear (Figure Note: The arrow on top of the cell adapter indicates the direction of the light beam path. - Page 21 Installation Figure 6 Light shield Installation of the light shield 1. Open the cell compartment. 2. Place the light shield into cell compartment (2) so that the arrow on the light shield points to the rear.
-
Page 22: Beam Path
Installation Beam path Figure 7 shows the beam path of the DR 3900. Figure 7 Beam path Halogen lamp Splitter mirror Entrance slit Reference element Grating 10 Cell compartment (2) for rectangular cells Grating angle indicator 11 Lens Exit slit 12 Reading element Lens 13 Cell compartment (1) for round cells... -
Page 23: Section 4 Start Up
Section 4 Start up Switch on the instrument, startup process 1. Connect the power cable to the mains outlet. 2. Switch on the instrument by using the power button next to the display. 3. The instrument starts automatically with a startup process lasting approximately 45 seconds. -
Page 24: Sleep Mode
Start up Sleep mode The instrument can be put into sleep mode. 1. Briefly press the power button next to the display. The "Sleep mode" message is shown. The display will then switch off automatically. 2. To switch on, press the power button next to the display. The self-check will start automatically. -
Page 25: Section 5 Standard Programs
Section 5 Standard programs Overview 5.1.1 Tips for using the touch screen The whole screen responds to touch. To choose an option, tap with a fingernail, fingertip, an eraser or a specialised stylus. Do not touch the screen with sharp objects, such as the tip of a ballpoint pen. -
Page 26: Main Menu
Table 2 Main Menu options Option Function Stored programs are pre-programmed methods that make use of HACH chemicals and HACH-LANGE pipette tests. Stored Programs / Barcode Programs The working procedures for HACH-LANGE tests are included in the test packs. -
Page 27: Instrument Setup
Standard programs Instrument Setup 1. Select Instrument Setup in the Main Menu. A selection of functions appears in order to configure the functions of the instrument. 5.2.1 Operator ID Use this option to enter up to 30 sets of operator initials (up to ten characters each) into the instrument. -
Page 28: Operator Rfid Tag (Not Available On All Models)
Standard programs 10. With Back the device returns to the menu "Instrument Setup". Press Logout to log out of an active operator ID. Press Login to activate a selected operator ID. Press Options to enter, change or delete additional operator IDs. - Page 29 Standard programs used to specify the sample location or other sample specific information, for example. 1. Press Sample ID in the toolbar on the right. 2. Press New to enter a new sample ID. Note: If no sample ID has been entered yet, the alphanumeric keyboard is immediately displayed.
-
Page 30: Sample Id With Scanner Method 1
Standard programs 9. Press New to enter another sample ID. Press Delete to delete a sample ID. Press Edit to edit a sample ID. Press Initialize RFID Tag to write the sample ID to an optional location RFID tag (not available on all models). 5.2.2.1 Sample ID with scanner method 1 1. -
Page 31: Sample Id And Operator Id With The Optional Rfid Sample Id Kit (Not Available On All Models)
Standard programs 5.2.3 Sample ID and operator ID with the optional RFID Sample ID Kit (not available on all models) The optional RFID Sample ID Kit consists of: • A LOC 100 RFID Locator • An operator RFID tag • Five location RFID tags and •... -
Page 32: Assign Operator Security Level
Standard programs 4. Press Security List to access various functions with security level 1 or 2. 5. Select the required function and press Setup. 6. Select the required security level (two keys, one key or off) and confirm using OK. 7. - Page 33 Standard programs 1. Select Operator ID from "Instrument Setup". 2. Enter the security password and confirm by pressing OK. 3. Set up an operator ID (refer to section 5.2.1). 4. Press Operator Password. 5. Enter the operator password and confirm with OK. 6.
-
Page 34: Deactivate Password
Standard programs 9. Press OK. The operator ID is displayed with the selected security level. 10. Activate the selected operator ID by pressing Login. 11. Enter the operator password. 12. Confirm with OK and return to "Instrument Setup". 5.2.4.2 Deactivate password 1. -
Page 35: Date And Time
Standard programs 5.2.5 Date and time 1. Press Date & Time in the "Instrument Setup". 2. Select a Date Format for the date. 3. Press OK to confirm the entry. 4. Select a Time Format for the time. 5. Press OK to confirm the entry. 6. -
Page 36: Sound Settings
Standard programs 7. Enter the current date and time. Change the information using the arrow keys. 8. Press OK to confirm the entry. The instrument then returns to "Instrument Setup". 5.2.6 Sound settings 1. Press Sound Settings in "Instrument Setup". The following options will be displayed: •... -
Page 37: Printer Setup
Standard programs transferring data to a PC and in a network. These interfaces can be used for the connection of a USB stick, an external USB keyboard or a USB Barcode handset scanner. Note: Various accessories can also be connected simultaneously using a USB hub. -
Page 38: Print Data
Standard programs Printer Setup: • Resolution: Font size • Paper: Paper size Note: If an optional Thermal Printer is connected, the function "Auto Send" on/off is available. 4. Press Resolution to select the print quality. Select between: • 100 dpi, •... -
Page 39: Print Data Continuously
Standard programs 5.2.7.3 Print data continuously If all readings are to be printed out automatically straight after measurement, the use of a continuous form printer is recommended, e.g. the 4" paper thermal printer. Refer to Section 9, page 137. 1. Connect the thermal printer to a USB type A port. 2. - Page 40 Standard programs 5. Select Fix to configure the IP address. 6. Press IP address and enter the address. In conjunction with the IP address of an instrument, the subnet mask establishes which IP addresses are located within the local network. 7.
- Page 41 Standard programs 10. Press Network Server: <Off> to determine the target site for the data transfer. 11. Select Netdrive and run Netdrive Setup. Alternatively, select FTP and run FTP Setup. The procedures are completely identical. As an example, Netdrive Setup is described here. The target site can be defined by IP address or a server name.
-
Page 42: Power Management
Standard programs User and password must be identical to the settings on the target system. 15. Press User and enter the username. 16. Press OK to confirm. 17. Press Password and enter the password. 18. Press OK to confirm the entry. 19. -
Page 43: Save, Recall, Send And Delete Data
Standard programs 4. Select Power Off Timer and press OK. 5. Select the required time span after which the instrument will automatically be powered off if it is not used, and confirm with OK. 6. Press OK to confirm the entry. The instrument then returns to "Instrument Setup". -
Page 44: Recall Stored Data From The Data Log
Standard programs 5.3.1.2 Recall stored data from the data log 1. Press Recall Data in the Main Menu. 2. Press Data Log. A listing of the stored data is displayed. 3. Press Filter: On/Off. The function Filter Settings is used to search for specific items. -
Page 45: Send Data From The Data Log
Standard programs 6. Press View Details to get more information. 5.3.1.3 Send data from the data log Data is sent from the internal data log as an XML (Extensible Markup Language) file or as a CSV (Comma Separated Value) file, to a directory with the name DataLog on a USB mass storage device or a network drive. -
Page 46: Delete Stored Data From The Data Log
Standard programs 5. Select the data to be sent. The following options are available: • Single point: only this selected reading will be sent • Filtered data: only readings that correspond to the set filters will be sent • All data: all data in the selected data category will be sent. - Page 47 Standard programs 3. Press Filter: On/Off. 4. Activate On. 5. Select a required parameter. 6. Press OK to confirm the selection. The chosen items are listed. 7. Press Options>Control Chart. 8. Press Standard Control Chart to choose the control chart of the selected standard.
-
Page 48: Store, Recall, Send And Delete Data From Wavelength Scan And Time Course
Standard programs 9. Press Range Control Chart to select the control chart of the range in % for multiple determinations. The range in % is displayed graphically with the control limits and date. 5.3.3 Store, recall, send and delete data from wavelength scan and time course The instrument can store 20 datasets for the Wavelength Scan and 20 datasets for the Time Course. -
Page 49: Recall Stored Data From Wavelength Scan Or Time Course
Send data from wavelength scan or time course There are two ways to recall sent data to a USB memory stick, printer or PC with Hach Data Trans. Option 1: 1. Press Recall Data in the Main Menu and then Wavelength Scan or Time Course. -
Page 50: Delete Stored Data From Wavelength Scan Or Time Course
Standard programs • If a USB memory stick is connected, the files will be automatically sent to the USB memory stick as xml or csv files in the file folder "WLData (data of a wavelength scan) or "TCData" (data of a time course). The file name will be formatted as: "ScanData_X.csv"... -
Page 51: Trends
Standard programs Use the Ratio function to monitor the parameter relationships at a particular location and display them in a graph. Use the Interference Check function to display analyses with the same sample IDs and unfavourable levels of ion interference. 5.3.4.1 Trends 1. -
Page 52: Ratios
Standard programs 7. Select the required data analysis interval or the start and end date, and press Next to confirm. 8. Set an upper and lower control limit and press Next to confirm. 9. All of the selected functions are dispalyed in Trend Settings. Press OK to confirm. - Page 53 Standard programs 1. Select Recall Data>Data analysis. 2. Select Ratios. If a ratio analysis has already been carried out, a list of the defined analyses will be displayed. 3. Press Options. 4. Press New, to define a new ratio analysis.
- Page 54 Standard programs 5. Select the required sample ID and press Next to confirm. 6. Select parameter I with the greatest concentration and press Next to confirm. 7. Select parameter II with the middle concentration and press Next to confirm. 8. Select parameter III with the smallest concentration and press Next to confirm.
-
Page 55: Interference Check (Not Available On All Models)
Standard programs 9. Select the required data analysis interval. It is possible to select a fixed interval and an specific customised interval with start and end dates. 10. Press OK to confirm. 11. Choose an upper and lower control limit for the first and second parameters and press Next to confirm. -
Page 56: Stored Programs
Standard programs Example: Analysis of ammonium with barcode test LCK303 and recording of the readings. According to the LCK303 ion interference table, nitrate concentrates > 50 mg/L will interfere with the analysis. The instrument displays a warning if the same sample ID has a value >... -
Page 57: Use Of Program Timers
Standard programs Table 4 Stored programs options Options Description More For further Options With the Store On setting, all measurement data is stored automatically. With the Store Off Store Off/On setting, no measurement data is stored. % Trans/Conc/Abs To switch to % transmittance, concentration or absorbance readings Send Data icon / To send data to a printer, network drive, computer or USB memory stick (USB type A or Ethernet Send Data... -
Page 58: Set The Dilution Factor
Standard programs 1. Press the Timer icon. 2. Press OK to start the first timer. The timer will count down on the screen. 3. To start the next timed activity for the Stored Program, press the Timer icon and OK. Note: Press Close to view the reading screen while the timer is running. -
Page 59: Run A Standard Adjust
Standard programs 5.4.5 Run a standard adjust The Standard Adjust functions allows the calibration curve for a stored program to be adjusted based on analysis of a known standard solution. The Accuracy Check section of written procedures often suggests a standard solution concentration for this purpose. -
Page 60: Change Of The Default Setting Of The Chemical Form
Standard programs 5.4.6.1 Change of the default setting of the chemical form 1. In the result display, press Options>More>Chemical Form. 2. A list of available evaluation forms appear. Select the new default setting. 3. Press Save as Default. The current result and all further readings will be displayed in the new chemical form. -
Page 61: To Carry Out A Multiple Determination
Standard programs Note: The reagent blank icon is shown in the result display (refer to arrow) when the function is active. 5.4.8 To carry out a multiple determination A sample can be measured several times using the multiple determination functions. 1. -
Page 62: Update/Edit Tests (Not Available On All Models)
Standard programs 4. Remove the zero solution cell from the cell compartment. Insert the sample cell into the cell compartment. 5. Press Read. The result will be displayed. Note: To define a sample dilution, press the Dilution key in the toolbar. -
Page 63: 5.4.10.3 Program A New Test
Standard programs The Data list of the corresponding test will appear. The process specification of the corresponding test contains the new data (Wavelength, Factors, reading Ranges, Conversion Factor for chemical Form etc.). 3. Highlight the corresponding line in the data overview and press Edit. -
Page 64: Barcode Programs
Standard programs Barcode Programs A special barcode reader in cell compartment #1 automatically reads the barcode on the 13 mm cuvette/vial as the cuvette/vial completes a single rotation. The instrument uses the barcode identification to automatically set the correct wavelength for the analysis and calculates the result immediately with the help of stored factors. -
Page 65: Select The Chemical Evaluation Form
Standard programs 5.5.2 Select the chemical evaluation form The chemical form of the test result of a number of parameters can be selected individually. 1. In the result display, press the unit (e. g. mg/L) or the chemical representation of the evaluation form (e. g. 3–... - Page 66 Standard programs Table 5 Barcode program options Options Description More For further Options Store: On stores all measurement data automatically Store Off/On Store: Off does not store any measurement data. Abs % Trans To switch to % transmittance or absorbance readings Send Data icon / To send data to a printer, computer or USB memory stick (USB A) or network.
-
Page 67: Sample Blank
Standard programs 5.5.4 Sample blank Turbidity and colour in the sample matrix can falsify the results of a photometric analysis. The interference factors come from the sample or are created by reactions with the reagents. The influence of turbidity and/or colour can be eliminated or reduced by taking a sample blank reading. -
Page 68: Manual Update Of A Barcode Test
Standard programs 5.5.5.2 Manual update of a barcode test Note: Only in very few cases does the revision of a test require all test specifications to be updated. The various data types that determine a barcode test are described in Table Table 6 Program update options Program point... - Page 69 Standard programs Enter the measurement process For detailed information on entering the measurement process, refer to section 6.1.2, page Check the process specification in advance to determine whether this point needs to be changed. 1. Highlight the Measurement process line in the data overview and press Edit.
-
Page 70: Manual Check/Revision Of Test Data
Update via USB memory stick To obtain the software for the update from the Internet at www.hach-lange.com: 1. Go to http://www.hach-lange.com. 2. Select the country and go to Download>Software. 3. Enter DR 3900 in "Search for documents". 4. Navigate to the corresponding file for download. -
Page 71: Program A New Test
Standard programs 7. Connect the USB memory stick to the USB port (type A) on the instrument, refer to section 3.5, page 8. Press OK. The link is established automatically and the software is updated. 9. Press OK to return to the "System Check" menu. Update via the web function 1. - Page 72 Standard programs...
-
Page 73: Section 6 Expanded Programs
Section 6 Expanded programs User programs User programs provide the opportunity to complete "made to measure" analysis. The "User Programs" database is empty when the instrument leaves the factory and is used to accommodate programs created by users for specific needs. User programs with 13 mm round cells can only be performed with the empty cells LCW906. - Page 74 Expanded programs Program Number: The program number is a specific test number, with which the program can subsequently be called up from the selection list in the User Programs menu or the Favorites menu. 2. Use the alphanumeric keypad to enter a program number between 9000 and 9099.
-
Page 75: Single Wavelength Settings
Expanded programs Table 8 Program descriptions Program type Description Single Wavelength Readings at a defined wavelength In the Multi Wavelength mode, absorbance values can be measured at up to four wavelengths Multi Wavelength and the results can be mathematically processed to obtain sums, differences and relationships. A high degree of flexibility results in individual options to create a user program. -
Page 76: Multi Wavelength Settings
Expanded programs Chemical form: 1. Enter the chemical formula used in the display to represent the analysis parameter. 2. Press Continue. 6.1.1.2 Multi wavelength settings When selecting the Multi-Wavelength mode, the following parameters can be defined: Units: 1. Select the required unit from the list 2. - Page 77 Expanded programs Wavelength λ 1. Press the λ buttons. The number of wavelengths results from the calculation formula. 2. Enter the required wavelengths. 3. If necessary, repeat until all values for the formula have been entered. The entered wavelengths must be in the range from 320-1100 mm.
-
Page 78: Calibration Settings For Single And Multi Wavelength Mode
Expanded programs 6.1.1.3 Calibration settings for single and Multi Wavelength mode A method is calibrated by determining the absorbance values of several standard solutions of known concentration. Create and save a calibration curve by entering values or measuring standards or entering formulas (Table Table 9 Calibration settings Option... - Page 79 Expanded programs 9. Press Graph. The entered data is shown as a calibration curve. Note: The correlation coefficient (r ) is shown on the left below the axes. The linear equation corresponds to the standard setting. 10. Press Next graph. The presentation changes to polynomial curve of the second order.
- Page 80 Expanded programs The entered and measured data is shown in the table. Note: To delete a standard concentration, highlight the appropriate line and press the Delete icon. The timer icon shown in the display helps to make sure, when necessary, that the steps of an analysis are correctly timed (e. g. reaction times, wait time, etc., can be exactly specified).
-
Page 81: Store A User Program
Expanded programs 3. Press the Formula key. A list of available formulas (linear and 2nd and 3rd order polynomial order) is displayed. Up to 4 coefficients can be entered, depending on the selected formula. 4. Press the required formula. According to the selected formula, the required factors (a, b, c...) are shown. -
Page 82: Free Programming" Program Type
Expanded programs Timer 1 / Timer 2 / Timer 3 / Timer 4: Up to four time intervals can be defined as timers with this function. Descriptions of the individual work steps, such as shaking, waiting, and stirring can be allocated to the timers. 1. - Page 83 Expanded programs Program Number: The program number is a specific test number, with which the program can subsequently be called up from the selection list in the User Programs menu or the Favorites menu. 2. Enter a program number between 9000 and 9099. The lowest available number appears automatically.
-
Page 84: Measurement Process
Expanded programs Table 10 Definitions of the program points Program point Description Name Name of the analysis parameter Version An abbreviation or version number assigned by the user is entered here. Exact definition of the test: the number of wavelengths at which readings are carried out, the Measurement process number of absorbance readings needed, the keys to be used, any waiting periods between readings, etc. - Page 85 Expanded programs Content and definition of the keys [Z] key / Zeroing 1. Press [Z] to program a zero reading. 2. Press OK to confirm. 3. Press New. 4. Press Zeroing and enter the wavelength for which the zero reading is to be performed. 5.
- Page 86 Expanded programs Key { } Elements of the reading sequence that are to be repeated are placed in brackets. The left bracket { marks the start of the sequence to be repeated and the right bracket } marks the end. Note: The showing the right bracket remains inactive until a left bracket is entered.
-
Page 87: Enter The Calibration Formula (Evaluation Formula)
Expanded programs 6.1.2.3 Enter the calibration formula (evaluation formula) The calibration formula (evaluation formula) defines the calculation and display of intermediate and final results. The previously defined elements of the measuring sequence are the basis for calculating the concentrations. Enter calibration formula C1 1. - Page 88 Expanded programs Table 11 Description of the keys for the editing of formulae Screen Description Press the Abs/Variables key to select, from the displayed list, the required element of the defined Abs/Variables measuring sequence and therefore the corresponding reading wavelength, so that this can be taken into account in the formula.
- Page 89 Expanded programs Table 11 Description of the keys for the editing of formulae(Continued) Screen Description Press >=< to include logic statements/links/conditions in the formula. The following functions are available: = (Equal to), < (Less than), > (Greater than), <= (Less than or equal to), >= (Greater than or equal to), IF, THEN, ELSE When the evaluation formula C1 has been entered...
-
Page 90: Enter Variables
Expanded programs 6.1.2.4 Enter variables 1. Mark the Variables row in the data overview. 2. Press Edit. 3. Select the variable to be edited. 4. Press Edit and enter the data (refer to process specification) (for F1, F2, λ1, U1 etc.) 5. -
Page 91: Add To Favorites
Expanded programs 1. Press User Programs in the Main Menu. The User Programs list will appear. 2. Highlight the selection by pressing it or Select by Number to search for the program by number. 3. Press Program Options. Using Add to favorites, add the selected program to the favorite list. -
Page 92: Delete Program
Expanded programs 6.1.4.3 Delete program 1. Press Delete. 2. Press OK to confirm. The program will be deleted from the list of user programs. Note: If the stored program is deleted in User Programs, it will also be deleted in Favorites Programs. Favorites The most frequently used tests/methods in the Stored Programs menu and the User Programs menu can also be added to the list... -
Page 93: Standard Addition - Monitoring/Checking Results
Expanded programs 4. Press OK to confirm. Note: If a Favorite Program is deleted, it will stay in the User Programs or Stored Programs. Note: If the stored program is deleted in User Programs, it will also be deleted in Favorites Programs. Standard Addition - monitoring/checking results The accuracy of readings (their correspondence with the actual concentration of the analyte in the sample) and their precision... -
Page 94: Complete A Standard Addition
Expanded programs Measures to identify other interference factors: Checklist: 1. Check if the procedure is completed correctly: a. Are the reagents added in the correct order? b. Is enough time allowed for colour development? c. Is the correct glassware in use? d. - Page 95 Expanded programs Maximum Method Volume/Sample volume 1. Press Stored Programs in the Main Menu. 2. Select the required program. 3. Press Start. 4. Analyze a sample without added standard solution in accordance with the instructions in the Procedures Manual. When the reading is complete, leave the sample cuvette/cell in the cuvette/sample cell compartment.
- Page 96 Expanded programs 10. Press the keys to change the standard addition volumes. Use the alphanumeric keypad to enter the new data. 11. Press OK to confirm. Description of the table of readings • The first column shows the standard addition volume. 0 ml stands for a sample containing no added standard.
-
Page 97: Single Wavelength (Absorbance, Concentration And Transmittance Readings)
Expanded programs Single Wavelength (absorbance, concentration and transmittance readings) The Single Wavelength mode can be used in three ways. For sample readings at a single wavelength, the instrument can be programmed to measure the absorbance, % transmittance or concentration of the analyte. •... - Page 98 Expanded programs Table 12 Options for Single Wavelength(Continued) Options Description Save as User Program To store the selected parameters as a User Program, refer to section 6.1, page Recall measurement Recall saved measurement data, wavelength scans or time courses, refer to section 5.3, data page...
-
Page 99: Take Single Wavelength Readings (Single Reading)
Expanded programs 6.4.2 Take single wavelength readings (single reading) 1. Insert the zero solution cell into the cell compartment. 2. Press Zero. Note: The Read key is only active after the zero reading has been completed. 3. Insert the analysis cell into the cell compartment. 4. - Page 100 Expanded programs Table 13 Multi wavelength setup options Options Description More For further Options Recall measurement Recall saved measurement data, wavelength scans or time courses, refer to section 5.3, data symbol page %Trans/Ext (% To switch to % transmittance, concentration or absorbance readings Trans/Abs) To input the wavelength setting.
- Page 101 Expanded programs ) / K ) / (K refers to the absorbance at wavelength 1 refers to the absorbance at wavelength 2, etc. refers to the coefficient at wavelength 1 refers to the coefficient at wavelength 2, etc. If a subtraction has to be completed, the factors can be entered with a minus sign.
-
Page 102: Complete A Reading In The Multi Wavelength Mode
Expanded programs Concentration Resolution: 1. Press Concentration Resolution in the "Options" menu. 2. Select the resolution. 3. Press OK to confirm. 4. Press Return to return to the results screen. 6.5.2 Complete a reading in the Multi Wavelength mode 1. Insert the zero solution cell into the cell compartment. 2. -
Page 103: Set Up The Wavelength Scan
Expanded programs 6.6.1 Set up the wavelength scan Press Wavelength Scan in the Main Menu. Press Options for Parameter Setup. Table 14 Options during wavelength scan Option Description More Further options are displayed Folder icon To store the scan data From the displayed list of stored scans, a record is selected for use as a reference scan/superimposed scan. - Page 104 Expanded programs 6. Enter the upper wavelength. 7. Press OK to confirm. Note: Do not select the same wavelength for minimum and maximum. 8. Highlight the required wavelength step. Note: The selection of the interval influences the duration and resolution of the Wavelength Scan. Scans with a high resolution take longer than scans with a low resolution.
-
Page 105: Perform A Wavelength Scan
Expanded programs 5. Press Return to return to the Scan mode. Note: The Integral is shown instead of the date on the display. Note: For the next scan reading the setting for the Integral will be On. Scale & Units 1. -
Page 106: Navigation Of The Wavelength Scan Graph Or A Wavelength Scan Analysis
Expanded programs The Wavelength Scan is complete, if • the graph is shown full-size, • the scaling of the x-axis occurs automatically, • the Cursor functions in the vertical navigation bar are highlighted. • a signal sounds 6.6.2.1 Navigation of the wavelength scan graph or a wavelength scan analysis Table 15 Navigating the wavelength scan Cursor function/ Description... - Page 107 Expanded programs 3. To complete the wavelength scan reading, refer to section 6.6.2, page 105. • The newly plotted wavelength scan curves are shown in black. • The absorbance or transmittance value and the associated wavelength are highlighted in black. •...
-
Page 108: Time Course Of Absorbance/Transmittance
Expanded programs Time course of absorbance/transmittance The Time Course mode is used to collect data in either absorbance or transmittance for a user-specified length of time. This data can be displayed in either graphic or tabular format. While the time scan is taking place, the cell compartment cover must be closed. -
Page 109: Time Course Scan Reading
Expanded programs Time & Interval: 1. Press Time & Interval in the "Options" menu. 2. Enter the total time and measurement interval. 3. Press OK to confirm. Note: In total, 500 measuring steps can be accomplished during a scan. To select a total time and a time interval that would cause this number of readings to be exceeded, the time interval is defined automatically and the OK key is inactivated. -
Page 110: Analysis Of Time Course Data
Expanded programs • Select Mark to mark the next data point collected. This mark is not used by the instrument, but is available for the user and may indicate a significant event, such as the addition of a sample or other reagent. The mark is also shown in the table. •... -
Page 111: System Checks
Update the instrument software To obtain the software for the update from the Internet at www.hach-lange.com. 1. Go to http://www.hach-lange.com. 2. Select the country and go to Download>Software. 3. Enter DR 3900 in "Search for documents". 4. Navigate to the corresponding file for download. -
Page 112: Optical Checks
Expanded programs 7. Connect the USB memory stick to the USB port (type A) on the instrument, refer to section 3.5, page 8. Press OK to confirm. The link is established automatically and the software is updated. 9. Press OK to return to the "System Check" menu. Note: After the instrument update, a prompt to restart the instrument will be displayed. -
Page 113: Test Solution
Expanded programs 5. Press Verification. 6. Insert cell adapter A (Figure 3, page 19) in cell compartment (2). 7. Remove any remaining cells from the cell compartment. 8. Close the cell compartment cover. 9. Press Start. 10. Follow the directions on the display and set various filters one after another in the order displayed. - Page 114 Expanded programs 1. Press Test Solution in the "Optical Checks" menu. 2. Press Nominal Values. 3. Press Edit. An automatic menu guidance queries values (filters, wavelength, and nominal, minimum and maximum values) given in the quality control certificate, to the following specifications: 4.
-
Page 115: Wavelength Check
Expanded programs 7. Inset sample cell 1 (Figure 3, page 19) in cell compartment (1) a press Next. 8. Follow the dialog indicated. 9. After the fifth test cell, the photometrical accuracy is displayed in a log. 6.8.3.3 Wavelength check The Wavelength Check test is used to check wavelength accuracy at 807 nm. -
Page 116: Absorbance Check
Expanded programs 1. Press Stray Light Check in the "Optical Checks" menu. 2. Remove any cuvettes/analysis cuvettes from the cell compartment. 3. Place the cell adapter (A) for 10-mm rectangular cells in the cell compartment (2). 4. Close the cell compartment cover. 5. -
Page 117: Aqa - Analytical Quality Assurance
Expanded programs 7. Place the analysis cell in the cell compartment. 8. Close the cell compartment cover. 9. Press Read. 10. Remove the analysis cell. 11. Close the cell compartment cover. 12. Press Zero. 13. Place the analysis cell in the cell compartment. 14. -
Page 118: Aqa Standard Configuration
Expanded programs 6.8.4.1 AQA Standard configuration The working method, photometers, and accessories can be checked by the analysis of a standard solution. 1. Press AQA Standard A screen with standard sets opens (not available on all models), alternatively an individual standard can be defined. Select Options>New to define a new standard. -
Page 119: Aqa Addition
Expanded programs 9. Select Options>Reminder to enter an automatic interval when a standard analysis is required to be carried out. 10. Press On. 11. Select the required interval. Press OK to confirm the entry. 12. Select a unit for the interval. Press OK to confirm the entry. 6.8.4.2 AQA Addition Analysis of an addition solution allows for a check for errors and... -
Page 120: Multiple Determination
Expanded programs 3. Enter the required interval, and the system will automatically issue a prompt to add an analysis. Press OK to confirm the entry. 4. Define the required unit for the interval. Press OK to confirm the entry. 6.8.4.3 Multiple Determination 1. -
Page 121: Dilution
Expanded programs 6.8.4.4 Dilution 1. Press Dilution. 2. Press On. 3. Select the required interval. Press OK to confirm the entry. 4. Select a unit for the interval. Press OK to confirm the entry. 5. Enter the dilution factor. Press OK to confirm. 6. - Page 122 Expanded programs 1. Press Instrument Backup in the "System Check" menu. 2. Insert the USB stick (refer to section 3.5, page 18). 3. Press Store to start a Backup. If the file was stored, the message "Instrument Backup is stored" will be displayed.
-
Page 123: Service Menu
Expanded programs 6.8.6 Service menu Use of the service menu requires a service code. This menu is reserved exclusively for servicing tasks. 6.8.7 Service time In order to make sure a regular inspection is performed, an automatic memory reference for the service times can be entered. -
Page 124: Toolbar
Expanded programs After a lamp is replaced, the display of the switch-on cycles is reset to 0. 1. Press Lamp History in the "System Check" menu. 2. Press Reset and the lamp data are reset. 3. Press OK to return to the "System Check" menu. Toolbar The right of the display contains a toolbar with various programs. -
Page 125: Timer
Expanded programs 6.9.3 Timer Use this function to activate a timer at any time. 1. In the toolbar, press Timer. 2. Enter the required time and confirm with OK. The count-down starts automatically. 3. Press Close to let the timer run in the background. Press Cancel to stop the timer. -
Page 126: Website Dr 3900
Expanded programs Data transfer is either via memory card or network (LAN). For a detailed description, refer to the Link2SC operating instructions. 6.9.7 Website DR 3900 Use this function to call up an Internet website on an existing network connection. Current software updates, as well as documentation and information on the DR 3900 can be found here. -
Page 127: Section 7 Maintenance
Section 7 Maintenance C A U T I O N Potential Chemical, Biological Eye and Skin Hazards. Only qualified personnel should conduct the tasks described in this section of the manual. N O T I C E Remove all cells remaining in the instrument. Dispose of the cells or their contents in an authorized manner. -
Page 128: Lamp Replacement
Maintenance 2. Afterwards, rinse the cuvettes/sample cells several times with tap water and then thoroughly with deionized water. Note: Glass cuvettes/sample cells that have been used for organic solvents (such as chloroform, benzene, toluene, etc.) must be rinsed with acetone before being treated with cleaning agents. In addition, another rinse with acetone is necessary as a final treatment step before the cuvettes/sample cells are dried. - Page 129 Maintenance 7. Lift out the lamp holder upwards. 8. Turn the lamp holder so that the connector with the cable guide points forwards. 9. Push the clamp slide as far as possible to the right (Step 1). 10. Grasp the connector along with the lamp, pulling it out of the lamp holder (Step 2).
-
Page 130: Exchange Of The Replaceable Cell Compartment
Maintenance 4. Install the lamp holder in the instrument. Note: Take care that the lamp cable is not pinched by the cable guide. 5. Using a cross-head screwdriver, tighten the two lamp holder screws. 6. Replace the lamp cover. 7. Using a slot-head screwdriver tighten the cover screws. 8. - Page 131 Maintenance 4. Lift the cell receptacle upwards and out. 5. Emplace the new cell receptacle so that the pressure rollers guide slot is to the left. 6. Using a cross-head screwdriver, tighten the two screws on the floor of the cell compartment. 7.
- Page 132 Maintenance...
-
Page 133: Section 8 Troubleshooting
Section 8 Troubleshooting Error displayed Definition Resolution Insert the light shield. Attention! Readings with barcode cuvettes Please insert the light shield. generally require the light shield. Press OK. Reinsert the cell. Barcode label not read Barcode faulty If the barcode is not recognised, contact the manufacturer or his representative. -
Page 134: Troubleshooting
Troubleshooting Error displayed Definition Resolution Error copying from USB memory Start the procedure again or contact the Error during update stick. manufacturer or his representative. Make sure that the instrument is Error in FTP connection. FTP error connected to the network. Fault Program not accessible. - Page 135 Troubleshooting Error displayed Definition Resolution If possible, select a test with a lower The measured absorbance is below the Under measuring range reading range or use a cuvette with a calibration range of the test longer path length The analysis is possibly erroneous due Possible interference by: Interference Check to interferences.
- Page 136 Troubleshooting...
-
Page 137: Section 9 Replacement Parts
Section 9 Replacement parts Accessories Description Cat. No. SIP 10 sipper set for DR 3900 with 1 inch round cell, EU LQV157.99.10001 RFID read/write device LOC 100: Transponder for location RFID, EU LQV156.99.10001 DR/check gel test standard 2763900 Verification kit LZV537 Test solution LZV810... -
Page 138: Replacement Parts
Replacement parts Replacement parts Description Cat. No. Halogen lamp LZV565 Cell adapter A for 1-cm rectangular and 1-inch round cells LZV846 Cell adapter B for 3-cm rectangular cells, China only LZV847 Light shield LZV849 Bench top power supply LZV844 Power cord EU YAA080 Power cord CH XLH051... -
Page 139: Section 10 Contact
HACH Company Repair Service in the Repair Service in Canada: Repair Service in World Headquarters United States: Latin America, the Hach Sales & Service Caribbean, the Far East, P.O. Box 389 HACH Company Canada Ltd. Indian Subcontinent, Africa, Loveland, Colorado... - Page 140 Contact HACH LANGE D.O.O. ΗΑCH LANGE E.Π.Ε. HACH LANGE D.O.O. HACH LANGE MAROC SARLAU Fajfarjeva 15 Αυλίδος 27 Ivana Severa bb SI-1230 Domžale GR-115 27 Αθήνα HR-42 000 Varaždin Villa 14 – Rue 2 Casa Tel. +386 (0)59 051 000 Τηλ.
-
Page 141: Section 11 Warranty, Liability And Complaints
Section 11 Warranty, liability and complaints The manufacturer warrants that the product supplied is free of material and manufacturing defects and undertakes the obligation to repair or replace any defective parts at zero cost. The warranty period for instruments is 24 months. If a service contract is taken out within 6 months of purchase, the warranty period is extended to 60 months. - Page 142 Warranty, liability and complaints...
-
Page 143: Appendix A Help Guide
DR 3900, for the execution of a stored program or procedure in accordance with process specifications. The Help Guide is available for the most used HACH LANGE tests and the Hach powder pillow reagent tests. A.1 Display of the Help Guide for stored programs 1. -
Page 144: A.2 Display Of The Help Guide For Barcode Programs
Help Guide A list of preset times will be displayed. 6. Select the necessary time. 7. After the timer has finished, return to the Help Guide by pressing the information icon. 8. The next help screen will be activated 9. Press Cancel to return to the reading screen of the test/method. - Page 145 Help Guide 7. Press Cancel to return to the measurement screen for the test. 8. Press the information icon to return to the last current page of the Help Guide and complete the test. 9. Insert the zero cell or sample cell (corresponding to the process specification) into the cell compartment.
- Page 146 Help Guide...
-
Page 147: Index
Index Absorbance Check ..........116 Editing Tests ............. 62 Absorbance Formula ..........100 Ethernet communication .......... 39 Alphanumeric keypad ..........25 Ethernet port ............18 AQA ............... 117 Audio signals ............36 Factory Service ............123 Favorites ............26, 63, 92 Barcode Programs ...... - Page 148 Index Startup process ............23 Stored Data .............. 44 Operator ID .............. 27 Stored Programs ..26, 56, 57, 58, 59, 60, 62, 63, 66 Optical Checks ....... 112, 115, 116, 123 Stored programs ............57 Output Checks ............123 Stray light ..............
- Page 149 Index Wavelength selection ..........9 Wavelength spectrum ..........103 Wavelength setting ..........108...
- Page 150 Index...
Need help?
Do you have a question about the Lange DR 3900 and is the answer not in the manual?
Questions and answers