Table of Contents
Advertisement
Advertisement
Table of Contents

Related Manuals for Ozeri CardioTech BP2M


Summary of Contents for Ozeri CardioTech BP2M
- Page 1 Premium Series DIGITAL BLOOD PRESSURE MONITOR Model BP2M...
-
Page 2: Table Of Contents
Table of Contents Introduction Important Safety Information Health and Blood Pressure Values Suggestions Before Measuring Blood Pressure Device Description Description of Control Buttons Description of LCD Display Symbols Installing/Replacing Batteries Programming Date and Time Using the Wrist Cuff Correct Measurement Position Measuring your Blood Pressure About Blood Circulation Irregular Heartbeat? -
Page 3: Introduction
Introduction Thank you for purchasing an Ozeri Fully Automatic Wrist Blood Pressure Monitor. The device uses the oscillometric method of blood pressure measurement. This method detects the movement of your blood through your brachial artery, and converts your blood pressure into a digital reading. The unit is simple to use because no stethoscope is needed while using an oscillometric monitor. -
Page 4: Health And Blood Pressure Values
• Operate this device only as it is intended. Do not use this device for any other purpose. • This device is intended for use in measuring blood pressure and heart rates for adults only. Do not use on infants or persons who cannot express their intentions. -
Page 5: Suggestions Before Measuring Blood Pressure
Suggestions before Measuring Blood Pressure 1. Rest for at least 5-10 minutes before taking your blood pressure. 2. Avoid eating, smoking, exercising, bathing and drinking (especially alcohol, caffeine or tea) for at least 20-30 minutes before taking a measurement, and avoid talking while measuring your blood pressure. -
Page 6: Device Description
Device Descriptions Description of Control Buttons Description of Control Buttons POWER: Turns the unit on or off. START: pressure and pulse measurement. TIME: MEMO/▲: Displays the previously recorded blood pressure reading. This button is also used to change the Date & Time during programming. -
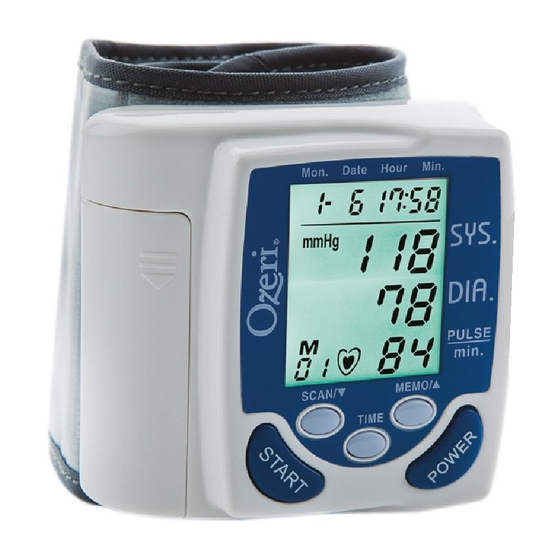
Page 7: Description Of Lcd Display Symbols
Description of LCD Display Symbols Installing/Replacing Batteries To prevent the accidental deletion of the blood pressure readings stored in Memory, make sure the device is turned off before installing / replacing the batteries. 1. Remove the battery cover by sliding it in the direction indicated by the arrow. -
Page 8: Programming Date And Time
Note: a. When (Low Battery Indicator) appears on the display, the batteries are low in charge. Change the batteries as soon as possible. A low battery charge can affect the ability of this device to take correct measurements. b. Replace old batteries with new ones immediately. -
Page 9: Using The Wrist Cuff
setting. The number representing the Month 4. Follow the same instructions as above to set the Month, Date, Hour and Minute settings. Note: After replacing batteries, always proceed to use the blood pressure monitor. Using the Wrist Cuff 1. Remove all clothes from your arm allowing the cuff to make direct contact on your skin. -
Page 10: Correct Measurement Position
4. Hold the bottom part of the cuff and wrap it comfortably around your wrist. The top and bottom edges of the cuff should be tightened evenly around your wrist. (Do not pull strongly on the cuff. Do not apply the wrist cuff too tightly.) 5. - Page 11 resting position: Wrist should also be relaxed and in a natural resting position:...
-
Page 12: Measuring Your Blood Pressure
Measuring Your Blood Pressure 1. Press the POWER button to turn on the device. seconds during boot up. The screen will then time. Press UP or DOWN to choose user 1, 2 or 3. If no specific user is chosen, the default user is always “1”. -
Page 13: About Blood Circulation
a. Green indicates a normal blood pressure level b. Orange indicates prehypertension. c. Red indicates hypertension. 4. The blood pressure and pulse reading will remain on the screen for 1 minute before the device automatically powers off. About Blood Circulation The blood circulation is responsible for supplying the body with oxygen. -
Page 14: Irregular Heartbeat
Irregular Heartbeat? that varies by 25% from the average of all heartbeat intervals while the unit is measuring the systolic and diastolic blood pressure. If an irregular rhythm is detected more than twice during measurement, the irregular will appear on the display along with the measurement results. -
Page 15: What Is Arrhythmia
What is Arrhythmia? A heartbeat is stimulated by electrical signals that cause the heart to contract. Arrhythmia is a condition where the heartbeat rhythm is system that drives the heartbeat. Typical symptoms are skipped heartbeats, premature contraction, an abnormally rapid (tachycardia) or slow (bradycardia) pulse. -
Page 16: Recall/Review Previous Measurements
Recall/Review previous measurements Note: The memory feature does not require following instructions apply whether the device is on or off. Press the MEMO/▲ button to recall/review the most recent measurement. Continue to press the MEMO/▲ button to review each previous measurement. If there are any measurements stored in the memory, the latest measurement (M 01) will appear when you press the MEMO/▲... -
Page 17: Using The Average Feature
Scanning previous measurements in 10 measurement increments: press SCAN/down to recall/review the measurements in 10 measurement increments: from M10, M20, M30, ... etc. Using the Average Feature The blood pressure monitor provides an average blood pressure reading calculated based on the total measurements stored in memory. -
Page 18: Deleting All Measurements
Deleting All Measurements To delete all measurements for a user, first turn on the device and press the MEMO/UP button to select user 1, 2 or 3. Then turn off the device. Once off, press and hold the SCAN/▼ button until the symbol “dEL ALL”... - Page 19 Condition Cause Solution Cuff is not Ensure proper fails or does properly wrist position attached and that the properly. to the wrist applied to wrist leaving 1/4”~1/2” (0.6 cm - 1.3 cm) between the edge of the cuff and the palm of hand.
- Page 20 When • Ensure proper attempted wrist position to measure and that the blood pressure, the applied to left LCD screen wrist leaving displays an 1/4”~1/2” error message (0.6 cm - 1.3 cm) and fails to between the complete edge of the cuff measurement.
- Page 21 The blood Blood pressure pressure can vary based monitor on stress, time displays of day, exercise, different consumption of results that alcohol, smoking, vary too tightness of much. cuff, and other variables. A single measurement does not provide an accurate indication of blood pressure.
-
Page 22: Error Messages
ERROR MESSAGES Error Cause Solution Indicators Incorrect • Cuff is not posture during fastened well. measurement. • Wait at least 3 Can also be minutes before caused by taking another talking or measurement other small • Keep your exertions wrist at heart during level during the measurement... - Page 23 between the edge of the cuff and the palm of hand • Cuff is not fastened well. See above instructions. • Pump, venting valve or failure. Please contact your distributor for warranty service. SPECIFICATIONS Model No. BP2M Display LCD Digital Display Measurement Oscillometric method Method...
- Page 24 Accuracy / Pressure: ± 3mmHg or 2% Calibration of reading Pulse: ± 5% of reading Memory 399 measurements per capacity user (total 3 users) pump Automatic liner pressure Pressure Automatic exhaust valve Release Sensor Semiconductor pressure sensor Power Supply 3V DC (2 “AAA” alkaline batteries) Measuring 1 mmHg...
- Page 25 Unit Weight Approx. 105 grams (not including batteries) Cuff Size Wrist Circumference approx. 135~195mm (5 1/4~ 7 3/4 inch) Unit dimensions Approx. 74 (l) x 72 (w) x 25 (h) mm Accessories Storage Case, Instruction Manual...
-
Page 26: Care And Maintenance
Care and Maintenance Care 1. Keep the unit in the storage case when not in use. 2. Clean the unit with a soft dry cloth. Do not use any abrasive or volatile cleaners. Maintenance • Keep the unit in the storage case when not in use. -
Page 27: Warranty Information
Ozeri. Please pack carefully to avoid damages in transit. Under this warranty, Ozeri will repair or replace any parts found to be defective due to a manufacturer’s... - Page 28 Customer service: 1-877-299-1296 (USA) Email: support@ozeri.com (Ozeri and its subsidiaries assume no liability for damage caused by the use of the Ozeri Blood Pressure Monitor other than for its intended use or as instructed above and in the User Manual.)
- Page 30 Ozeri Customer Service Customer service: 1-877-299-1296 or Email: support@ozeri.com...
Need help?
Do you have a question about the CardioTech BP2M and is the answer not in the manual?
Questions and answers