Table of Contents
Advertisement
Advertisement
Table of Contents

Related Manuals for SportDOG TEK 1.5


Summary of Contents for SportDOG TEK 1.5
- Page 1 OPERATING GUIDE PLEASE READ THIS ENTIRE GUIDE BEFORE BEGINNING...
- Page 2 Hereinafter Radio Systems Corporation, Radio Systems PetSafe Europe Ltd., Radio Systems Australia Ltd. and any other affiliate or Brand of Radio Systems Corporation may be referred to collectively as “We” or “Us”. IMPORTANT SAFETY INFORMATION EXPLANATION OF ATTENTION WORDS AND SYMBOLS USED IN THIS GUIDE This is the safety alert symbol.
- Page 3 If the condition persists beyond 48 hours, see your veterinarian. For additional information on bed sores and pressure necrosis, please visit the Support section for Remote Trainers at www.sportdog.com. These steps will help keep your dog safe and comfortable. Millions of dogs are comfortable while they wear Contact Points.
-
Page 4: Table Of Contents
To get the most protection out of your warranty, please register your product within 30 days at www.sportdog.com. By registering and keeping your receipt you will enjoy the product’s full warranty and, should you ever need to call the Customer Care Centre, we will be able to help you faster. -
Page 5: Components
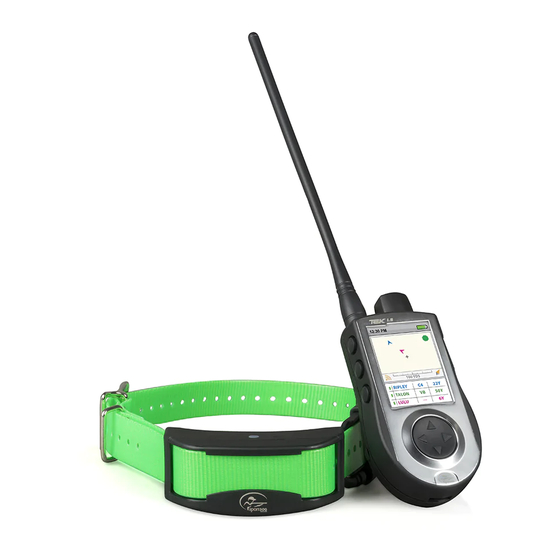
GPS antenna mounted on the collar to track the location of your dog. The Handheld Device sends a signal, activating the E-Collar Module to deliver a harmless stimulation.* With proper training, a dog will learn to associate the signal with a command. Like all SportDOG products, this model features adjustable static ®... -
Page 6: Key Definitions
KEY DEFINITIONS HANDHELD DEVICE: Receives and displays location updates from the GPS Collar. It sends the radio signal to the E-Collar Module. It is waterproof and can be submerged in water to a depth of 1.5 m. ON/OFF BUTTON: Pressing and releasing this button turns the Handheld Device ON and OFF, and also controls the display’s brightness level. - Page 7 GPS COLLAR: Receives location from GPS and transmits location updates to the Handheld Device. It is waterproof and can be submerged in water to a depth of 7.6 m. ON/OFF BUTTON: Pressing this button and releasing when the GPS Receiver Indicator Light comes on will turn the unit on.
-
Page 8: Icon Definitions
ICON DEFINITIONS The following icons are used throughout the TEK Series 1.5 software interface. ICON FUNCTION GENERAL ICONS 09:40 TIME INDICATOR: Displays the current local time. Default is 24H format. BRIGHTNESS INDICATOR: Displays the current brightness level. BATTERY GAUGE: Displays the battery charge status of the Handheld Device. BATTERY GAUGE: Displays the battery charge status of the GPS Collar. -
Page 9: Main Menu
Available only with the TEK-V1.5LT system. For the TEK-V1.5L system, purchase the TEK TRAINING ICONS Series E-Collar Module accessory to add E-Collar functionality to a GPS Collar. CONTINUOUS STIMULATION: You control both when and how long stimulation is delivered, up to a maximum of 10 seconds. After 10 seconds, the Handheld Device will “time-out”... -
Page 10: Operate The Tek Series 1.5 Handheld Device
OPERATE THE TEK SERIES 1.5 HANDHELD DEVICE The following terms are used throughout this Operating Guide: SELECT: Use the Up, Down, Left, or Right Arrow Keys to scroll through and highlight menu items or areas of the screen. A selected item is highlighted in orange. FIELD: The location on a screen where data can be entered. -
Page 11: Prepare The Gps Collar/E-Collar Module
PREPARE THE GPS COLLAR/E-COLLAR MODULE YOU MUST COMPLETE THESE STEPS PRIOR TO USING THIS DEVICE FOR THE FIRST TIME. TO CHARGE THE GPS COLLAR/E-COLLAR MODULE Attach the supplied Charge Cradle so that the SportDOG Brand ® logo on the Charge Cradle covers the SportDOG Brand logo on ®... - Page 12 GPS COLLAR RECEIVER INDICATOR LIGHT OPERATIONAL MODE LIGHT LIGHT FUNCTION BATTERY SPEAKER FUNCTION COLOUR STATUS Unit is turned on via Green Light is solid in Good Beeps 1-5 times On/Off Button colour during depending on beep sequence GPS Code Unit is turned off via Light is solid in On/Off Button colour during...
- Page 13 ABOUT RECHARGEABLE BATTERIES • The Handheld Device and GPS Collar contain Lithium-Ion (Li-Ion) batteries; never incinerate, puncture, deform, short-circuit, or charge with an inappropriate Charger. Fire, explosion, property damage, or bodily harm may occur if this warning is not followed. •...
-
Page 14: Convert A Gps Collar To A Gps Collar With E-Collar Module
CONVERT A GPS COLLAR TO A GPS COLLAR WITH E-COLLAR MODULE Remove the 2 outer screws from the Location-Only Module with a 3/32 Allen wrench (A). 2. Separate the Location-Only Module from the GPS Collar’s front housing (B). 3. Thoroughly clean inside the front housing with a soft towel, removing any debris. -
Page 15: Fit The Gps Collar Or Gps Collar With E-Collar Module
FIT THE GPS COLLAR OR GPS COLLAR WITH E-COLLAR MODULE To ensure the effectiveness of this product and the comfort and safety of your dog, check the fit of the collar frequently. If you notice that your dog is experiencing skin irritation, discontinue use of the collar for a few days. If the condition persists beyond 48 hours, see your veterinarian. -
Page 16: Prepare The Tek Series 1.5 Handheld Device
STEP :: 02 PREPARE THE TEK SERIES 1.5 HANDHELD DEVICE YOU MUST COMPLETE THESE STEPS PRIOR TO USING THIS DEVICE FOR THE FIRST TIME. TO CHARGE THE HANDHELD DEVICE Lift the rubber cover protecting the Charging Jack. 2. Connect the appropriate Charger Connector to the Charging Jack. 3. -
Page 17: Tek 1.5 Settings
STEP :: 03 TEK 1.5 SETTINGS MAIN MENU When you power ON the Handheld Device or press the BACK button, the main menu displays. The main menu provides the following options: DOG TRACKING: View the location of your dogs and way points in relation to you. - Page 18 LANGUAGE The default is English and there are 10 additional languages available. TO CHANGE THE LANGUAGE: From the main menu, select SETTINGS > LANGUAGE. 2. Use the Arrow Keys to highlight the desired language. 3. Press the Right Arrow Key to change the language. Available Languages : •...
- Page 19 DOG NAME From the main menu, select SETTINGS > MY DOGS > DOG > CHANGE NAME where DOG is the name previously entered for this dog. A text entry screen displays. 2. Press the Arrow Keys to select CLR and press ENTER to clear the name. 3.
- Page 20 STIM RANGE TO CHANGE STIM RANGE SETTINGS FOR A DOG: The STIM RANGE setting allows you to set the stimulation range (low, medium, or high) for the temperament of a specific dog. A dog with a mild temperament should have a low range while a stubborn dog may require a high “STIM BUTTONS”).
- Page 21 ADDITIONAL COLLARS The MY COLLARS screen allows you to configure a new collar, pair the collar to work with your Handheld Device, or share tracking of a collar from another Handheld Device. You can add up to 12 collars to the system. TO ADD A COLLAR: From the main menu, select SETTINGS >...
- Page 22 PAIR THE COLLAR Your system will already be paired when you get it, but in the event you need to pair the Handheld Device to the GPS Collar or GPS Collar with E-Collar Module, follow the steps below. The Handheld Device can support up to 12 collars at a time.
- Page 23 TO CALIBRATE THE COMPASS In order for the TEK Series 1.5 Handheld Device to accurately display your location, you must first calibrate the electronic compass. You should always calibrate the compass after you arrive at a new starting location, after periods of storage or after you install new batteries.
- Page 24 TO SET THE MAGNETIC DECLINATION ANGLE: Magnetic declination is the angle between magnetic north (the direction the north end of a compass needle points) and true north. The declination is positive when the magnetic north is east of true north and negative when the magnetic north is west of true north.
- Page 25 SETTINGS On the SETTINGS menu, you will find a list that allows you to access all the screens on your Handheld Device. See ”TEK 1.5 SETTINGS” section for descriptions of each. S P O R T D O G . C O M...
-
Page 26: My Dogs
MY DOGS The MY DOGS Screen displays a list of your dogs. You can add and remove dogs, assign each dog to a colour-coded collar so it can be tracked, and manage settings for each dog from this screen. DOG LIST Active dog names (up to 12) appear next to their collar colours and inactive dog names appear in grey. - Page 27 STIM BUTTONS The STIM BUTTONS setting allows you to assign the type of stimulation for each User-Defined Stim button according to your training preferences for a particular dog. The buttons are labeled Button 1 (top), Button 2 (middle), and Button 3 (bottom). NOTE: This setting only applies to the specific dog chosen.
- Page 28 DOG DETAILS To view a dog’s details, highlight and select the dog name in the list. To edit a specific detail, highlight the field and press the TRACKING/TRAINING TOGGLE BUTTON. Press the Left Arrow Key at any time to return to the MY DOGS Screen.
- Page 29 STIM BUTTONS The STIM BUTTONS setting allows you to assign the type of stimulation for each User-Defined Stim Button according to your training preferences for a particular dog. The buttons are labeled Button 1 (top), Button 2 (middle), and Button 3 (bottom). NOTE: This setting only applies to the specific dog chosen.
-
Page 30: My Collars
MY COLLARS The MY COLLARS screen allows you to configure a new collar, pair the collar to work with your Handheld Device, or share tracking of a collar from another Handheld Device. COLLAR LIST Active collars appear next to their selected colour and inactive collars appear in grey. You can have up to 12 collars in the list. - Page 31 PAIR COLLAR Your system will already be paired when you get it, but in the event you need to pair the Handheld Device to the GPS Collar with E-Collar Module, follow the steps below. The Handheld Device can support up to 12 collars at a time.
-
Page 32: Training
Every dog is different. Visit our website at www.sportdog.com to find more detailed training tips and guides or contact our Customer Care Centre for further assistance. For a listing of telephone numbers in your area, visit our website at www.sportdog.com. - Page 33 TO FIND YOUR DOG’S RECOGNITION LEVEL: NOTE: Always start at the lowest level and work your way up. Every dog is different and you cannot predict where your dog’s recognition level will be. Watch closely for any slight change in behaviour that tells you your dog is feeling the stimulation.
- Page 34 STIM BUTTONS TO USE TRAINING MODE: The DOG TRAINING screen allows you to send a signal to deliver stimulation to your dog in order to correct a behaviour. You can switch among the dogs currently being trained and select the type and intensity level of stimulation. NOTE: In training mode, the User-Defined Stim Buttons are active, allowing you to select among 3 predefined stimulation types for the currently selected dog.
- Page 35 INTENSITY LEVEL The number displayed in the center of the DOG TRAINING screen is the Intensity Level setting for the current dog. Use the Up or Down Arrow Keys to adjust the level from 1 to 99.* * The default Intensity Level is 1. Each time you adjust the Intensity Level for a dog, that value is remembered between training sessions and recharge cycles.
-
Page 36: Tracking
TRACKING ACQUIRE GPS SATELLITE SIGNALS Before the TEK Series 1.5 Handheld Device can show your current location and the location of your dog(s), both units must acquire a GPS signal fix. TO ACQUIRE GPS SIGNAL FIX: NOTE: Acquiring a GPS signal fix can take several minutes. Go outdoors to an open area with a clear vi ew of the sky. - Page 37 COMPASS NEEDLE The Compass Needle in the bottom-right corner of the map represents the direction to either magnetic north or true north, based on your current SETTINGS. As you turn, the map will rotate and the North Arrow will update to reflect the new heading.* SCALE BAR The scale bar below the map displays the current map scale* and notifies you if the map is set to Auto Scale.
-
Page 38: Compass
COMPASS The TEK Series 1.5 System comes with a built-in electronic compass and GPS tools to track your location and guide you to previously saved locations. From the main menu, select COMPASS. The COMPASS screen displays. NOTE: When using the compass, hold the Handheld Device up to a 45° angle and point the antenna forward along your line of travel. - Page 39 TO RENAME A WAY POINT: From the main menu, select WAY POINTS > WAY POINT NAME where WAY POINT NAME is a previously marked way point. 2. Select RENAME. A text entry screen displays. 3. Use the Arrow Keys to type in the new name. 4.
- Page 40 TRACKED DOGS NOTE: You must have first paired a dog to your Handheld Device before you can use the compass to navigate to a dog, and you must have a good GPS lock of your current location. From the main menu, select COMPASS. The COMPASS screen displays. 2.
-
Page 41: Settings
SETTINGS The SETTINGS screen allows you to customize the operation of the Handheld Device. TO OPEN THE SETTINGS MENU: From the main menu, select SETTINGS. The SETTINGS screen displays the following options: LANGUAGE: Allows the current language to be changed. GENERAL: Includes tracking/training modes, stimulation SETTINGS, action, name, and magnetic declination. - Page 42 TRACKING ONLY: Choose to enable or disable all stimulation functions. Select Yes to make the TEK Series 1.5 a tracking only system. Select No to use an E-Collar with your system. Default TEK-V1.5L: Yes Default TEK-V1.5LT: No STIM LEVELS: Choose the number of increments for the Stim Level. Select from 20 (Default) up to 99. STIM BUTTONS: Set the default Stim Button configuration for when a new dog is added.
- Page 43 TO CHANGE THE USER ID: From the main menu, select SETTINGS > COMMUNICATION > USER ID. 2. Press the Up or Down Arrow Keys to select a User ID number from 0 to 100. NOTE: The User ID value is a number from 0 to 100 that is used to alter the actual ID value that the Handheld Device uses for communication.
- Page 44 DISPLAY The DISPLAY screen allows you to configure the brightness display timer and the power OFF timer. TO CHANGE THE LIGHT DIM TIMER: From the main menu, select SETTINGS > DISPLAY > LIGHT DIM. 2. Press the Right Arrow Key on the Menu Selection Pad to toggle among timer SETTINGS: NO, 30 SEC, 60 SEC, 90 SEC.
-
Page 45: Accessories
TEK-V2CABLE Collar Antenna Id Band TEK-V2IDBANDS Canvas Bag TEK-V2BAG To purchase additional accessories for your TEK-V1.5L-C or TEK-V1.5LT-C, contact the Customer Care Centre or visit our website at www.sportdog.com. GPS Collar with E-Collar Module TEK-2AD-C GPS Collar TEK-2L-C E-Collar Module... -
Page 46: Frequently Asked Questions
E-Collar Module is installed, be sure the extra collar does not interfere with the Contact Points. Can I program my TEK Series 1.5 System Yes. The TEK Series 1.5 Systems is compatible with the TEK-2AD, to work with my other SportDOG TEK-2L-2, TEK-2T, TEK-V2GCRAD, TEK-CARANT, TEK-V2GANT, and ® Brand Systems? TEK-V2GBATT. - Page 47 FREQUENTLY ASKED QUESTIONS TEK-V1.5LT: Is the static stimulation safe for my dog? While continuous and/or momentary static stimulation may be unpleasant, it is harmless to your dog. Electronic training devices require interaction and training from the owner to achieve desired results. Once my dog is trained and has been Your dog may need to wear the E-Collar Module from time to time obeying my commands, will my dog have...
-
Page 48: Troubleshooting
TROUBLESHOOTING The answers to these questions should help you solve any problem you have with this system. If they do not, please contact the Customer Care Centre or visit our website at www.sportdog.com/international. PROBLEM SOLUTION My Handheld Device does not Check to make sure the unit was properly charged. - Page 49 TROUBLESHOOTING TEK-V1.5LT: My dog is not responding when I • Check to see if the E-Collar Module has been turned ON. press a Stim Button. • If your range has reduced from the first time you used it, please check to see if the battery is low in either the Handheld Device or E-Collar Module.
-
Page 50: Terms Of Use And Limitation Of Liability
Radio Systems Corporation are in violation of EU R&TTE regulations, could void the user’s authority to operate the equipment, and void the warranty. The Declaration of Conformity can be found at: www.sportdog.com/eu_docs.php This device complies with Industry Canada licence-exempt RSS standard(s). Operation is subject to the following two conditions: (1) this device may not cause interference, and (2) this device must accept any interference, including interference that may cause undesired operation of the device. -
Page 51: Battery Disposal
If this is not possible, please contact the Customer Care Center for further information. For a listing of Customer Care Center telephone numbers, visit our website at www.sportdog.com. S P O R T D O G . C O M... -
Page 52: Warranty
THREE YEAR NON-TRANSFERABLE LIMITED WARRANTY This Product has the benefit of a limited manufacturer’s warranty. Complete details of the warranty applicable to this Product and its terms can be found at www.sportdog.com and/ or are available by contacting your local Customer Care Centre. - Page 53 TEK :: 2T :: E TEK SERIES GPS COLLAR WITH E-COLLAR MODULE TEK :: 2AD :: E NOT COMPATIBLE WITH TEK SERIES 1.5 OR OTHER SPORTDOG BRAND SYSTEMS. ® *PINK AND GREEN ID BANDS ALSO INCLUDED. ©2017 RADIO SYSTEMS CORPORATION Radio Systems Corporation •...
Need help?
Do you have a question about the TEK 1.5 and is the answer not in the manual?
Questions and answers