Table of Contents
Advertisement
ARCHOS 70b it English
The ARCHOS Team
All the information contained in this manual was correct at the time of publication. However, as we are often updating and improving our products, your device's software may
have a slightly different appearance or modified functionality than presented in this manual.Please register your product at www.archos.com/register.
Table of contents
1. General instructions
1.1. Product care
1.2. First steps
1.2.1. Charging the battery
1.2.2. The startup wizard
1.2.3. Online registration
2. Presentation
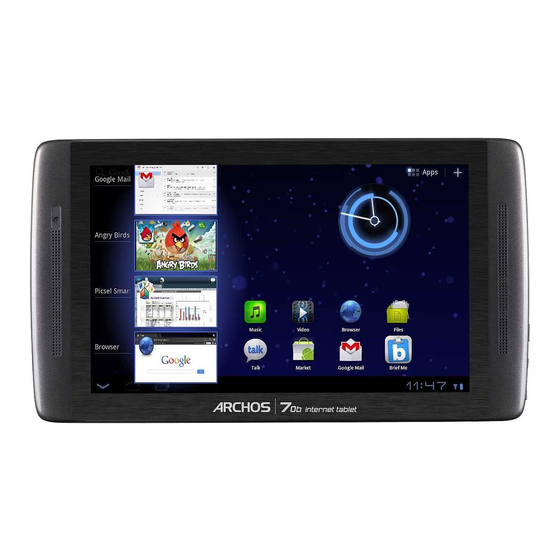
2.1. ARCHOS Description
2.1.1. Main touchscreen buttons
2.1.2. Touchscreen actions
2.2. Using the ANDROID interface
2.2.1. Status Details and Quick Settings
2.2.2. Work with Quick Settings
2.3. Enabling WiFi
2.3.1. Advanced connection
2.4. WiFi connection problems
2.5. Internet navigation
3. Applications
3.1. Music application
3.1.1. Browsing through your music files
3.1.2. The favorites
3.1.3. Music playback
3.1.4. Transferring your music to your ARCHOS
3.2. Video application
3.2.1. Details
3.2.2. Video playback screen
3.3. Tv out
3.4. Gallery application
3.4.1. Playing a slideshow
3.4.2. Putting photos onto your ARCHOS
3.5. Files
3.5.1. Swap
3.6. Browsing Other Computers on the Network
3.7. Accessing shared media files via UPnP
4. Playing your PC's shared media
4.1. Media from your PC's shared folders (SMB)
4.2. PC's shared media files (UPnP)
4.2.1. Setting windows media® player's sharing options
4.2.2. Playing shared Video and Music
4.2.3. Displaying shared Photos
5. Webcam
1. General Instructions
1.1. Product care
In addition to the information in the accompanying Warranty, Legal & Safety Notice, remember that your ARCHOS is an electronic product that needs to be treated with care:
Do not subject it to shock or vibration.
Do not subject it to heat; keep it cool.
Keep it away from water and excessively humid areas.
Keep it away from high electromagnetic fields.
Do not open it up. There are no user-serviceable parts inside. Opening it will void your warranty.
1.2. First steps
1.2.1. Charging The Battery
Before using your ARCHOS for the first time, completely charge its battery. Connect the supplied power charger/adapter/ USB power adapter.
Attention: Use ONLY the supplied ARCHOS charger/adapter/USB adapter on your device.
For the Flash Memory models: Use only the included USB cable to charge your device. Do not expect your device to charge properly when connected to your computer.
The ARCHOS will turn on and start charging. The battery icon will animate a blue "filling" action with a lightning bolt and the power/charge indicator light will remain solid.
When not plugged into a power adapter, the battery icon will display the amount of battery power available.
IMPORTANT: When the battery is completely empty and you plug in your device,
- The charging indicator light will turn on then start to blink within few seconds. The indicator light blinking rapidly means that the device is charging but does not yet have
enough power to start. This charging when off may take some time. Once the device has charged enough to start, it will switch on and display the ARCHOS boot logo.
- If the charging indicator does not blink after few seconds, it could mean that the battery is over discharged.
http://www.archos.com/manuals/A70b_it_EN.html
ENGLISH USER MANUAL
Dear customer
Thank you for choosing this ARCHOS product. We hope that you enjoy using it and that it brings you satisfaction for many years to
come. This tablet running Android™ lets you to download a multitude of applications (Apps), and get the most from the Internet
(surf, e-mail, widgets, etc.), just like you do with your desktop computer. And take advantage of the ARCHOS multimedia
experience when playing back music or video files.
6. Widgets
6.1. Music widget
6.2. Music covers widget
6.3. Analogue clock widget
7. Transferring files
7.1. Connecting the ARCHOS to a computer
7.2. Transferring files to/from the ARCHOS
7.3. Disconnecting
8. Settings
8.1. Wireless & Networks
8.1.1. Pairing
8.2. Sound
8.3. Screen
8.4. Location & security
8.5. Applications
8.6. Accounts and sync
8.7. Privacy
8.8. Storage
8.9. Language input
8.10. Accessibility
8.11. Date & Time
8.12. Repair and formatting
8.13. About tablet
9. Stopping apps
10. Updating the Device
10.1. From your device
10.2. Via computer
11. Troubleshooting
11.1. Resetting your ARCHOS
11.2. Touchscreen problems
11.3. System recovery
11.3.1. To enter into the Recovery screen
11.3.2. Recovery mode options
12. Accessories & Plug-ins
12.1. USB Host cable
12.2. Cinema Plug-in
12.3. Mini-HDMI to Standard-HDMI male/male cable
12.3.1. For more Accessories & Plug-ins, www.archos.com
13. Technical support information
Page 1 of 12
2012-11-19
Advertisement
Table of Contents

Related Manuals for Archos 70B


Summary of Contents for Archos 70B
- Page 1 - The charging indicator light will turn on then start to blink within few seconds. The indicator light blinking rapidly means that the device is charging but does not yet have enough power to start. This charging when off may take some time. Once the device has charged enough to start, it will switch on and display the ARCHOS boot logo.
-
Page 2: Archos Description
After a certain period (few minutes or one hour), the charging indicator starts blinking. 1.2.2. The Startup Wizard The first time you turn on the ARCHOS, the installation wizard will help you configure the main functions of your ARCHOS: language, country, time, etc. 1.2.3. Online Registration Do not forget to register your device. -
Page 3: Touchscreen Actions
4. In the Settings screen, select Wireless & networks. 5. If the WiFi is off, tap on the WiFi line to turn it on. Then select WiFi settings. The ARCHOS will scan automatically for available WiFi networks and show all the wireless networks in range of your device. The list is refreshed continuously. -
Page 4: Wifi Connection Problems
The ARCHOS internet tablets support the 802.11 b, g, and n WiFi protocols. If you cannot connect to your access point, first determine if the problem lies with your access point or with the ARCHOS. Try using another WiFi device, such as a laptop computer or a WiFi enabled telephone and see if that will connect to your access point. If it does, then use the same WiFi connection settings that it has on your ARCHOS. -
Page 5: Video Application
3.2. Video application The Video browser allows you to navigate through and play the video files stored in the ARCHOS internal memory or a micro-SD card (for devices that have a micro-SD card slot) or even files stored on other computers on your local network (see the chapter Playing your PC's shared media). -
Page 6: Gallery Application
When a photo is displayed or photos of a same folder, tap the slideshow button in the upper right corner. If it does not appear, tap the screen to reveal the slideshow button. To make a musical slideshow, go to the music player, start a song, and then go back to the gallery and start the slideshow. To get more impressive results, connect the ARCHOS to a television with the optional video cable to show it to many people at once. -
Page 7: Playing Your Pc's Shared Media
4. Playing Your PC’s Shared Media You don't have to limit yourself to playing only the video, music, and photo files that are stored on your device. When connected to your home WiFi network, your ARCHOS gives you the possibility to watch, directly on your device, the shared media files (videos, music or photos) stored on your computer. There are two main ways to "stream" media to your ARCHOS via WiFi. -
Page 8: Transferring Files
6.3. Analogue Clock Widget 7. Transferring Files When you want to transfer files to or from the ARCHOS (photos, documents, music, video, or applications (.apk files)) you can transfer them via the USB cable or via a wireless http://www.archos.com/manuals/A70b_it_EN.html 2012-11-19... -
Page 9: Connecting The Archos To A Computer
8. Settings Use the settings to modify your ARCHOS to function for your particular needs. You can scroll the screen up and down to reveal settings that you don’t initially see. When it is possible, you can use the Menu icon to access more options within one of the settings. -
Page 10: Stopping Apps
Some third party software includes special accessibility options for visually or hearing impaired users. Checking this option will enable those features. 8.11. Date & Time Automatic: Enable this option if you want to set the clock automatically when your ARCHOS is connected to a WiFi network. Disable this option to set the current date & time manually. -
Page 11: Updating The Device
12.1. USB Host cable This cable will allow your ARCHOS to have a full-sized USB Host port. That is, you can connect a camera, a USB stick, a USB memory card reader, a mouse, a keyboard, a combination mouse/keyboard, or a powered hard drive to your ARCHOS*. By using this cable, your ARCHOS can download all the photos from your camera directly, without having to transfer the photos to your computer first. -
Page 12: Technical Support Information
(it is easier to do on a regular computer). We'll make our best effort to get back to you within two business days with your answer. Also, see the frequently asked questions section at www.archos.com/faq.
Need help?
Do you have a question about the 70B and is the answer not in the manual?
Questions and answers