Table of Contents
Advertisement
Advertisement
Table of Contents

Related Manuals for TaoTronics TT-HS005

Summary of Contents for TaoTronics TT-HS005
-
Page 1: User Guide
TaoTronics Cloud IP Camera USER GUIDE Model NO.: TT-HS005... -
Page 2: Table Of Contents
Table of Contents 1. Introduction ....................3 1.1 Package Contents ................. 3 1.2 Product Diagram ..................4 2. Setting Up ...................... 5 2.1 Log In ......................5 2.1.1 Accessing the IP Camera ..............5 2.1.2 Scan the QR Code (IP CAM ID number) ......... 7 3. -
Page 3: Introduction
1. Introduction Thank you for choosing TaoTronics Cloud IP Camera. Please read this manual carefully and keep it in a safe place for future reference. If you need any further assistance, please contact our customer support team or email us at support@taotronics.com. -
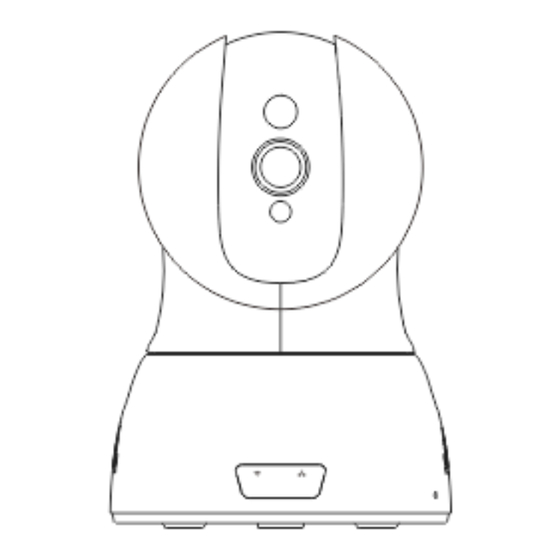
Page 4: Product Diagram
1.2 Product Diagram Reset Button Note: Press the Reset Button to restart the camera. Press and hold the Reset Button for 5 seconds to restore to factory settings. 2. Setting Up Please refer to the Quick Installation Guide for initial device setup. -
Page 5: Log In
2.1 Log In 2.1.1 Accessing the IP Camera Please refer to the Quick Installation Guide to download the E-Hawk app. After opening the app, tap Sign in to enter the login page, enter the camera's ID number and password. (Each IP Camera has a unique ID number and password.) - Page 6 Note: To protect your privacy, please modify the camera’s password after initial access. You can also tap on the "Sign up" button on the lower right to register a user account, then login to add / manage multiple cameras.
-
Page 7: Scan The Qr Code (Ip Cam Id Number)
2.1.2 Scan the QR Code (IP CAM ID number) Tap on the QR code icon next to the User Name and the QR code scanning page will pop up. Scan the QR code on the bottom of the IP Camera to automatically log in. 3. - Page 8 For Android: For iOS:...
-
Page 9: Camera Status
3.1.2 Camera Status You can see the online status of each camera. A green status light indicates that your camera is Green online and ready. A red light indicates the camera is offline and is currently not accessible remotely. A yellow light means the camera is online, but a camera software upgrade is pending or your Yellow password has been changed. -
Page 10: Image Settings
3.1.3 Image Settings to display and hide the status bar icons. For Android:... - Page 11 For iOS: You can access Resolution, Password, Guest Password, Options, Exit, and About through this icon. Set video size Choose the resolution of the images User admin Modify the account admin password password User guest Modify the account guest password password Exit Exit Video Interface...
-
Page 12: Interface Button Functions
3.1.4 Interface Button Functions Temporary audio / video manual recording - recording icon will be shown (the recorded clip will be stored on the micro SD memory card) Capture screen image – selectable image resolution (1280*720, 640*360, 320*180, 160*90) Mute phone and IP Cam microphone Activate phone and IP Cam microphone Mute phone and IP Cam audio Activate phone and IP Cam audio... -
Page 13: Ptz Control
3.1.5 PTZ Control Slide across the screen with your finger to control the PTZ of the camera. -
Page 14: Interface Buttons Of Records
3.1.6 Interface Buttons of Records Tap the “Records” button to access the photos and videos of the IP Cam. Tap each specific photo to view a larger image. On the larger image, to download the photo to your phone; now you can view the photo on your phone Photos. -
Page 15: Settings
3.2 Settings Here you can view and configure the camera settings. -
Page 16: About
3.2.1 About Model The camera model Software version Current camera software version Device ID Camera ID... -
Page 17: Name
3.2.2 Name You can modify the name of the camera. When done, tap “apply” to save your changes. -
Page 18: Device Admin Password
3.2.3 Device Admin Password To modify the login password, enter the current login password and Admin password modify according to the instructions (“admin” is the password by default) New password Log in with the new password Re-enter the modified login Confirm new password password Note:... -
Page 19: Device Guest Password
3.2.4 Device Guest Password Enter the administrator password of the current Admin password camera Enter new guest password to modify guest Guest password password (“admin” is the password by default) Confirm new Re-enter the new guest password to confirm password Note: When done, tap "Apply"... -
Page 20: Network
3.2.5 Network On this page, you can use the Enable function to enable or disable the network by switching the Enabled button on / off. Ethernet settings can be viewed on the left tab, while Wi-Fi settings are found on the right tab. No matter what form of network you choose, the software will automatically obtain the MAC address, IP, and DNS information. -
Page 21: Osd
3.2.6 OSD On the OSD page, you can set up the information to be displayed on the screen. Display text When checked, the upper left corner of the screen displays the name of the camera. The user can modify the display name of the camera (It does not support Chinese and symbols, only English and digits allowed) -
Page 22: Sd Card
Note: When it’s done, tap Apply to save your changes. 3.2.7 SD Card On this page, you can access your SD card settings. Enable Display SD card status and capacity Format the Micro SD (TF) card. The existing micro SD Format card data will be cleared Repair SD card when you can’t play back videos or... -
Page 23: Motion And Notification
3.2.8 Motion and Notification 1. Motion Detection On this page, you can set the sensitivity of motion detection - the greater the value, the higher the sensitivity; hence the lower relative probability of false alarms. We suggest you use the default values. - Page 24 2. I/O Alarm I/O alarm output, set as “normally open”, is used to connect with...
-
Page 25: Schedule Recording
external alarm device, such as loudspeakers, sound and optical alarm system etc. When an event occurs, the output switch on the camera closes to activate the alarm device. 3.2.9 Schedule Recording In this option, you can choose 24/7 recording or scheduled recording. -
Page 26: Day/Time
3.2.10 Day/Time... - Page 27 Time Server: You can manually enter the local country time zone server address (the system default is China time server address). Time zone: Select the corresponding local time zone. Day: Manually modify the display date when Auto-Sync is off. Time: Manually modify the display time when Auto-Sync is off. Auto sync: When turned on, the camcorder will automatically synchronize the time displayed on the address bar.
-
Page 28: System
3.2.11 System Upgrade: When new firmware is available, you can tap to Upgrade. Restore to factory settings: Tap the "Restore" button to restore to factory settings. Restart device: Tap the restart button to restart the camera. -
Page 29: Others
3.2.12 Others Speaker: Set the volume of the camera's speaker. Mic: Set the camera microphone sensitivity. Power frequency: Select from 50HZ/60HZ. Note: When you finish, tap Apply to save your changes. -
Page 30: Delete Device
Note: If you delete the device by mistake, you can add this device again by following the Quick Installation Guide. Warranty TaoTronics products are covered by a 12 month limited warranty from the date of their original purchase. If any problems occur, please contact our support team. - Page 31 Address: 46724 Lakeview Blvd, Fremont, CA 94538 EUROPE E-mail: support.uk@ taotronics.com (UK) support.de@ taotronics.com (DE) support.fr@ taotronics.com (FR) support.es@ taotronics.com (ES) support.it@ taotronics.com (IT) EU Importer: ZBT International Trading GmbH, Lederstr 21a, 22525 Hamburg, Deutschland ASIA PACIFIC E-mail: support.jp@ taotronics.com (JP) www. taotronics.com...
Need help?
Do you have a question about the TT-HS005 and is the answer not in the manual?
Questions and answers