
Related Manuals for Roberts RT100

Summary of Contents for Roberts RT100
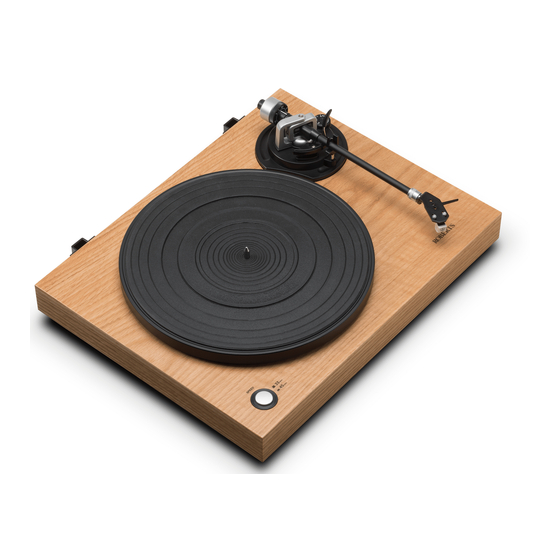
- Page 1 RT100 Turntable with USB connection and built-in preamplifier Please read this manual before use...
-
Page 2: Table Of Contents
Contents RT100 turntable features .............2 Unpacking the turntable............3 Assembling the turntable (part 1) ........4 Setting the tracking force ..........5-6 Assembling the turntable (part 2) ........7 Mains adaptor ..............8-9 Connecting the turntable ..........9-10 Playing a record............11-12 Frequently asked questions......... 13-14 Recording using a computer........ -
Page 3: Rt100 Turntable Features
RT100 turntable features 1. Counterweight This is used to set the tracking force. 2. Anti-skating control This is used to set the anti-skating force. 3. Cueing lever Use this lever to lower and raise the tone-arm. 4. Tone-arm rest and securing clip This holds the tone-arm in place when not in use. -
Page 4: Unpacking The Turntable
Unpacking the turntable 1. Clear a work area, such as a dining table, in which to unpack the turntable. 2. Ensure the packaging is the right-way up. 3. Open the packaging carefully. 4. Lift out each item, identify it, and carefully place to one side. •... -
Page 5: Assembling The Turntable (Part 1)
Assembling the turntable (part 1) 1. Unwrap the base unit, taking care not to put pressure on the tone-arm or the cueing lever. Tone-arm securing clip 2. Do not assemble the platter onto the base just yet. There is Tone-arm less chance of damage to the cartridge and stylus if the tone-arm is assembled and balanced first. -
Page 6: Setting The Tracking Force
Setting the tracking force 1. Set the anti-skating control to zero. 2. Raise the cueing lever. 3. Unclip the tone-arm from its securing clip so that it can move freely. Setting the anti-skating control to zero 4. Take the head-shell and observe that it is currently unbalanced. At Cueing lever (to raise or Balance the tone-arm this point the head-shell should drift upwards. - Page 7 Setting the tracking force cont. 9. When you have balanced the tone-arm, place it so that it is again secured on its rest using the securing clip. 10. Carefully replace the stylus cover. 11. Keeping the counterweight in place, rotate the scale on the front of the counterweight so that it reads zero.
-
Page 8: Assembling The Turntable (Part 2)
Assembling the turntable (part 2) Underside of the platter 1. Unpack the platter and identify the drive belt. 2. Place the platter on the spindle. Use one of the holes in the platter to Drive access the drive belt and place it over the pulley of the drive motor. belt 3. -
Page 9: Mains Adaptor
In order to disconnect the product from the mains, the mains adaptor should be removed from the mains socket completely. Use only the mains adaptor provided with the product, or a genuine replacement provided by Roberts Radio. The use of alternative AUDIO PRE AMP AUTO STOP 0.5A... -
Page 10: Connecting The Turntable
Many Roberts products are compatible with the turntable. These include the Revival RD60 radio, the Blutune 200 sound system, and the Stream 93i internet radio. The turntable can also be connected to all Roberts R-Line multi-room products such as the SB1 soundbar or the RS1 streamer which allows connection to a hi-fi system and to multi-room components at the same time. - Page 11 Cable with two phono Hi-Fi Amplifier sockets to a 3.5mm plug Radio with Auxiliary input socket Speaker (Roberts Stream 93i shown)
-
Page 12: Playing A Record
Playing a record 1. Ensure that the record is clean and dust free. Use a record cleaner if required. 2. Carefully place the record on the platter and set the speed switch to 33 or 45 r.p.m. as needed for the record. 3. - Page 13 Playing a record cont. 9. Provided that you have everything connected correctly, you will be able to listen to the record through your connected equipment (see page 10). 10. At the end of the record, the turntable will switch off. AUTO STOP AUTO STOP AUTO STOP AUTO STOP Note that the automatic switch off feature is dependent on the placement OFF ON OFF ON OFF ON...
-
Page 14: Frequently Asked Questions
Frequently asked questions 1. Why is the sound very distorted when playing a record? • Check that the turntable is connected to a suitable input on the connected device. • Check whether you have connected the turntable to a phono input on your amplifier. If so, ensure that the pre-amp switch on the turntable is set to Off. • Check the tracking force and anti-skating adjustment (see page 6). •... - Page 15 Frequently asked questions cont. 5. Why doesn’t the tone-arm return to the rest automatically at the end of the record? • While this feature was common on basic domestic turntables in the 1960s and 1970s, it is very uncommon in modern turntables. The mechanisms needed to lift and move the tone-arm in this way tend to detract from the quality of the audio available from the turntable since they also require that the design of the drive system and the tone-arm mechanism is more robust and therefore heavier than otherwise needed.
-
Page 16: Recording Using A Computer
Recording using a computer The RT100 turntable has a USB connection which allows digital recordings to be made of records that you own, so that you may later play them from other devices such as a smartphone or digital audio player. Note that there are many ways to make a recording from a record using a computer or similar platform. -
Page 17: Recording Using A Computer
Recording using a computer cont. Basic controls in Audacity system or switch it off, since the two preamplifiers in the turntable and the audio system will result in distorted sound from the audio system. In this case you would set the switch back to Off after recording. 10. Lower the tone-arm to allow the record to play and then click on the Record icon in Audacity. -
Page 18: General
General Safety instructions Do not allow this turntable to be exposed to water, steam or sand. Do not • Your turntable and AC/DC adaptor should not be exposed to dripping leave your turntable where excessive heat could cause damage such as or splashing and no objects filled with liquids, such as vases, shall be in a parked car where the heat from the sun can build up even though the placed on the turntable or adaptor. -
Page 19: Specifications
Specifications Cartridge and stylus Power Requirements Cartridge Moving magnet type Audio Technica AT-3600L Mains AC 100 240 volts, 50/60Hz (adaptor) Load impedance 47kΩ (Use only the supplied adaptor) Tracking force 3.0 - 4.0 grams Dimensions Replacement stylus Audio Technica ATN-3600L Cover closed: Width = 448mm Height (including cover) = 140mm Depth (including hinges) = 366mm... -
Page 20: Guarantee
Any claim under this guarantee should be made through the dealer from whom the product was purchased. It is likely that your Roberts dealer will be able to attend to any defect quickly and efficiently, but should it be necessary the dealer will return the product to the company’s service department for attention. In the event that it is not possible to return the product to the Roberts dealer from whom it was purchased, please contact Roberts Radio using the contact details on the www.robertsradio.com website.
Need help?
Do you have a question about the RT100 and is the answer not in the manual?
Questions and answers